How to Export a Single Frame from After Effects
Introduction – A Simple Guide to Exporting Frames in After Effects
Have you ever needed to extract a single frame from your After Effects project? Whether you want to create a thumbnail, design a poster, or highlight a specific moment, exporting frames can be incredibly useful. In this guide, we’ll walk you through the process of exporting a frame from After Effects. Follow these steps to save your desired frame as an image and utilize it in other projects or formats.
Step 1: Select the Layer and Frame
First, open After Effects and navigate to the composition that contains the layer with the frame you want to export. Click on the layer that holds your desired frame.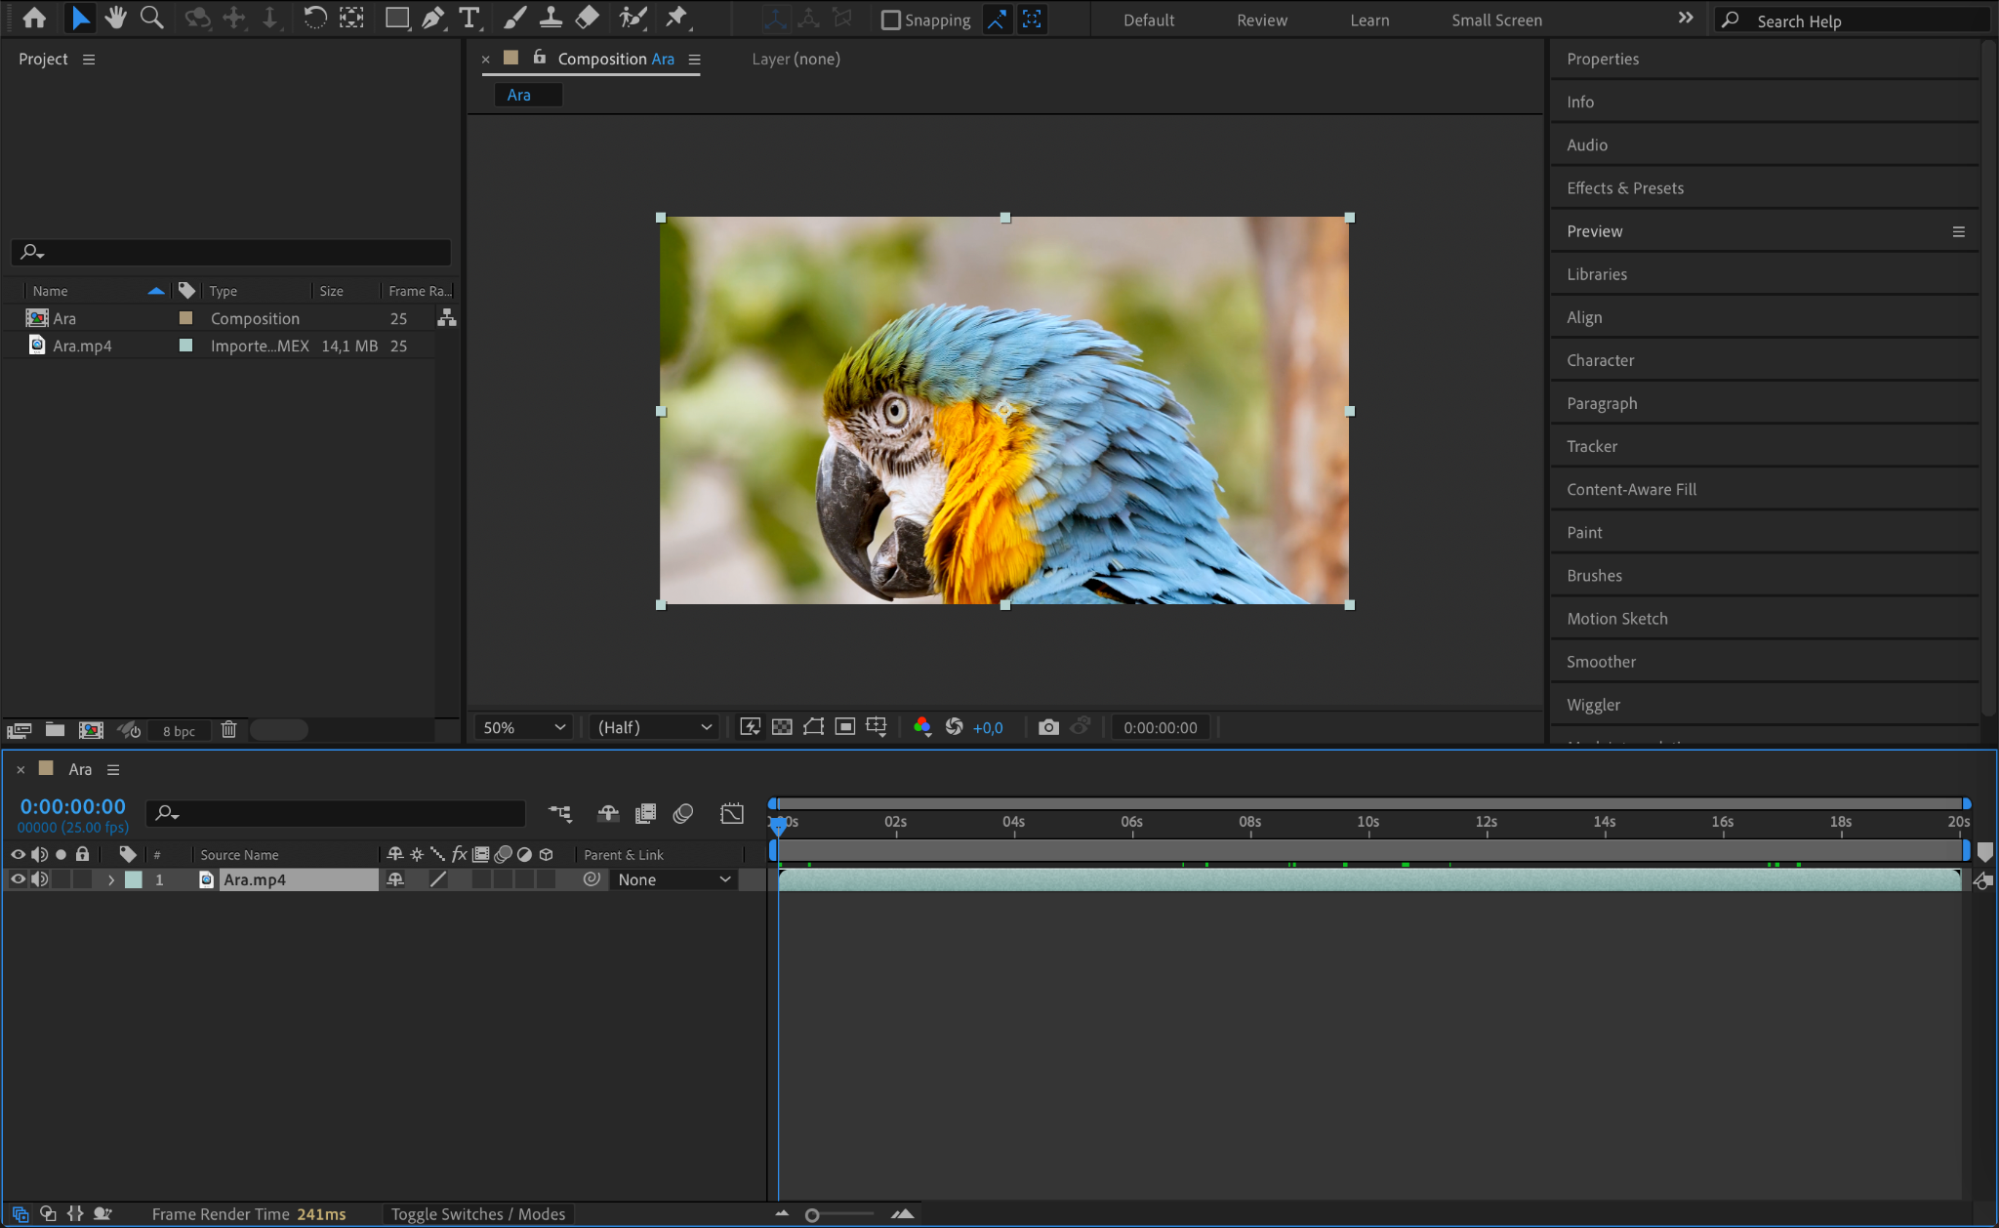 Step 2: Position the Current Time Indicator
Set the Current Time Indicator (CTI) to the exact frame you want to export. Move the CTI on the timeline to the specific point where the frame appears.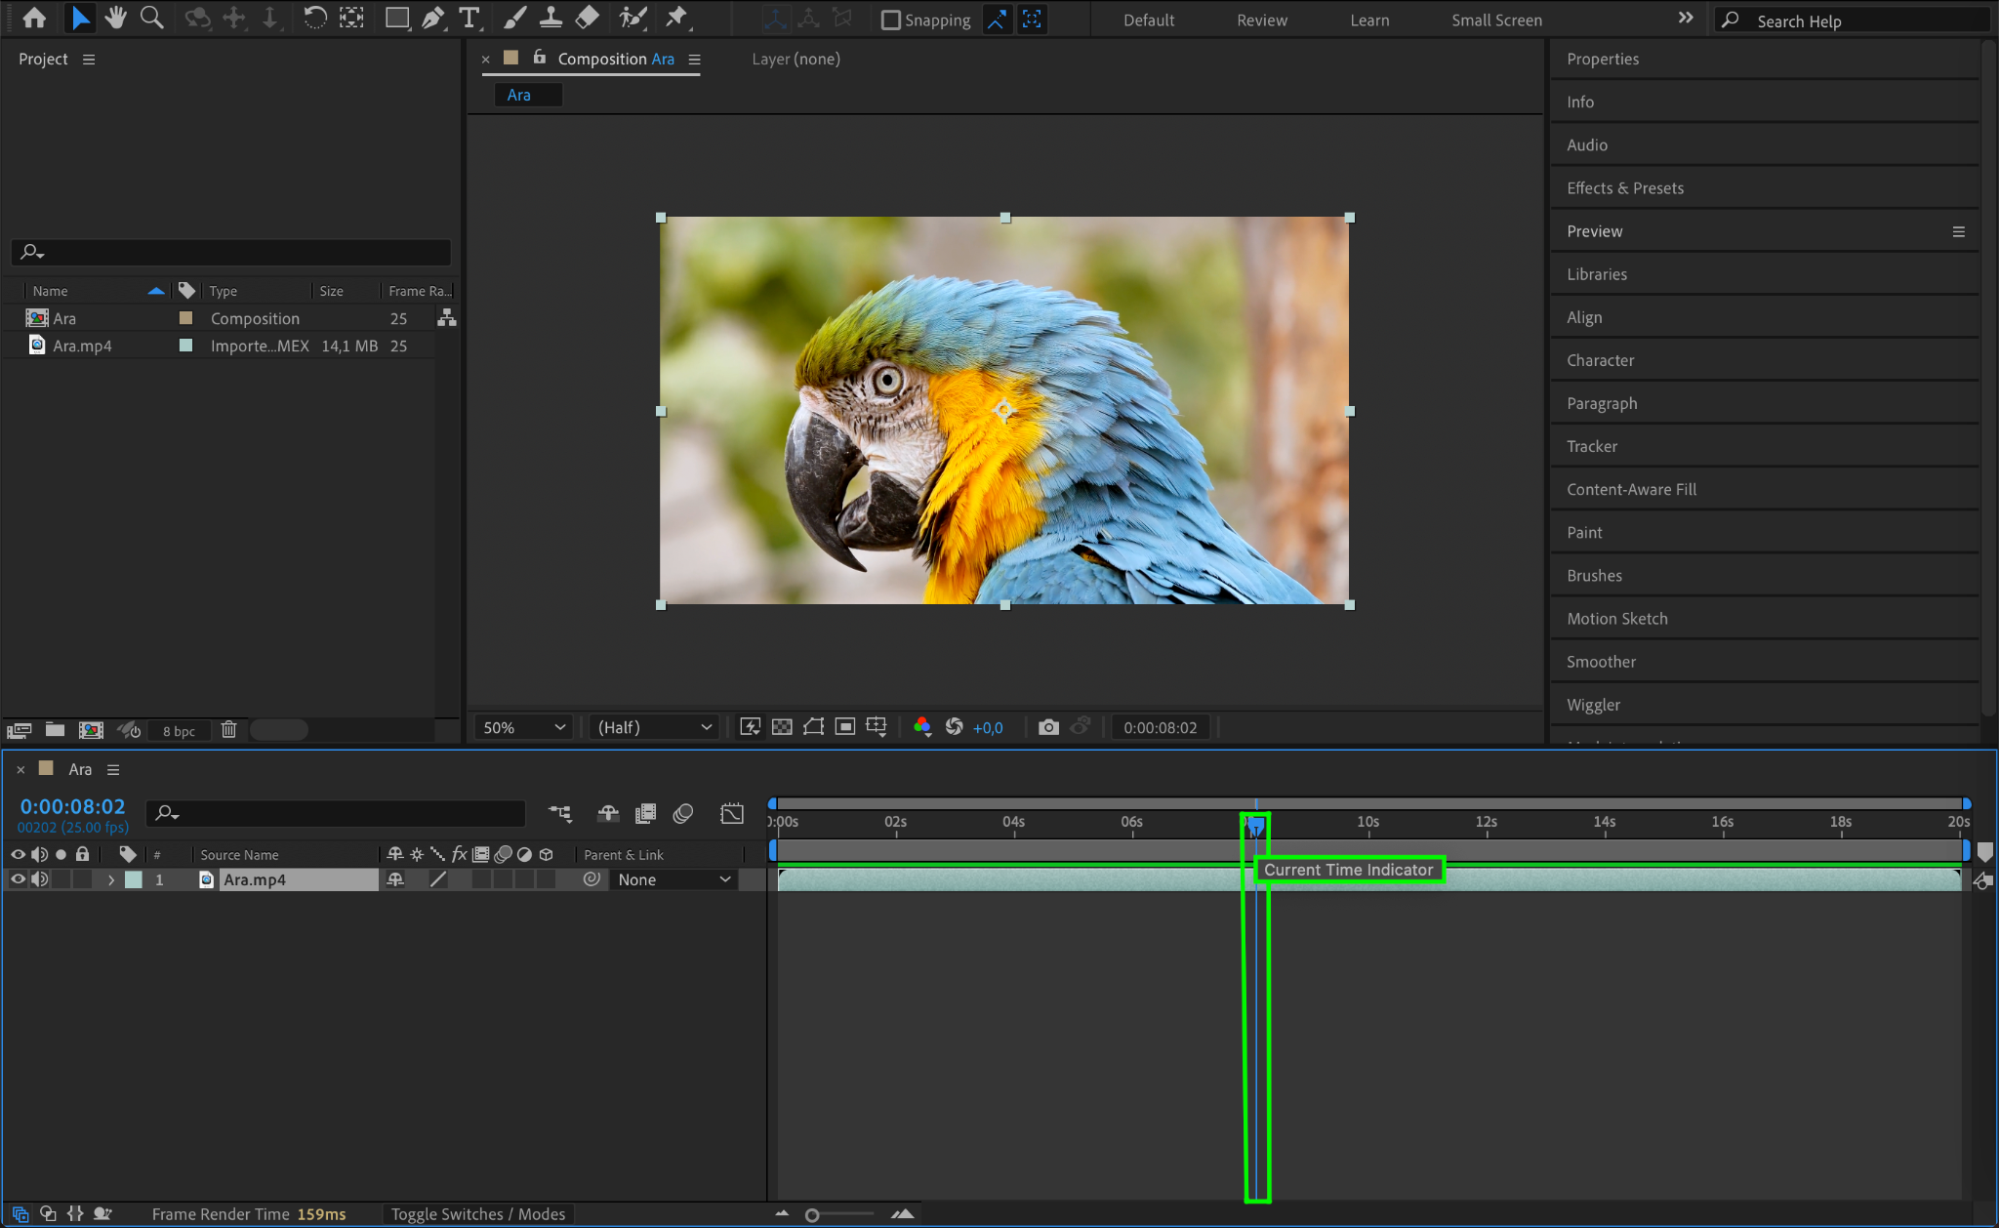 Step 3: Check Composition Settings
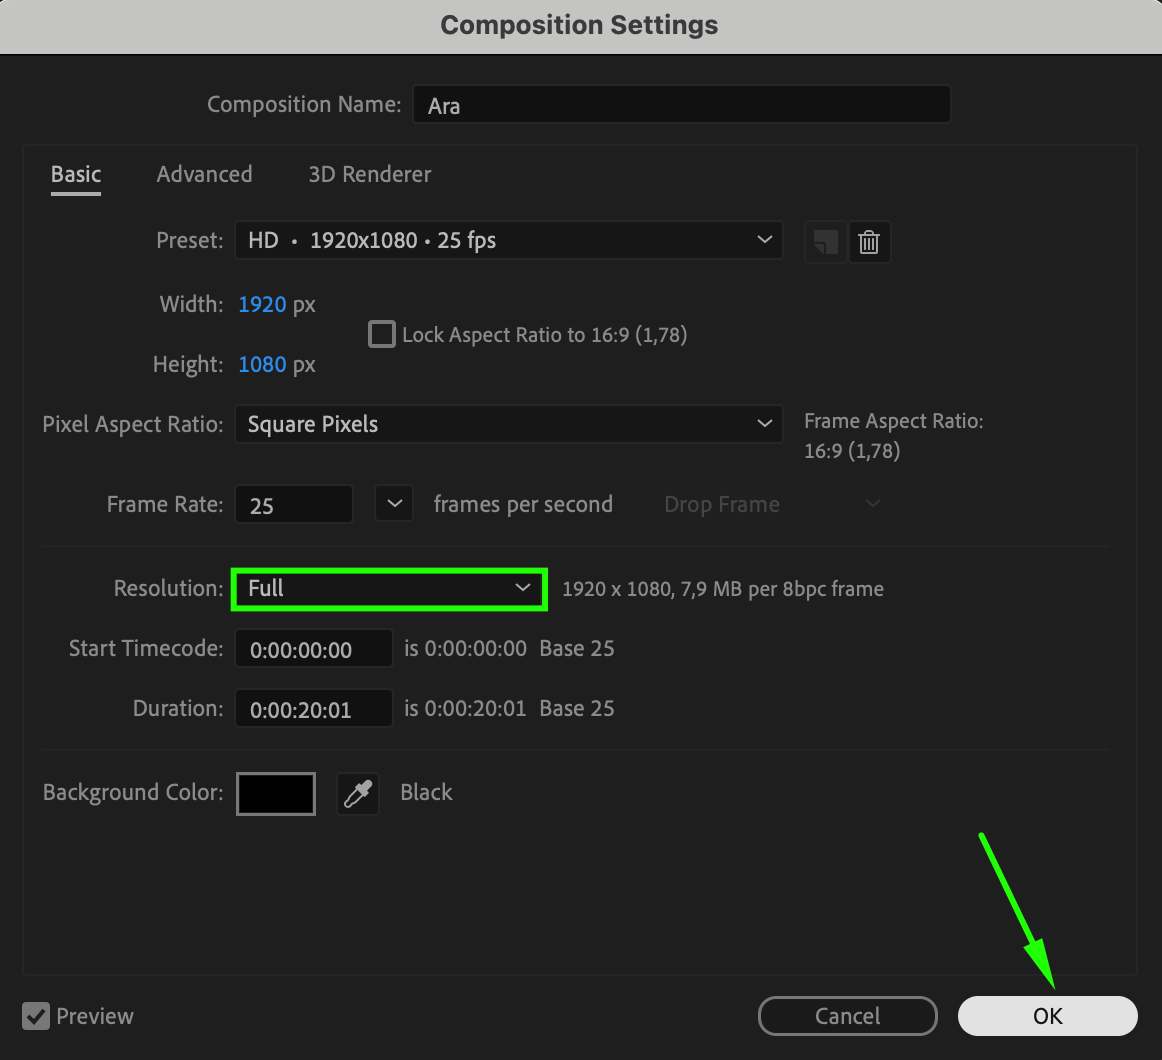
Before exporting, ensure your composition settings match your desired output format and resolution. Go to the Composition menu and select Composition Settings. Verify that the dimensions and frame rate are appropriate for your needs.
 Step 4: Export the Frame
To start the export process, navigate to the Composition menu and select Save Frame As > File or use the shortcut “Ctrl/Cmd + Alt/Option + S”. This will open a dialog box where you can choose the output location and format. Opt for an image format like Photoshop Sequence or JPEG, which is suitable for high-quality images.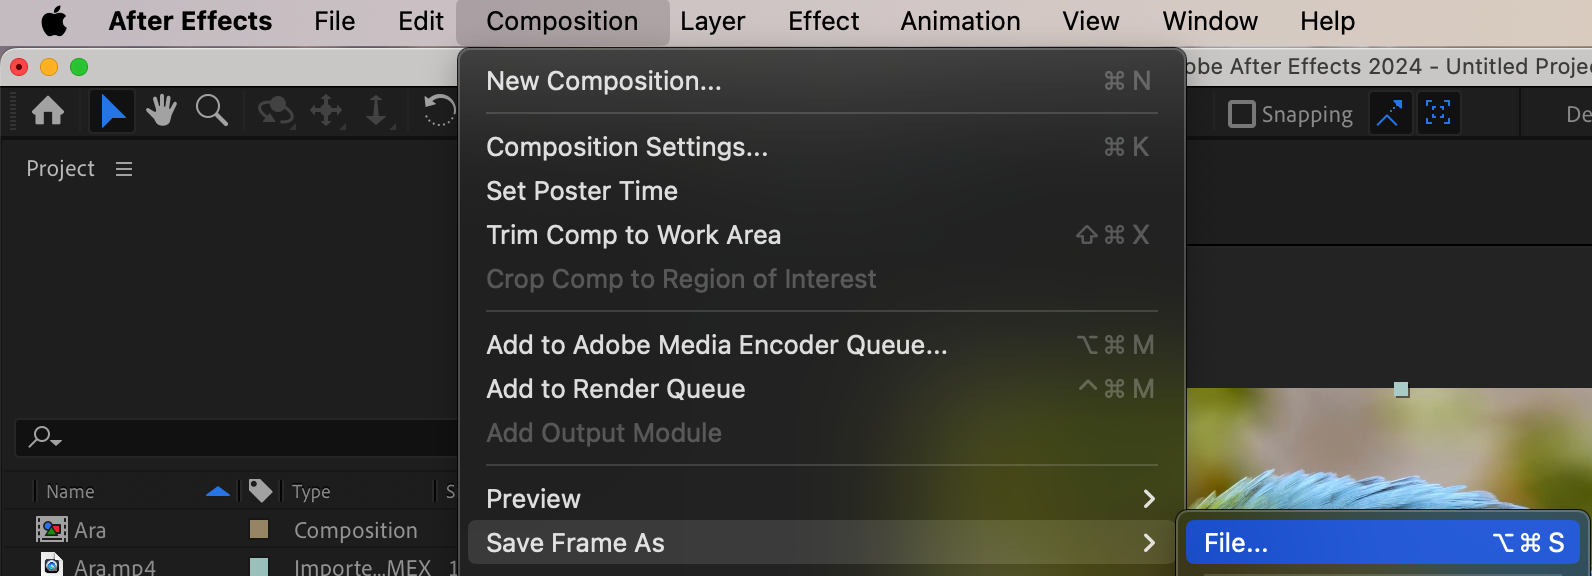 Step 5: Adjust Output Module Settings
The Render Queue panel will appear. Click on the format option next to the Output Module section. Customize the settings according to your requirements, such as choosing the quality format, color depth, and whether to enable an alpha channel. Review and adjust these settings before proceeding.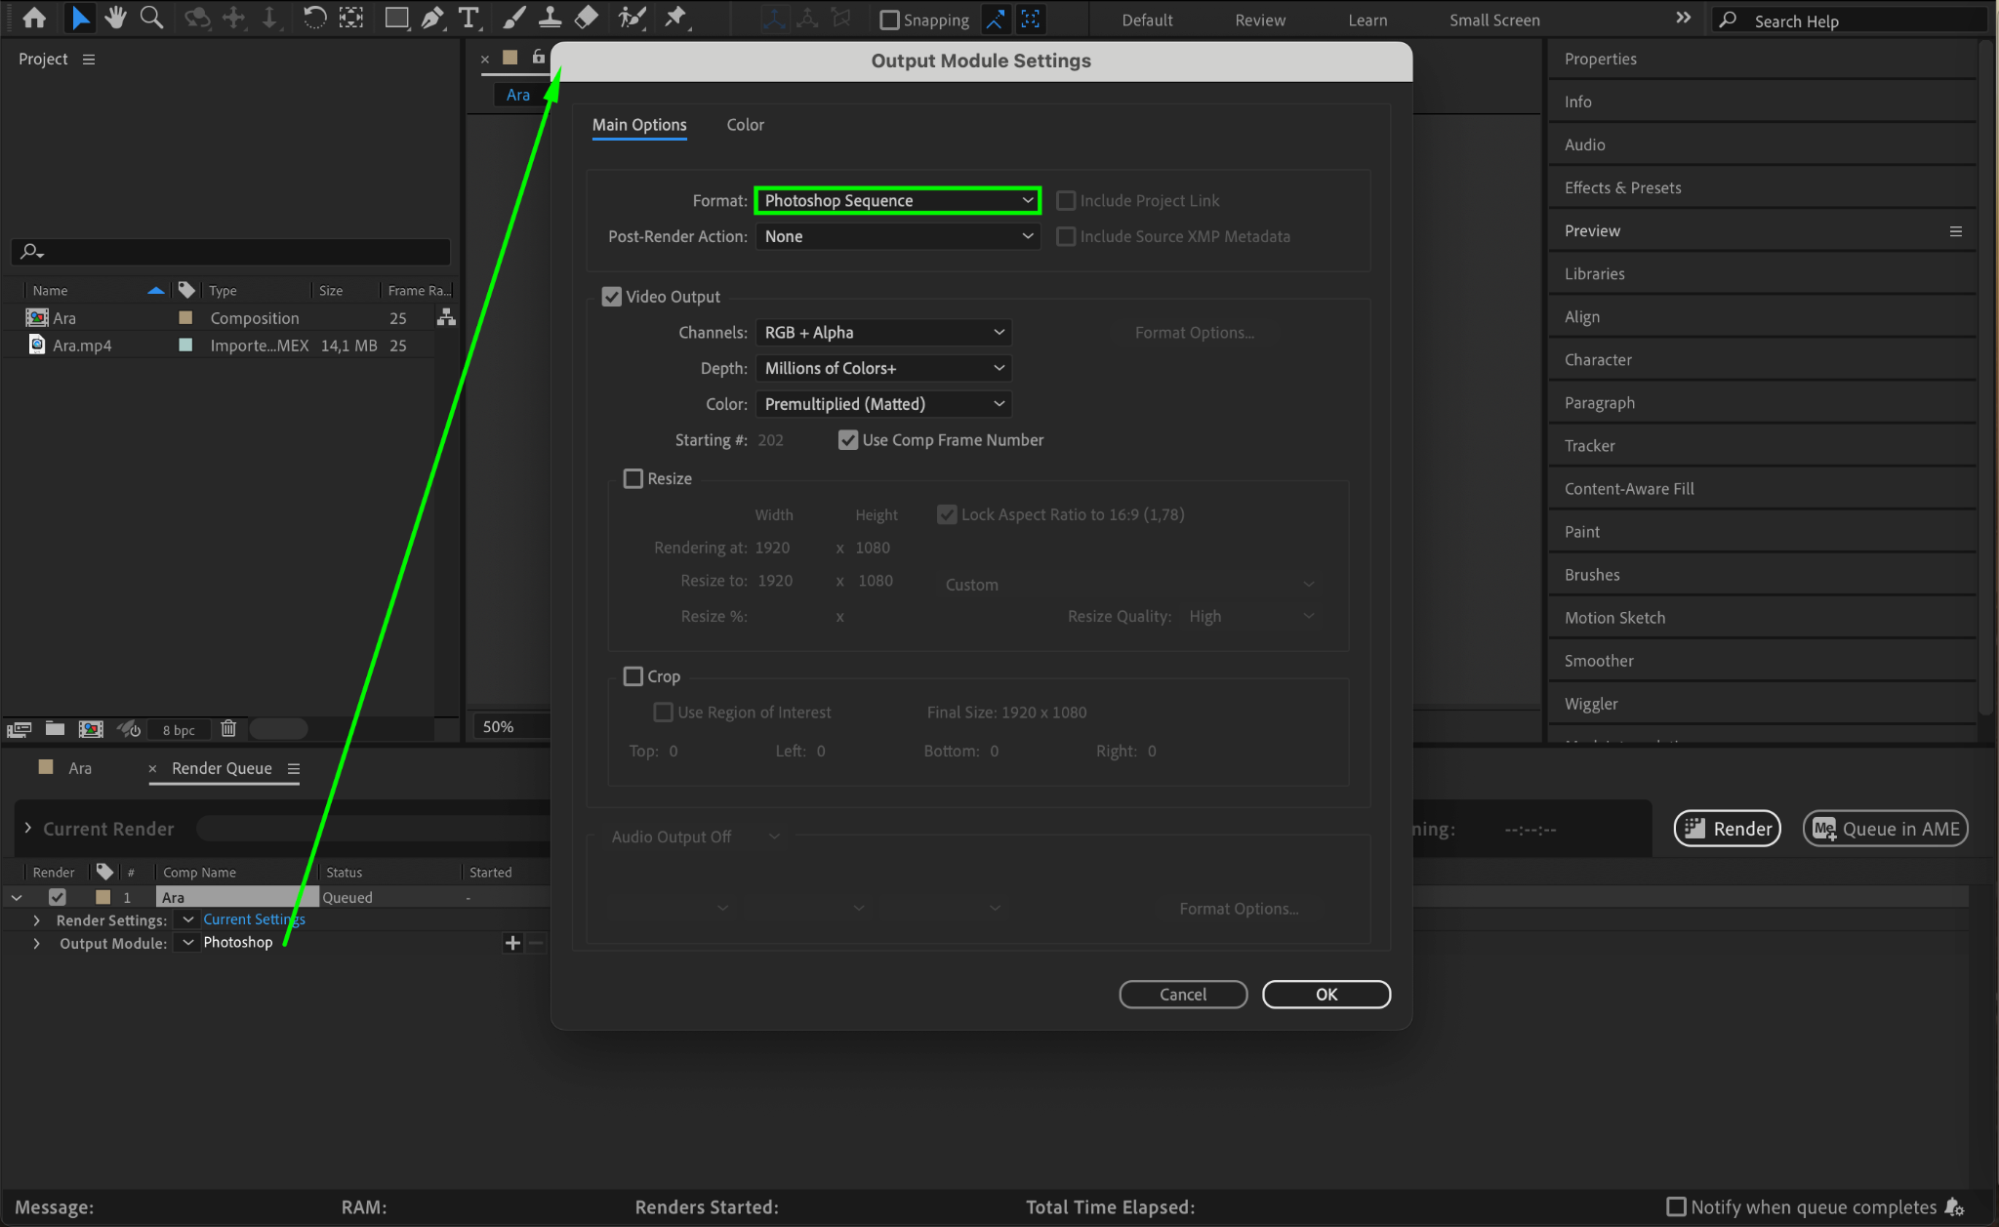 Step 6: Choose Output Location and File Name
Click on the text next to the Output To section to select the file name and save location. Specify where you want the exported frame to be saved on your computer.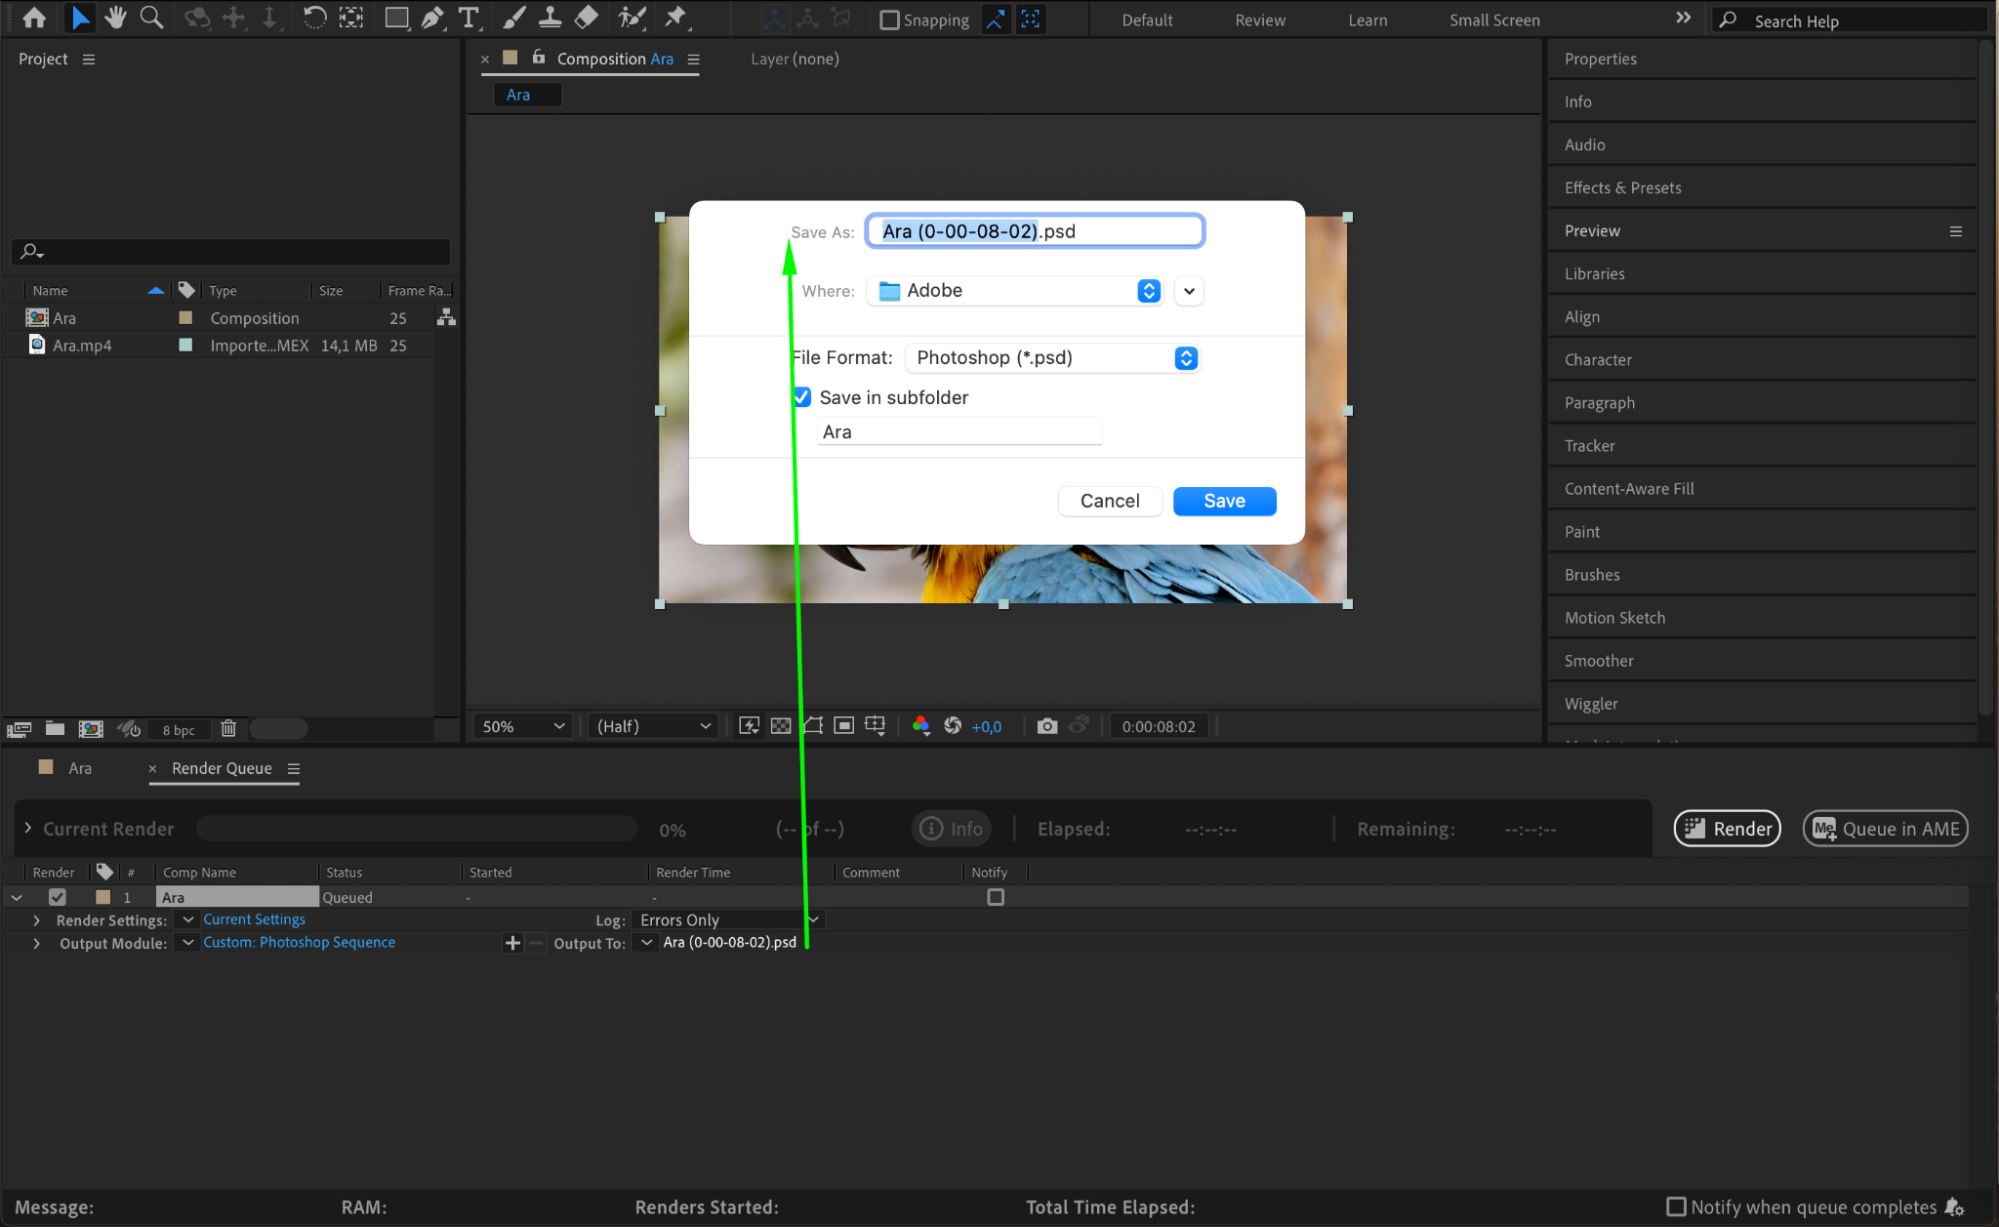 Step 7: Render the Frame
Finally, click the Render button to start the export process. After Effects will process the frame and save it as an image file in the location you specified. Conclusion
Get 10% off when you subscribe to our newsletter

Exporting frames from After Effects is a straightforward process that can enhance your workflow significantly. By following this step-by-step guide, you can efficiently select the composition, set the work area, adjust settings, and export your desired frame as an image file. This capability allows you to easily save and use frames from your After Effects projects for various purposes, such as social media posts, promotional materials, or reference images for future animations. Make the most of your After Effects projects by effortlessly exporting frames!


