Exporting a PNG Sequence from After Effects: A Step-by-Step Guide
Introduction to PNG Sequence Export in After Effects
Exporting a PNG sequence from After Effects is a powerful way to manage your video content frame by frame. This method is particularly useful for creating animations, visual effects, and assets for games or web projects. By exporting each frame as an individual PNG image, you can maintain the highest quality and have the flexibility to use these images in various ways. Let’s walk through the steps to export your composition as a PNG sequence.
Get 10% off when you subscribe to our newsletter

Step 1: Prepare Your Composition
Before exporting, ensure your composition is properly set up and organized. Trim any unnecessary frames and confirm that all layers, effects, and animations are finalized. This preparation will make the export process smoother and ensure that your final output is as intended.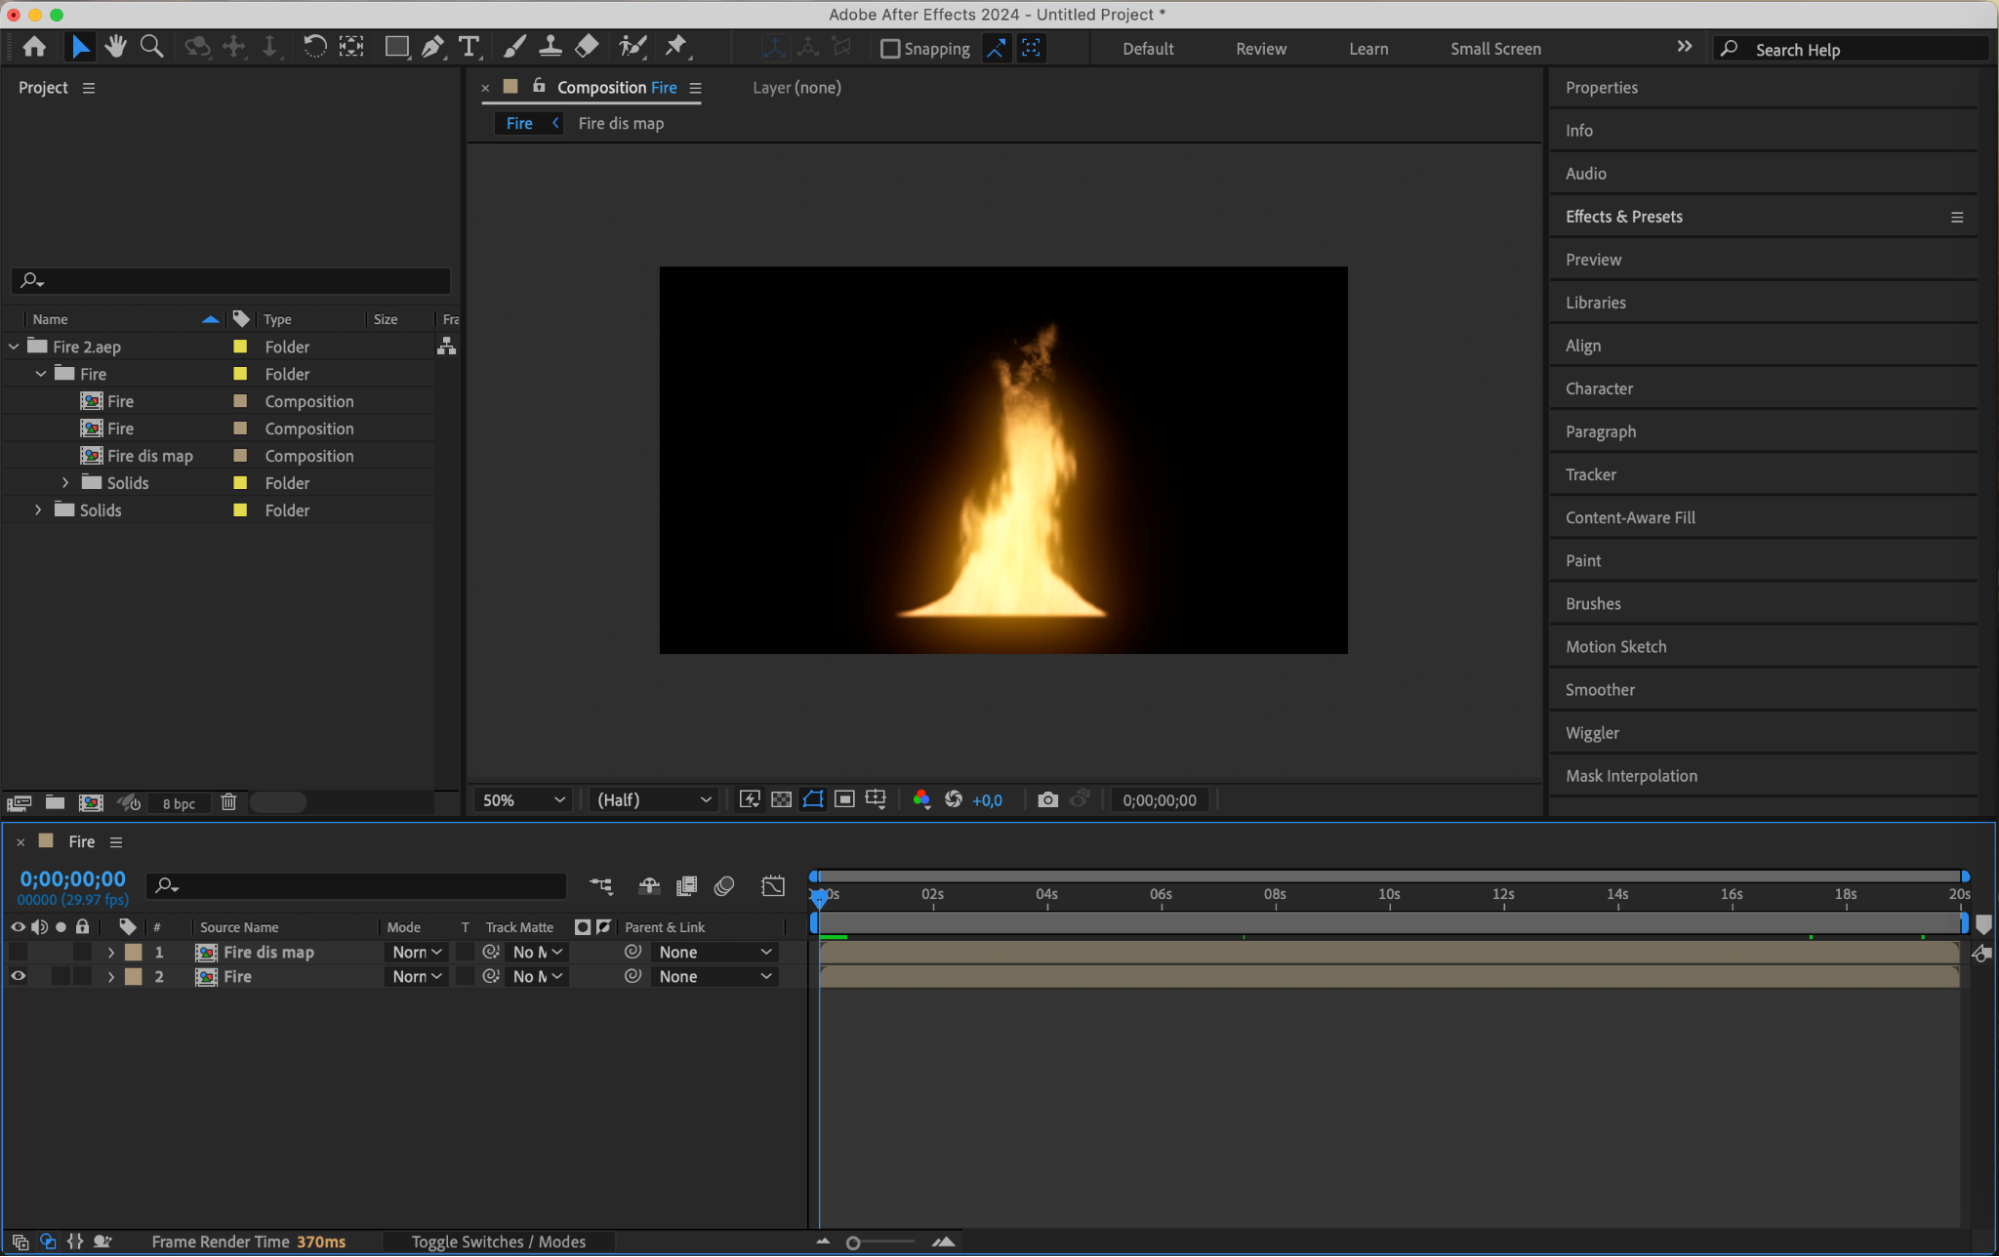 Step 2: Define the Work Area
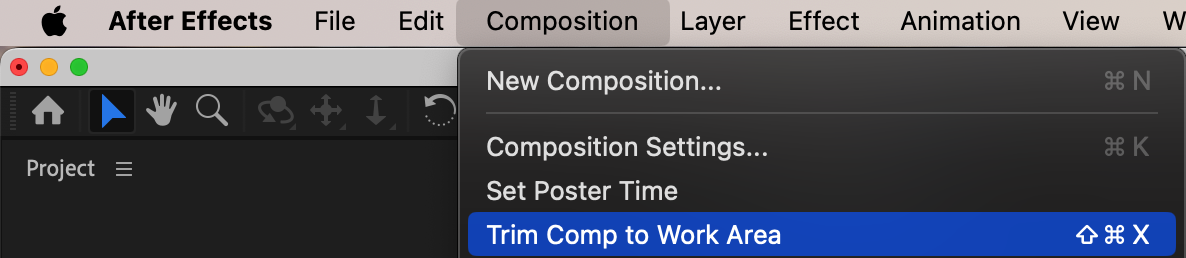
In the timeline panel, specify the range of frames you wish to export by adjusting the “Work Area Start” and “Work Area End” sliders. This ensures that only the selected portion of your composition will be exported as a PNG sequence. If you want to trim the composition to match the work area, go to the menu and select Composition > Trim Comp to Work Area. This will automatically adjust your composition’s length to fit within the defined work area, making the export process more efficient and focused.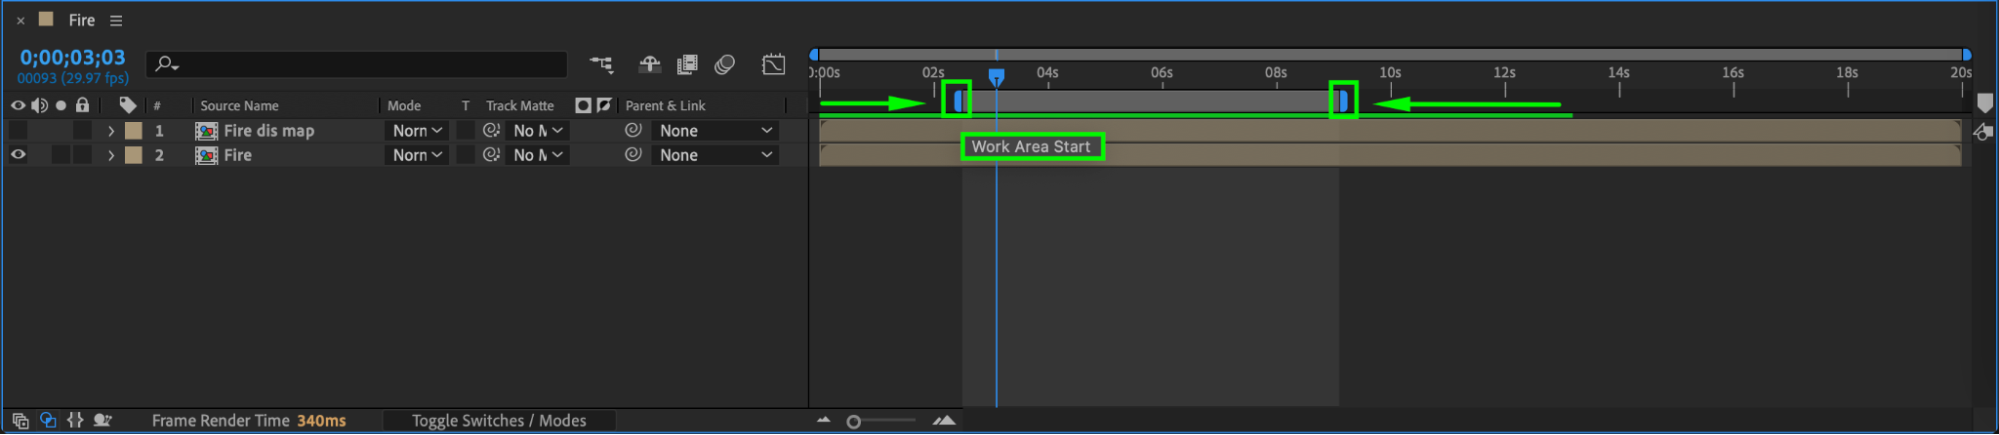
 Step 3: Add to Render Queue
Navigate to the “Composition” menu and select “Add to Render Queue” to move your composition to the Render Queue panel. This step prepares your project for export and opens up options for customization.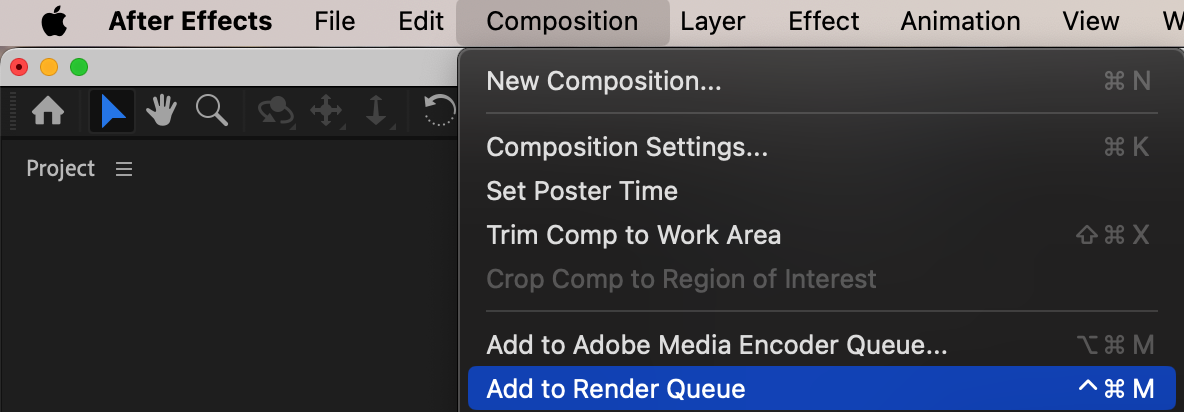 Step 4: Set Output Module
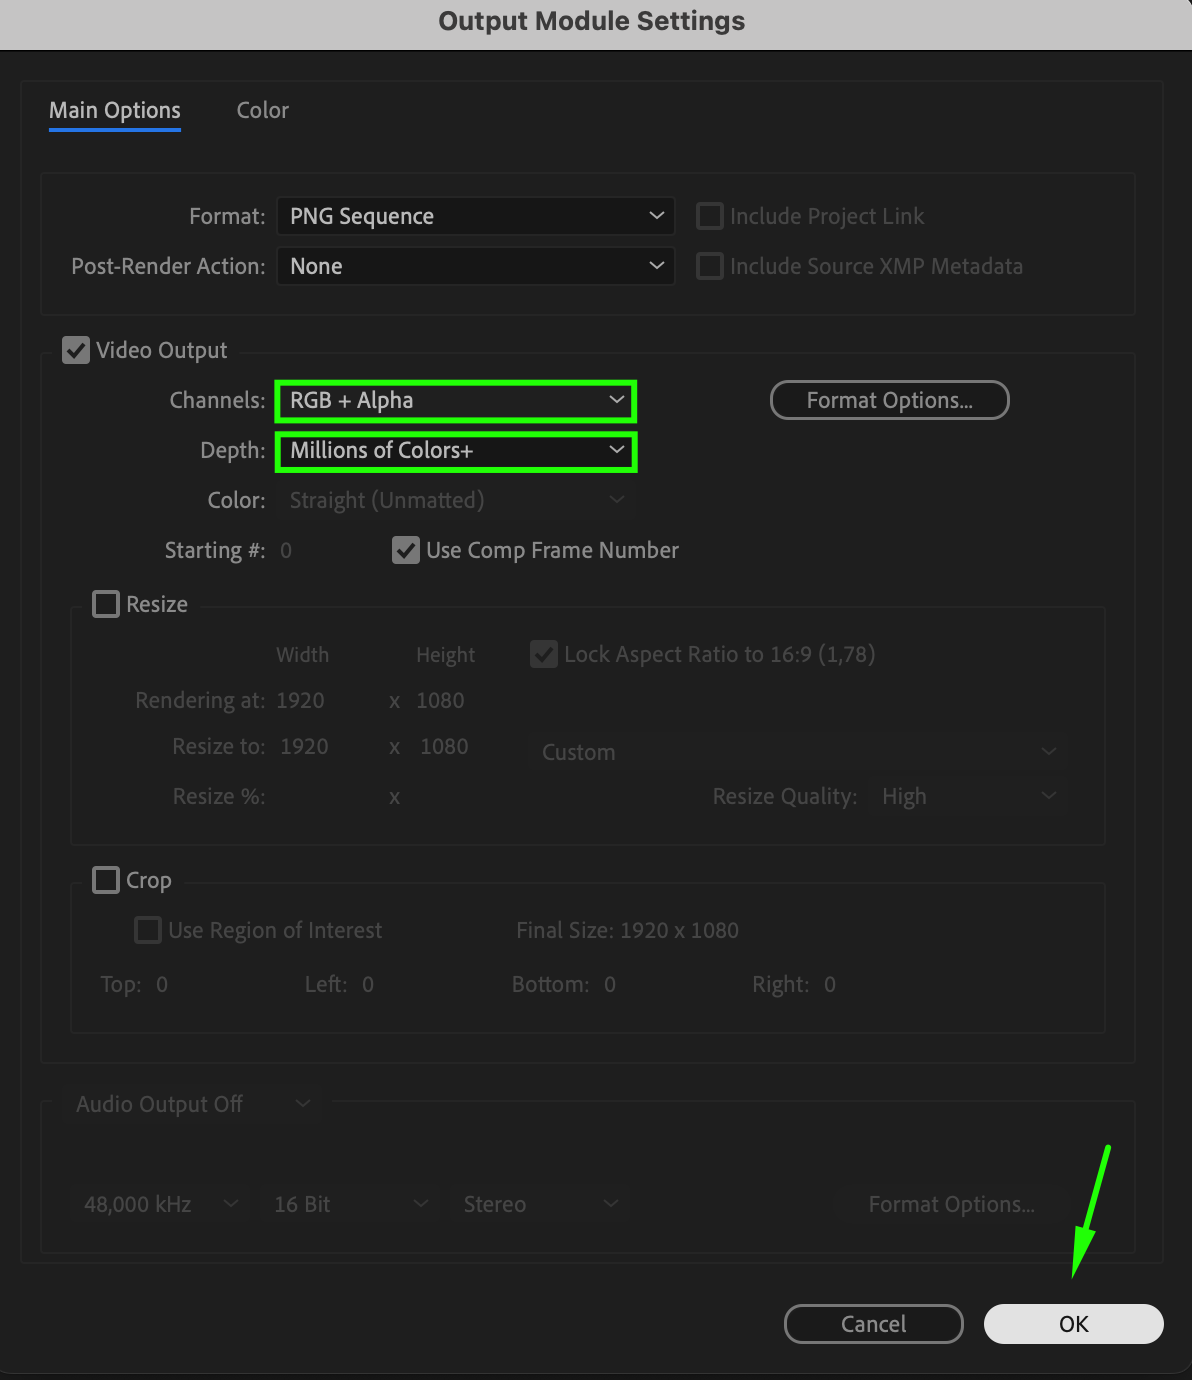
Click on the text next to the “Output Module” section in the Render Queue panel to open the settings window. From the list of formats, choose “PNG Sequence.” You can also adjust settings such as color channels (e.g., RGB+Alpha for transparency) and depth to suit your needs. These settings ensure that your PNG sequence maintains the desired quality and characteristics.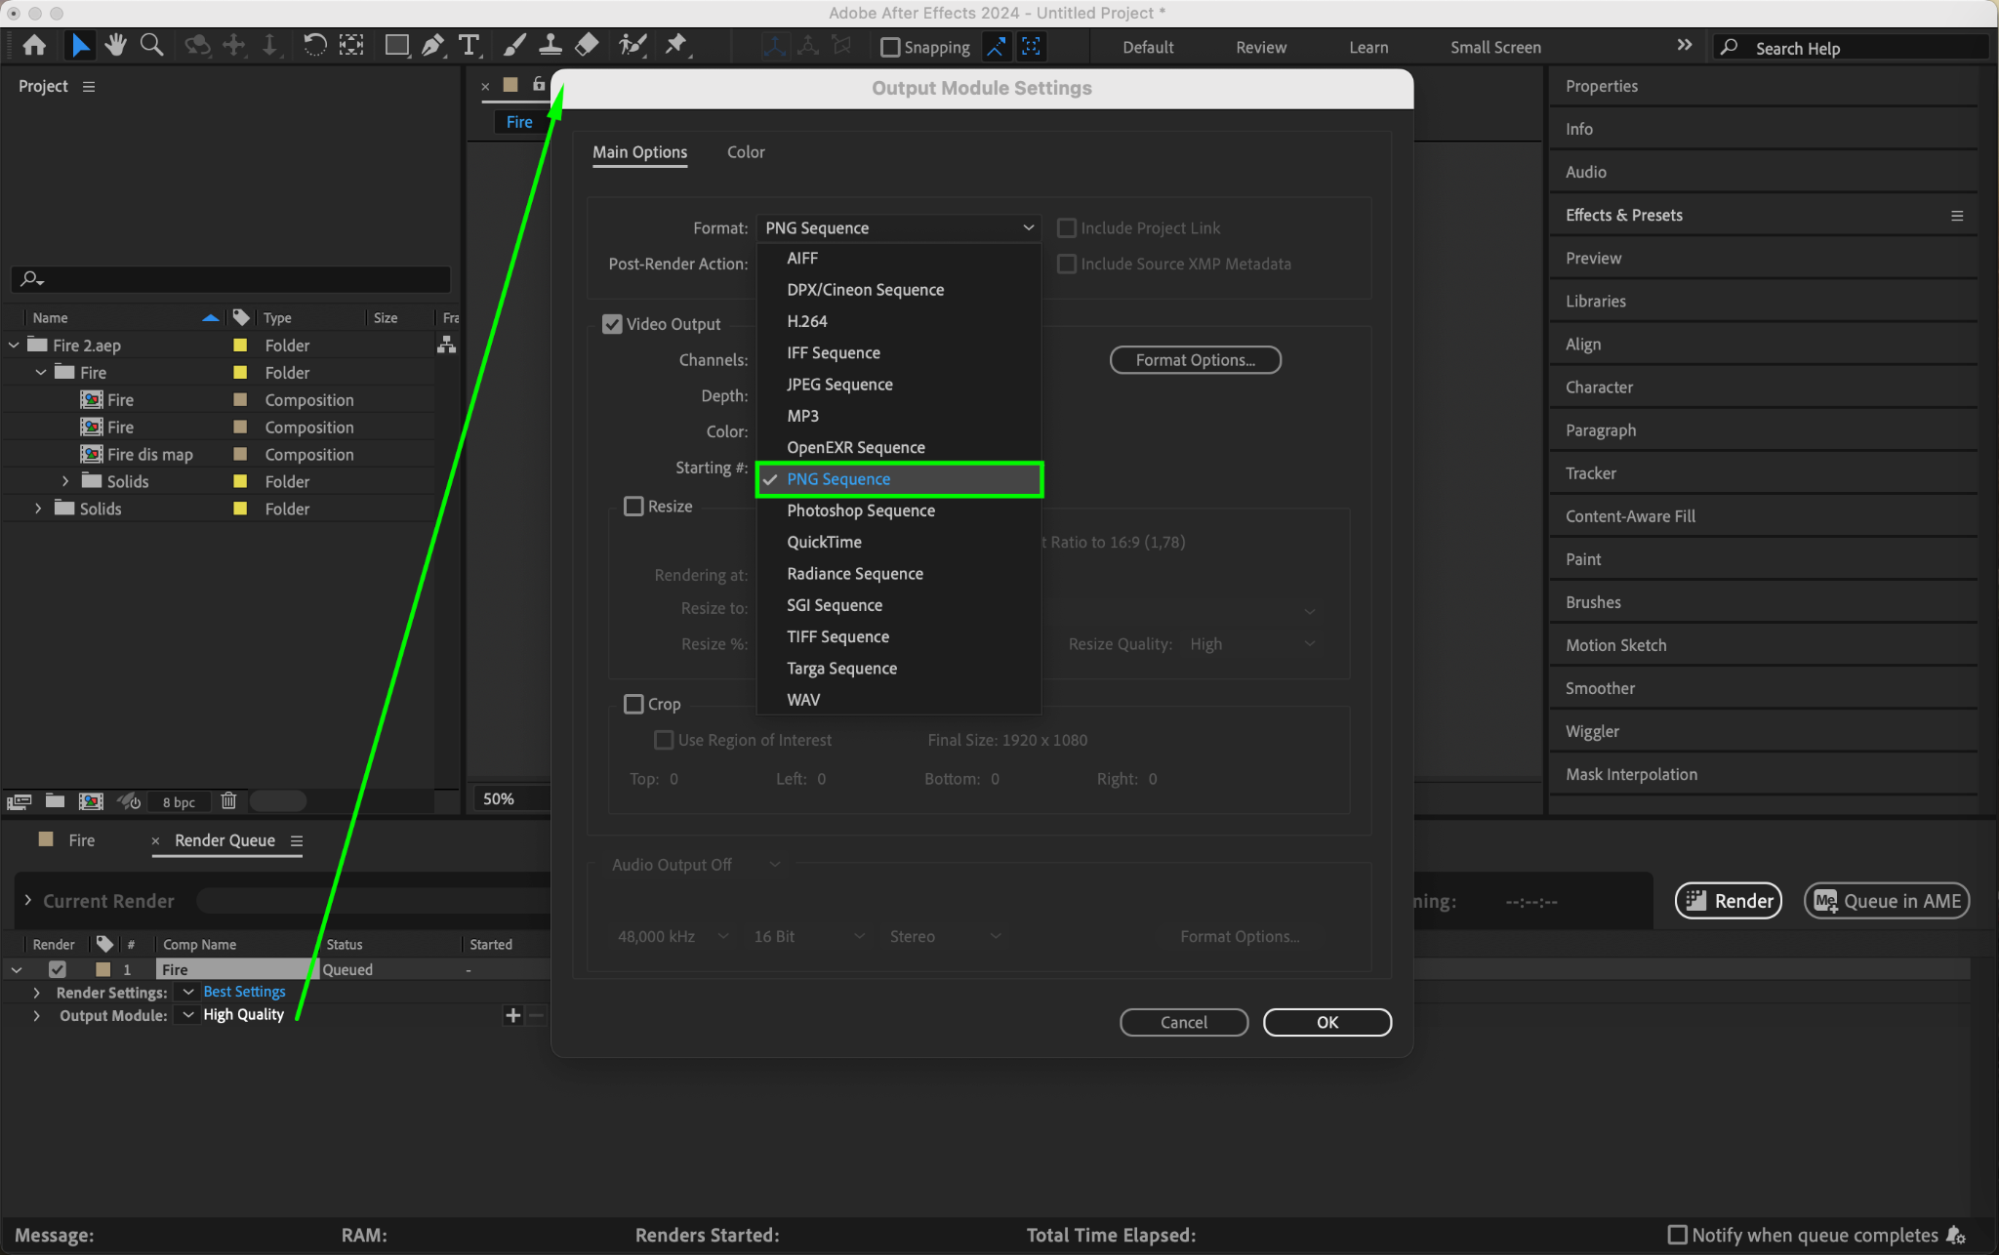
 Step 5: Choose the Output Destination
Click on the text next to the “Output To” section to select the destination folder for your PNG sequence. Name your files appropriately, as each frame will be saved individually and sequentially numbered.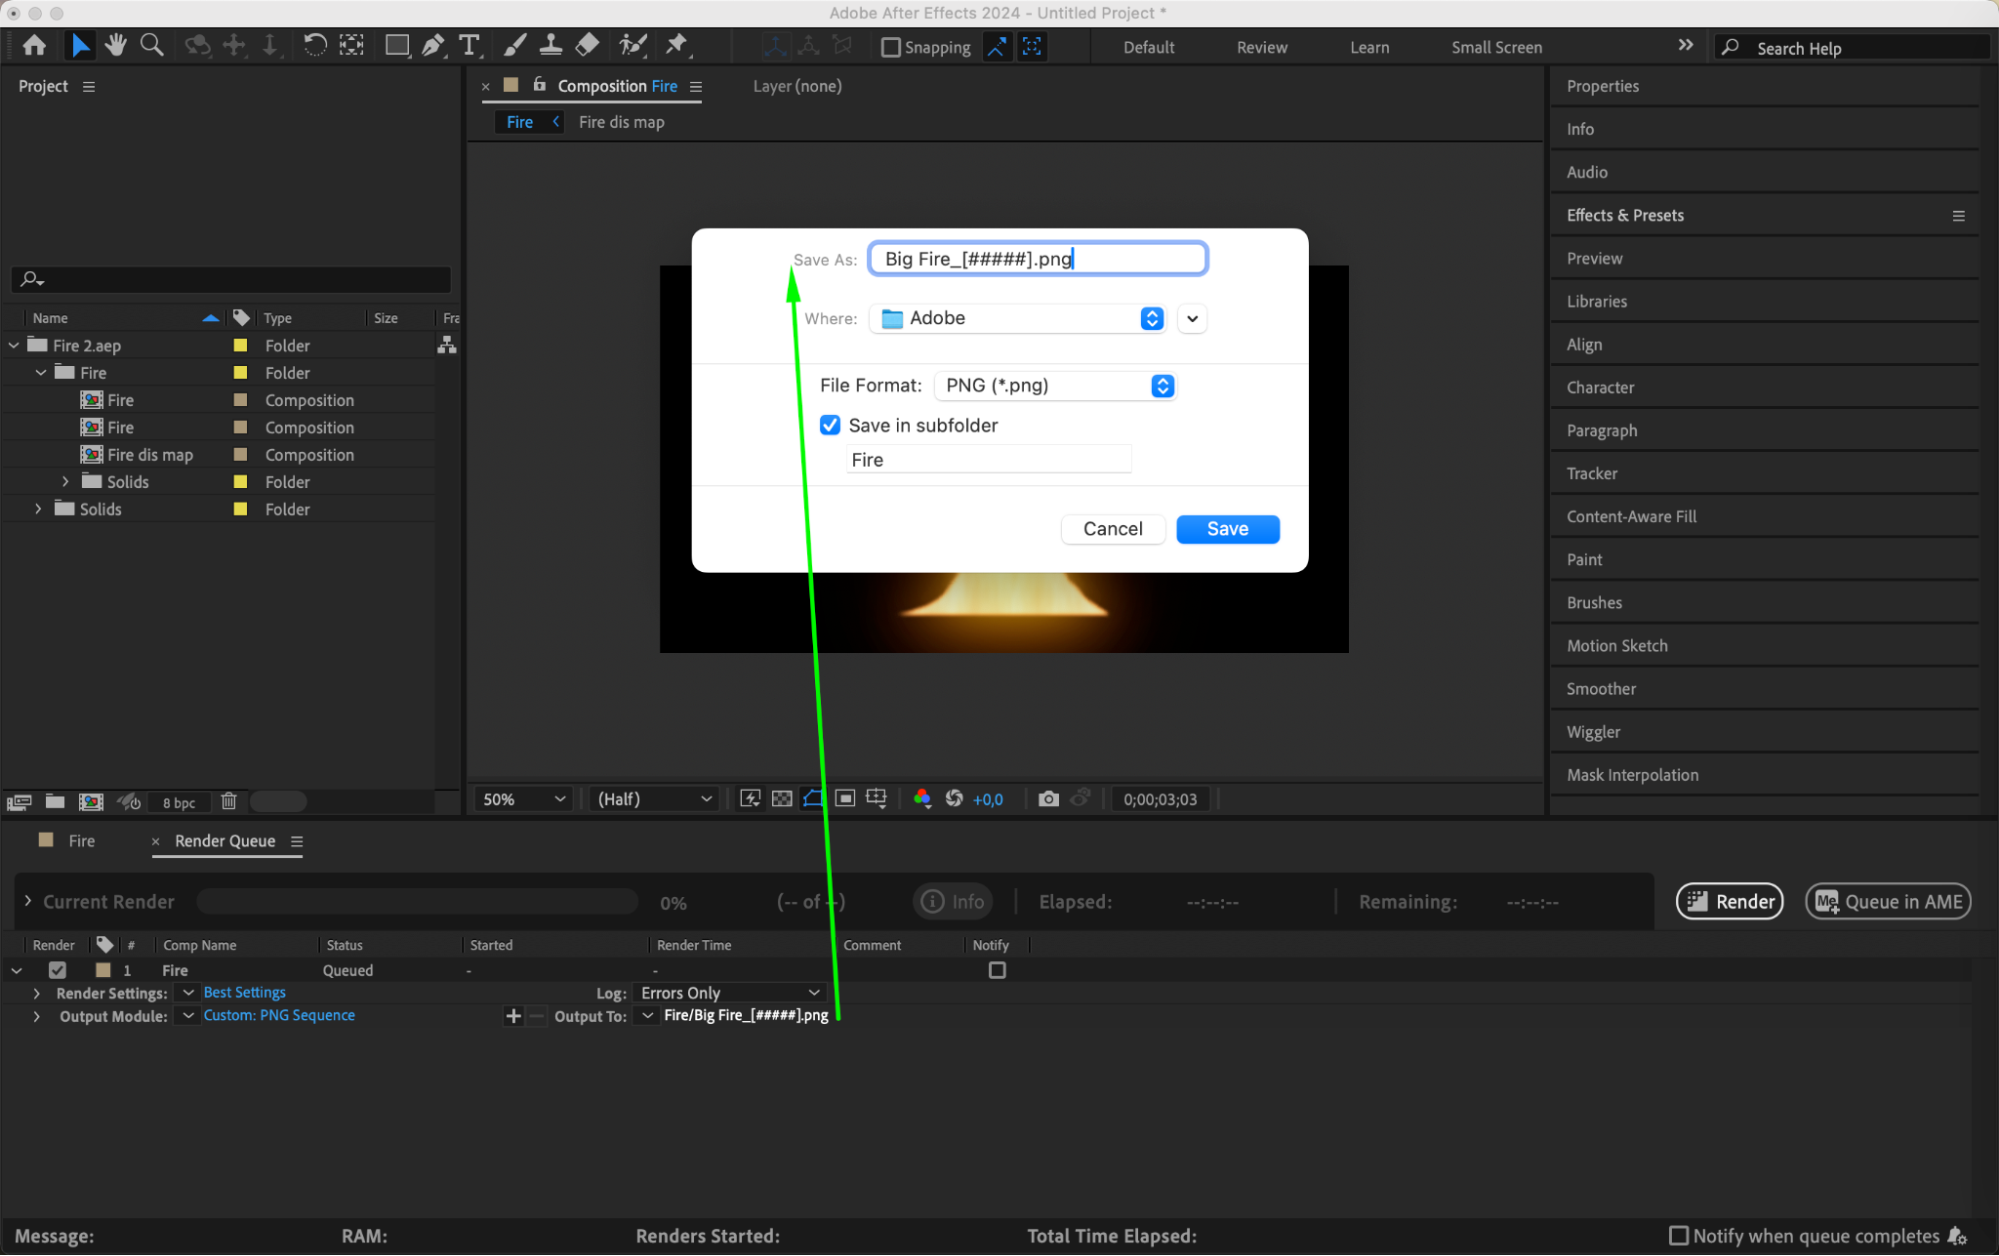 Step 6: Render the PNG Sequence
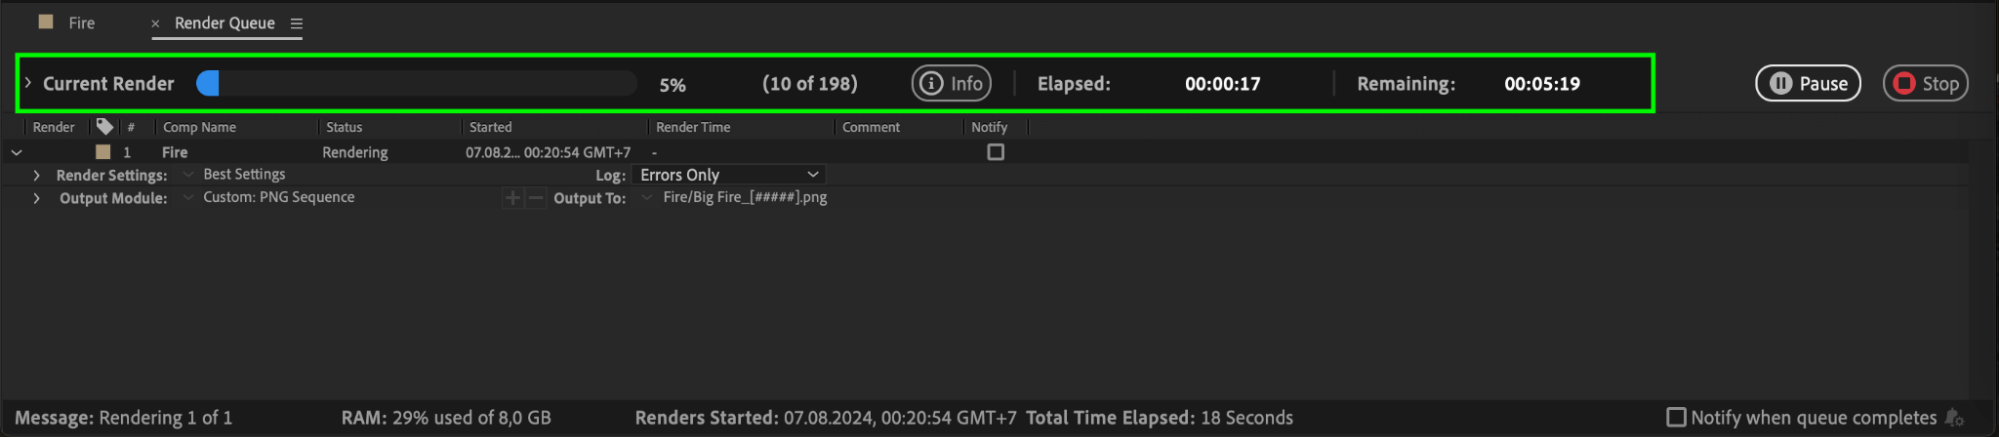
Once you’ve set all your preferences, click the “Render” button in the Render Queue panel to start the export process. After Effects will begin rendering each frame as a separate PNG file. You can monitor the progress through the Render Queue, which shows you the estimated time and completion status.
 Step 7: Review Your PNG Sequence
After rendering is complete, navigate to the output folder you selected to find your exported PNG sequence. Each frame will be named sequentially, making it easy to organize and manage. Review these files to ensure they meet your expectations.
Conclusion
Exporting a PNG sequence from After Effects gives you unparalleled control over your video content, allowing you to use individual frames in a variety of creative projects. Whether you’re working on animations, visual effects, or web assets, this method ensures high-quality results without any loss in fidelity. Start experimenting with PNG sequences in your next project to unlock new possibilities and precision in your work.
Our Bestsellers


