Exporting PNG Files from After Effects
Unveiling the Export Options
Adobe After Effects is a powerful tool widely used by video editors, motion graphics artists, and visual effects professionals to create stunning visual content. One essential aspect of working with After Effects is the ability to export files in various formats, including PNG. PNG (Portable Network Graphics) is a popular image format known for its lossless compression and support for transparency. Exporting your compositions as PNG files from After Effects can be beneficial for maintaining high image quality, preserving transparent backgrounds, and easily integrating them into other projects or platforms.
In this article, we will delve into the process of exporting PNG files from After Effects in a hassle-free manner. We will explore the steps involved in configuring export settings, selecting the appropriate options for your project requirements, and ensuring that the exported PNG files meet your desired specifications. Whether you are creating dynamic animations, stylish graphics, or intricate visual effects, knowing how to export PNG files effectively from After Effects is essential for delivering professional results.
Get 10% off when you subscribe to our newsletter

Exploring Export Options in After Effects:
Before diving into the specifics of exporting PNG files from After Effects, it is important to understand the range of export options available within the software. After Effects offers users a plethora of versatile export settings that can be customized to suit different project requirements. From adjusting image resolution and frame rate to selecting color profiles and alpha channel settings, the software provides users with the flexibility to fine-tune their export parameters for optimal results.
One of the key considerations when exporting PNG files from After Effects is determining the desired image quality and file size. PNG files are known for their lossless compression, which ensures that the image quality remains high without sacrificing details. By adjusting the export settings such as color depth and compression level, users can strike a balance between image quality and file size, ensuring that the final PNG files meet their expectations.
Additionally, users have the option to include alpha channels in their PNG exports, allowing for transparency to be preserved in the images. This is particularly useful when working with visual effects, motion graphics, or animations that require elements to appear seamlessly on different backgrounds. By enabling the alpha channel setting during export, users can create PNG files with transparent backgrounds, making it easier to composite the images into other projects or platforms.
Furthermore, After Effects offers users the ability to customize the dimensions and aspect ratio of their exported PNG files. Whether you are creating content for social media platforms, websites, or video projects, having the option to specify the resolution and aspect ratio ensures that your PNG files are optimized for their intended use. By adjusting the export settings for resolution, aspect ratio, and pixel aspect ratio, users can ensure that their PNG files are rendered in the appropriate dimensions for their projects.
In addition to these export options, After Effects provides users with the ability to export PNG sequences, allowing for multiple PNG images to be exported sequentially. This feature is particularly useful for creating animations, visual effects, or motion graphics that need to be exported as a series of images. By exporting PNG sequences, users can retain the individual frames of their compositions, enabling them to further edit or refine the visual content as needed.
Step-by-Step Guide to Exporting PNG from After Effects:
Now that we have explored the various export options available in After Effects, let’s delve into the step-by-step process of exporting PNG files from the software. Follow these detailed instructions to ensure a seamless and efficient export process, allowing you to create high-quality PNG images for your projects.
1. Prepare Your Composition: Before exporting your composition as a PNG file, ensure that your project is finalized and ready for export. Make any necessary adjustments to the composition to achieve the desired visual result.
2. Select Your Composition: In the After Effects timeline, select the composition that you want to export as a PNG file. Ensure that the composition is selected and active in the timeline panel before proceeding with the export process.
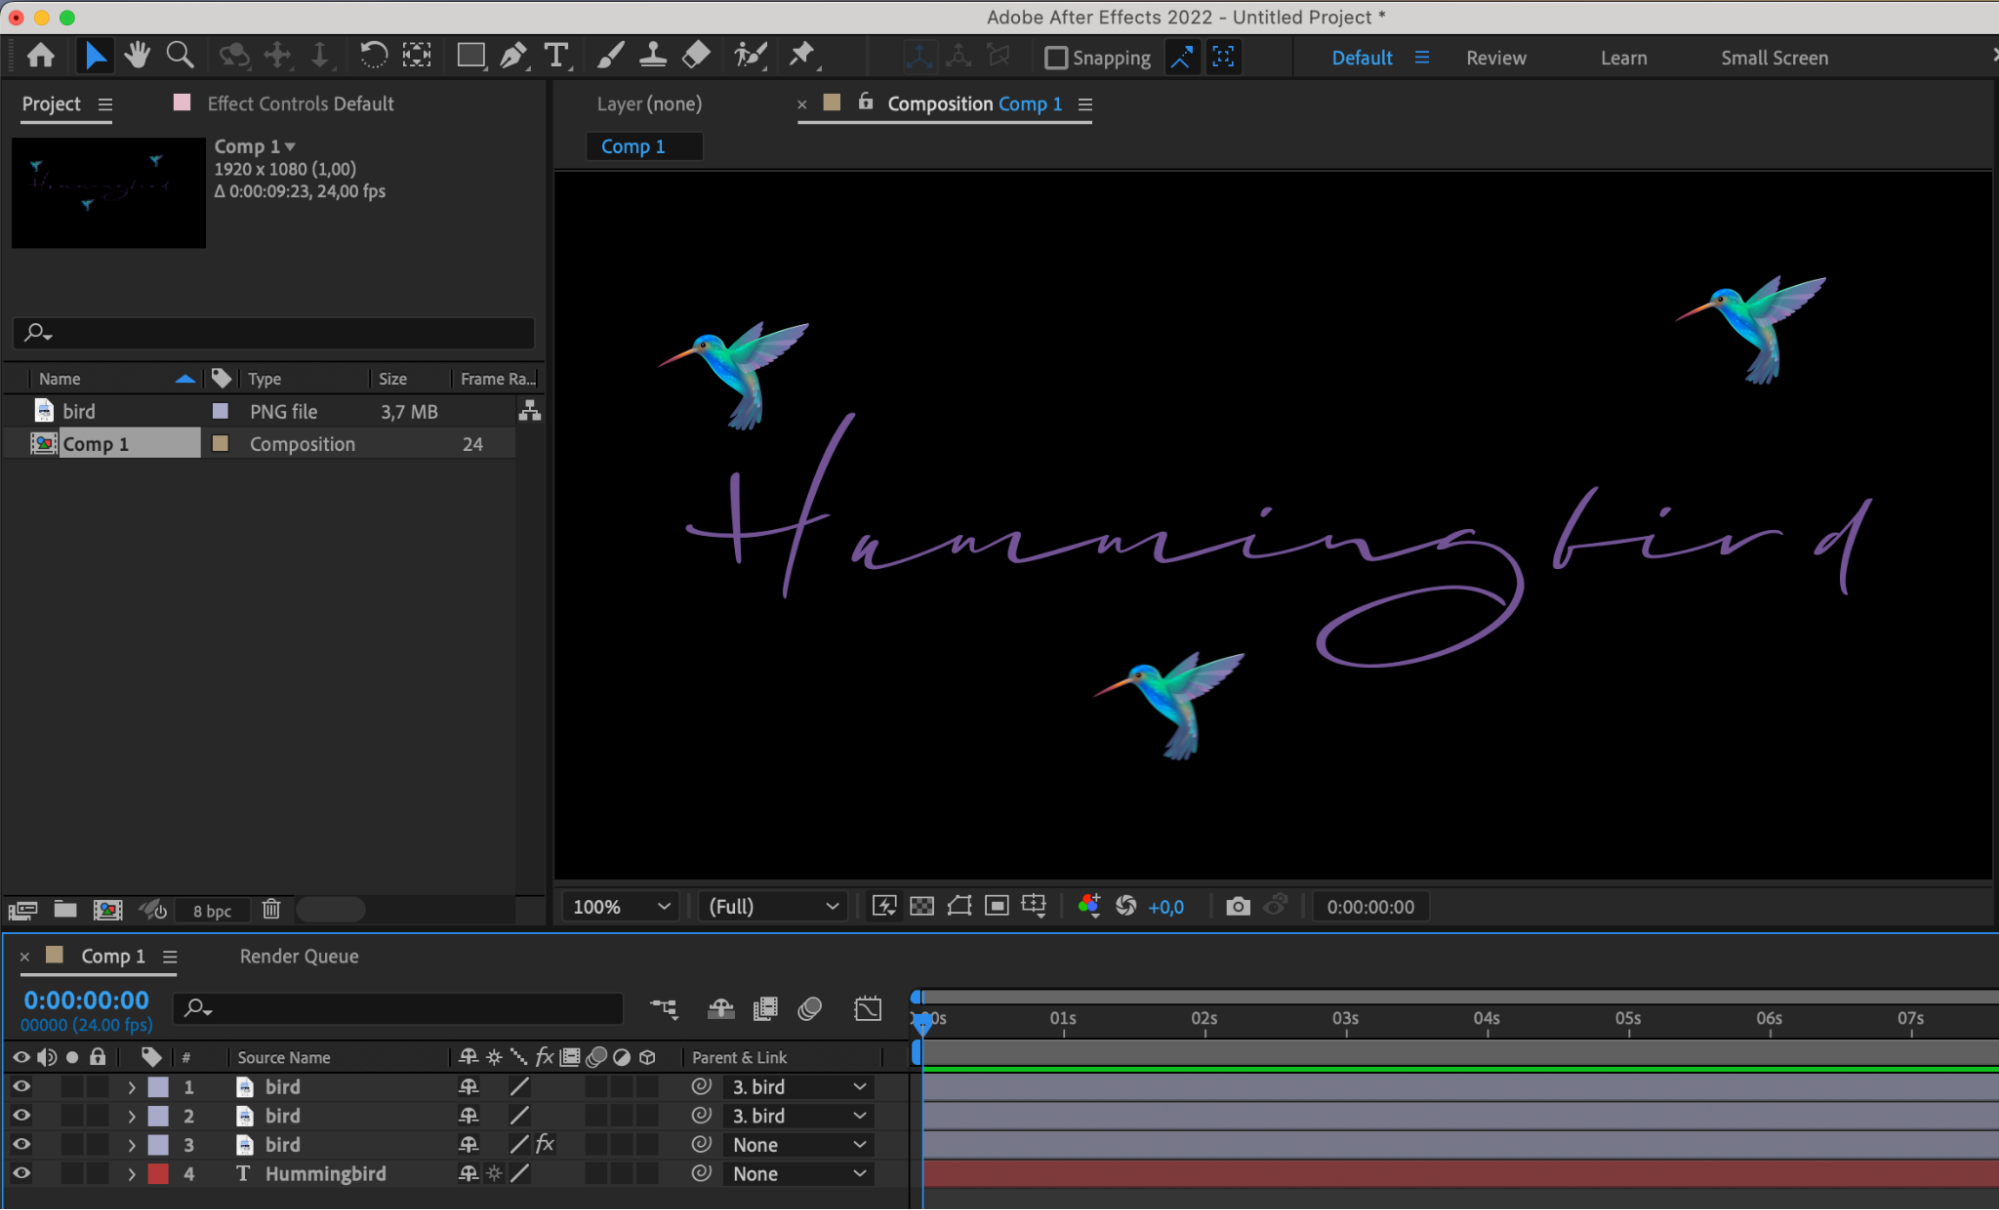
3. Access the Export Settings: To begin the export process, navigate to the “File” menu at the top of the After Effects interface. Click on “Export” and then select “Add to Adobe Media Encoder Queue.” This action will open the Adobe Media Encoder software, where you can configure the export settings for your PNG file.

4. Configure Export Settings: Within Adobe Media Encoder, you will see a list of export presets. Locate the “PNG” preset or create a custom preset by selecting the desired settings for your PNG export. Adjust parameters such as image resolution, frame rate, color depth, and alpha channel settings to match your project requirements.
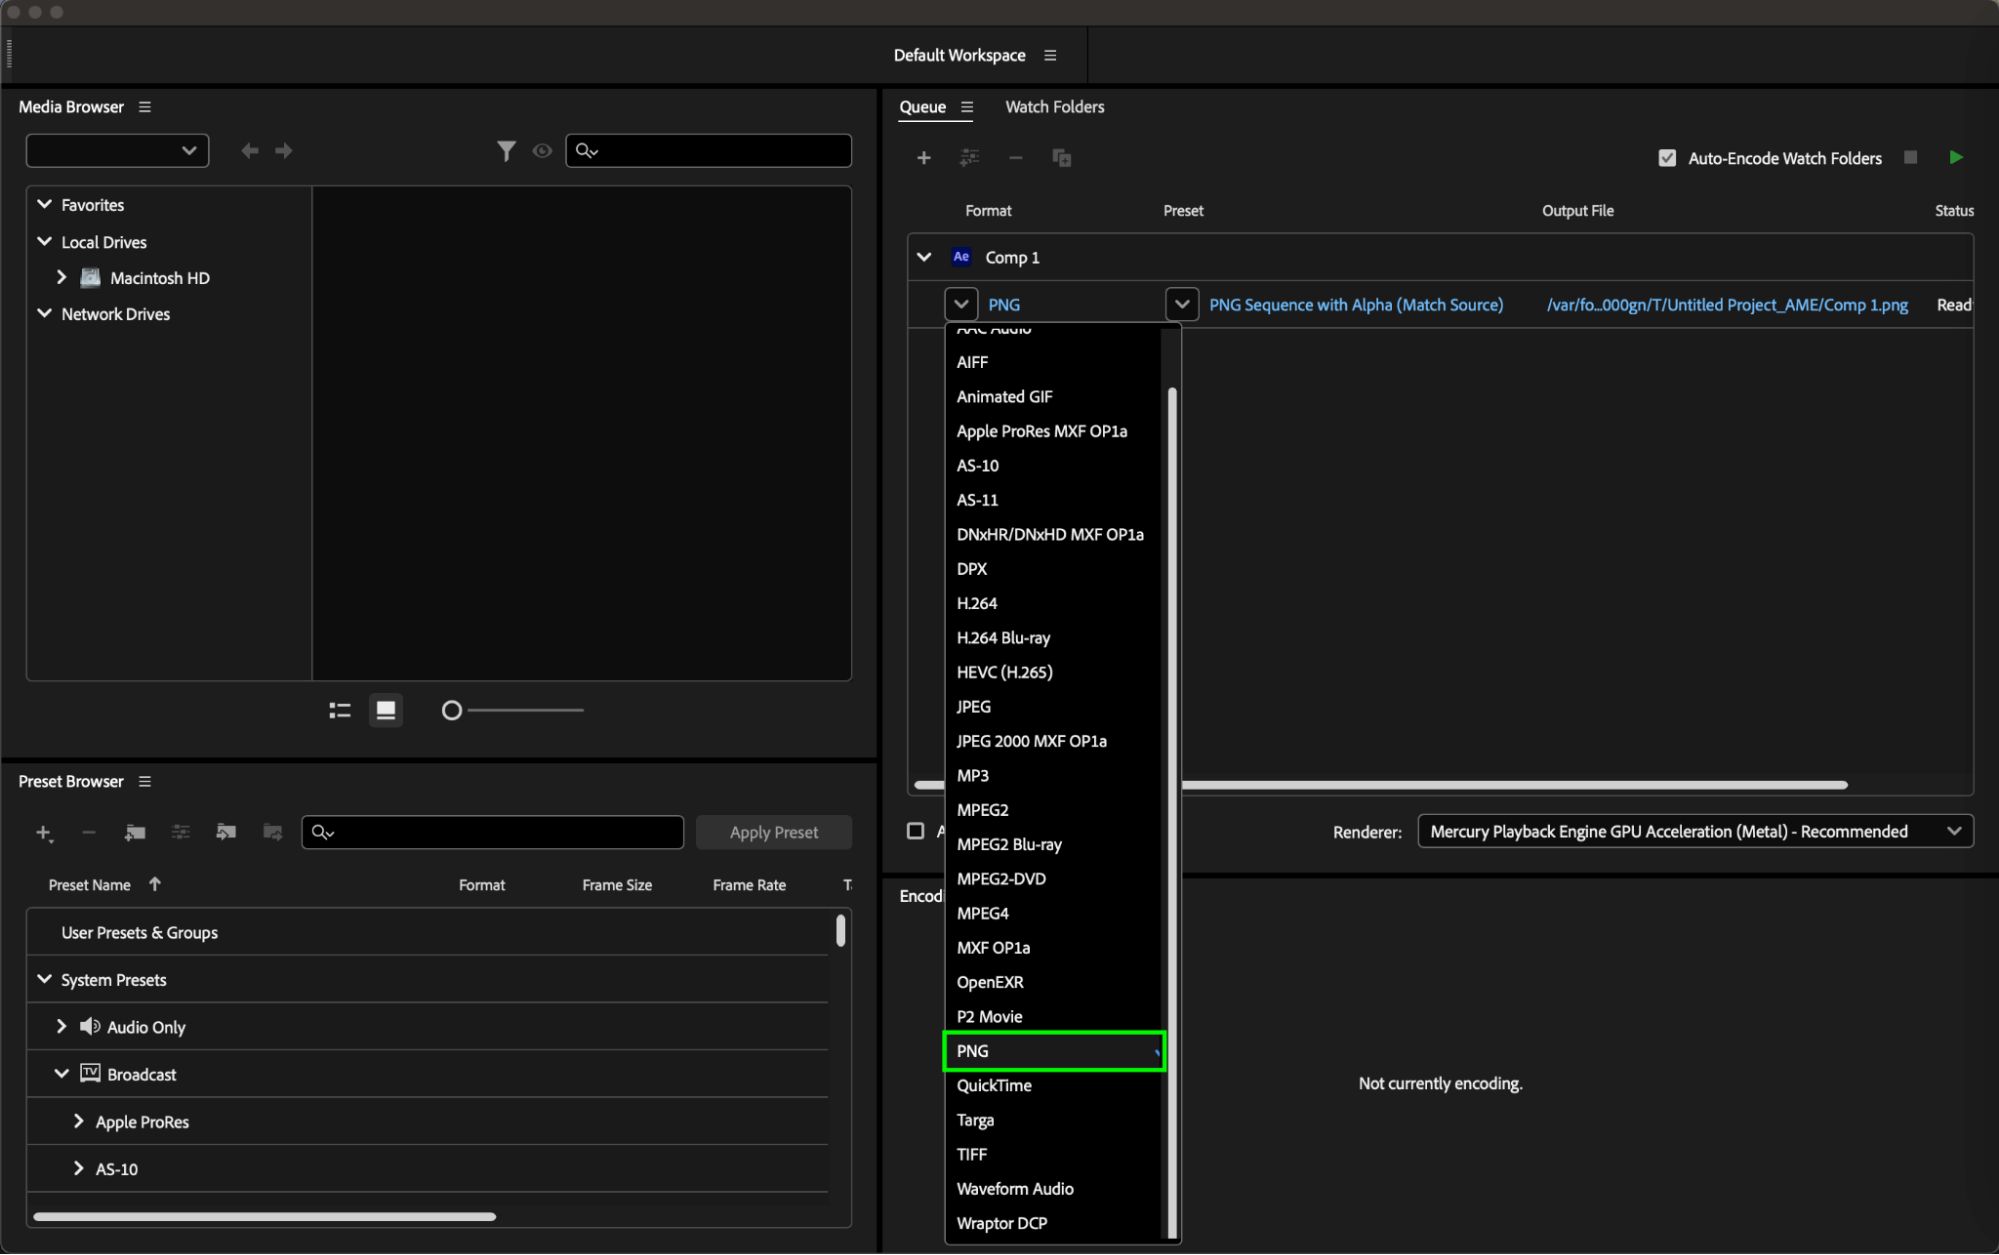
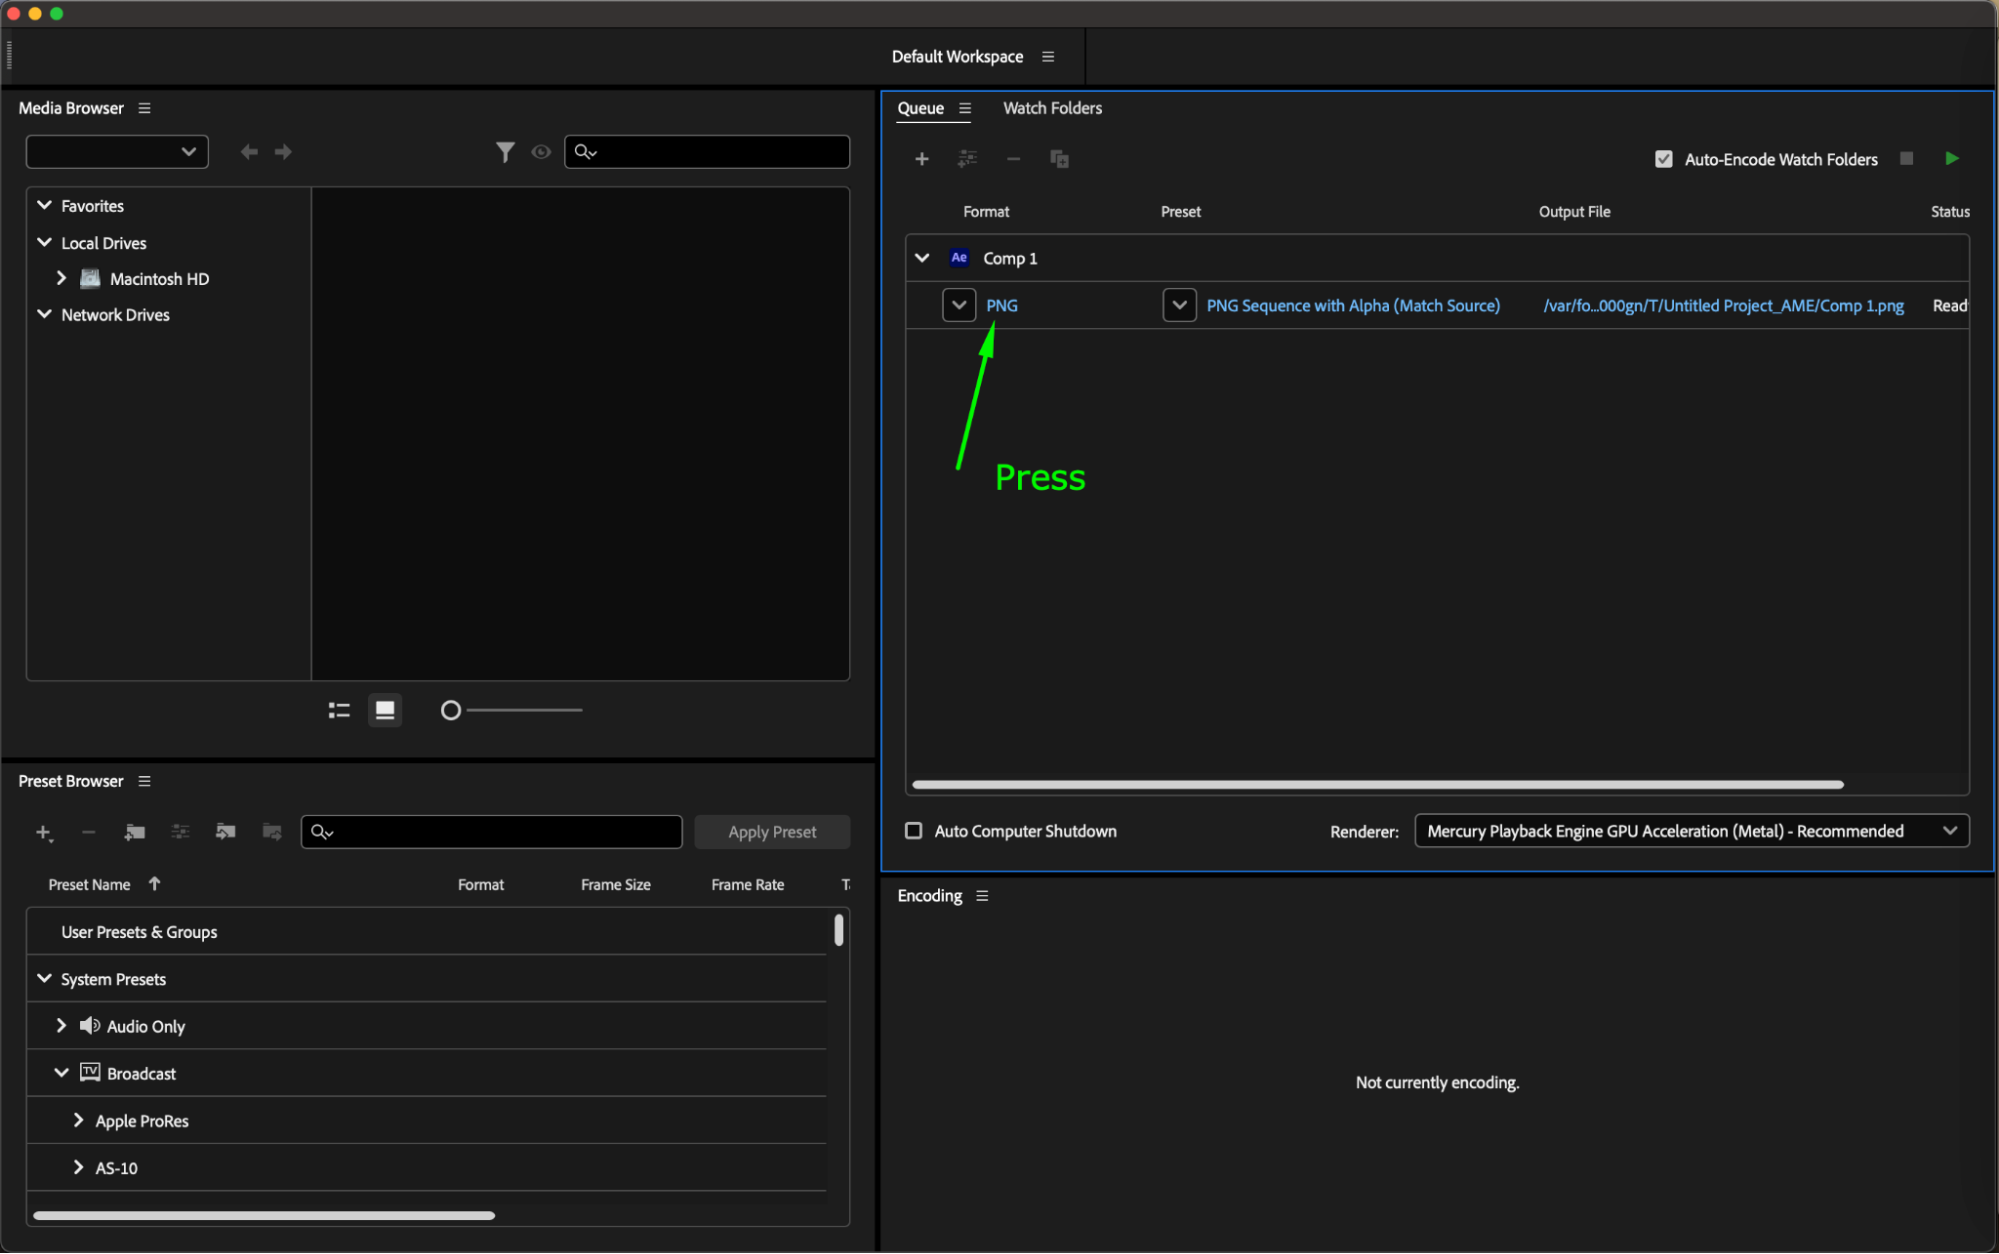
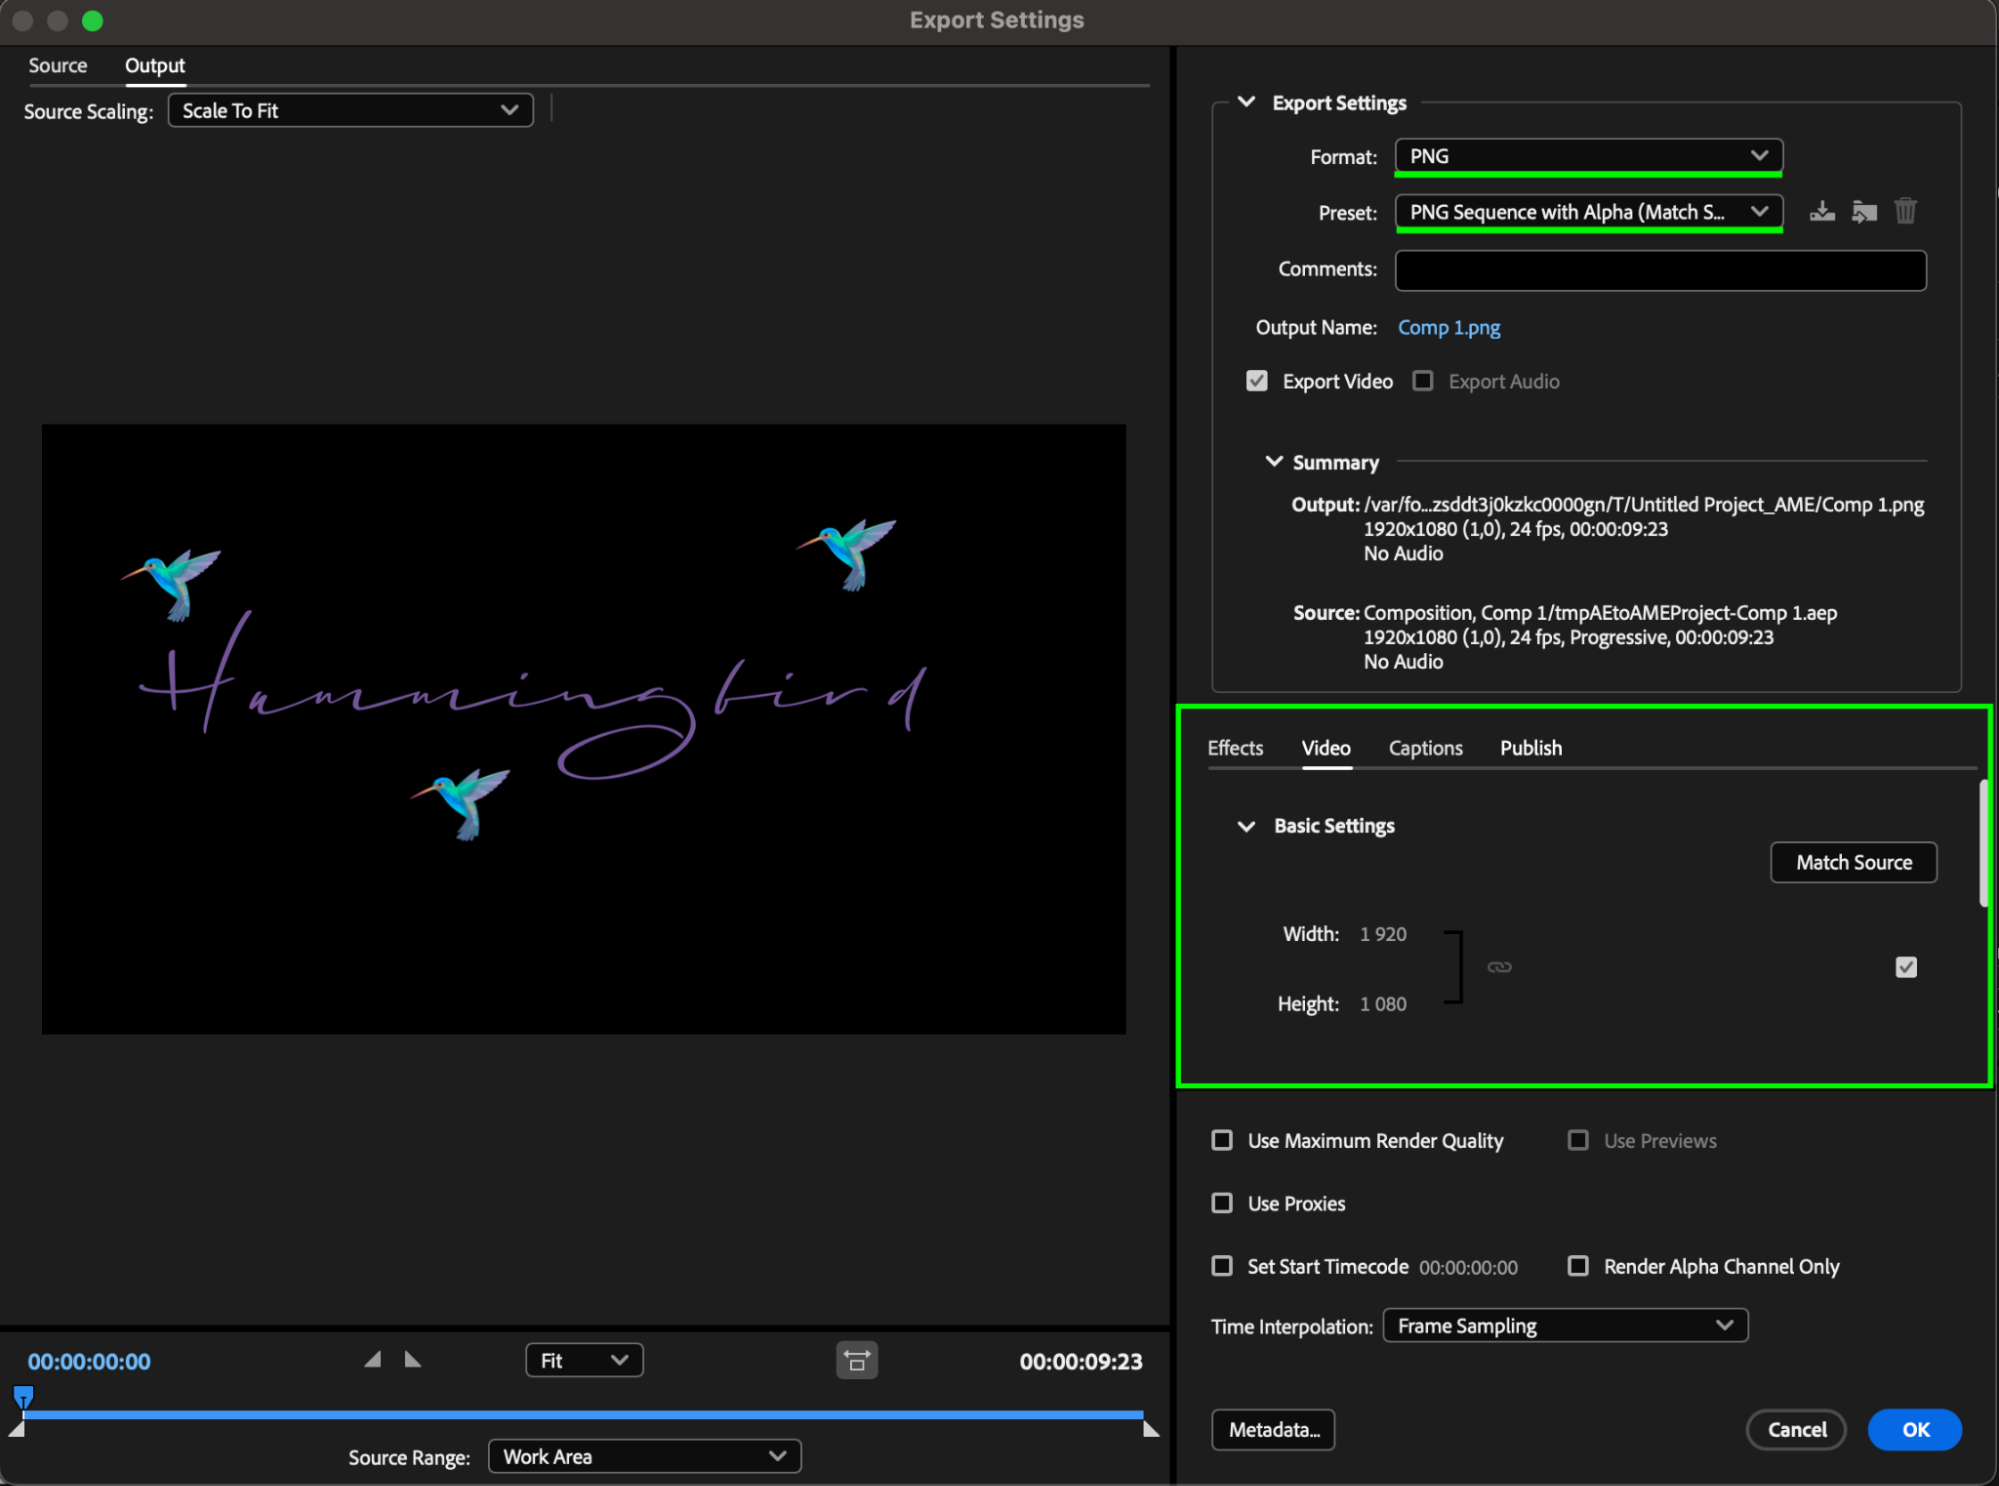
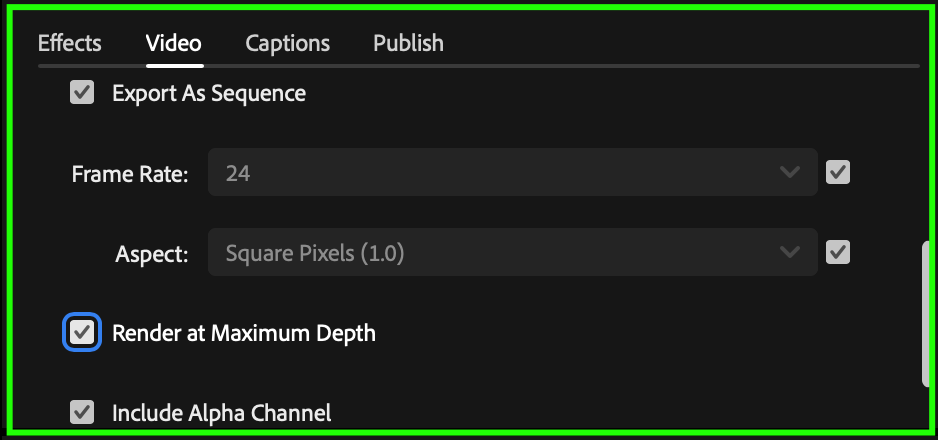
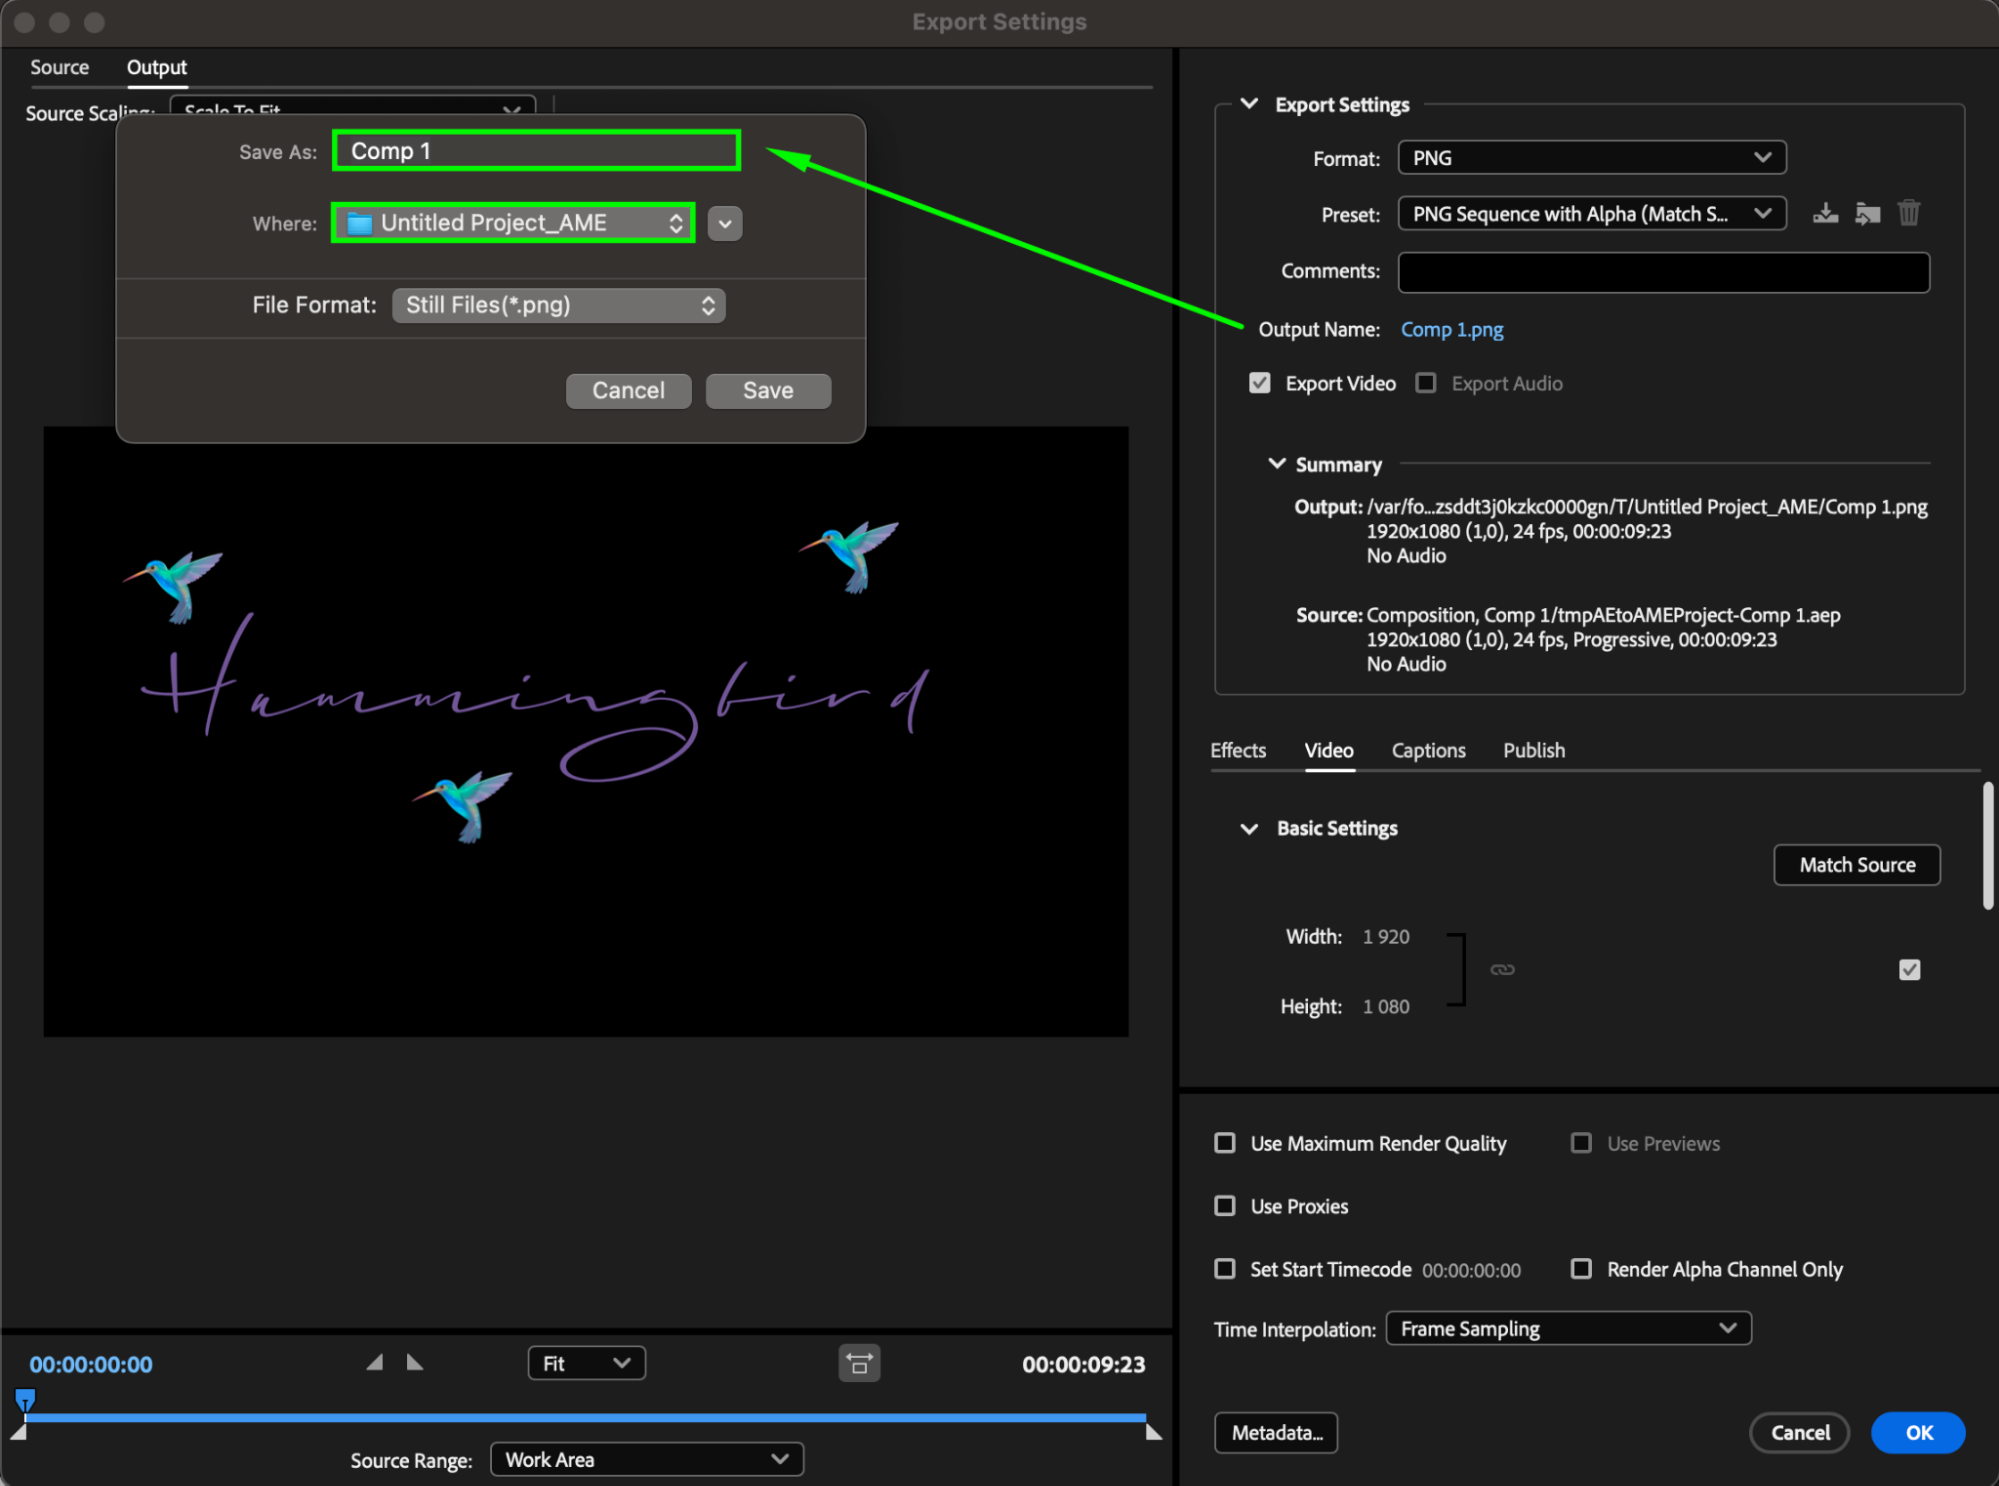
5. Select Output Destination: Choose the output destination where you want to save the exported PNG file. You can specify the folder location and file name for the PNG file to be saved. Ensure that you select a location on your computer where you can easily access the exported PNG file.
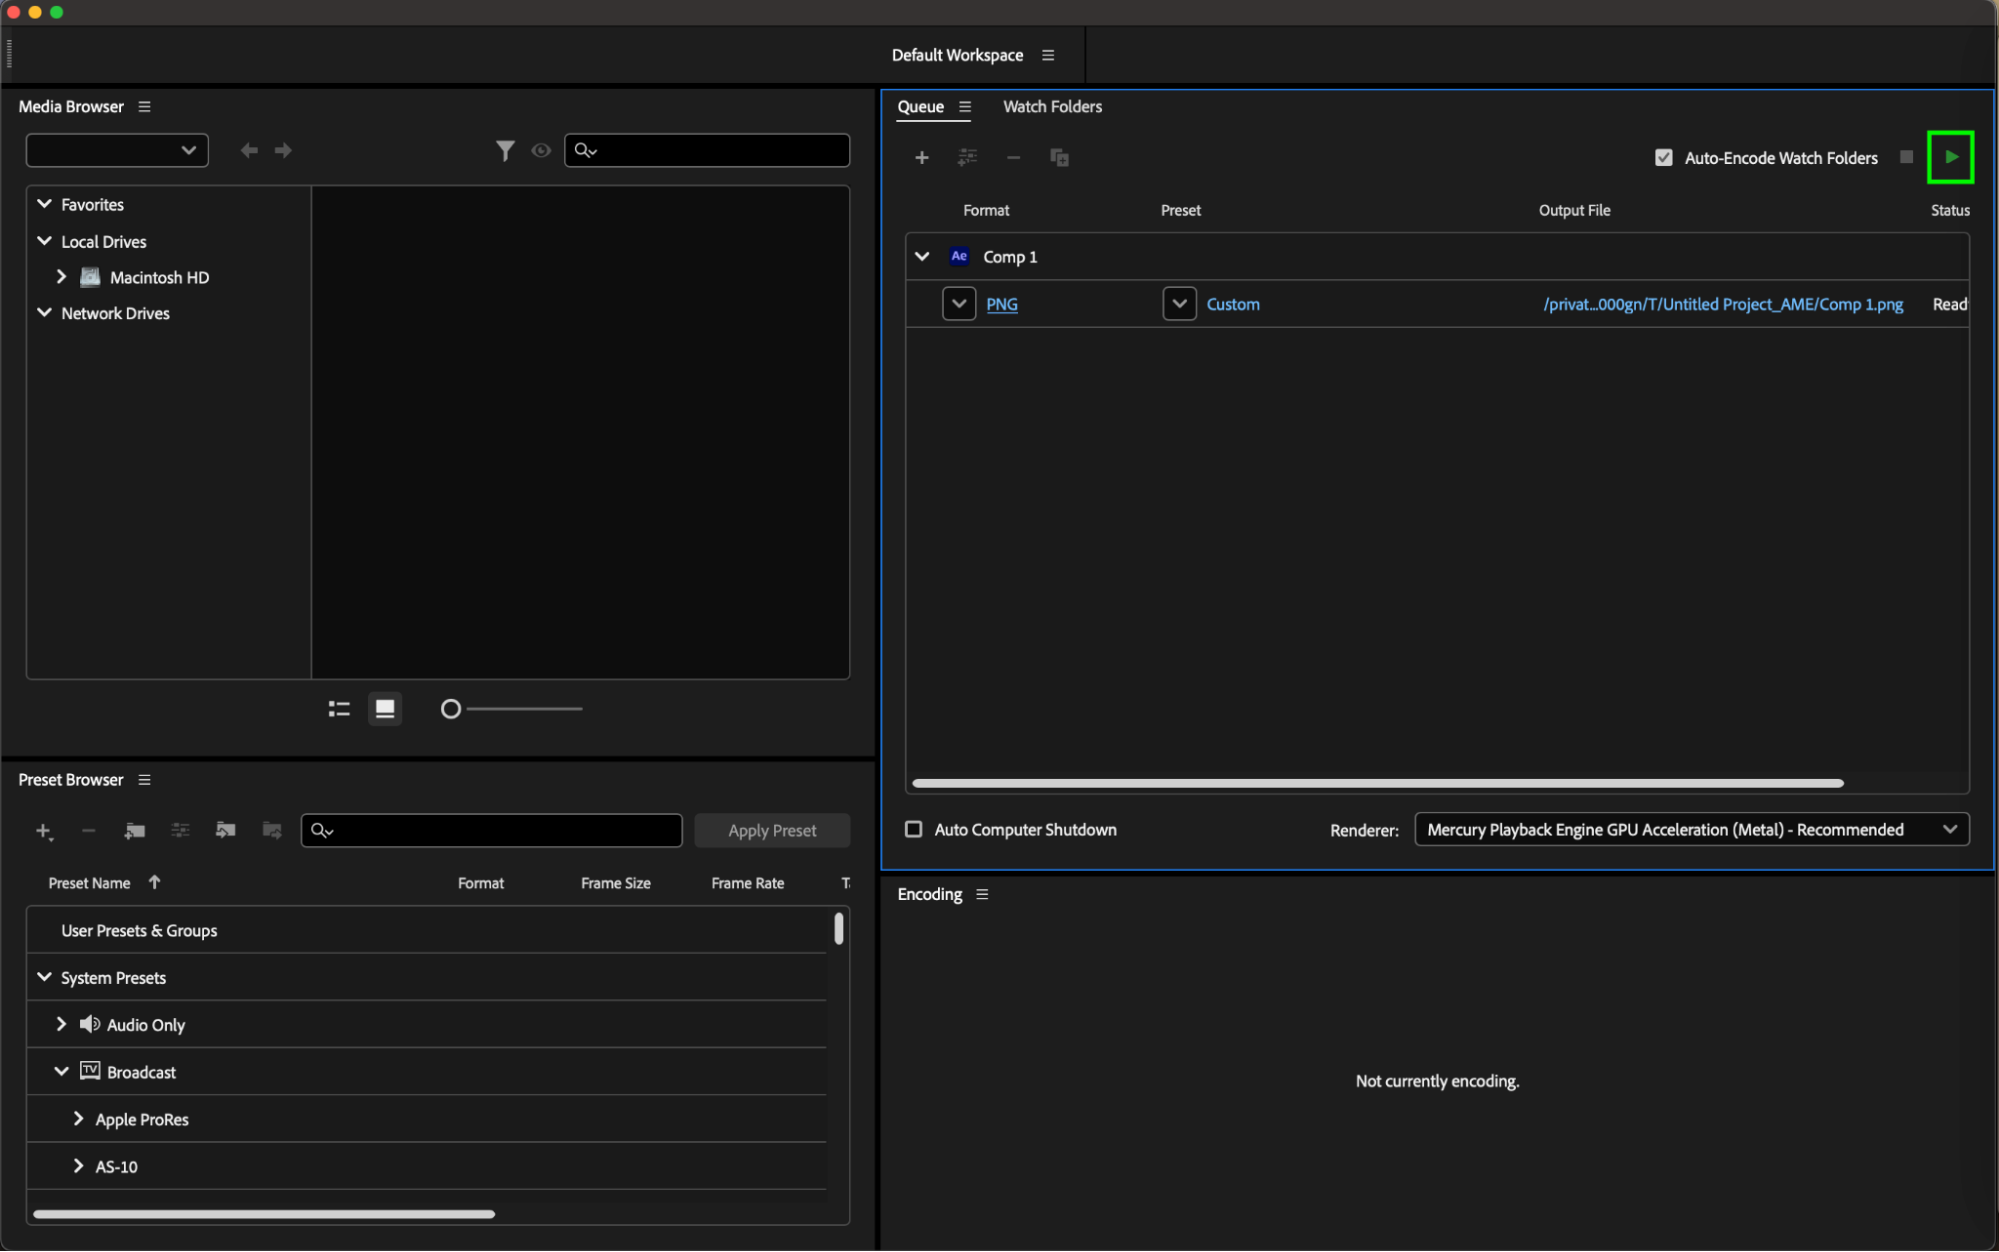
6. Initiate the Export Process: Once you have configured the export settings and selected the output destination, click on the “Start Queue” button to begin the export process. Adobe Media Encoder will start rendering the composition and generate the PNG file based on the specified settings.
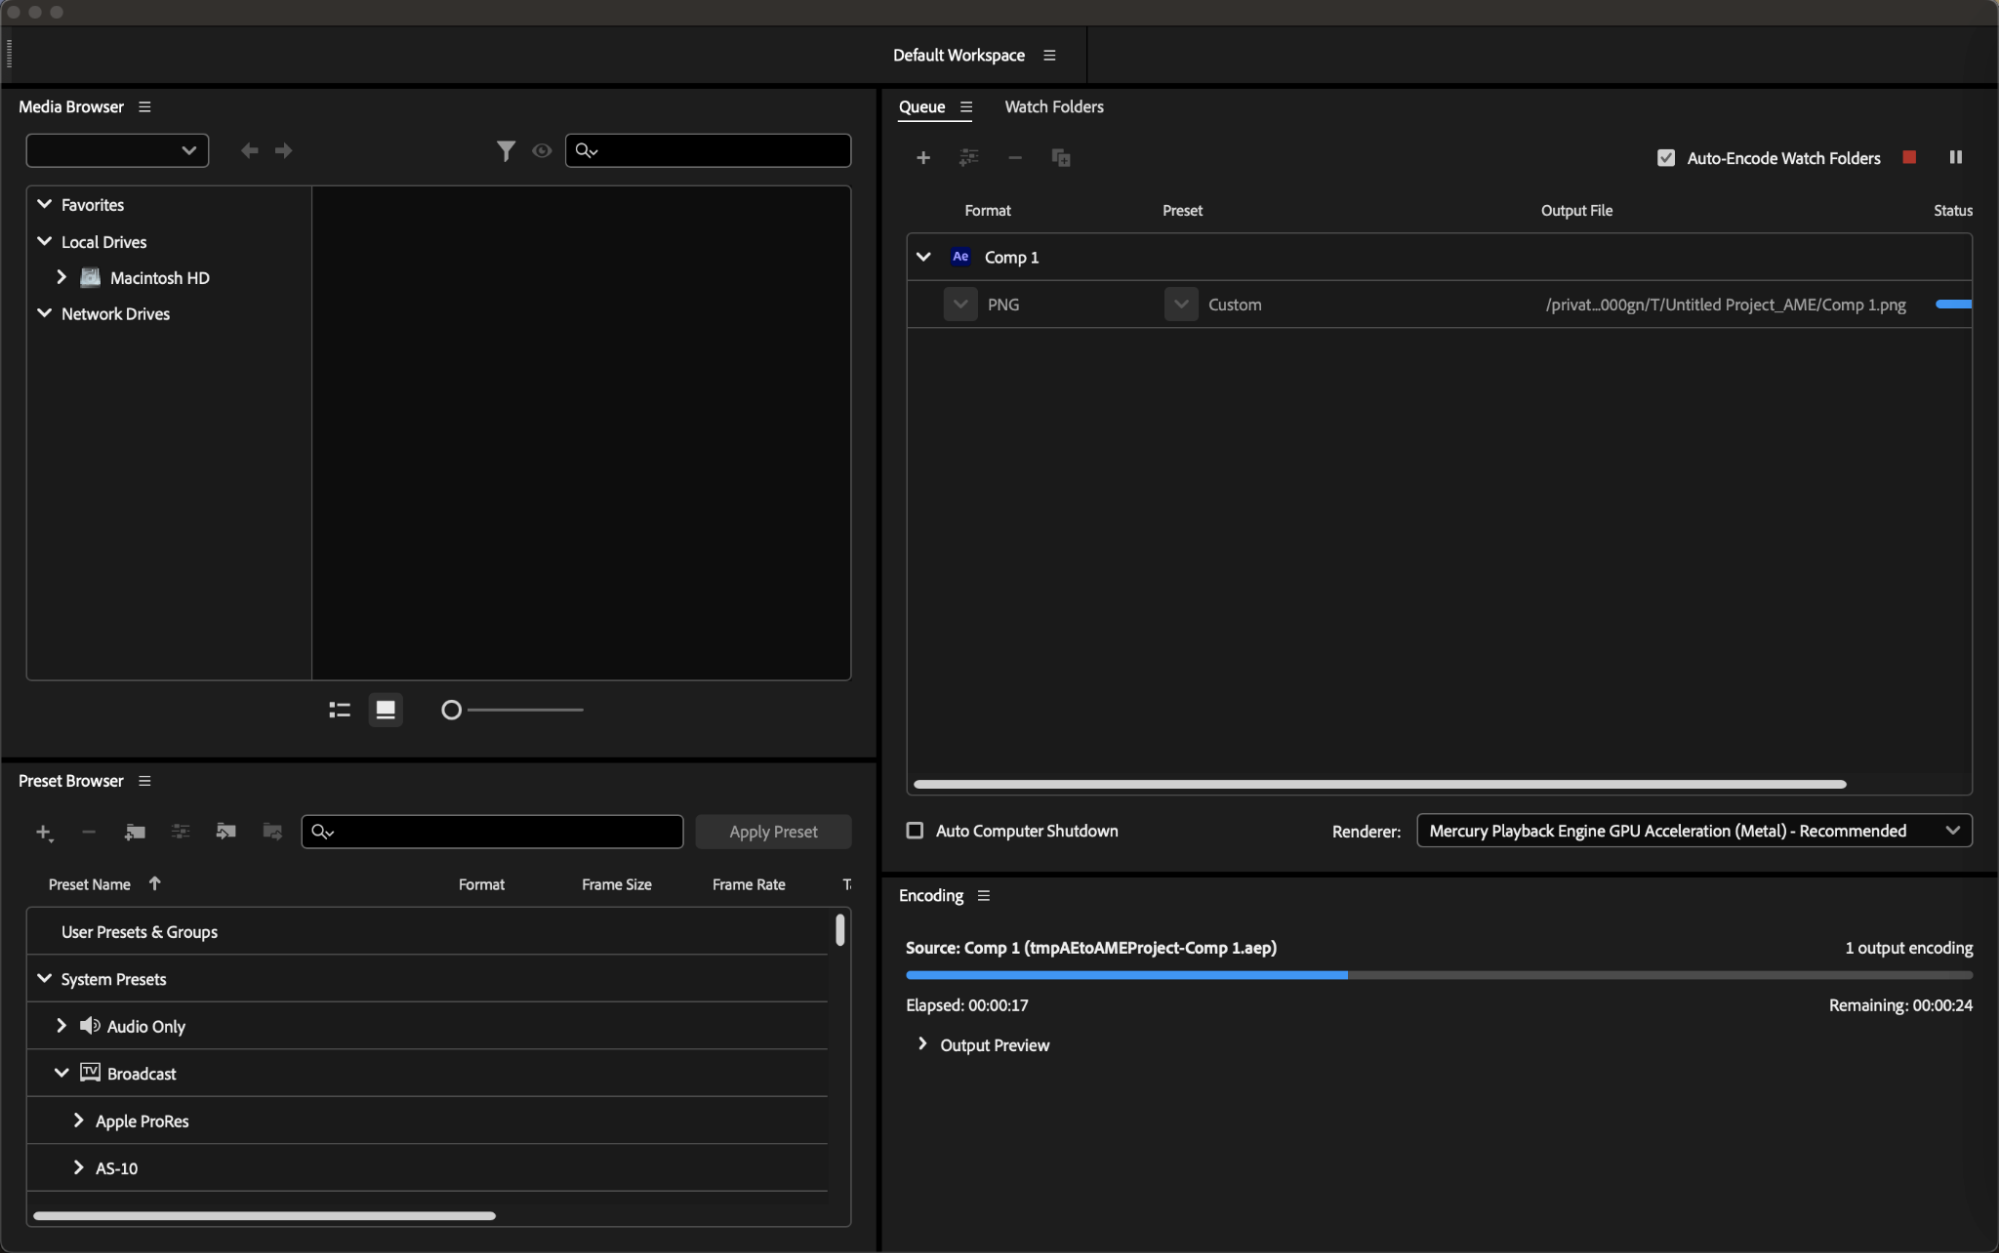
7. Monitor the Export Progress: During the export process, you can monitor the progress of the rendering within Adobe Media Encoder. The software will display a progress bar indicating the status of the export operation, allowing you to track the completion of the PNG file generation.
8. Verify the Exported PNG File: Once the export process is complete, navigate to the output destination where you saved the PNG file. Open the PNG file in an image viewer to verify that the export was successful and that the image quality, transparency, and other settings meet your expectations.

Tips for Optimizing PNG Export in After Effects:
In addition to mastering the fundamental steps of exporting PNG files from After Effects, there are several tips and techniques that can help optimize the export process and enhance the quality of your PNG images. By implementing these strategies, you can ensure that your exported PNG files maintain clarity, transparency, and visual appeal, making them ideal for a wide range of applications and projects.
1. Utilize Alpha Channels Effectively: When exporting PNG files from After Effects, leverage the alpha channel feature to preserve transparency in your images.
2. Optimize Image Resolution and Aspect Ratio: Consider the resolution and aspect ratio of your PNG exports to ensure that they are optimized for their intended use.
3. Experiment with Color Profiles and Depth: Explore different color profiles and color depth settings when exporting PNG files to achieve the desired color accuracy and image quality.
4. Check Compression Settings: When exporting PNG files, pay attention to the compression level to balance image quality and file size.
5. Export PNG Sequences for Animation: If you are working on animations or motion graphics in After Effects, consider exporting your compositions as PNG sequences.
6. Organize Exported PNG Files: After exporting PNG files from After Effects, organize them in a structured manner to streamline your workflow.
By incorporating these tips and techniques into your PNG export process in After Effects, you can elevate the quality of your visual projects and optimize the efficiency of your workflow. Experiment with different settings, configurations, and export options to discover the best practices that work for your specific projects and creative objectives. With a strategic approach to exporting PNG files from After Effects, you can enhance the visual impact of your compositions and deliver polished images that captivate and engage your audience.


