Guide to Exporting Video Files from After Effects
Introduction: Simplifying the Export Process in After Effects
Exporting a video file from After Effects is a crucial final step in the video production process. However, with numerous export options and settings, it can sometimes feel overwhelming. To help you export your video file with ease, we’ve created this comprehensive guide. Whether you’re exporting for online use, client delivery, or further editing, this step-by-step tutorial will help you choose the right format and settings for your project.
Step 1: Add Your Composition to the Render Queue
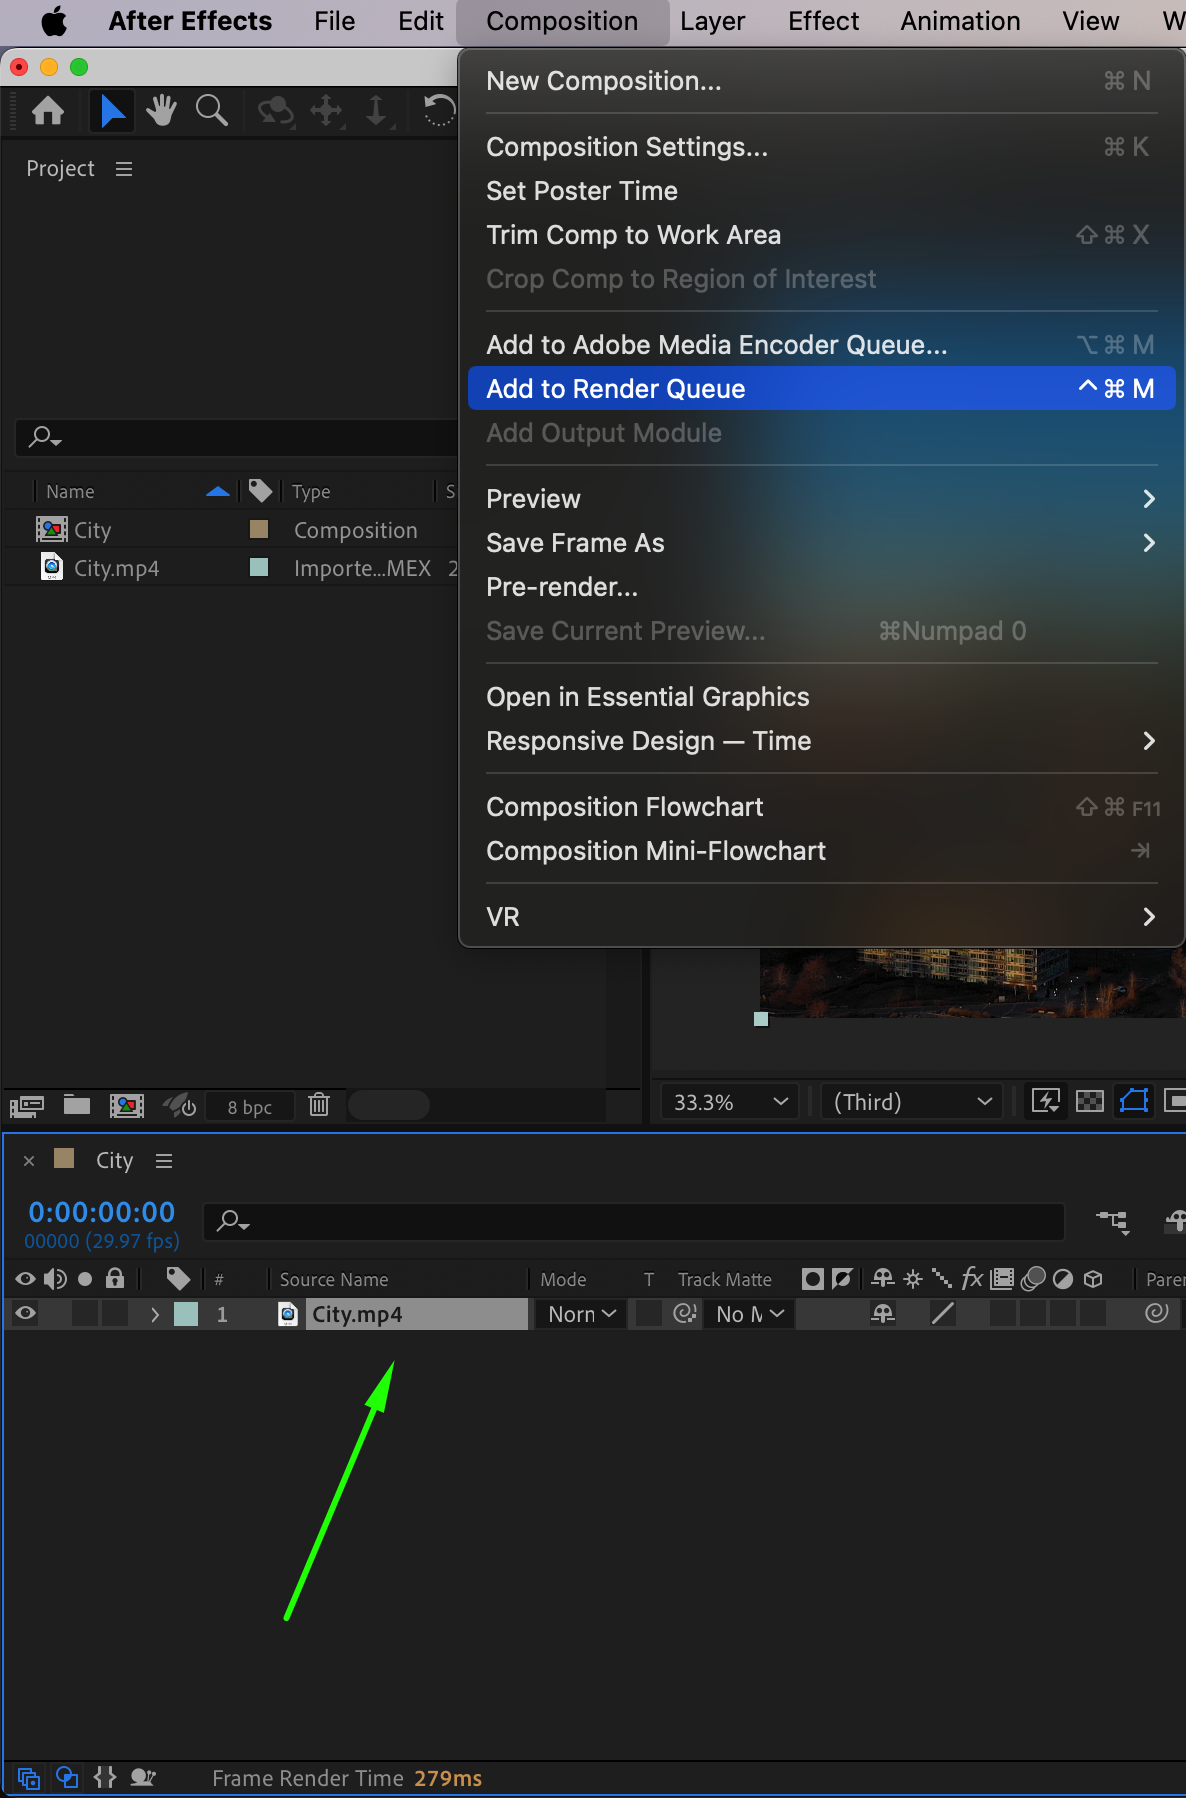
The first step in exporting a video file from After Effects is selecting the composition you wish to export. To do this, click on any layer in your composition’s Timeline panel to ensure it’s active. Then, go to the Composition menu at the top of the screen and select Add to Render Queue. This action sends your composition to the Render Queue panel, where you’ll manage the output settings and prepare the composition for rendering.
Step 2: Configure the Output Module Settings
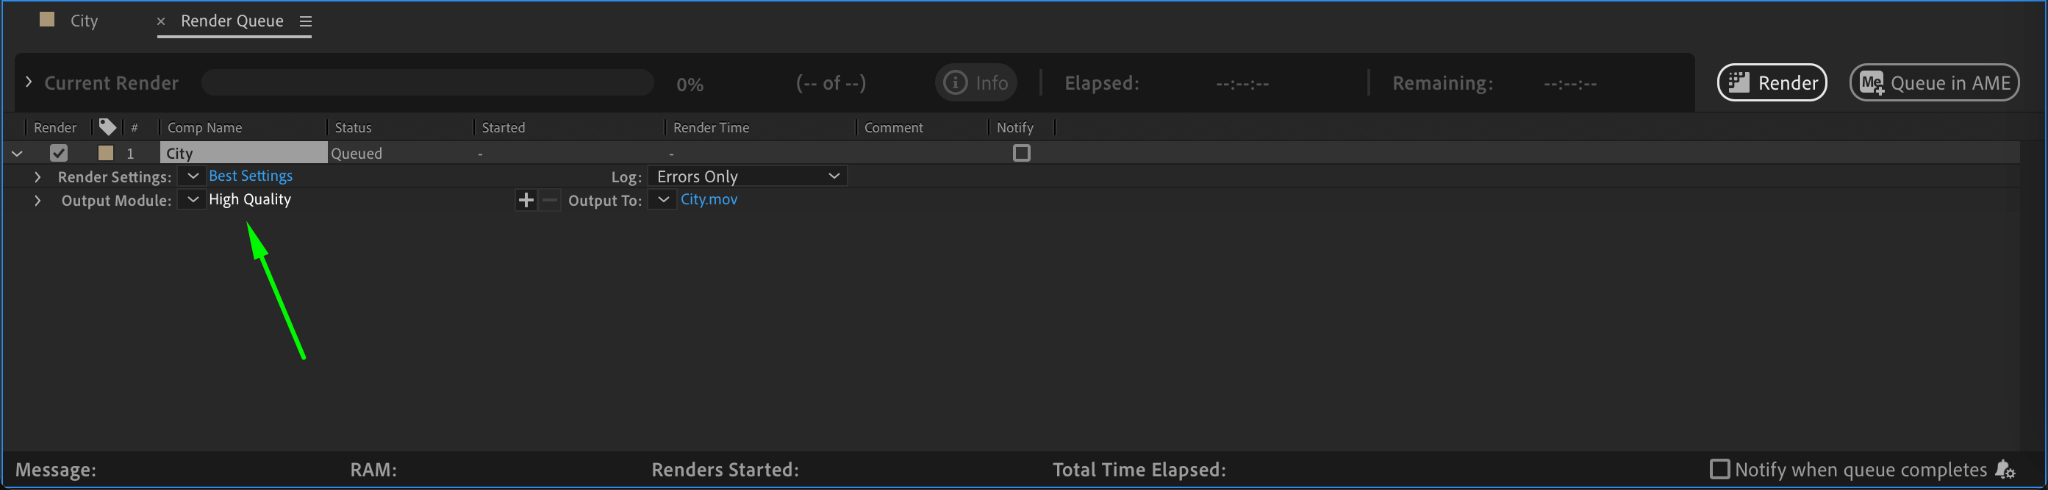
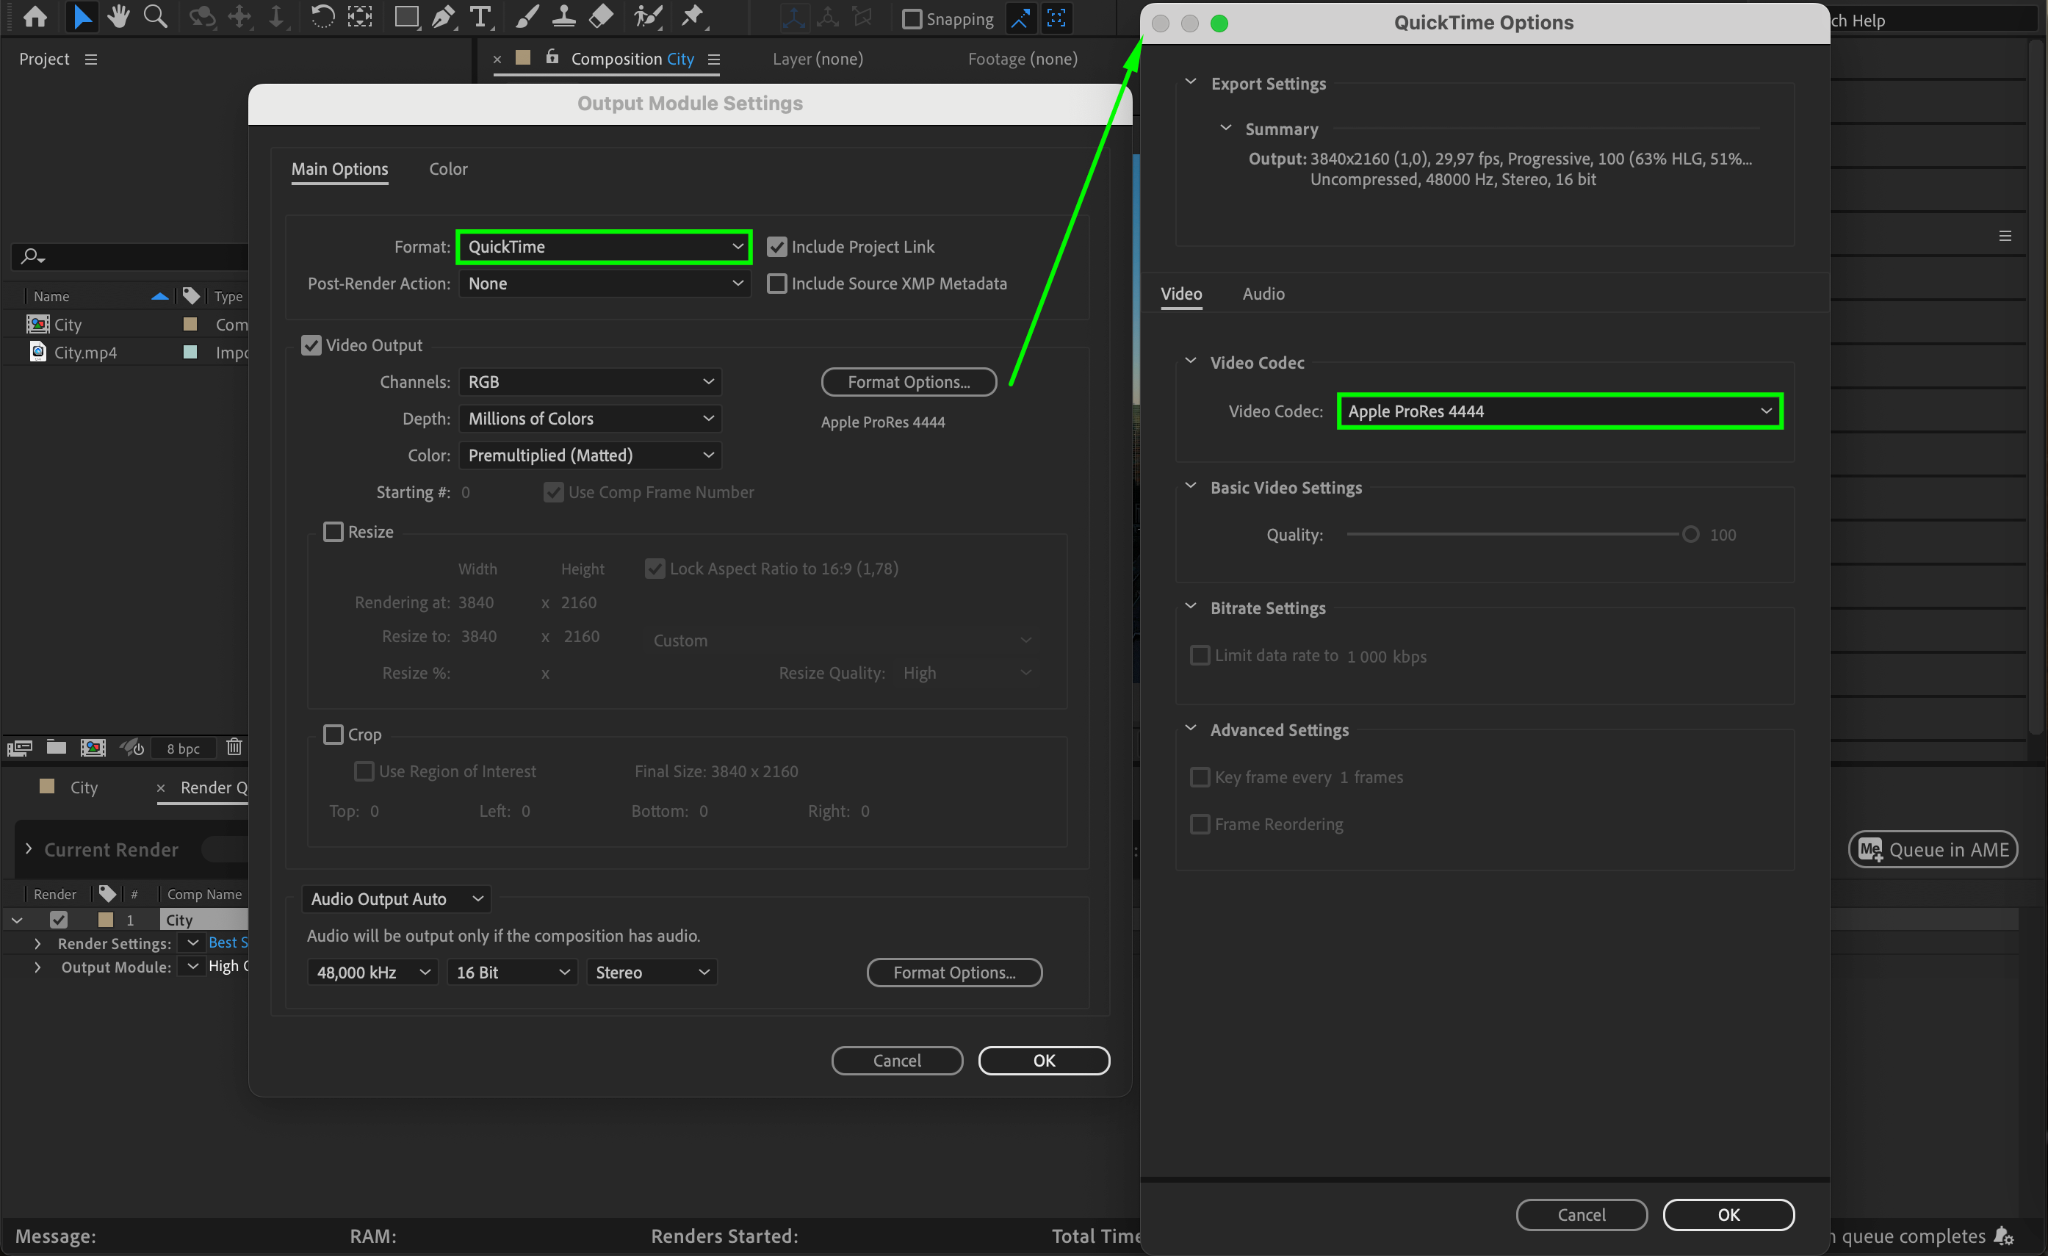
Once your composition is in the Render Queue, it’s time to configure the output module settings. Click on the text next to the Output Module section (it usually says “High Quality” by default) to open the Output Module Settings window. In this window, you can choose the file format, such as AVI, QuickTime, or H.264. Selecting the right format is crucial, as it determines the codec and compatibility of your video file. If you’re exporting for the web or sharing platforms, H.264 is a great option, as it produces high-quality video files in the MP4 format while keeping the file size manageable. Additionally, you can adjust settings such as bit depth, color channels, and audio output, depending on your project’s needs.
Step 3: Set Output Name and Destination
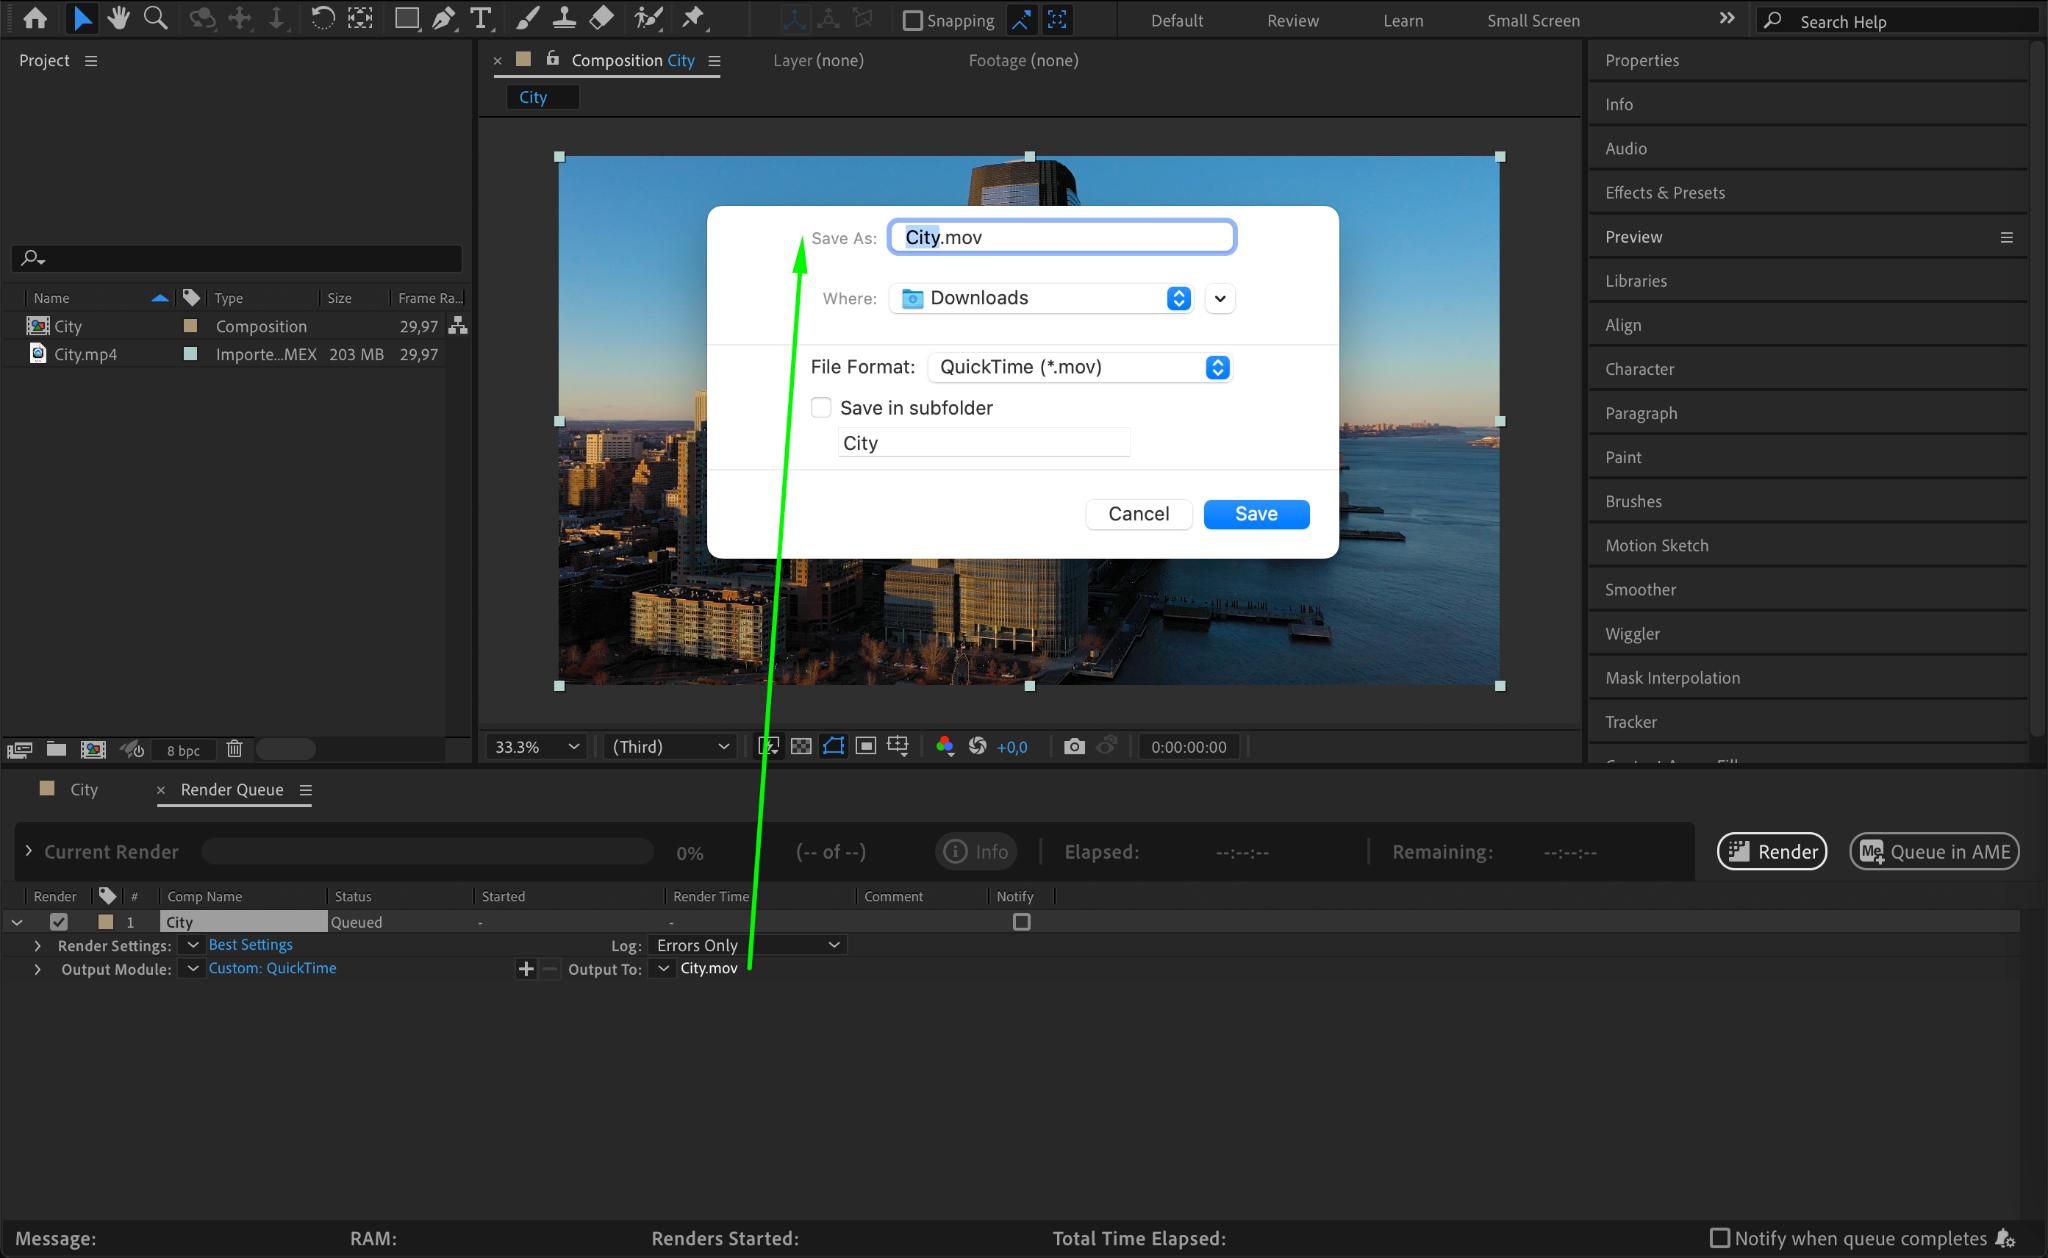
Now that the output module is configured, you need to specify where the exported video will be saved and what it will be named. In the Render Queue panel, next to the Output To section, click on the text displaying the current file name. This will open a file explorer window, allowing you to choose the location where your video file will be saved. Select a folder that has sufficient storage space and is easy to access. Be sure to give your video file a clear and descriptive name to stay organized, especially when working on multiple projects.
Get 10% off when you subscribe to our newsletter

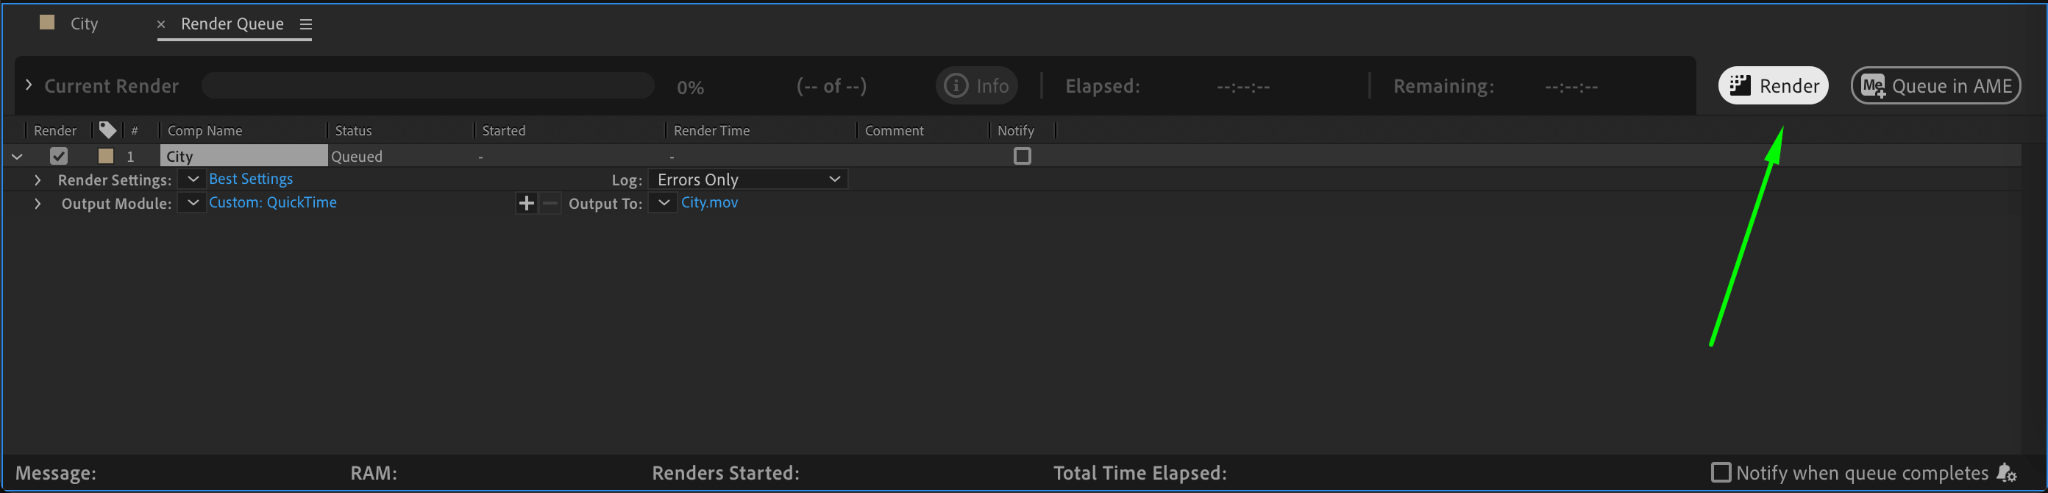
Step 4: Start the Render Process
With all your settings in place, you’re now ready to render your video file. In the Render Queue panel, click on the Render button to begin the rendering process. The time it takes for After Effects to render the video will depend on several factors, including the length and complexity of your composition, the resolution, and the export settings you chose. More complex animations or higher-quality settings may result in longer render times, so be patient and allow the render to complete.
Step 5: Preview the Exported Video File
After the rendering process is complete, it’s a good idea to preview your exported video to ensure everything looks as expected. Open the file using a media player that supports the format you exported, such as VLC or QuickTime, and review the quality, playback, and audio. If you notice any issues, you can go back to After Effects, adjust the settings, and render the video again until you’re satisfied with the result.
Conclusion: Exporting with Confidence
Exporting video files from After Effects doesn’t have to be complicated or intimidating. By following these steps, you can confidently export your project with the best format and settings suited to your needs. Whether you’re sharing your work on social media, delivering it to a client, or archiving it for future use, mastering the export process ensures that your video looks professional and polished.
So, take the time to experiment with different settings, understand the export options, and export your videos in the highest quality possible. Now that you know the process, you’re ready to showcase your creative work to the world!
Our Bestsellers
Our Bestsellers


