How to Accelerate Video Playback in After Effects
Introduction: Learn How to Fast Forward Videos with After Effects
Are you eager to learn how to fast forward a video in After Effects? It’s a fantastic skill to have in your editing toolkit, allowing you to speed up your editing process and create visually engaging effects. Want to know how to do it? You’re in the right place! Let’s dive into the step-by-step process of fast forwarding a video in After Effects and uncover some valuable tips and tricks along the way.
Step 1: Import the Video
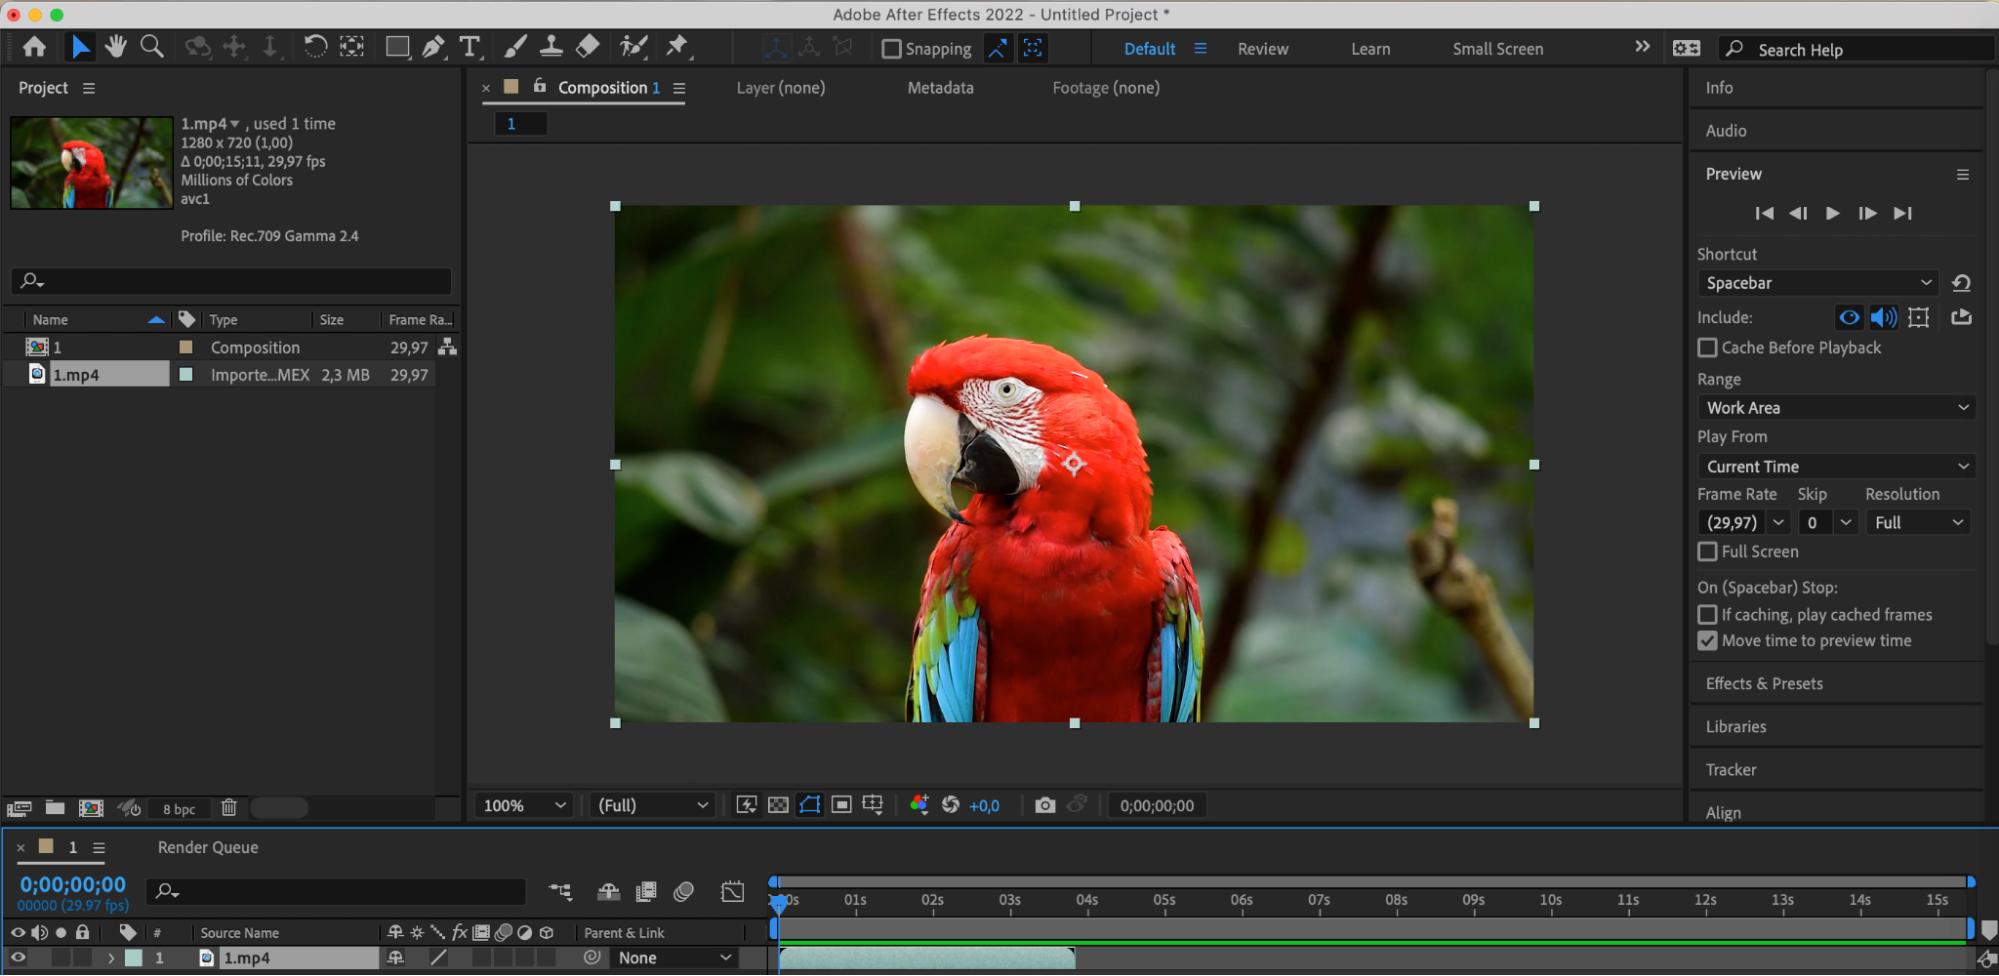
Open After Effects and import the video file you want to fast forward into your project.
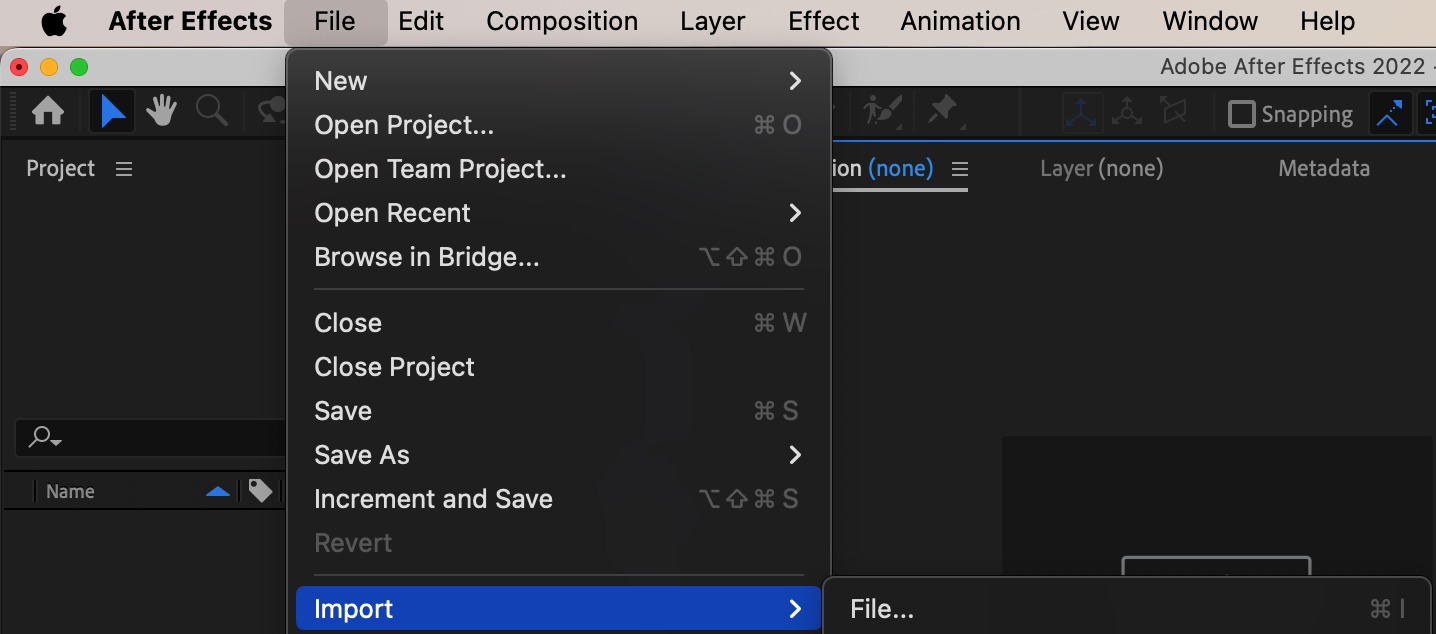
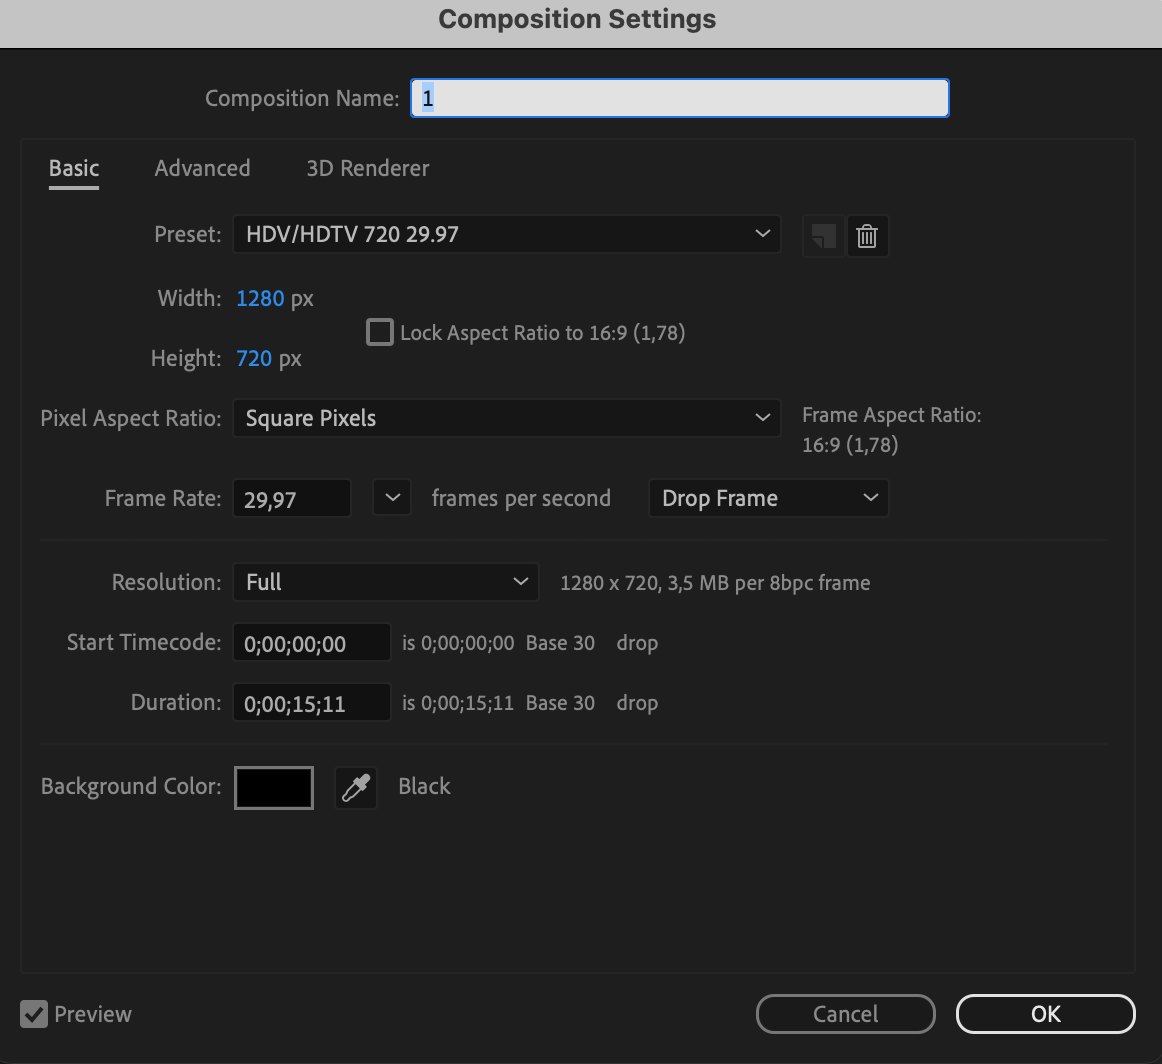
Step 2: Create a New Composition
Click on the “New Composition” icon in the Composition panel to create a new composition. Configure the composition settings, including frame size and duration.
Get 10% off when you subscribe to our newsletter


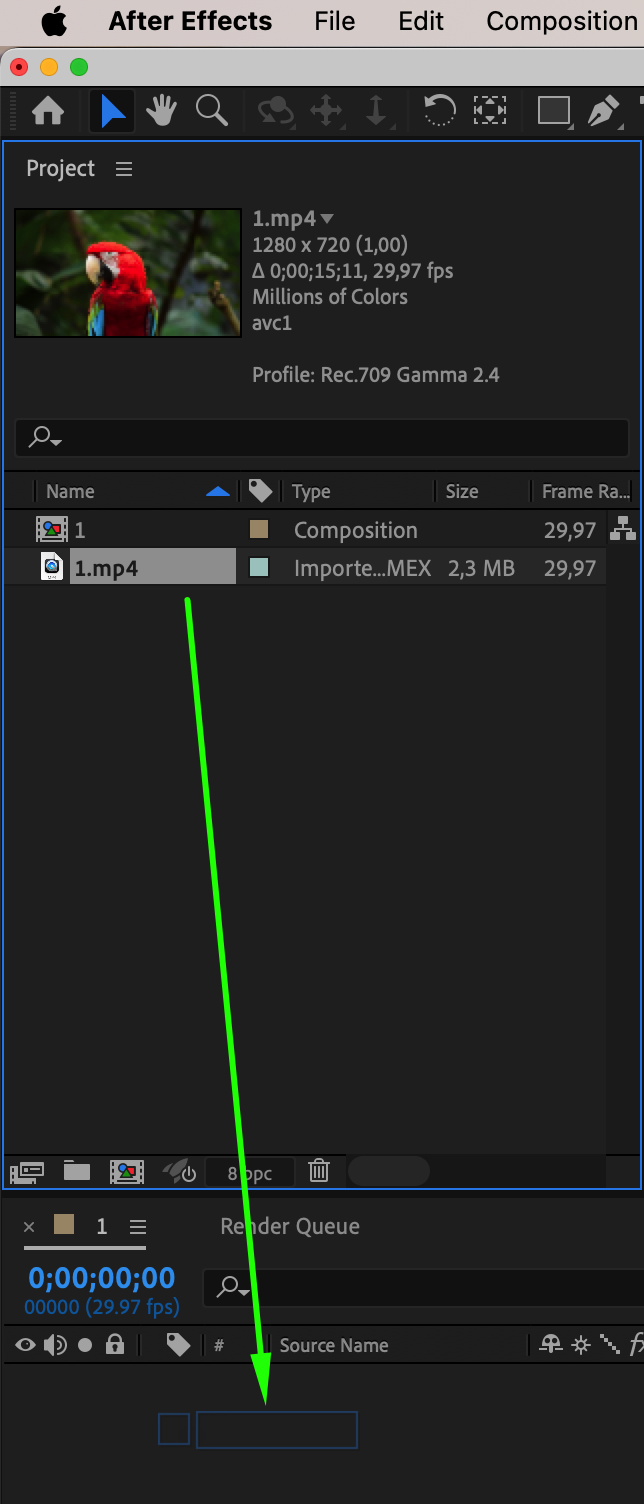
Step 3: Add the Video to the Timeline
Drag your composition from the Project panel onto the timeline. This will add the video to the timeline for editing.
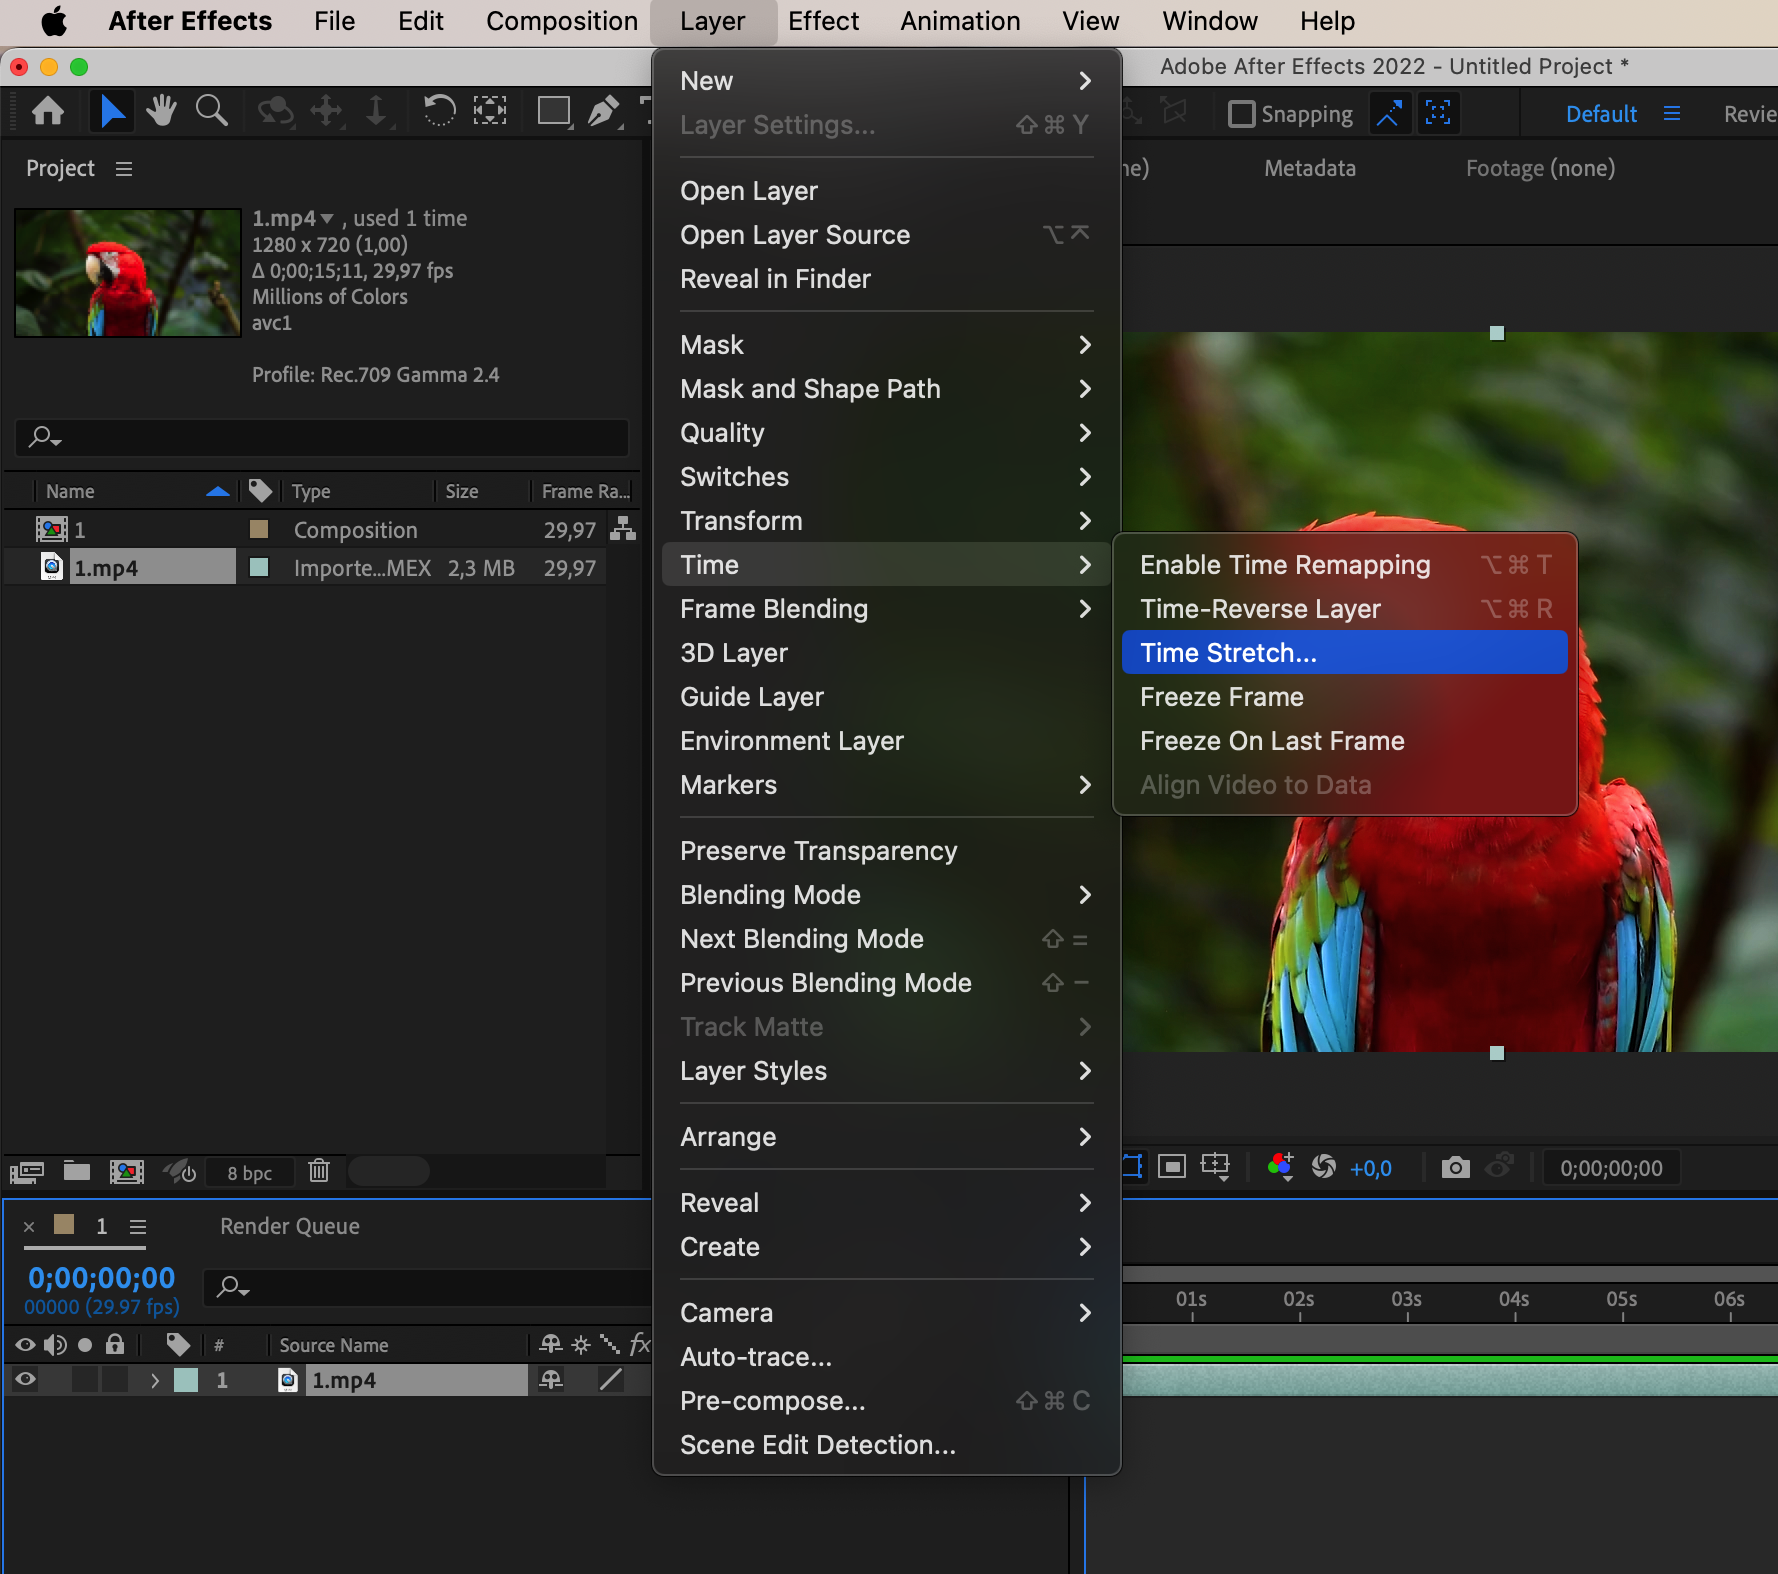
Step 4: Adjust the Speed
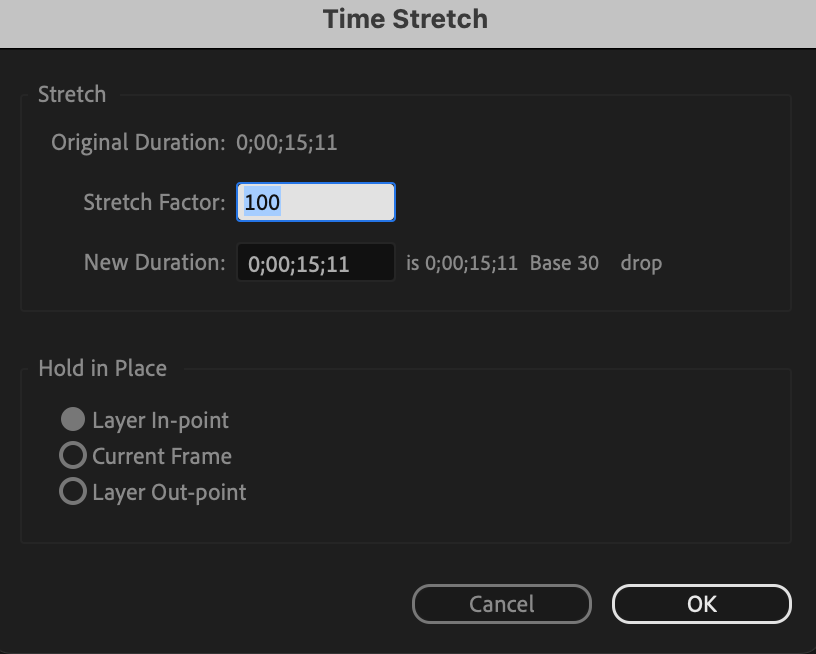
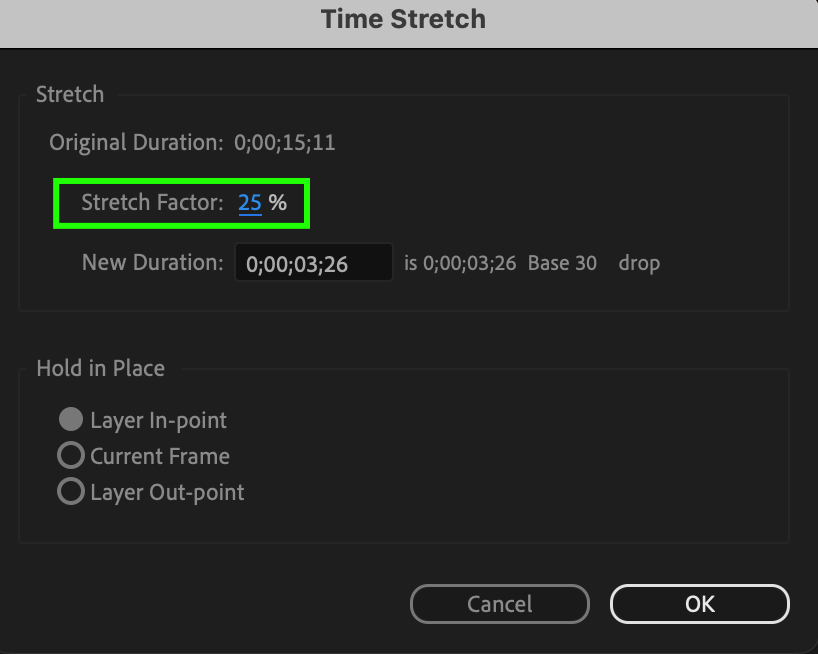
From the menu, select Layer > Time > Time Stretch. Enter the value by which you want to increase the speed, such as 50%, to double the video speed. Similarly, a smaller percentage will increase the video speed even further.
Step 5: Preview and Render
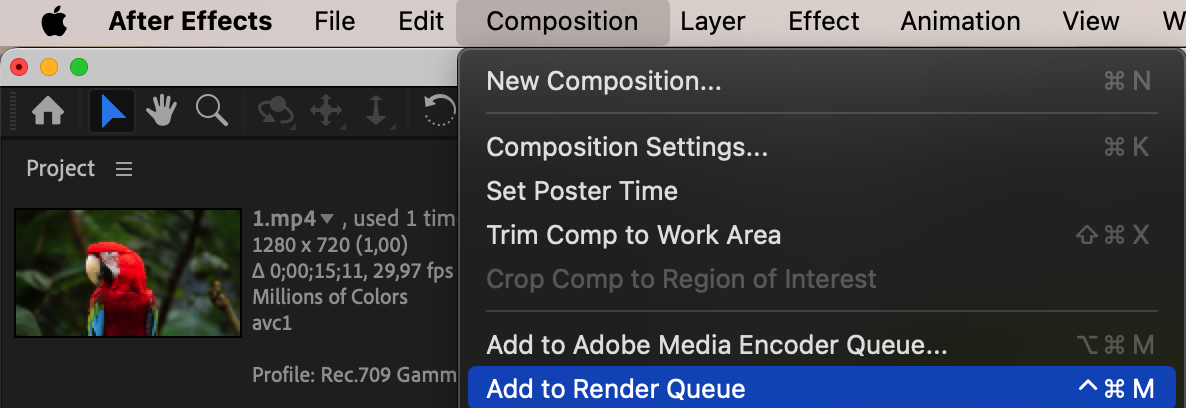
Preview the fast-forwarded video to ensure it looks as desired. If satisfied, render the project to save the changes.
 Conclusion
Mastering the art of fast forwarding in After Effects requires practice and experimentation. With the right skills and knowledge, you can enhance your video editing projects and achieve professional results. Whether you’re creating a high-energy promo video, a dynamic music montage, or an engaging social media post, learning how to fast forward a video in After Effects will take your editing skills to the next level and produce standout visual content that resonates with viewers. So, are you ready to fast forward like a pro? Let’s get started!


