Step-by-Step Guide to Importing Video into Adobe After Effects
Introduction
Importing video footage into Adobe After Effects is a vital step in creating captivating motion graphics and stunning visual effects. Whether you’re new to After Effects or a seasoned designer, understanding how to import video efficiently is essential for your workflow. In this guide, we’ll walk you through the process, ensuring you can seamlessly integrate your video footage into your projects and bring your creative ideas to life.
Get 10% off when you subscribe to our newsletter

Step 1: Open Adobe After Effects and Import Video Footage
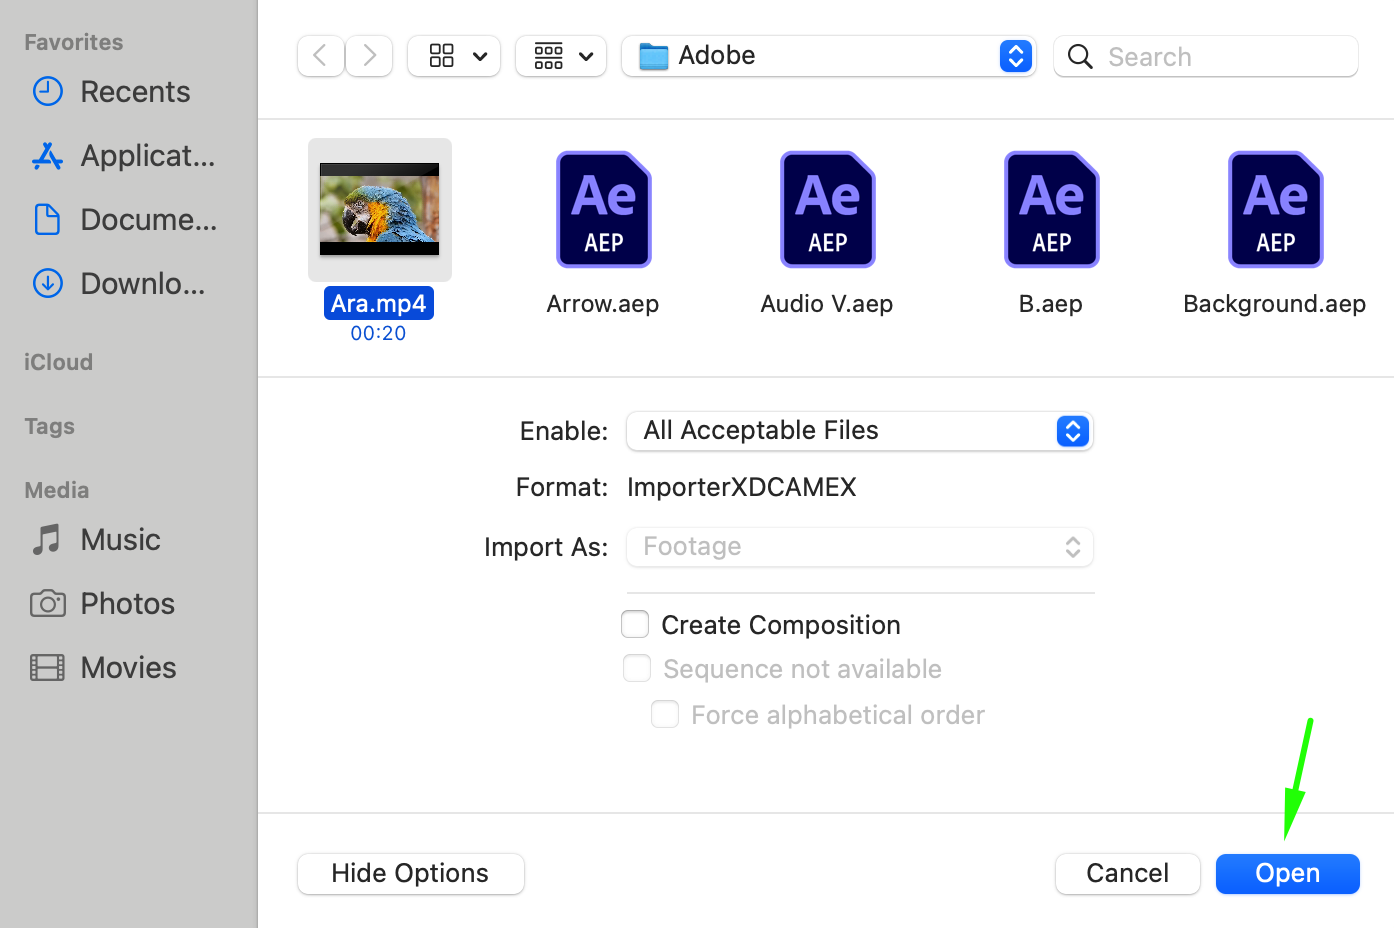
To get started, open Adobe After Effects on your computer. If you haven’t already installed it, download and install the software from the Adobe Creative Cloud website. Once the software is launched, it’s time to import your video footage. Click on “File” in the top menu and select “Import” > “File,” or use the shortcut “Ctrl/Cmd + I”. Navigate to the location of your video file, select it, and click “Open.” After Effects supports a wide range of video formats like MP4, AVI, and MOV, making it easy to work with different types of footage.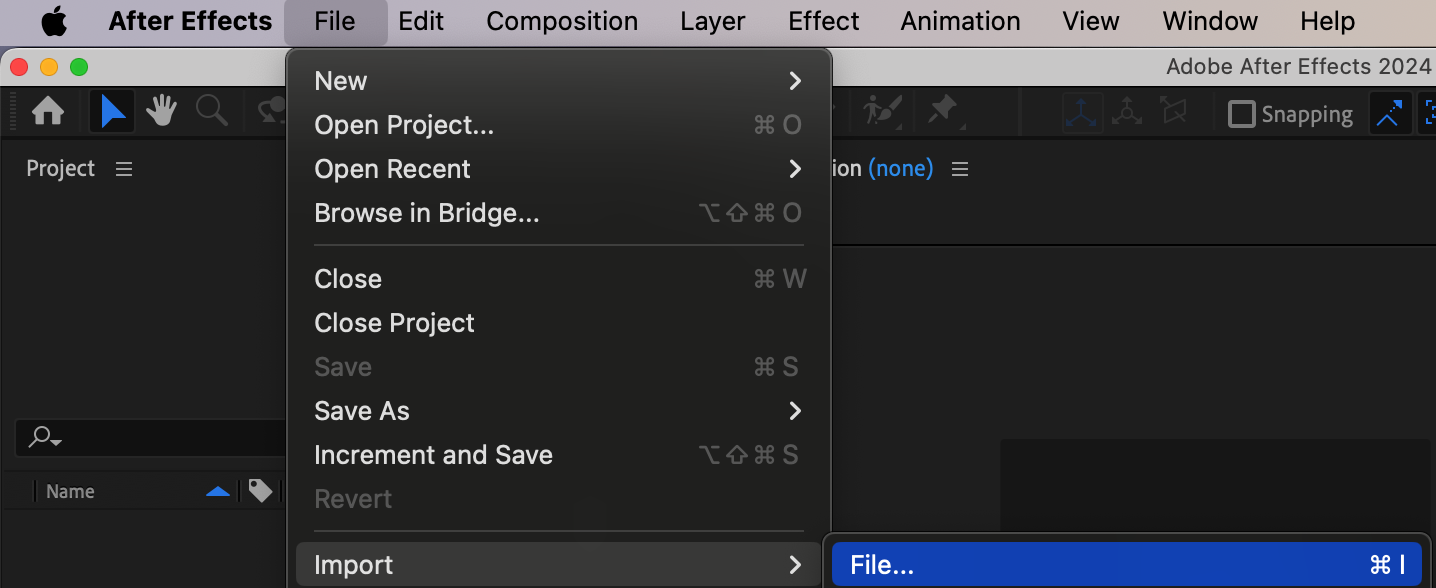
 Step 2: Organize Your Imported Video in the Project Panel
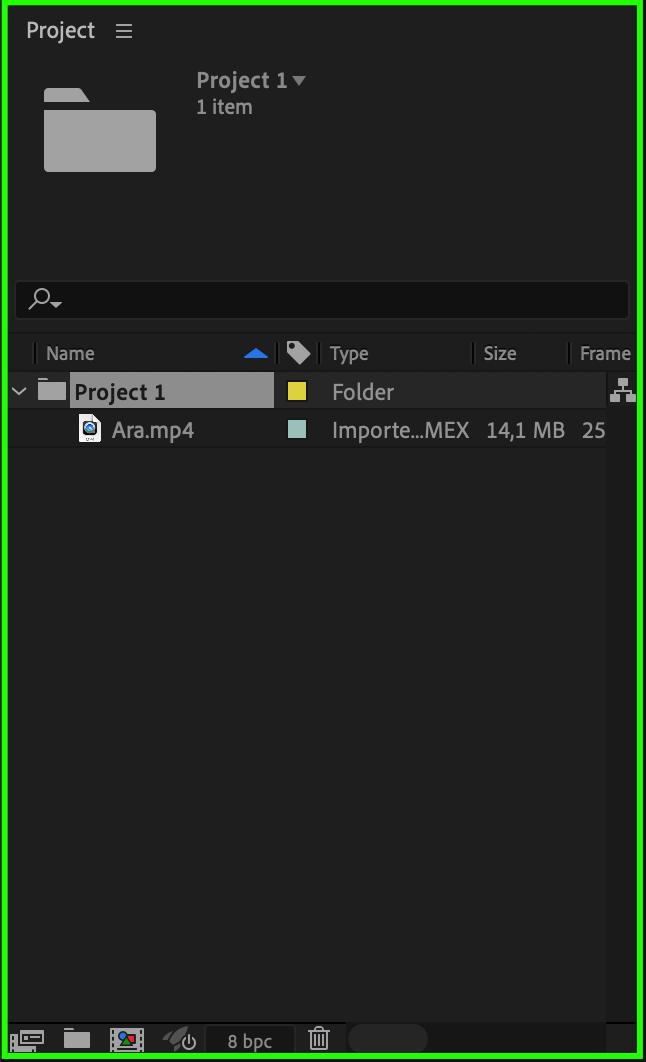
Once imported, your video footage will appear in the Project panel, which serves as the main hub for all your project assets. Proper organization of your files is crucial for efficient workflow, especially in complex projects. You can create folders to categorize and manage your files. Right-click in the Project panel and select “New Folder” to create a new folder, then drag and drop your imported footage into it. This practice keeps your workspace tidy and makes it easier to locate specific files as you work.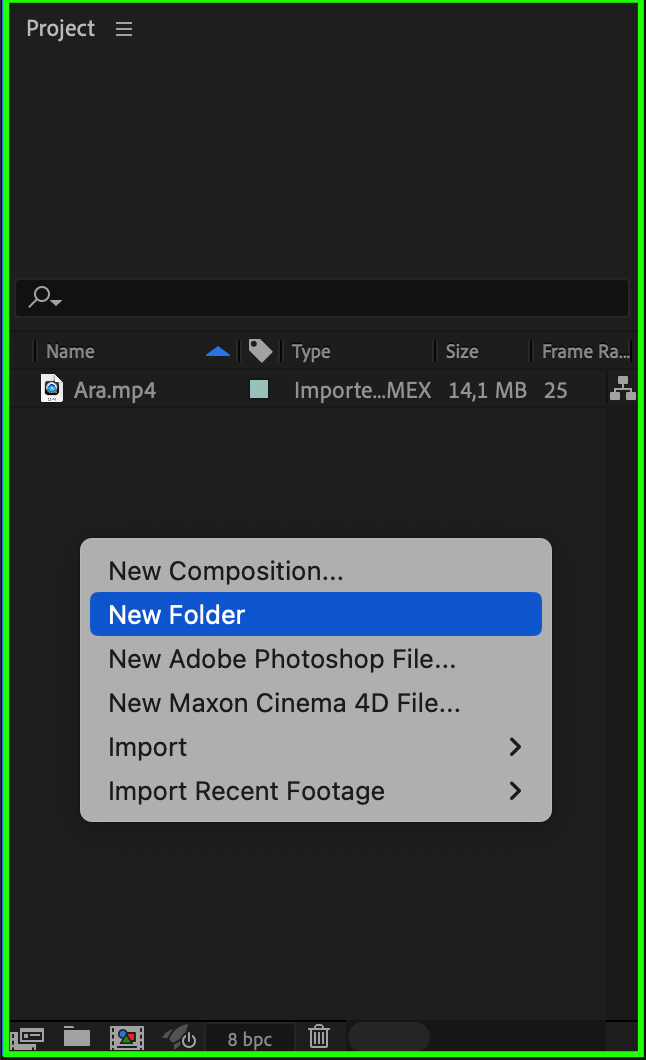
 Step 3: Create a New Composition
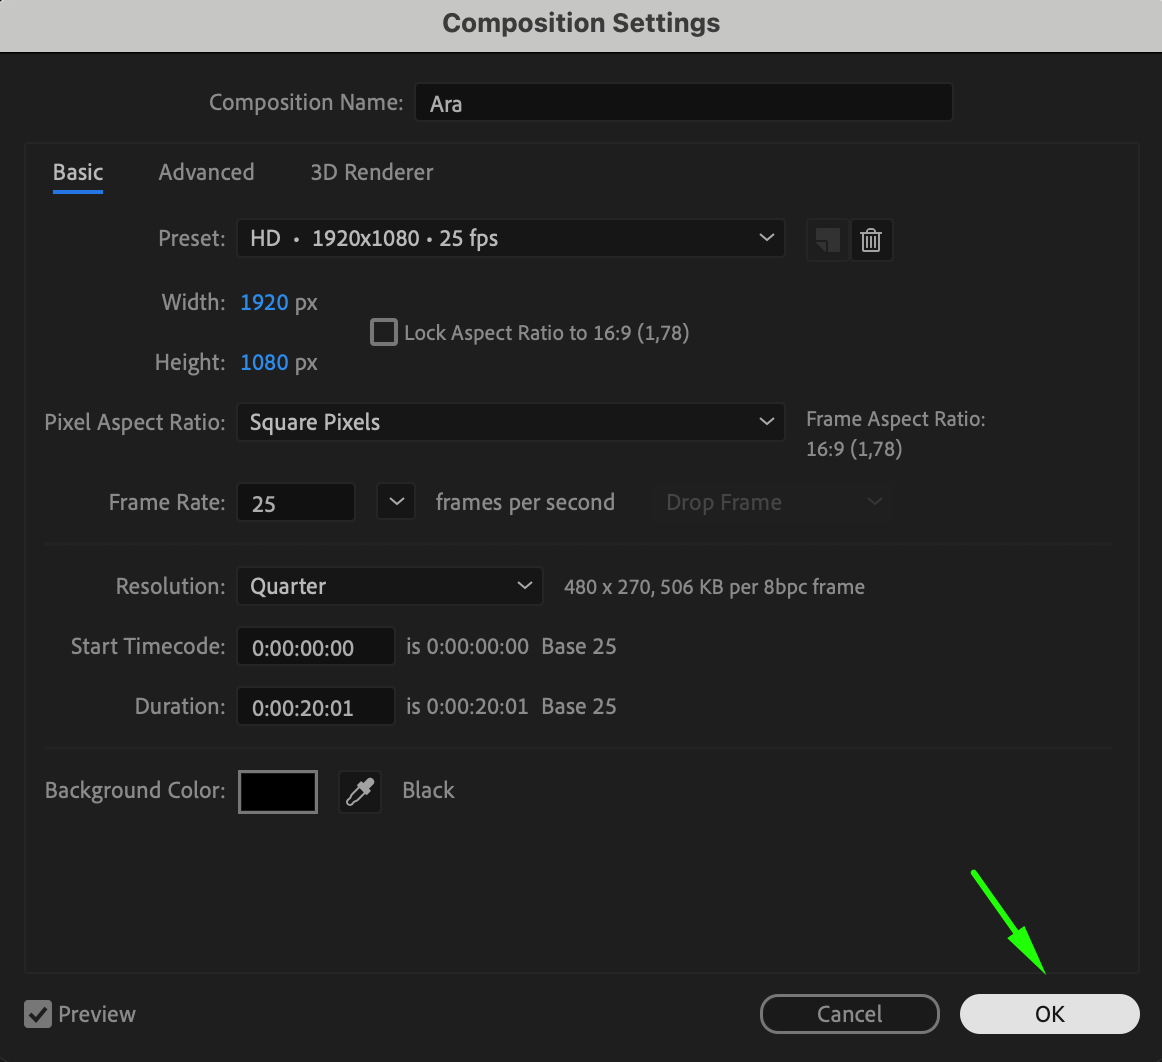
To start working with your footage, you need to create a new composition. A composition is the workspace where your video editing and animation take place. Go to the Composition menu and select “New Composition,” or simply drag your video file from the Project panel to the “Create a New Composition” button at the bottom of the Project panel. Set your composition settings such as resolution, frame rate, and duration according to your project’s needs.
 Step 4: Add Video Footage to the Timeline
After creating a composition, the next step is to add your video footage to the Timeline panel. The Timeline panel is where you arrange and edit your video clips. Drag and drop your video file from the Project panel onto the Timeline panel. This allows you to start arranging and editing your footage within the composition, enabling you to add effects, transitions, and more.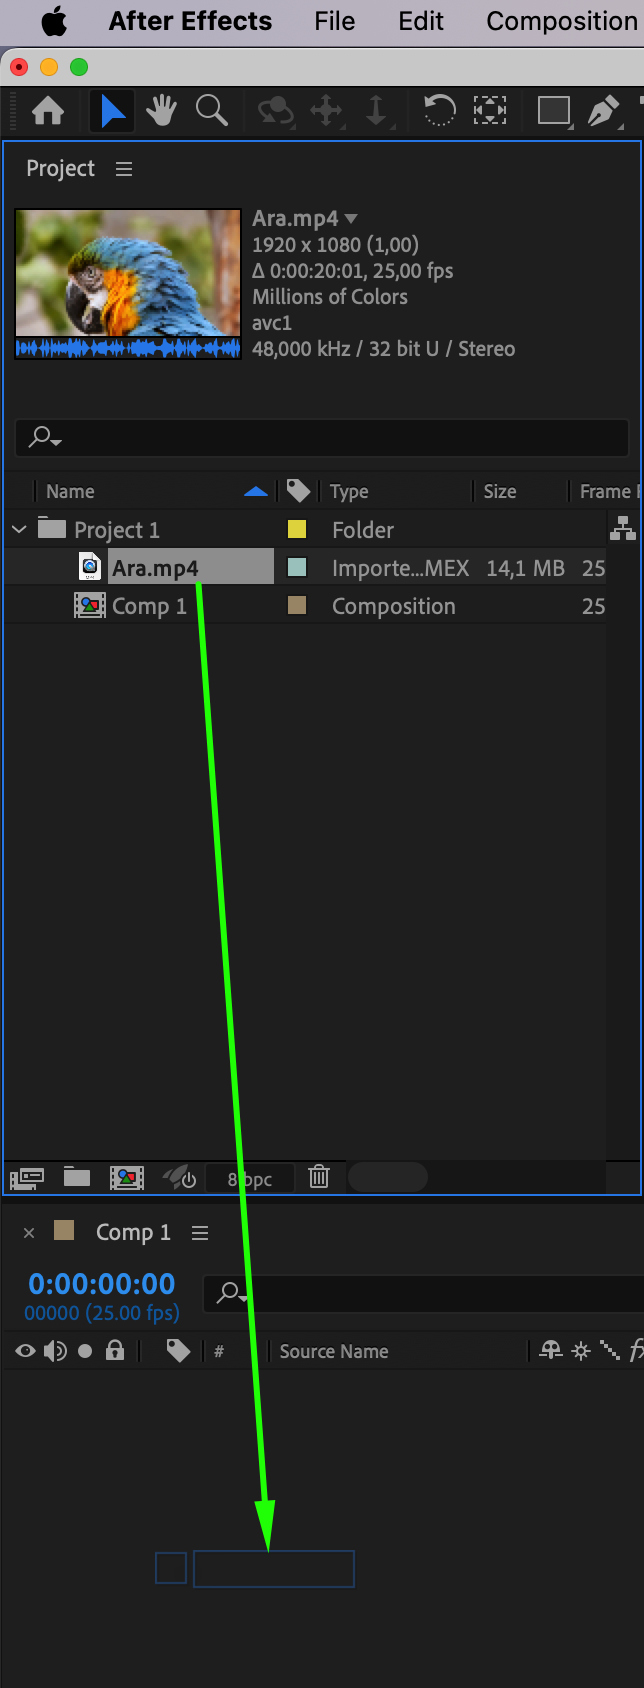 Step 5: Start Editing Your Video Footage
With your footage in the Timeline, you can now begin editing. After Effects offers a wide array of tools and features to enhance your video. Apply effects, transitions, and animations to your footage. Experiment with different tools like keyframing, masking, and color correction to achieve the desired result. As you edit, constantly preview your work by pressing the spacebar to ensure your changes are taking shape as expected.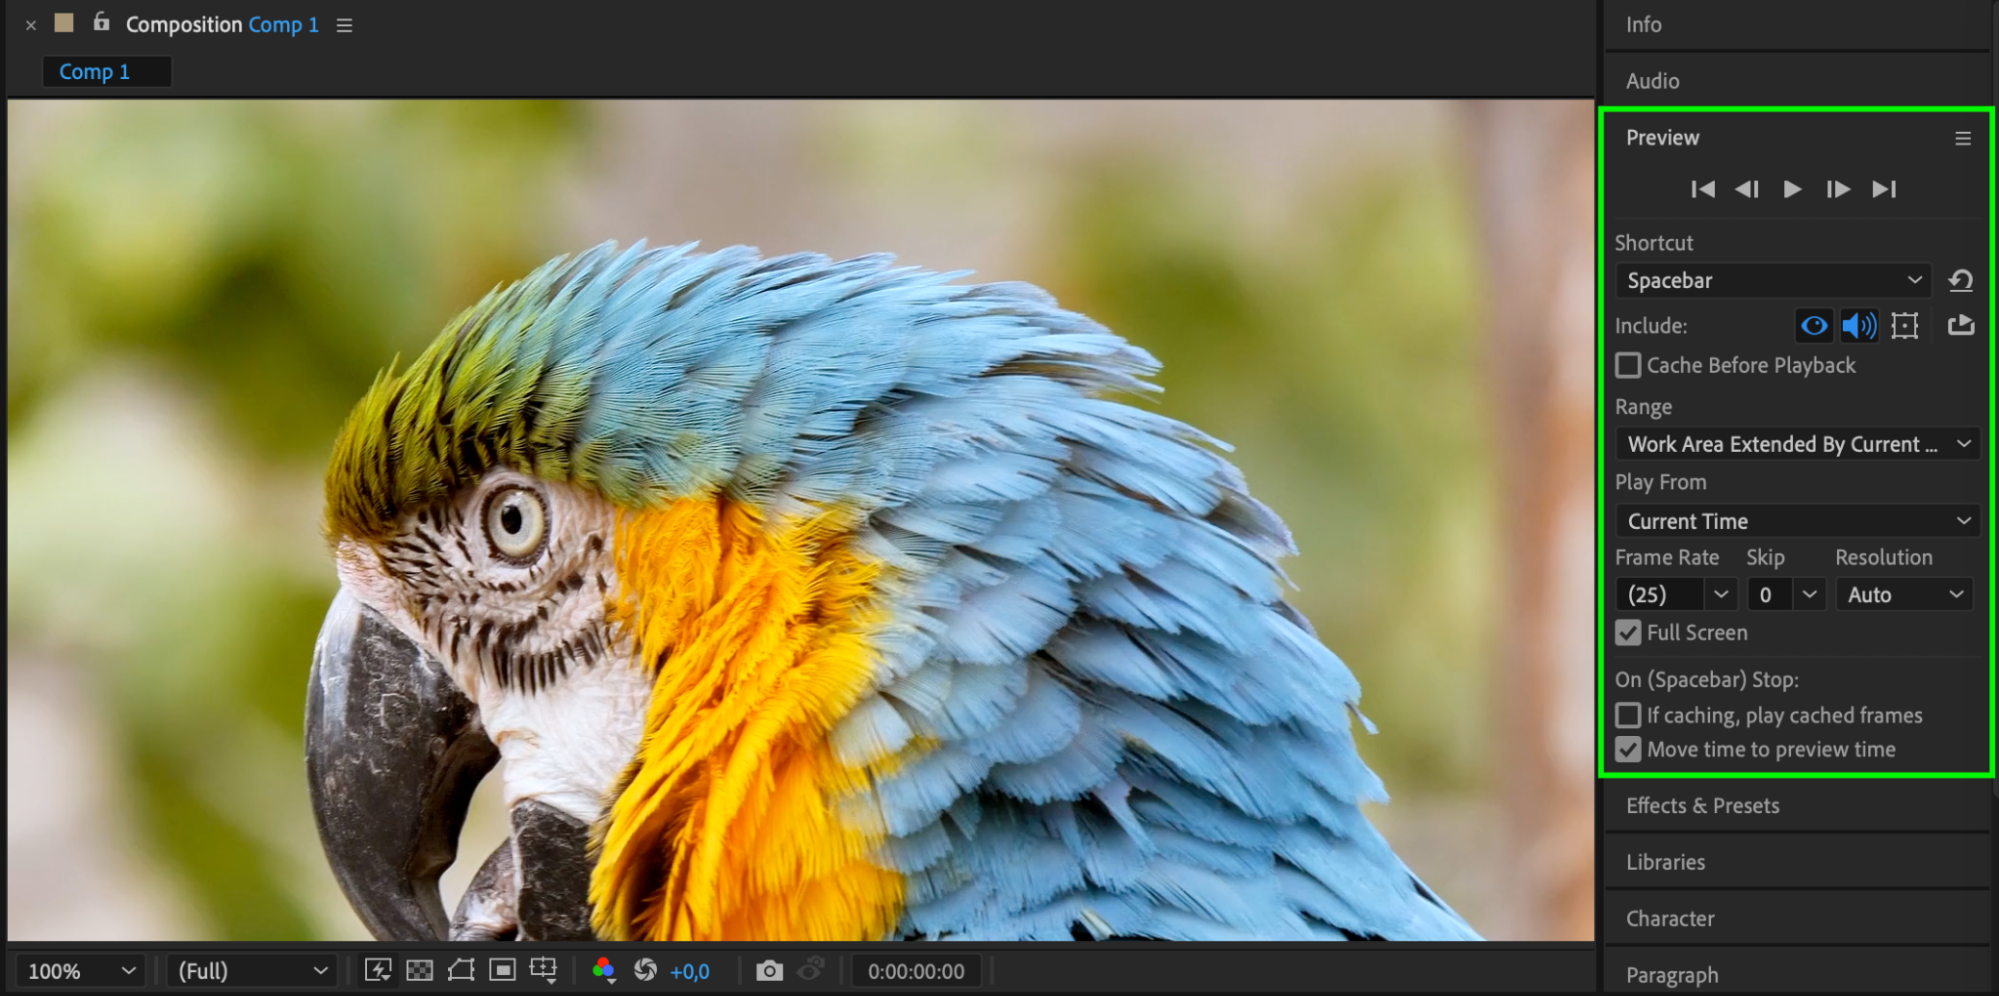 Step 6: Save Your Project
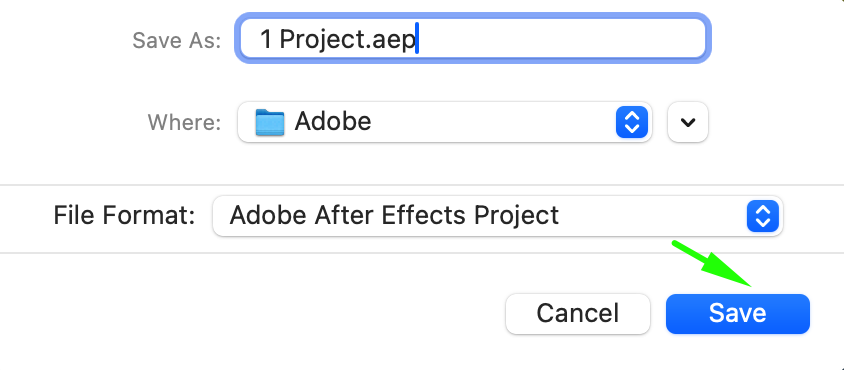
It’s crucial to save your project regularly to avoid losing your progress. Saving your work also allows you to revisit and edit your project later. Click on “File” and select “Save As,” or use the shortcut “Ctrl/Cmd + Shift + S”. In the dialog box that appears, choose a file name, select a save location, and click “Save.” Regular saving is a good habit to maintain, especially during lengthy editing sessions.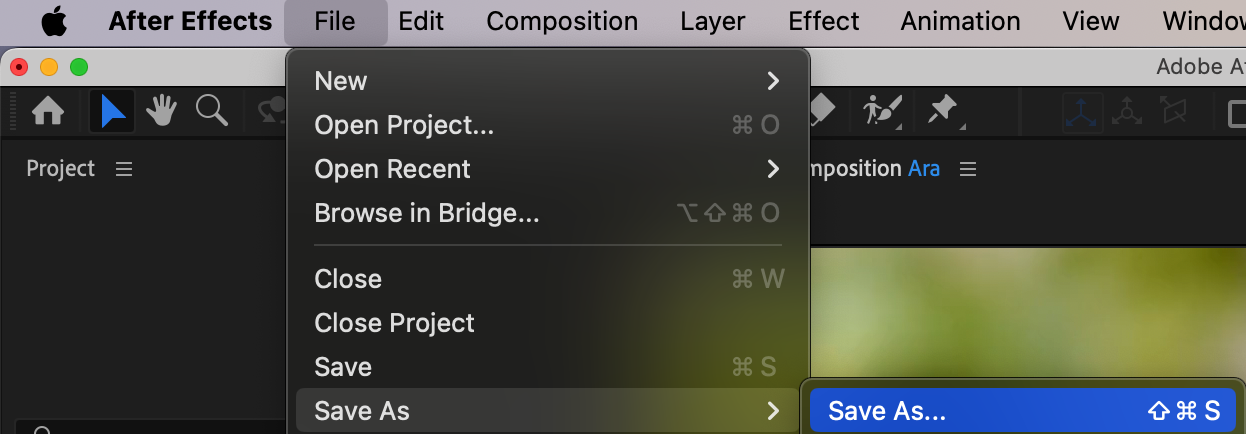
 Step 7: Export Your Final Video
Once you’re satisfied with your edits, it’s time to export your final video. Go to the “Composition” menu and select “Add to Render Queue.” In the Render Queue panel, adjust your output settings such as format, resolution, and quality. Once everything is set, click the “Render” button to start exporting your video. After Effects will process the video based on your settings, and once complete, you’ll have a high-quality video ready to use.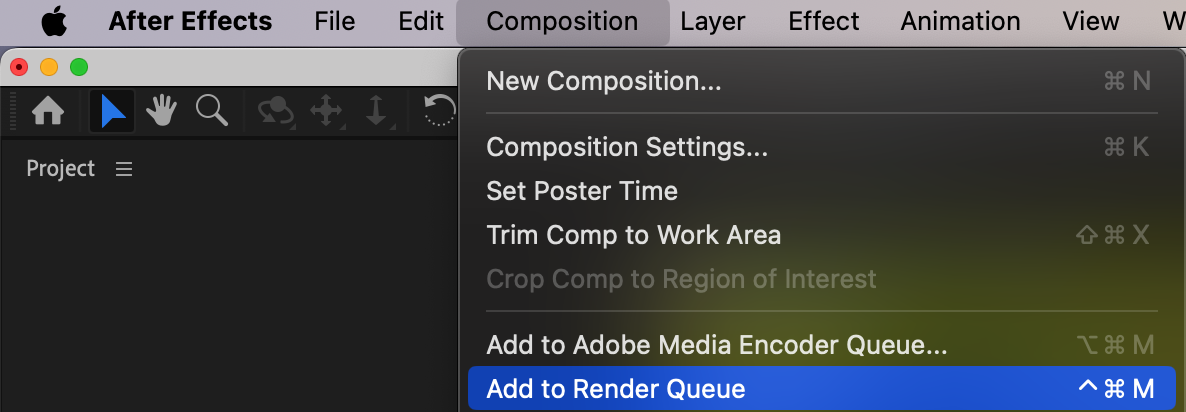

Conclusion
Importing video footage into Adobe After Effects is a straightforward process that allows you to unleash your creative potential. By following these steps and exploring different editing techniques and tools, you can create stunning visual effects and motion graphics for your projects. So, get started and let your creativity soar in Adobe After Effects!


