Introduction to Better Mask Tracking
Mask tracking in Adobe After Effects is useful when you want a mask to follow a moving object, like tracking a face or isolating a background. However, automatic tracking is not always perfect. Masks can slip or become misaligned, especially with complex motion or low-contrast footage. In this guide, you’ll learn how to get more precise and stable mask tracking using built-in tools and best practices.
Step 1: Use High-Quality Footage
Start with high-resolution footage whenever possible. Tracking works better when the object has clear edges, contrast, and minimal motion blur. If your video is low quality, try sharpening or color correcting it slightly before tracking to help After Effects detect movement more accurately. Step 2: Choose the Right Mask Path
Before tracking, make sure you select the correct mask and that it’s properly positioned over the object. You can adjust the mask shape and feathering if needed. A clean, tightly fitted mask makes tracking smoother and more reliable.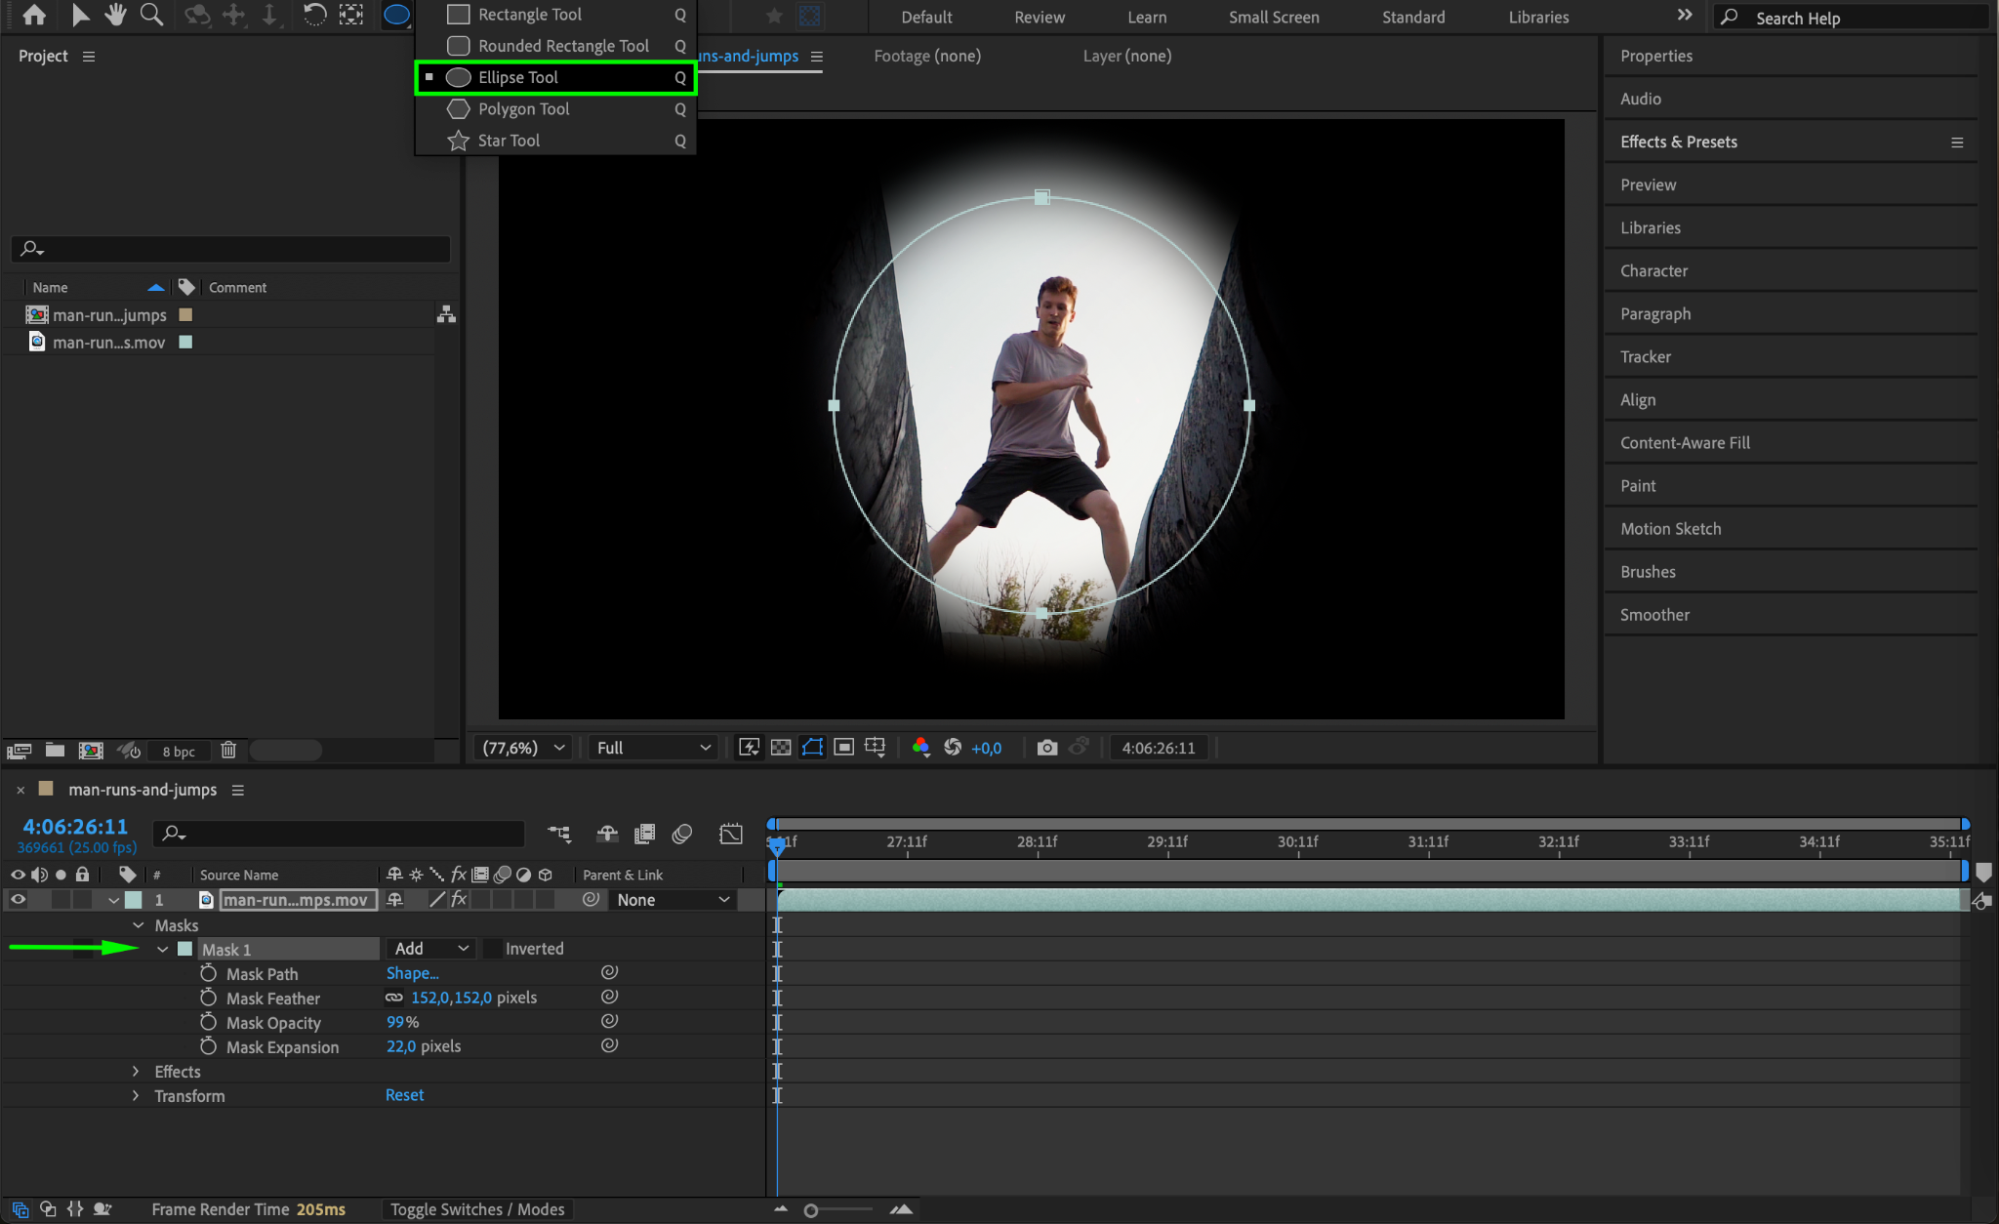
Get 10% off when you subscribe to our newsletter

Step 3: Start Mask Tracking
Right-click directly on the mask path in the timeline and select Track Mask. This will activate the Tracker panel with settings specific to mask tracking. You are now ready to begin tracking the movement of the mask.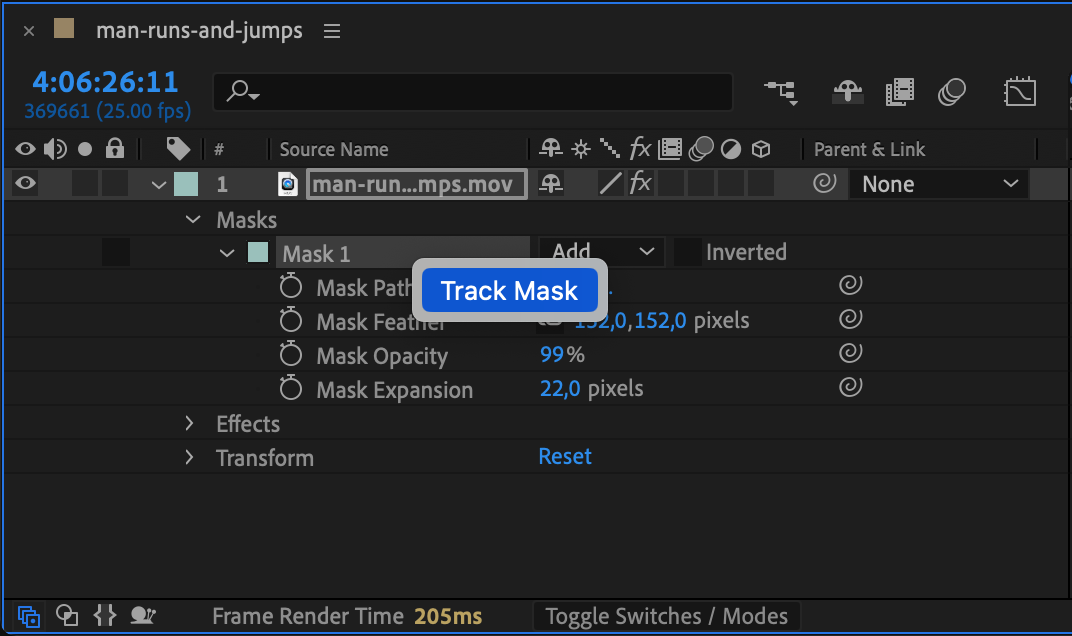 Step 4: Choose the Right Tracking Method
In the Tracker panel, choose a tracking method. If you’re tracking a face or complex motion, select Face Tracking (Detailed Features) for better accuracy. Use the Analyze Forward or Analyze 1 Frame Forward buttons to move frame by frame. This helps ensure the tracking stays precise and allows you to make adjustments as needed.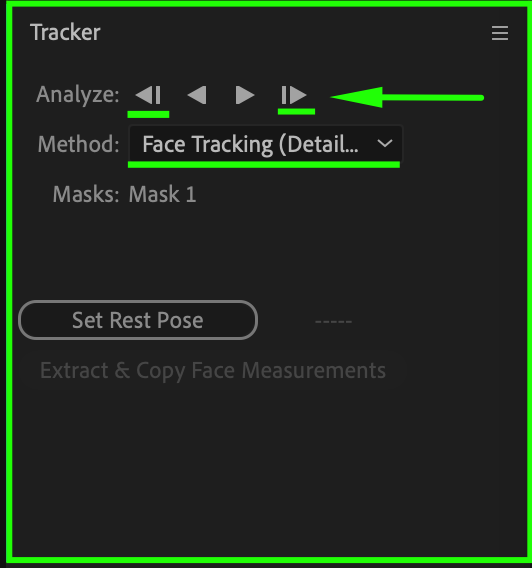
 Step 5: Enable Motion Blur for Realism
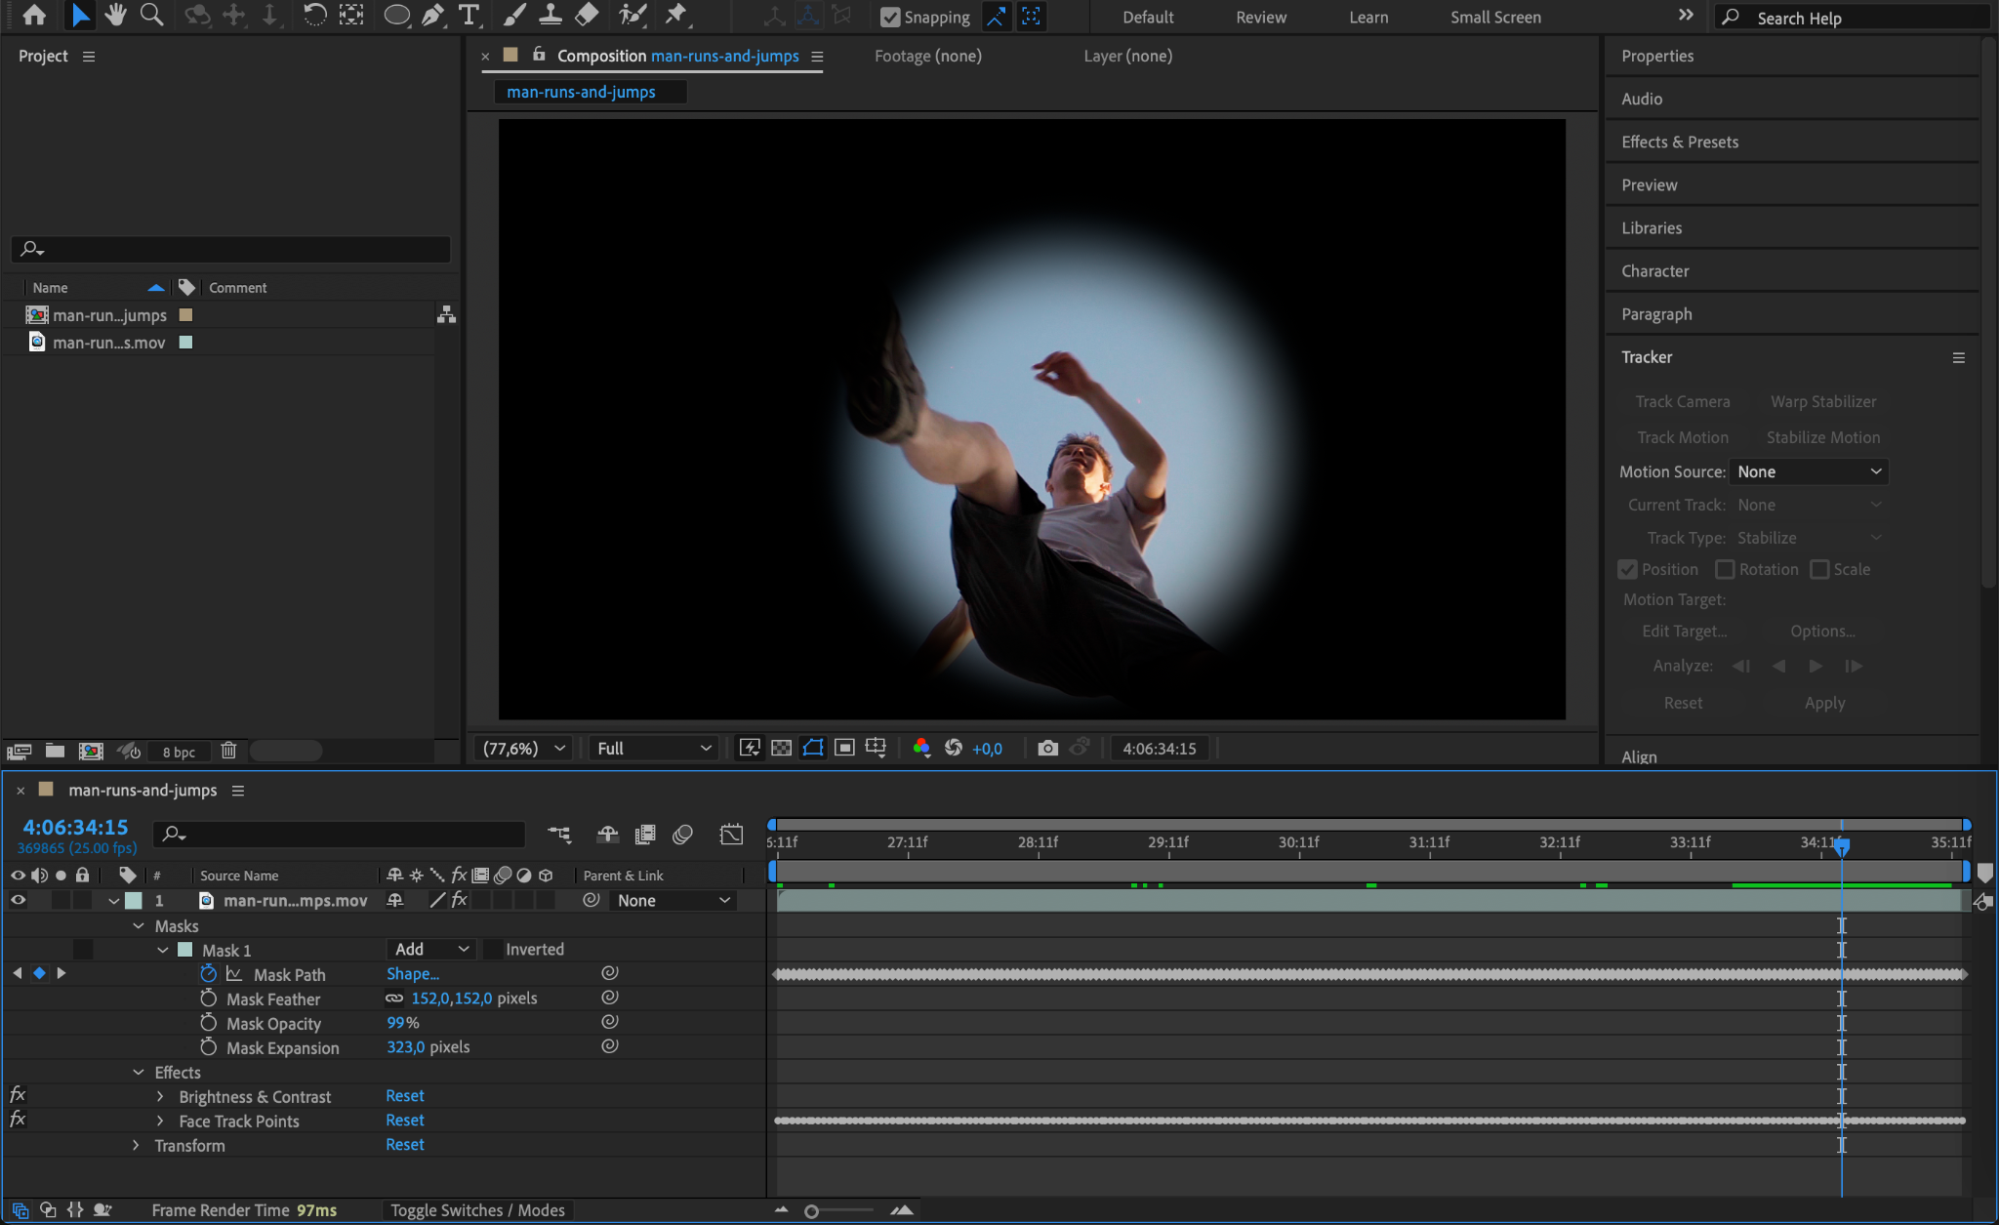
Once tracking is done, enable Motion Blur by checking the Motion Blur box on the layer and turning it on in the timeline. This helps the movement appear more natural, especially for fast-moving subjects.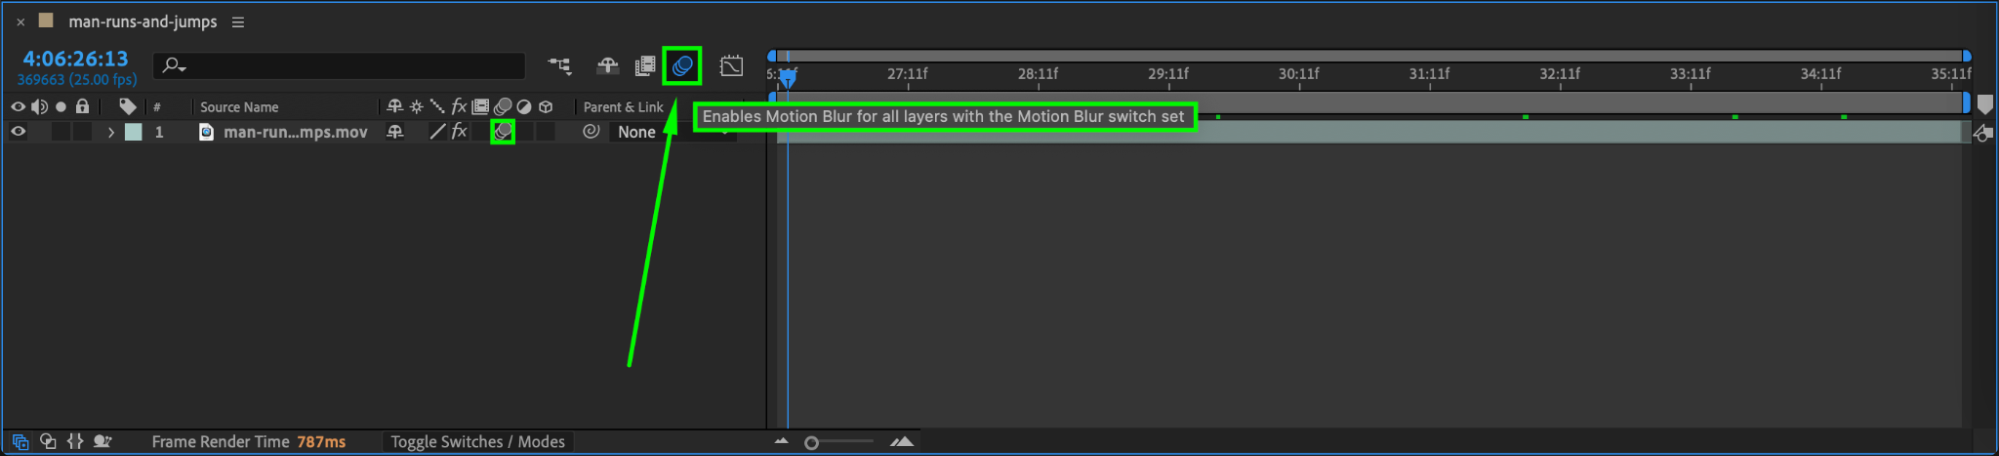
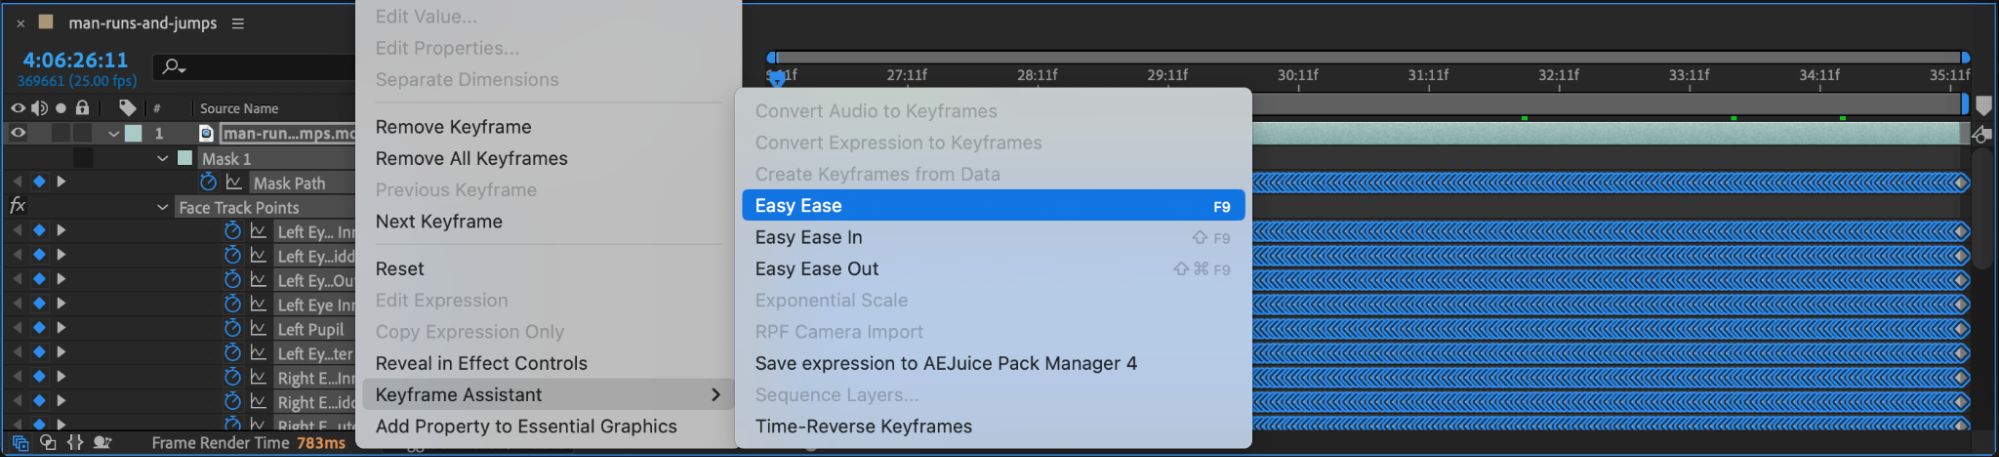
Step 6: Smooth the Animation with Easy Ease
To make any keyframe motion smoother, select your keyframes, right-click, and choose Keyframe Assistant > Easy Ease. For even more control, open the Graph Editor to fine-tune the speed and flow of movement. This step is optional but helpful for a polished look.
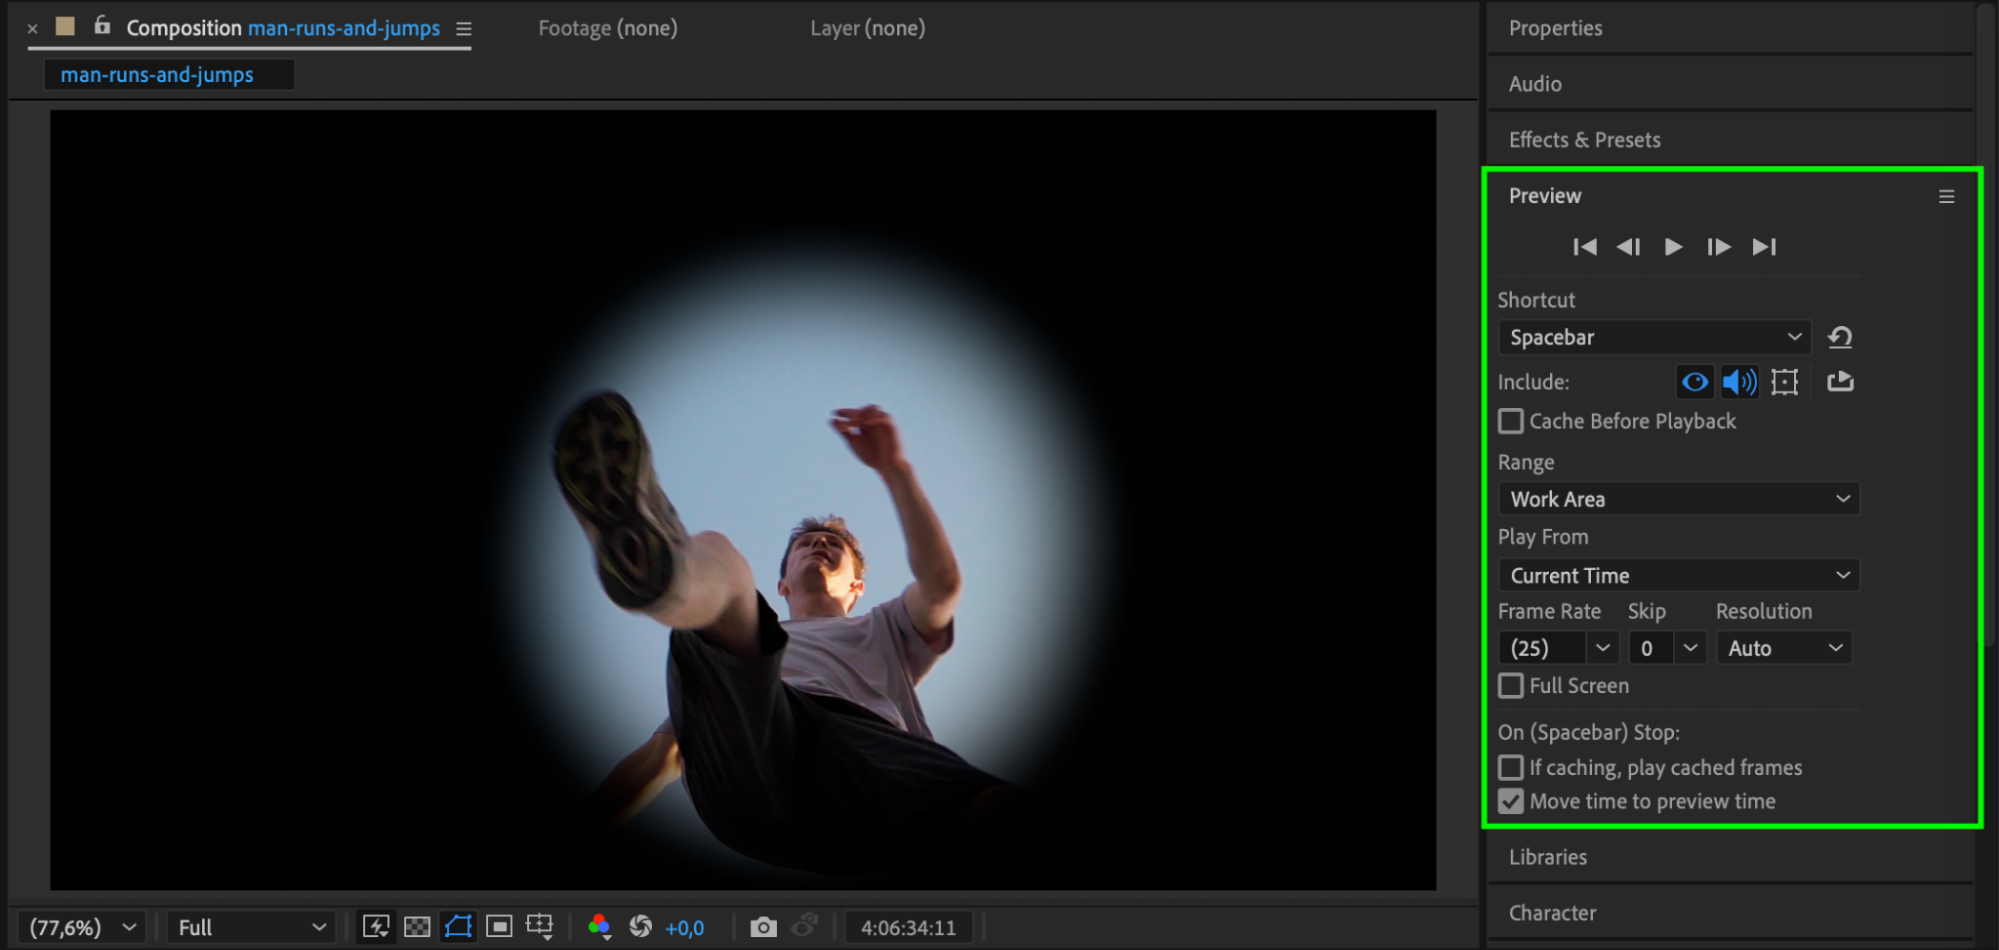
 Step 7: Preview and Refine
Press Spacebar to preview your animation. Watch carefully for any parts where the mask slips or looks unnatural. If necessary, stop playback and adjust keyframes manually to keep everything in sync with the moving object.
 Conclusion
Improving mask tracking in After Effects doesn’t always require advanced plugins—just a few careful steps. Using high-quality footage, the right tracking method, and tools like Easy Ease and Motion Blur can make your masks track more accurately and look more professional. With practice, you’ll be able to handle even complex tracking tasks smoothly and with confidence.
Our Bestsellers


