Transforming a 2D Image into 3D in After Effects
Introduction – Unveiling the Power of 3D Conversion
Dive into the realm of 3D design as we explore the process of transforming flat images into captivating 3D compositions using After Effects. Discover the tools and techniques needed to add depth and dimension to your designs, unlocking a world of creative possibilities.
Step-by-step guide of creating a 3D effect from a 2D image in After Effects:
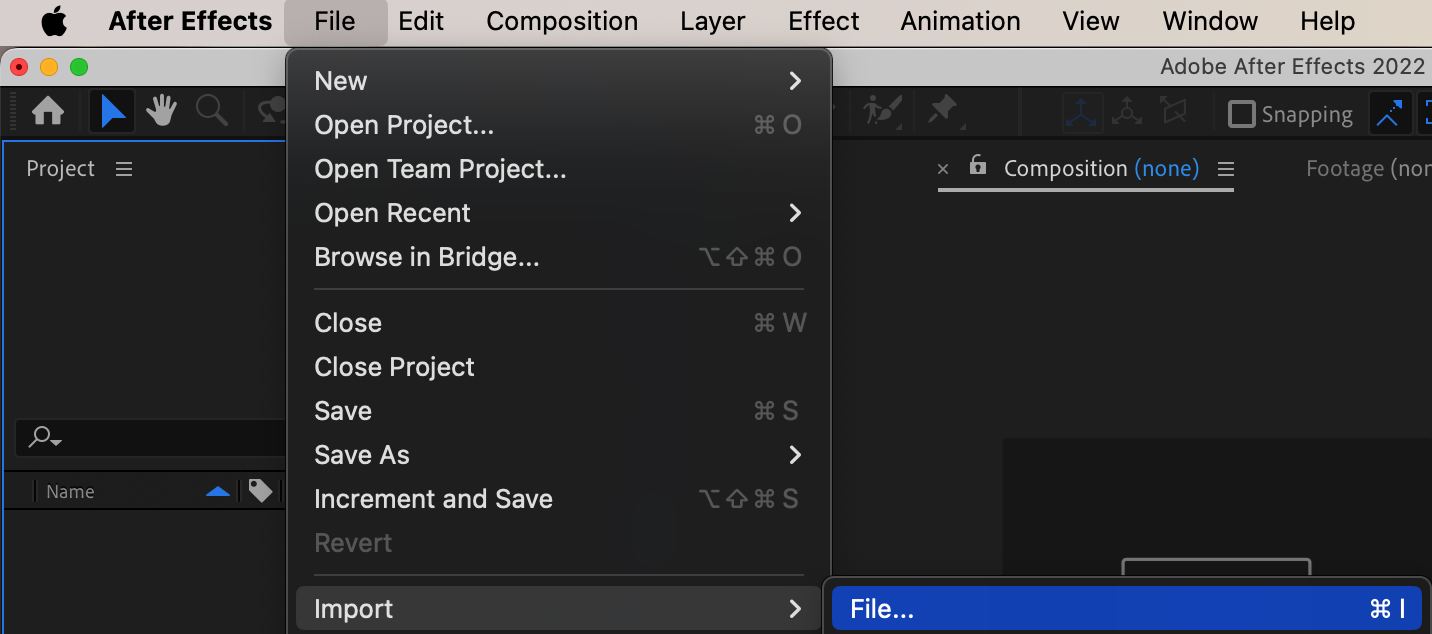
1. Import PNG file:
Import your PNG file into the After Effects project.
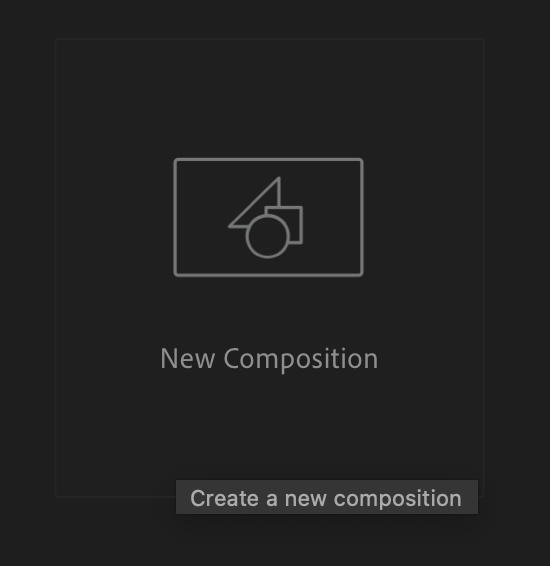
2. Create a new composition:
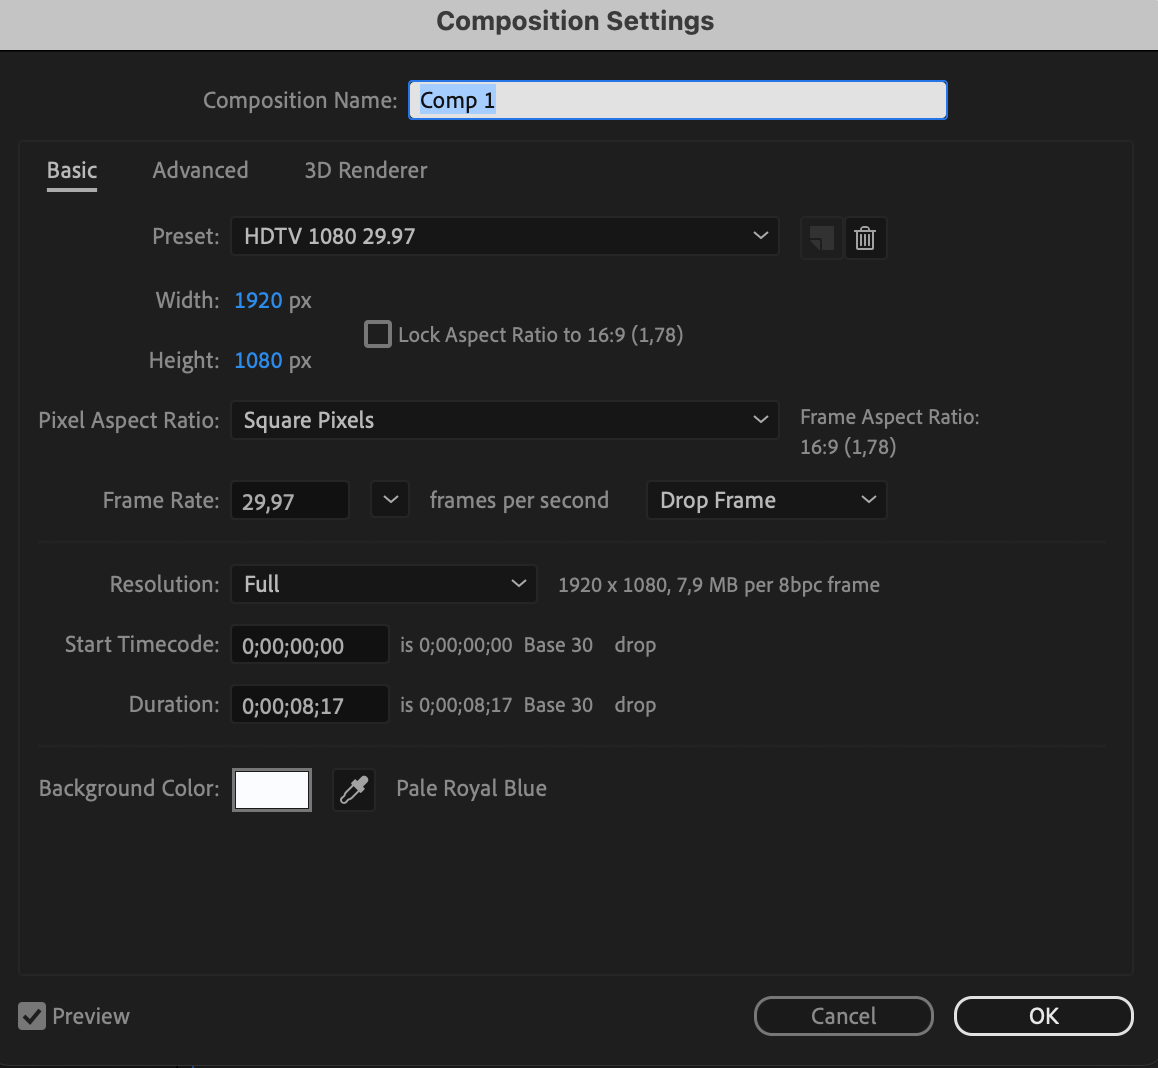
Create a new composition and adjust the settings (size, duration, etc.).
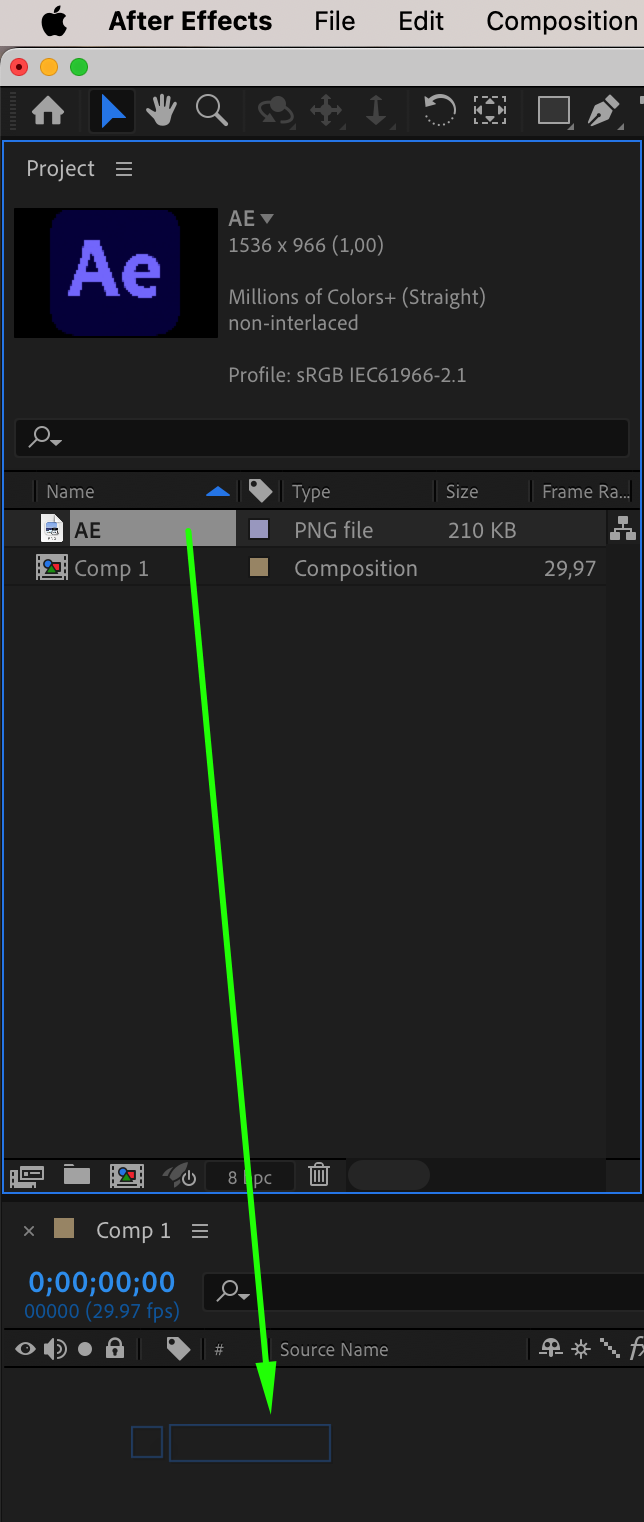
3. Add the image to the composition:
Drag the imported file onto the composition panel.
4. Check for transparency:
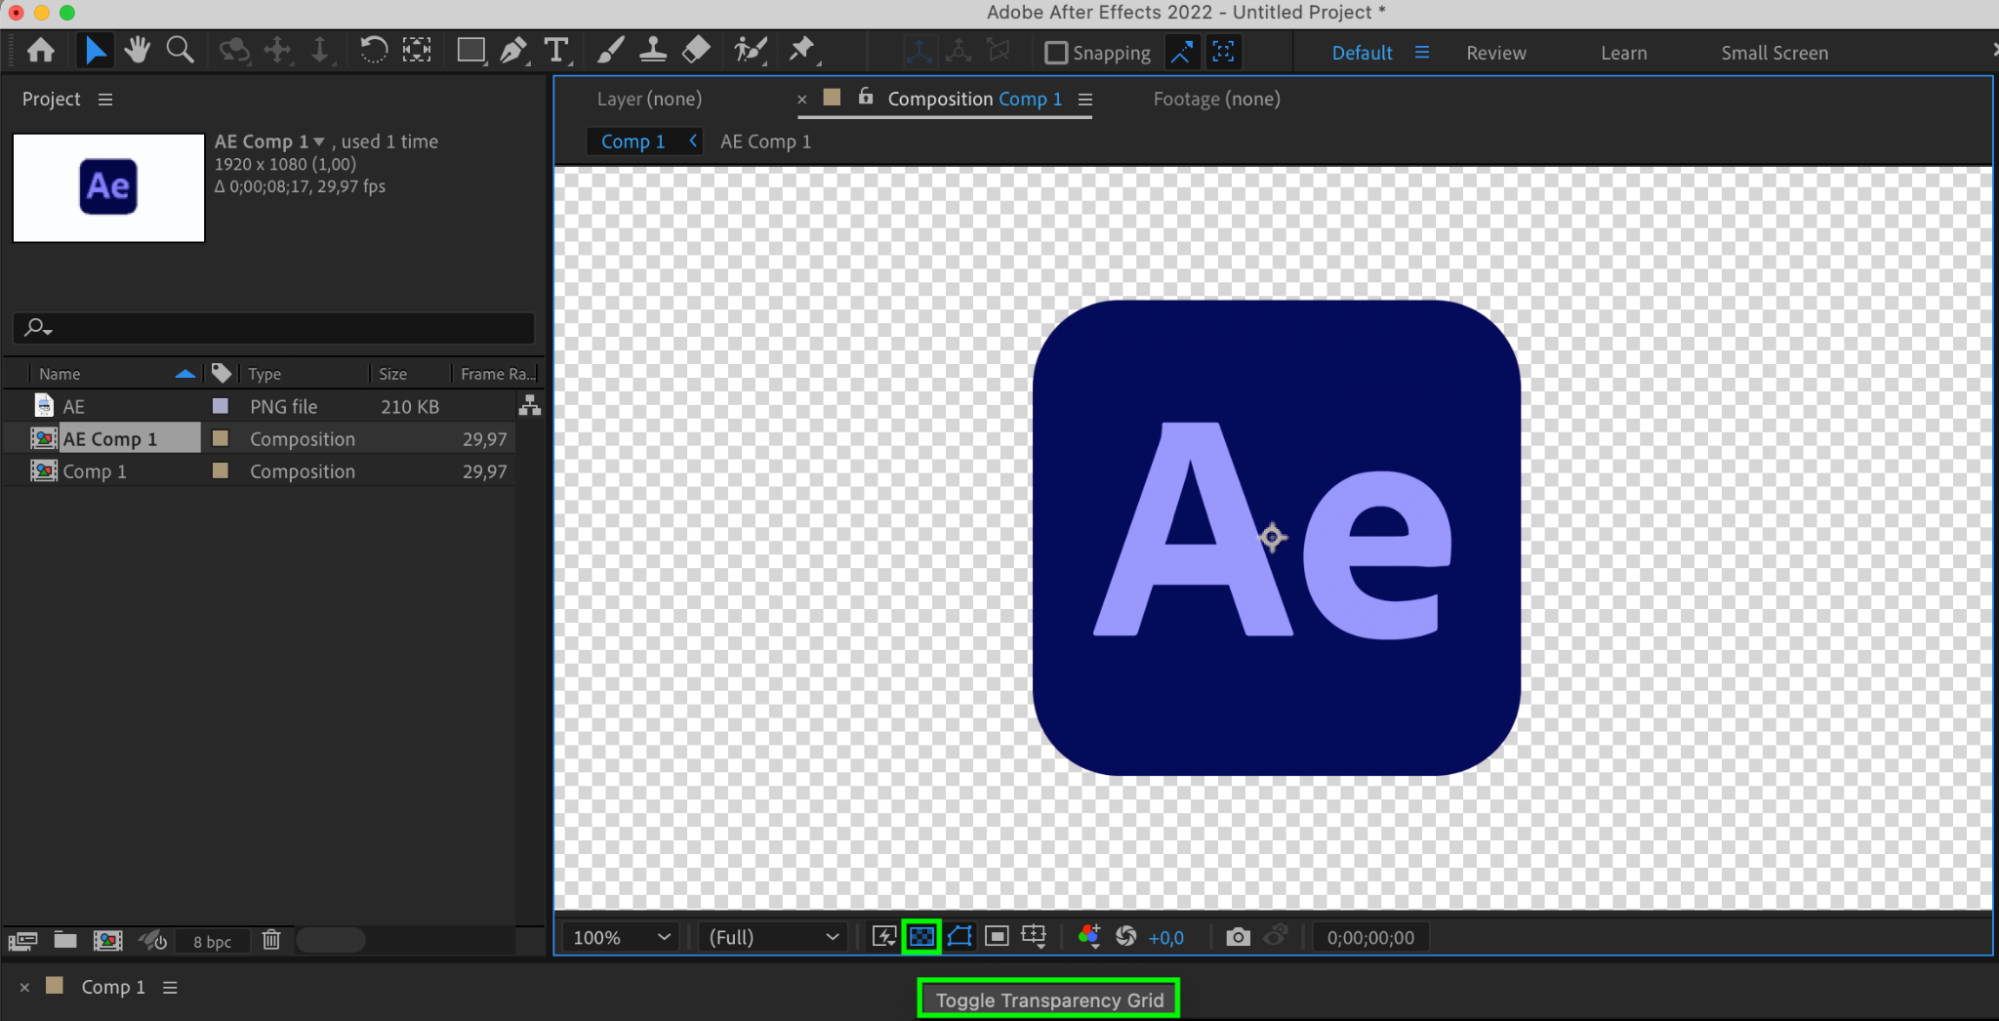
Ensure that your object has no background by using the “Toggle Transparency Grid” button, or use the “Pen Tool (G)” to select and remove the background.
5. Pre-compose:
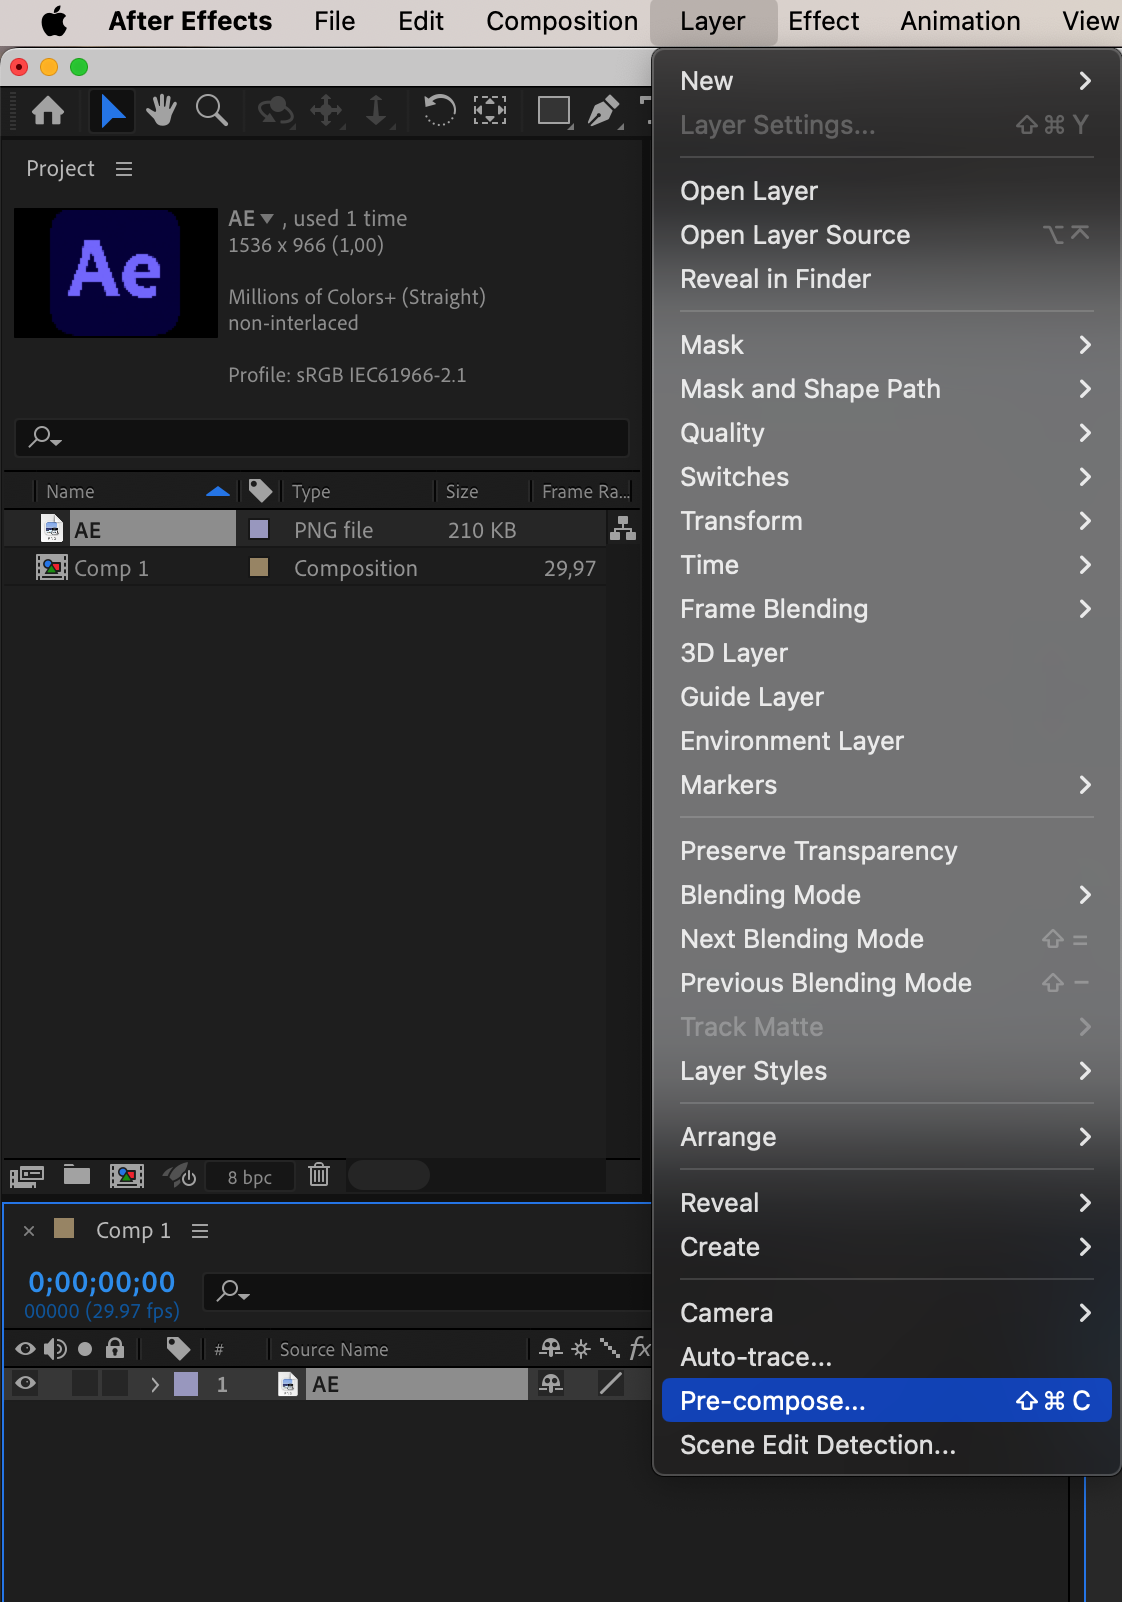
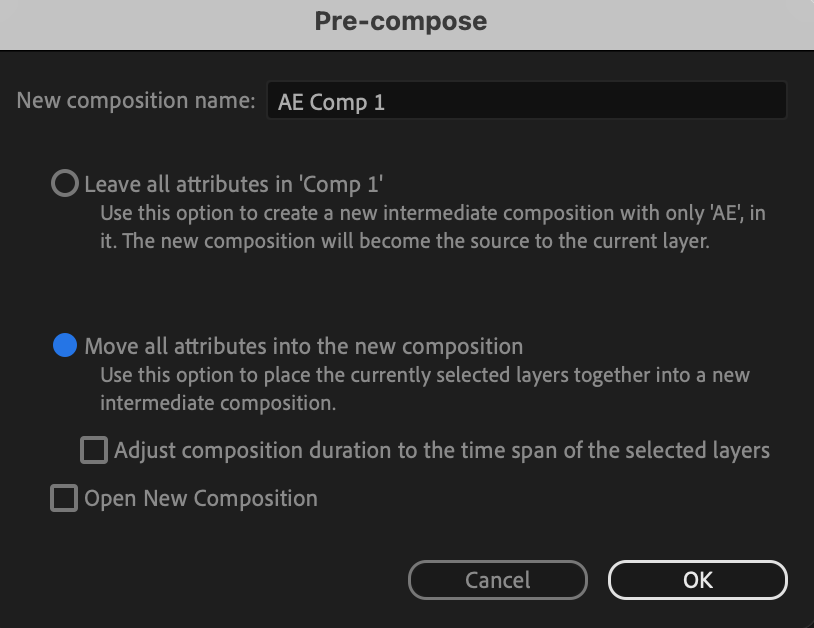
Create a pre-composition for your image through the “Layer > Pre-compose” menu.
Get 10% off when you subscribe to our newsletter

6. Apply the Shatter effect:
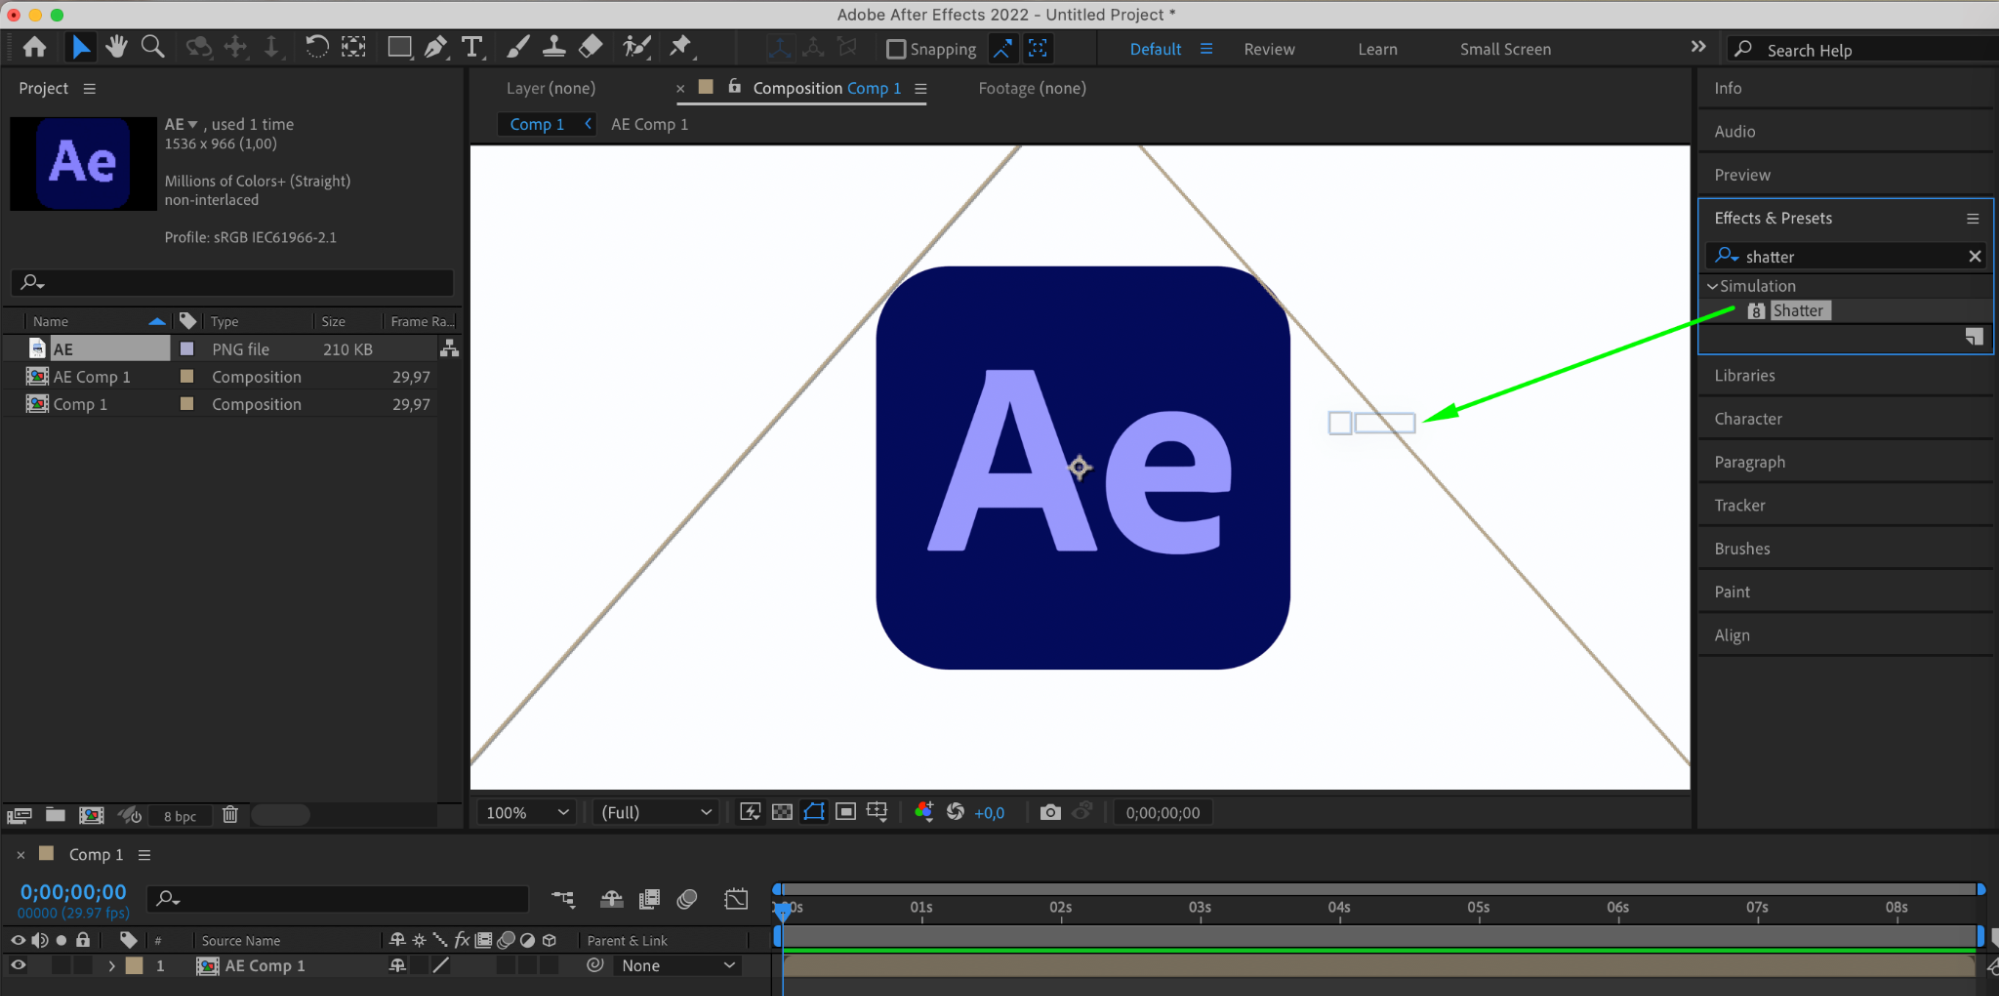
Find the “Shatter” effect in the “Effects & Presets” panel and drag it onto your composition.
7. Adjust Shatter effect parameters:
Set the “View” parameter to “Rendered”.
Choose “Pattern” as “Custom”.
Select your pre-composition as the “Custom Shatter Map”.
Set “Extrusion Depth” to 0.50.
Set “Depth” to 0.
Set “Radius” to 0.
Set “Strength” to 0.
Choose the color of textures.
Set “Front” Mode to “Layer”.
Set “Side” Mode to “Color”.
By adjusting the “Y Rotation” value, you can rotate the image.
Set “Light Type” to “First Comp Light”.
Set “Ambient Light” to 1.
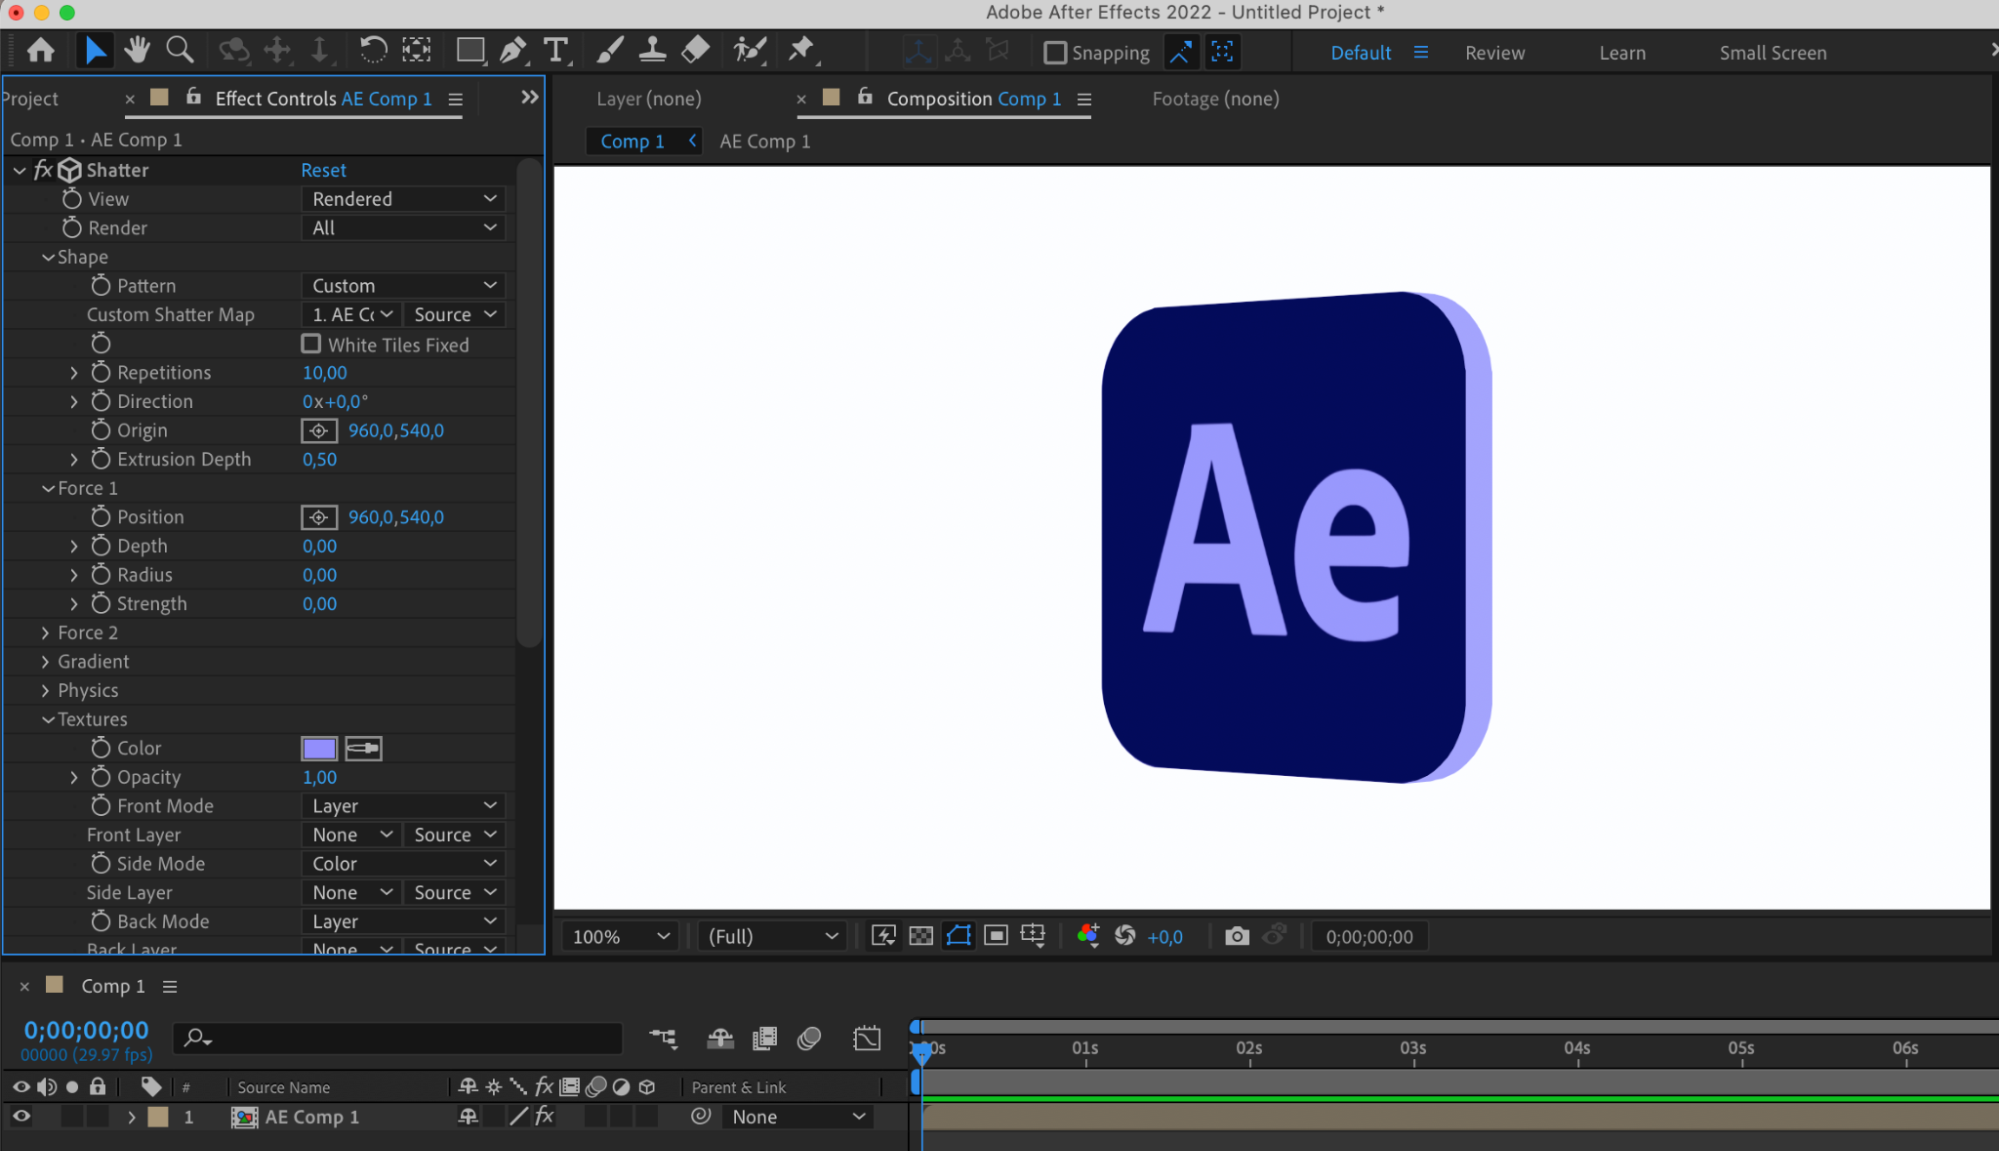
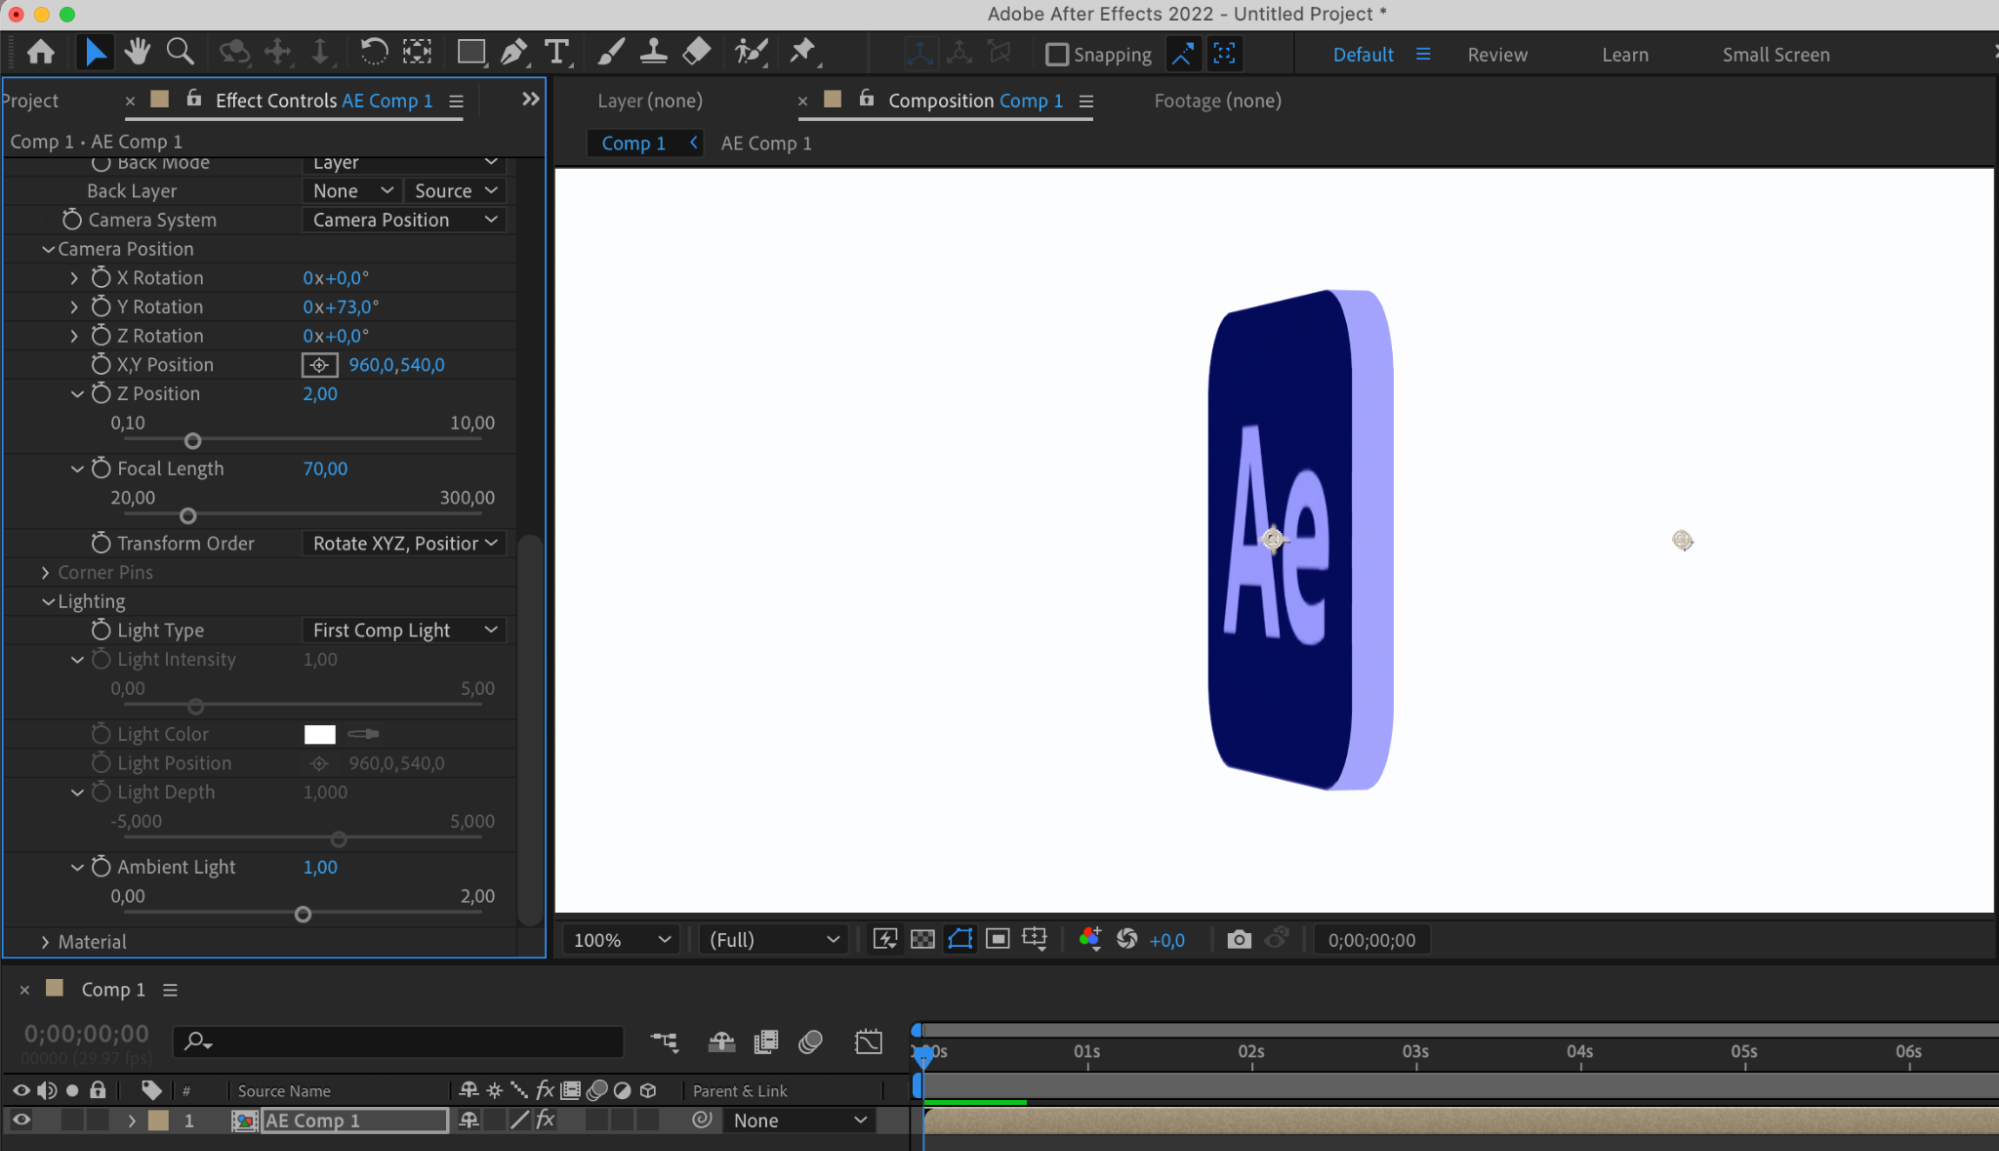
After completing these steps, your 2D image will be transformed into a 3D object using the Shatter effect in After Effects.
Conclusion
With the completion of these steps, your once static 2D image has now been transformed into a vibrant 3D masterpiece, showcasing the power of After Effects in bringing visual concepts to life. Embrace the endless potential of 3D design and unleash your creativity to craft compelling visuals that captivate and inspire audiences.


