
Step-by-Step Guide to Creating a Neon Sign Effect in After Effects
Introduction to Making a Neon Sign in After Effects
In this guide, you’ll learn how to create a neon sign effect in After Effects, which includes steps to make your text glow realistically, add shadows, and simulate the look of an actual neon sign.
Step 1: Create a New Composition
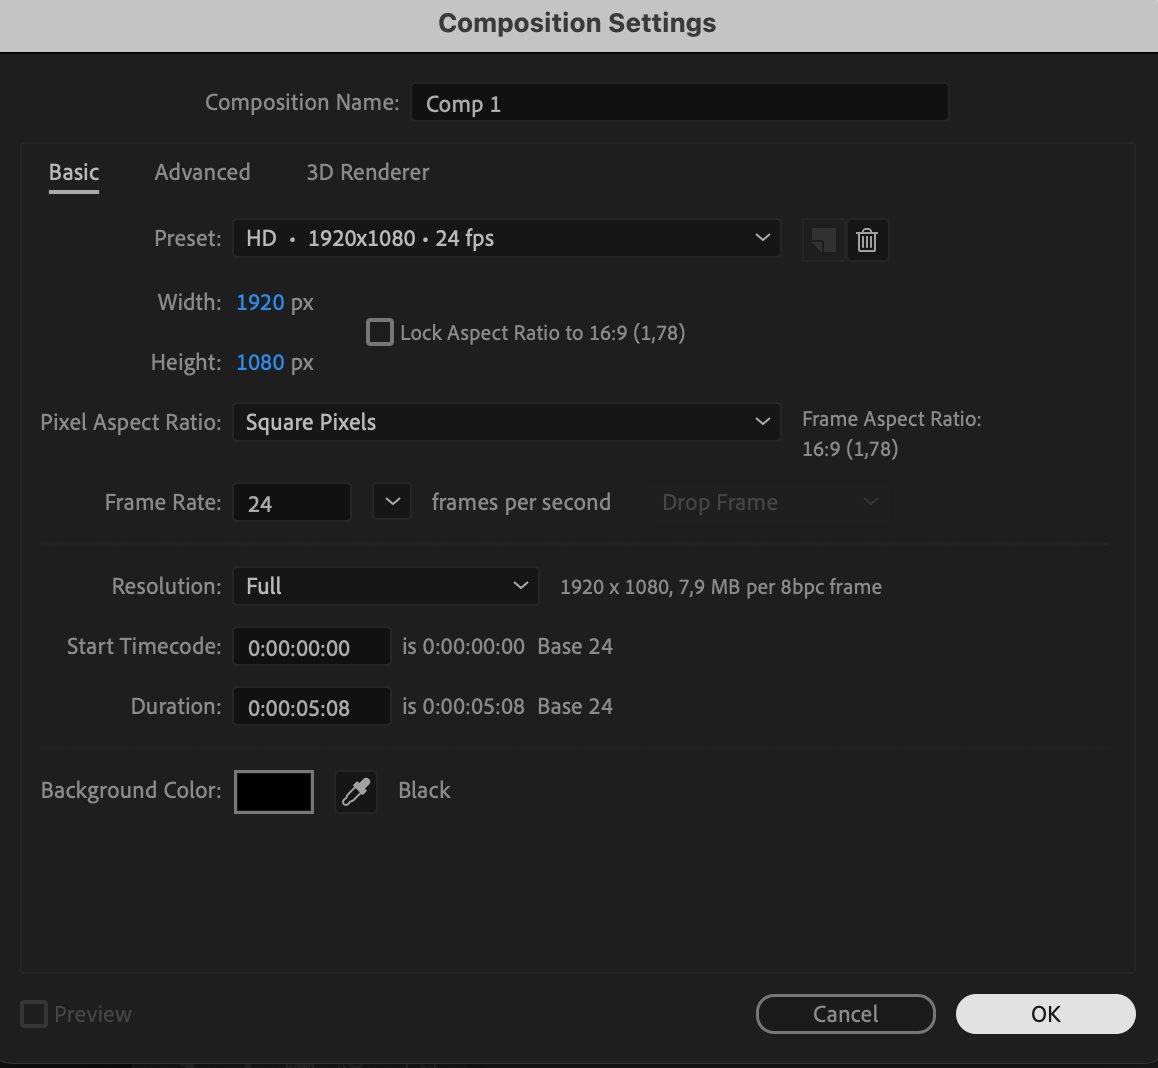
Begin by creating a new composition. Go to Composition > New Composition, and set your desired resolution, duration, and frame rate. This will be the workspace for building your neon sign.
 Step 2: Add Text
Use the Text Tool (Ctrl/Cmd + T) to type your desired text. To create the look of a neon outline, set the Fill to none and use only the Stroke option for the text color. This will give it a thin, tubular appearance, resembling real neon signage.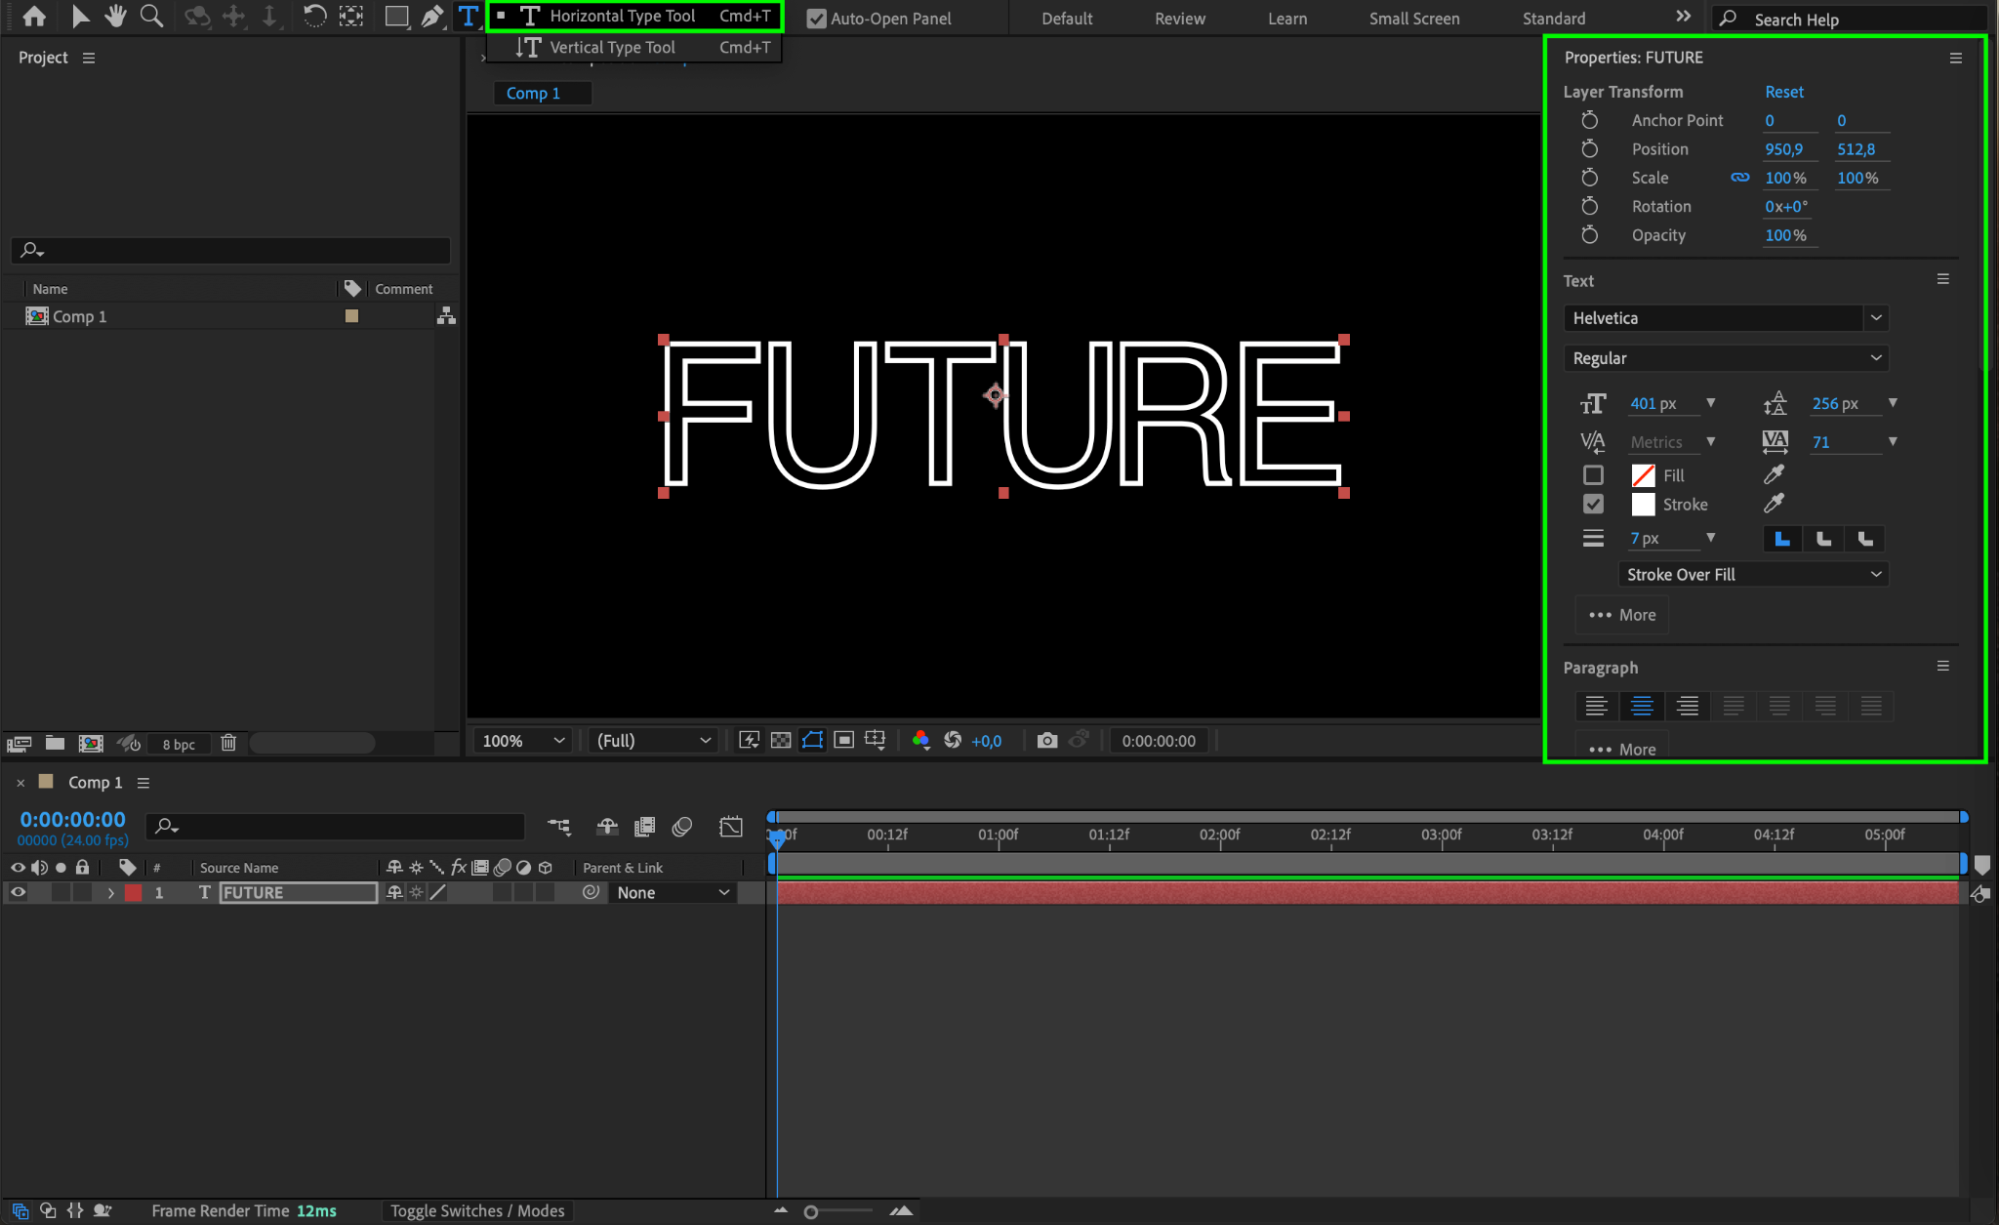 Step 3: Create a Border
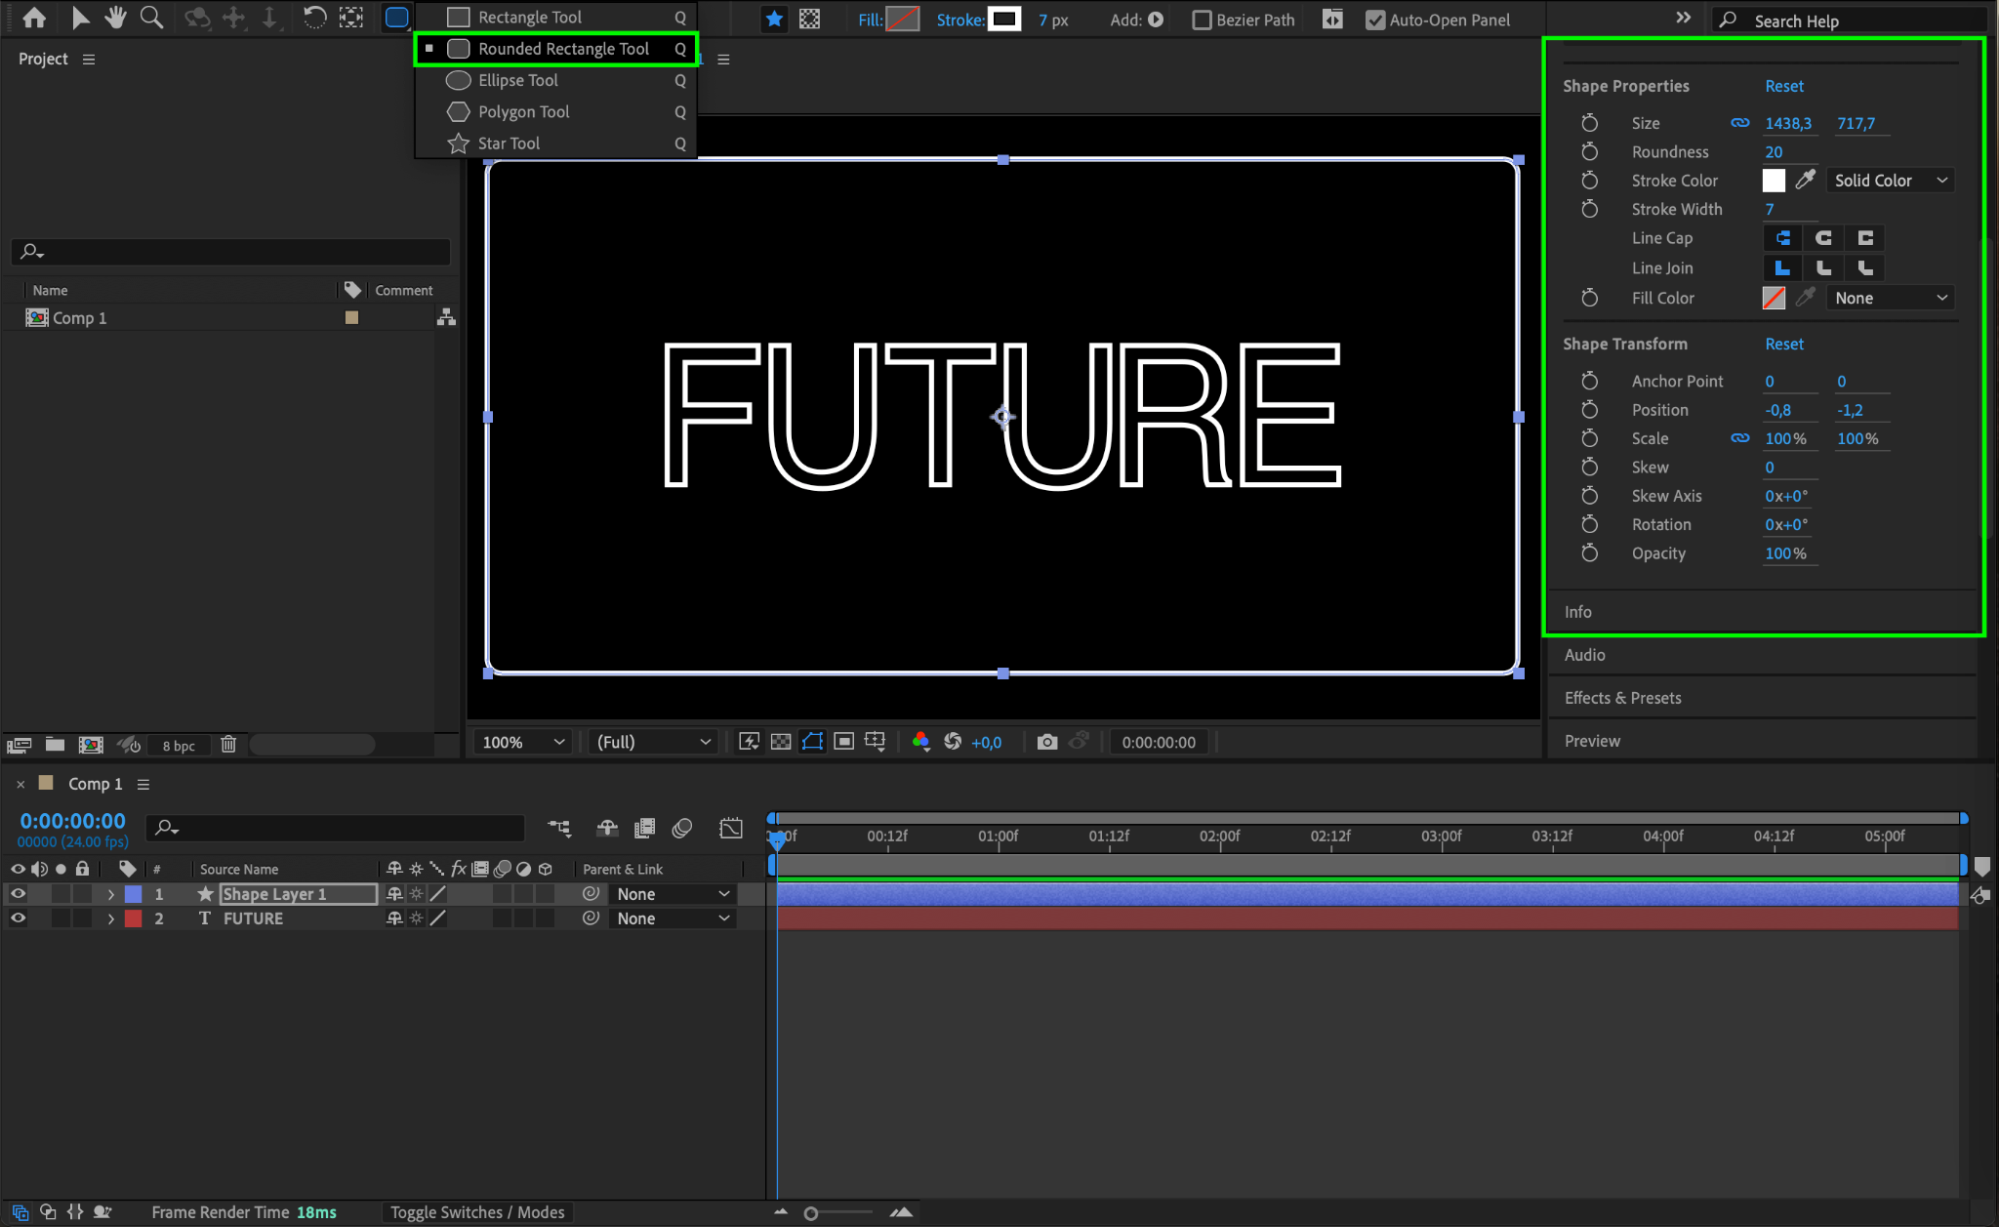
Select the Shape Tool (Q) to create a border around your text. This will simulate the frame of the neon sign. Adjust the color and stroke width to match the sign’s style, making sure it complements your text color.
 Step 4: Pre-compose the Text and Border Layers
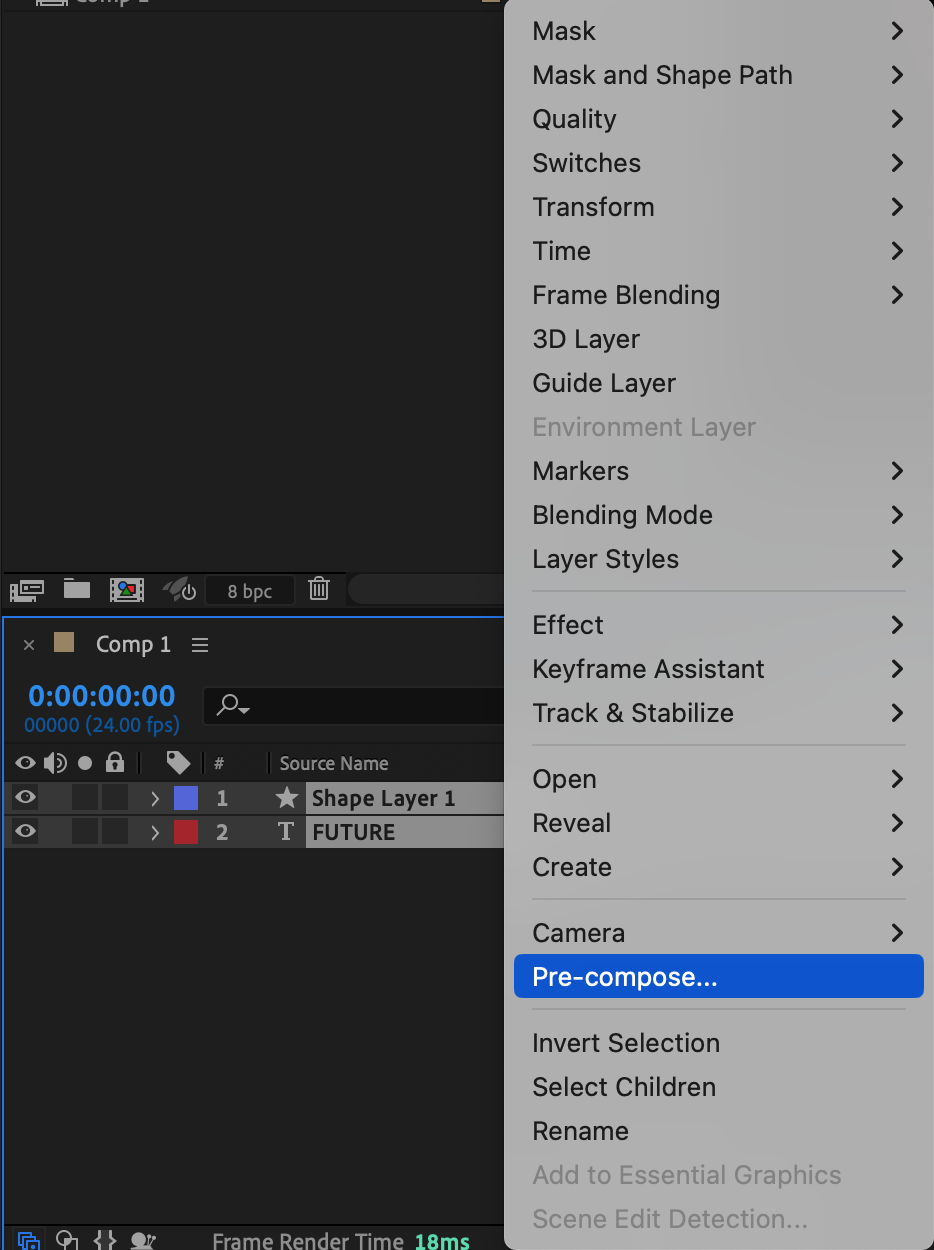
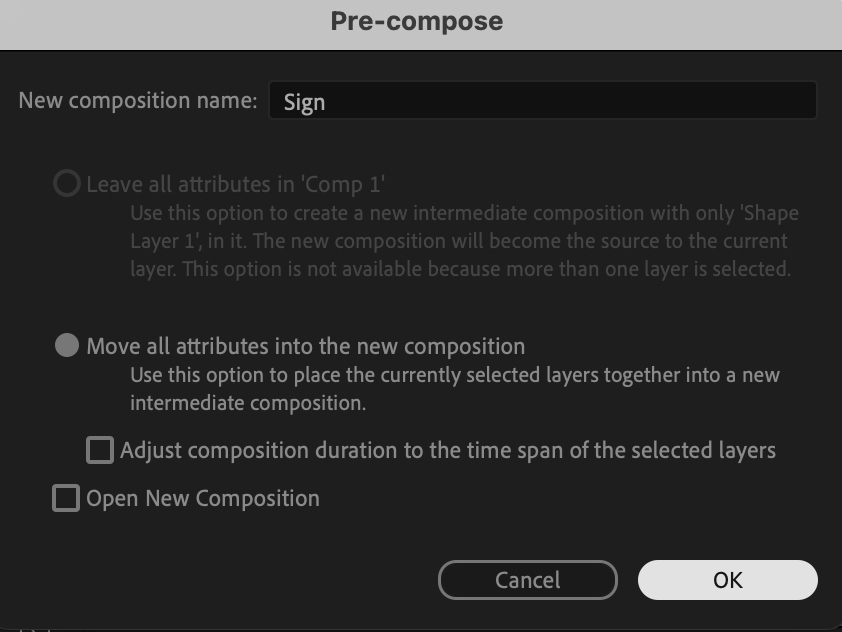
To keep your layers organized, pre-compose your text and border layers by selecting them, then right-clicking and choosing Pre-compose. Name the new composition “Sign.”
 Step 5: Add Mask Details for Realism
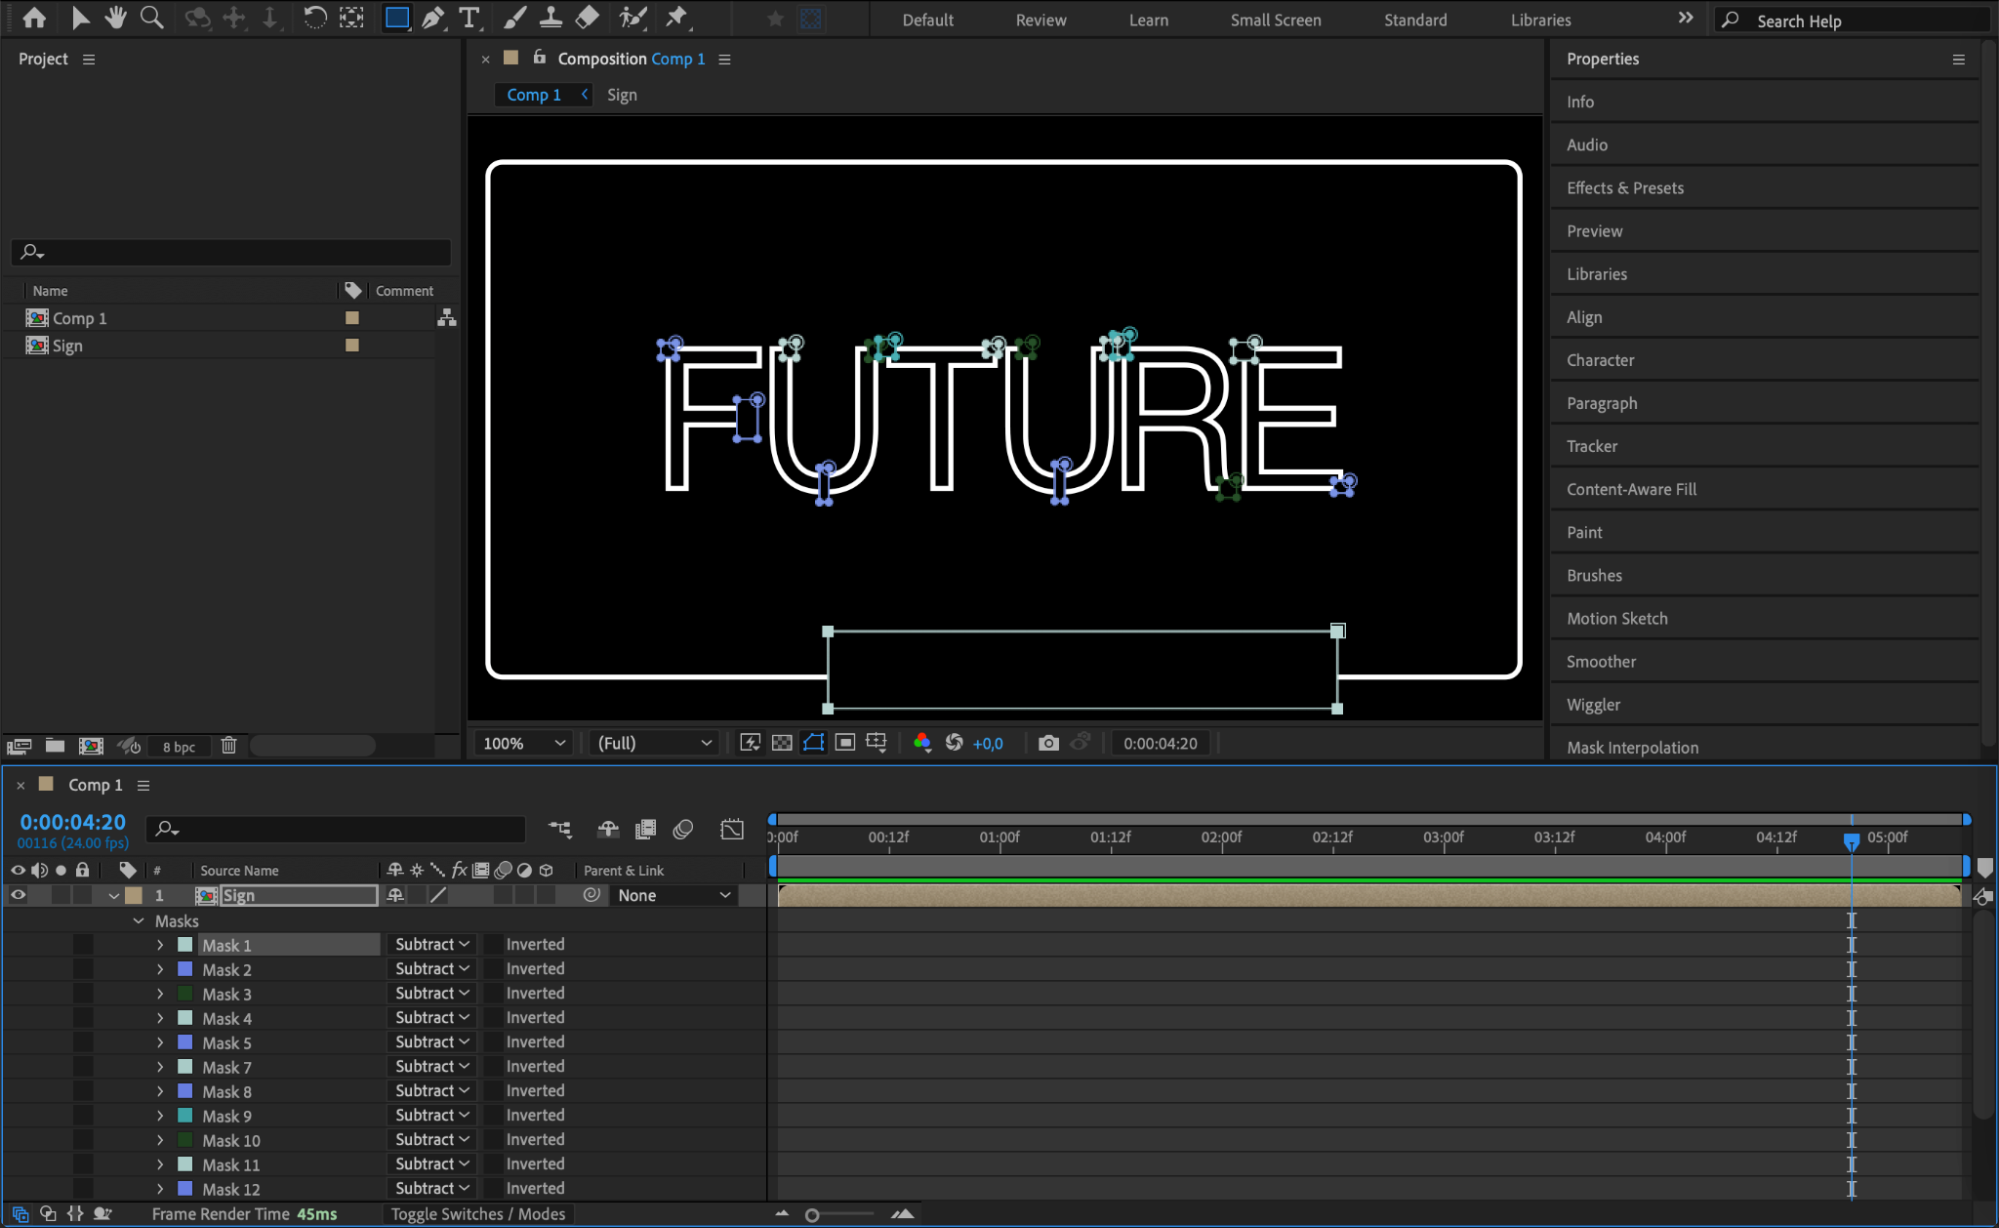
With the Rectangle Tool (Q), create small mask sections along the text where you want it to appear segmented, mimicking how real neon tubes are joined together.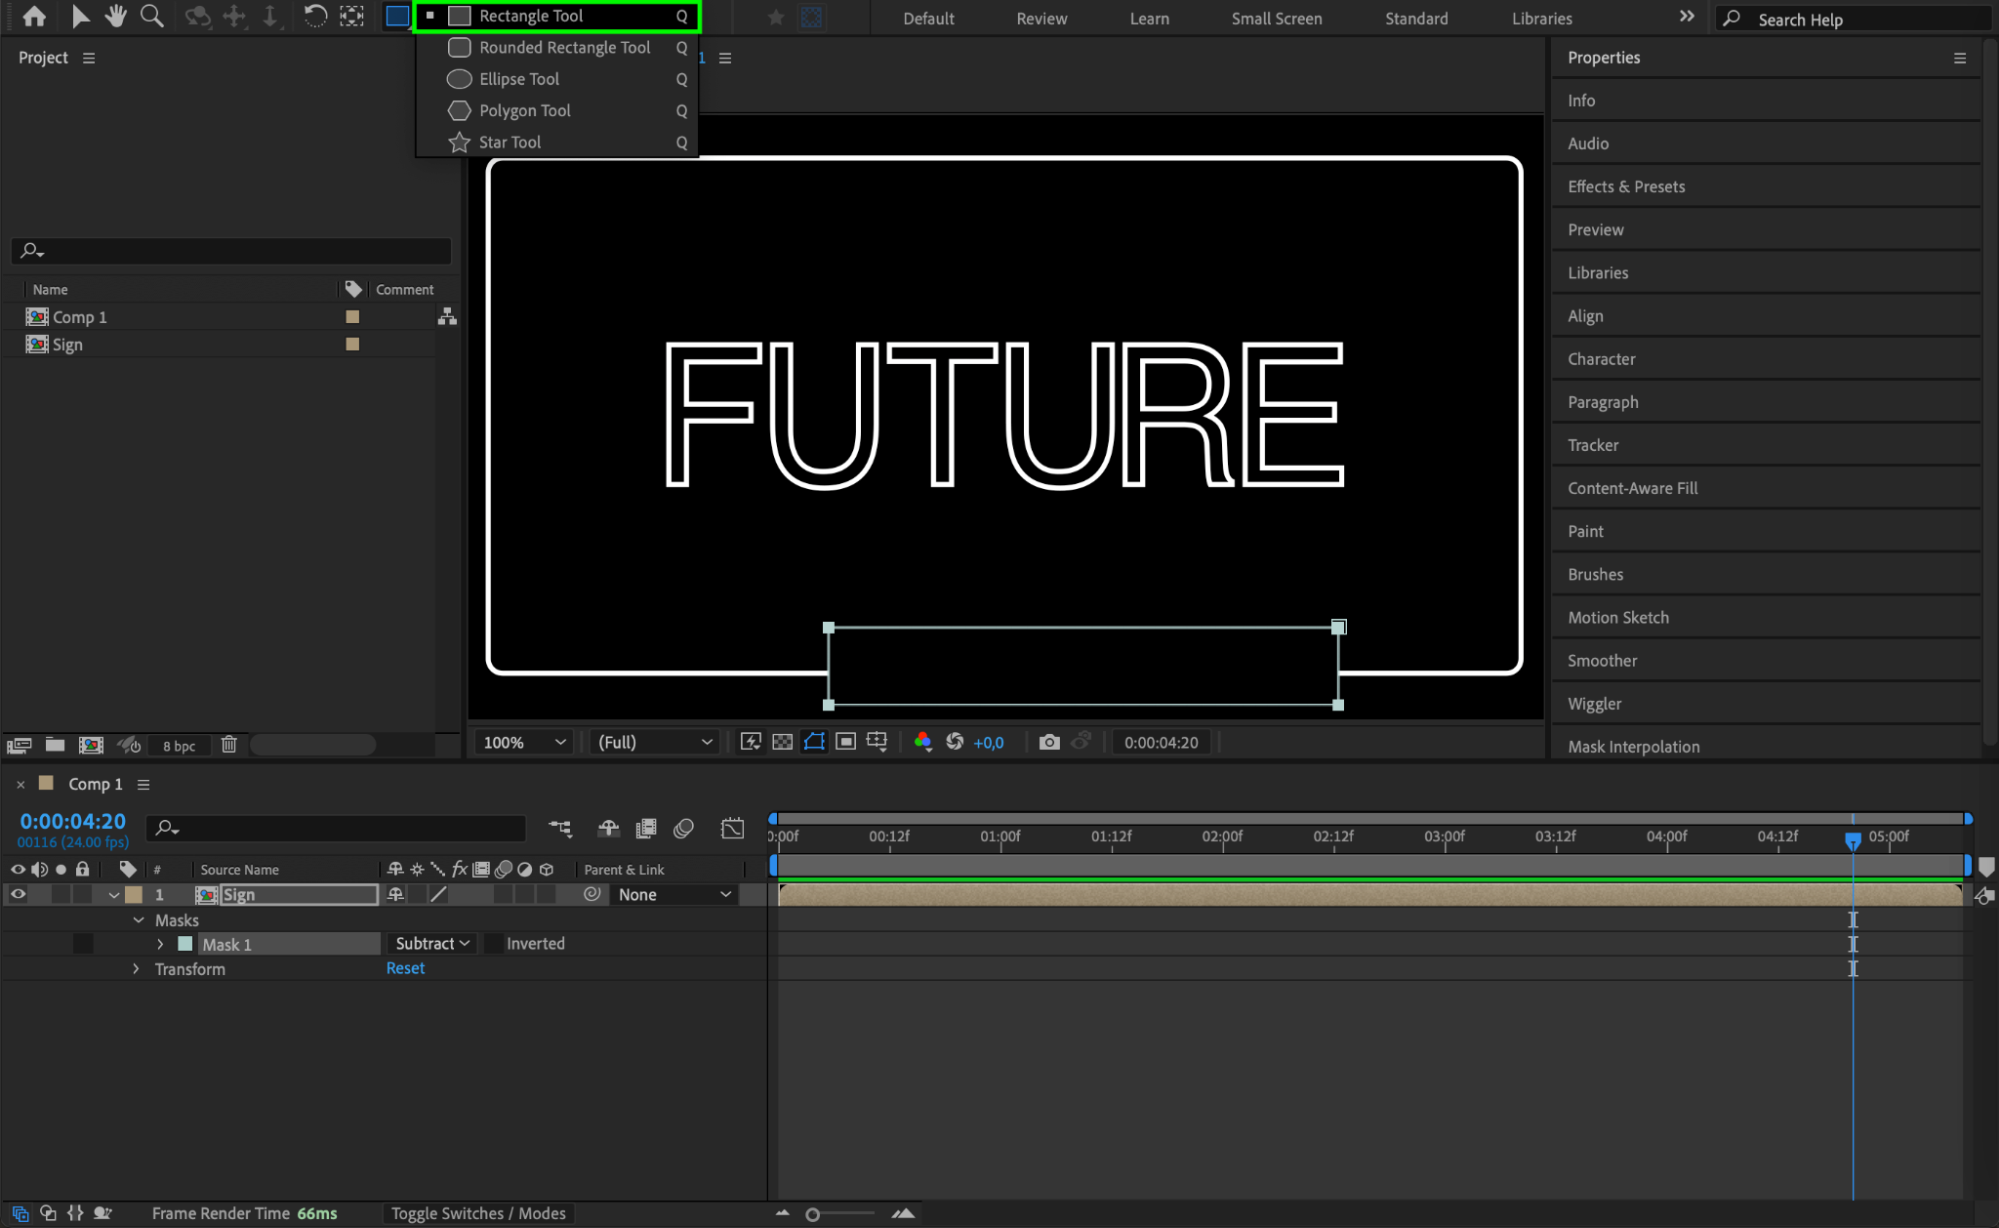
 Step 6: Add Mounting Pins
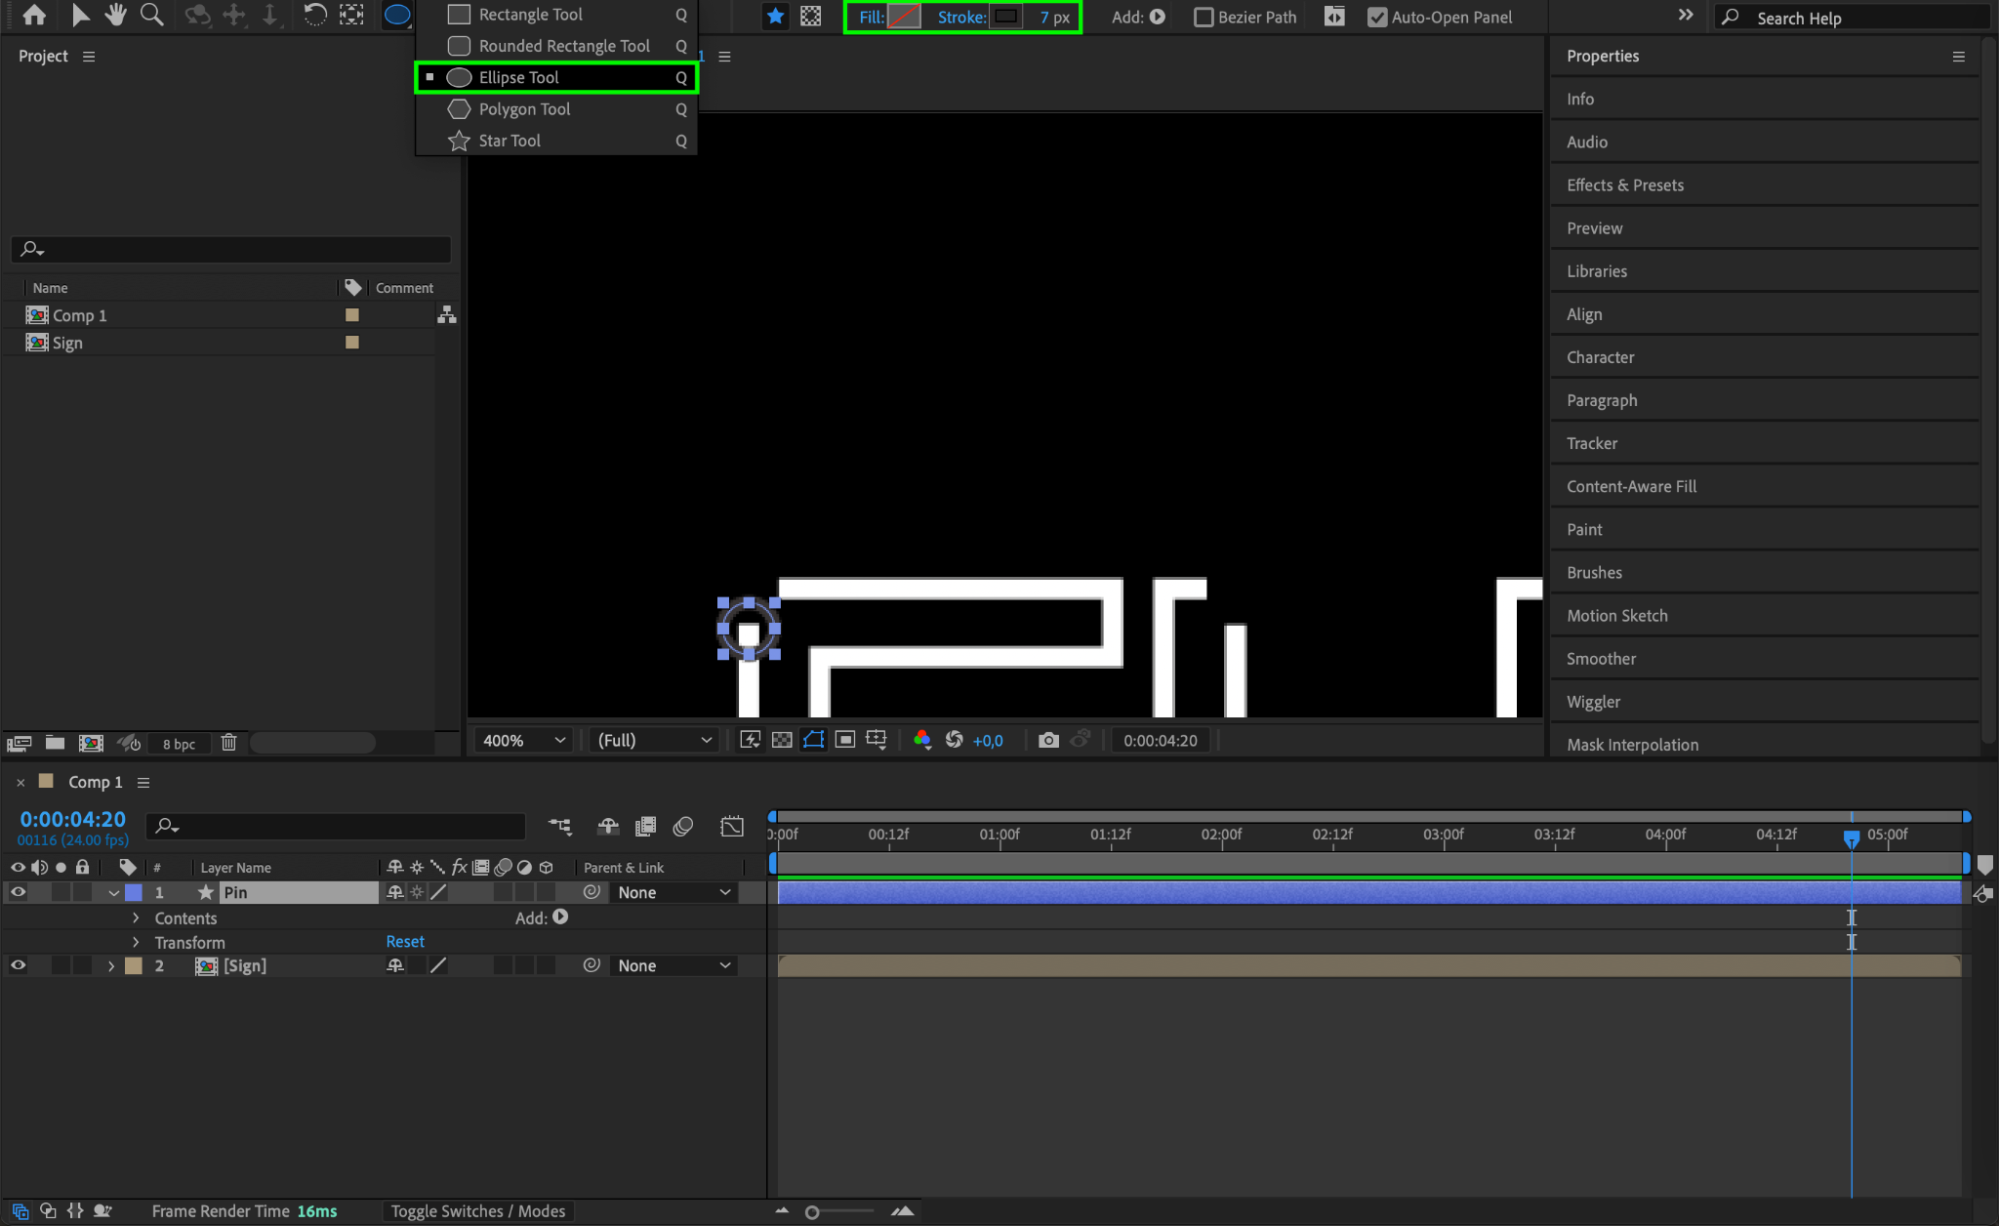
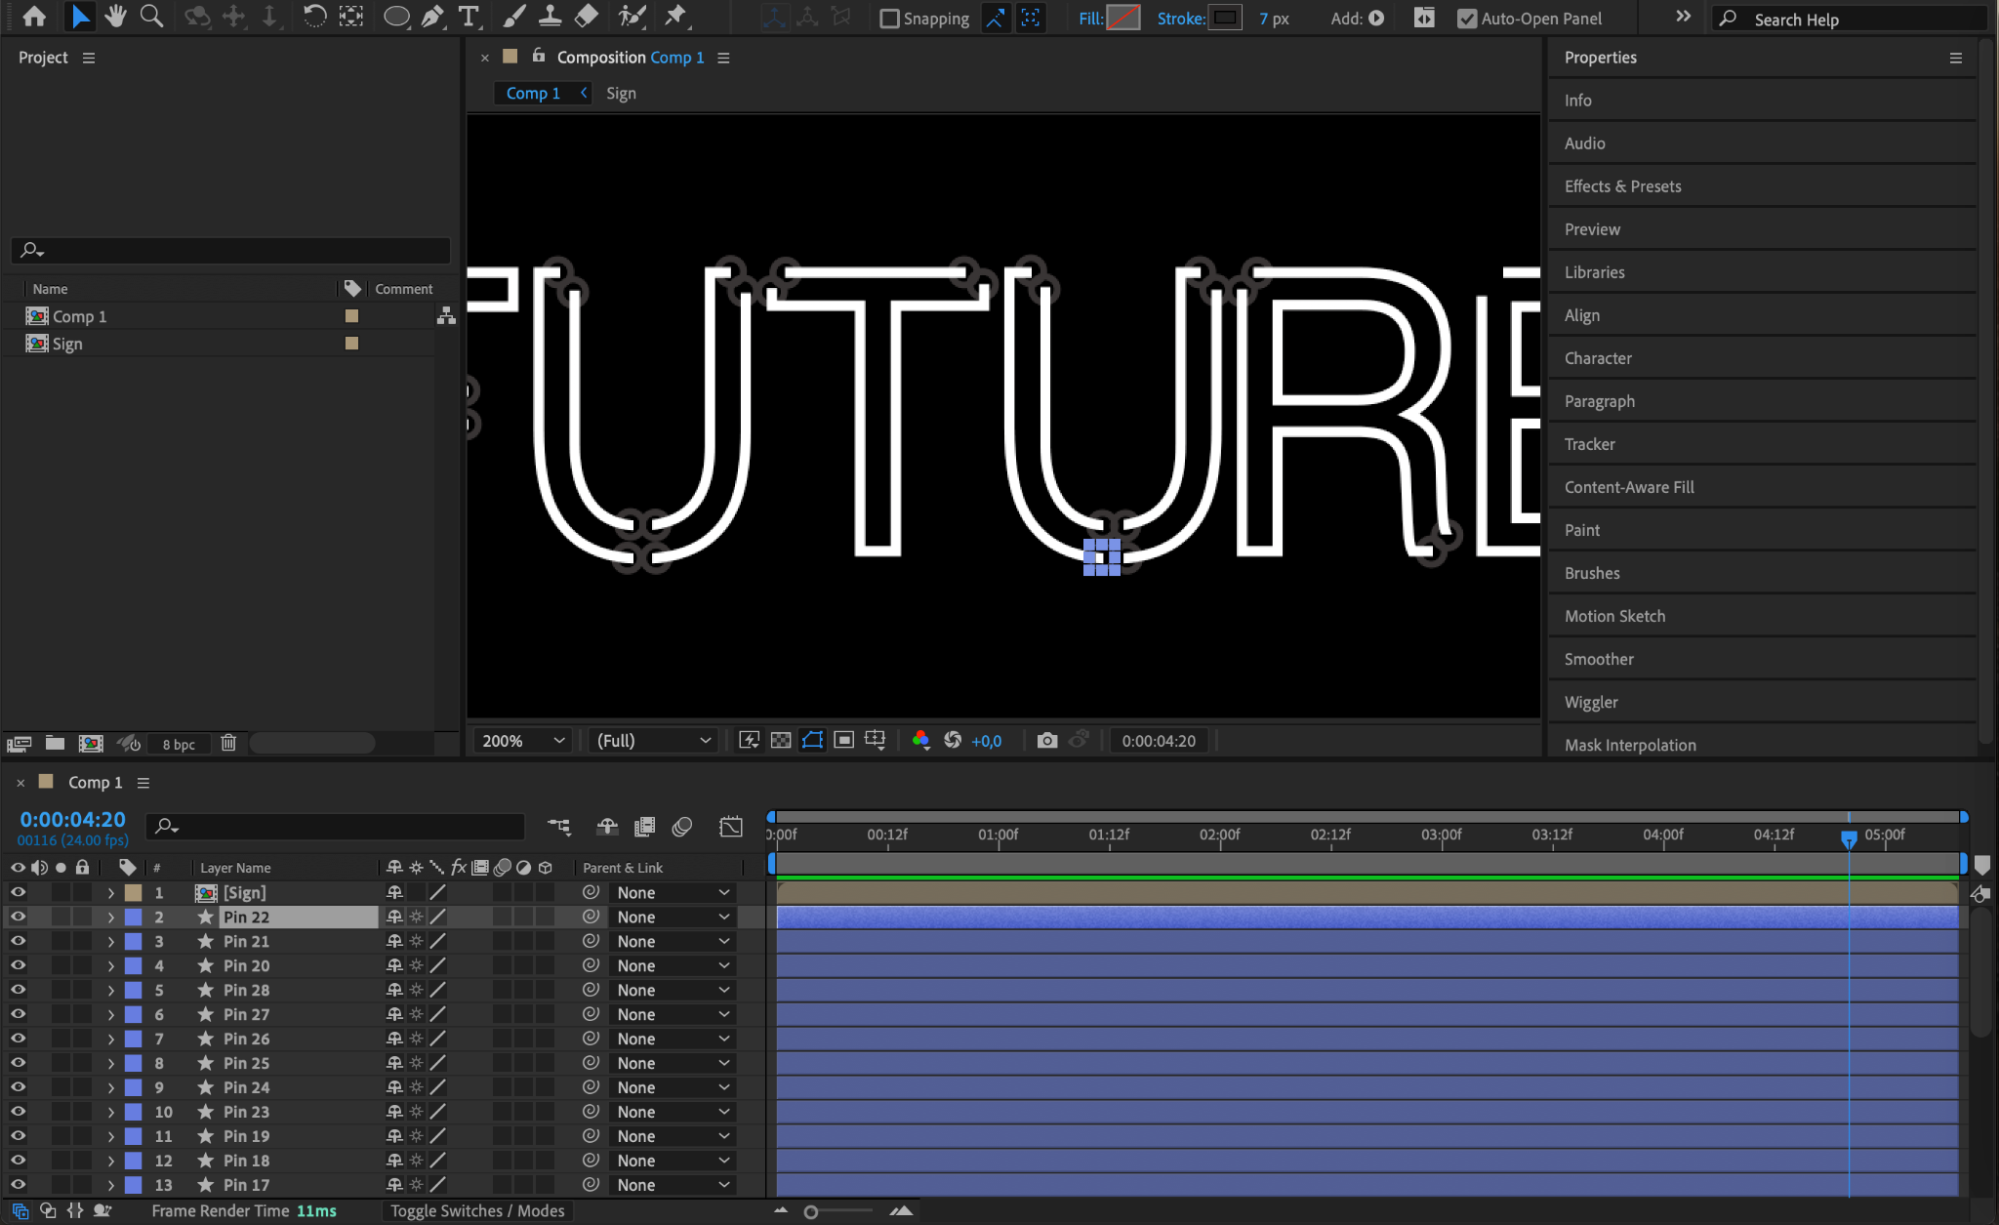
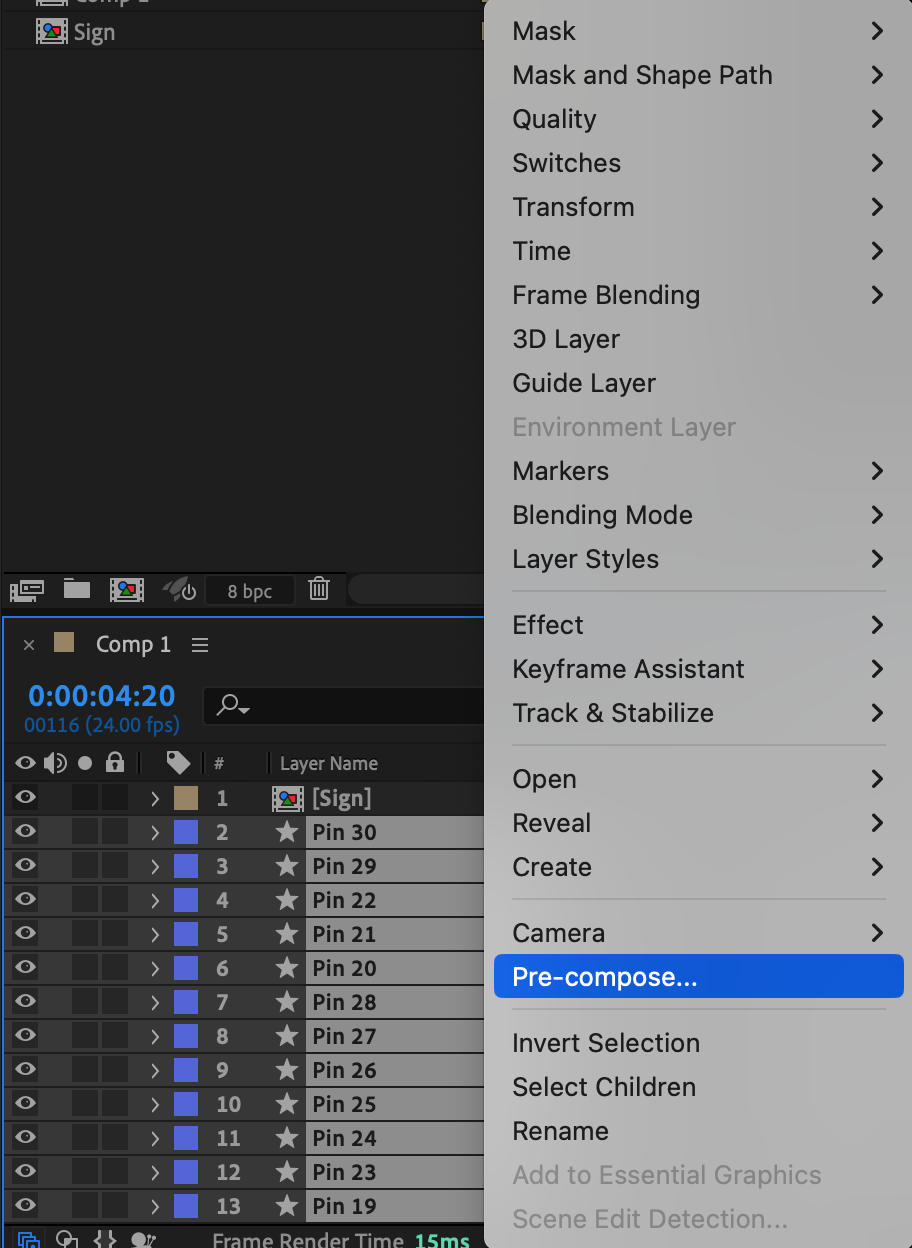
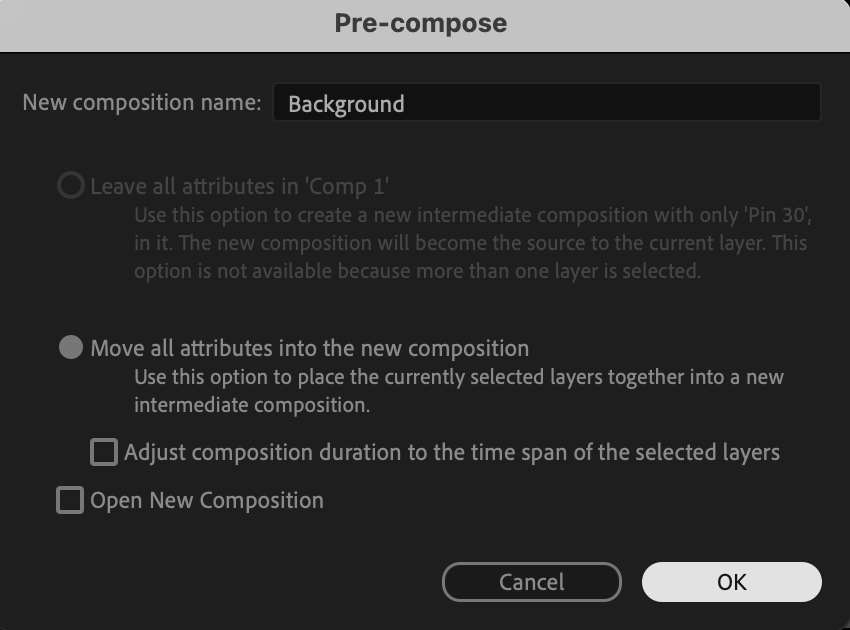
Use the Ellipse Tool (Q) to create small dark circles to represent pins that “hold” the neon letters. Name these “Pin” layers, place them around the letters, and position them underneath the “Sign” composition. Pre-compose these pins and name the new composition “Background.”
 Step 7: Create a Shadow Layer
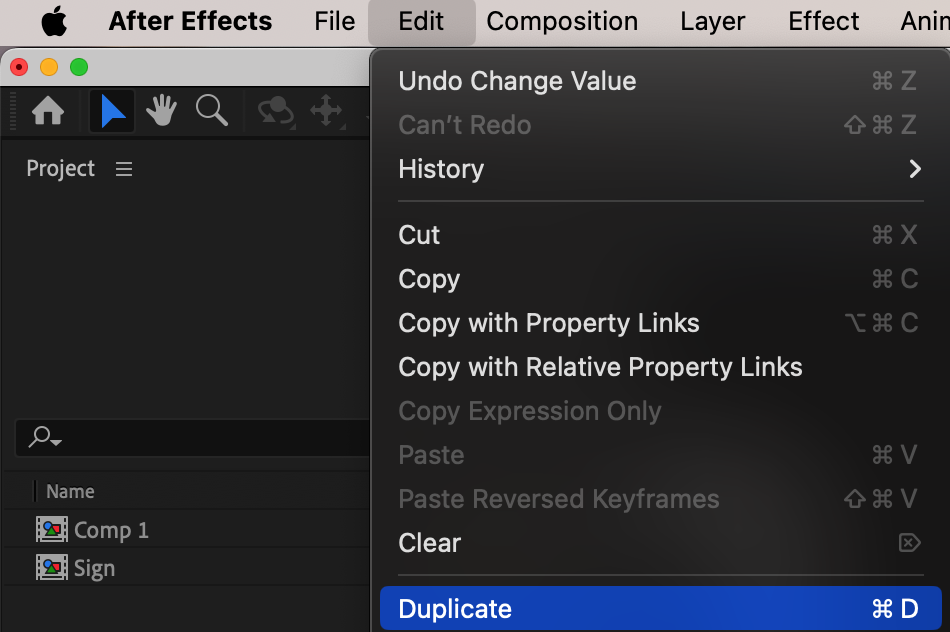
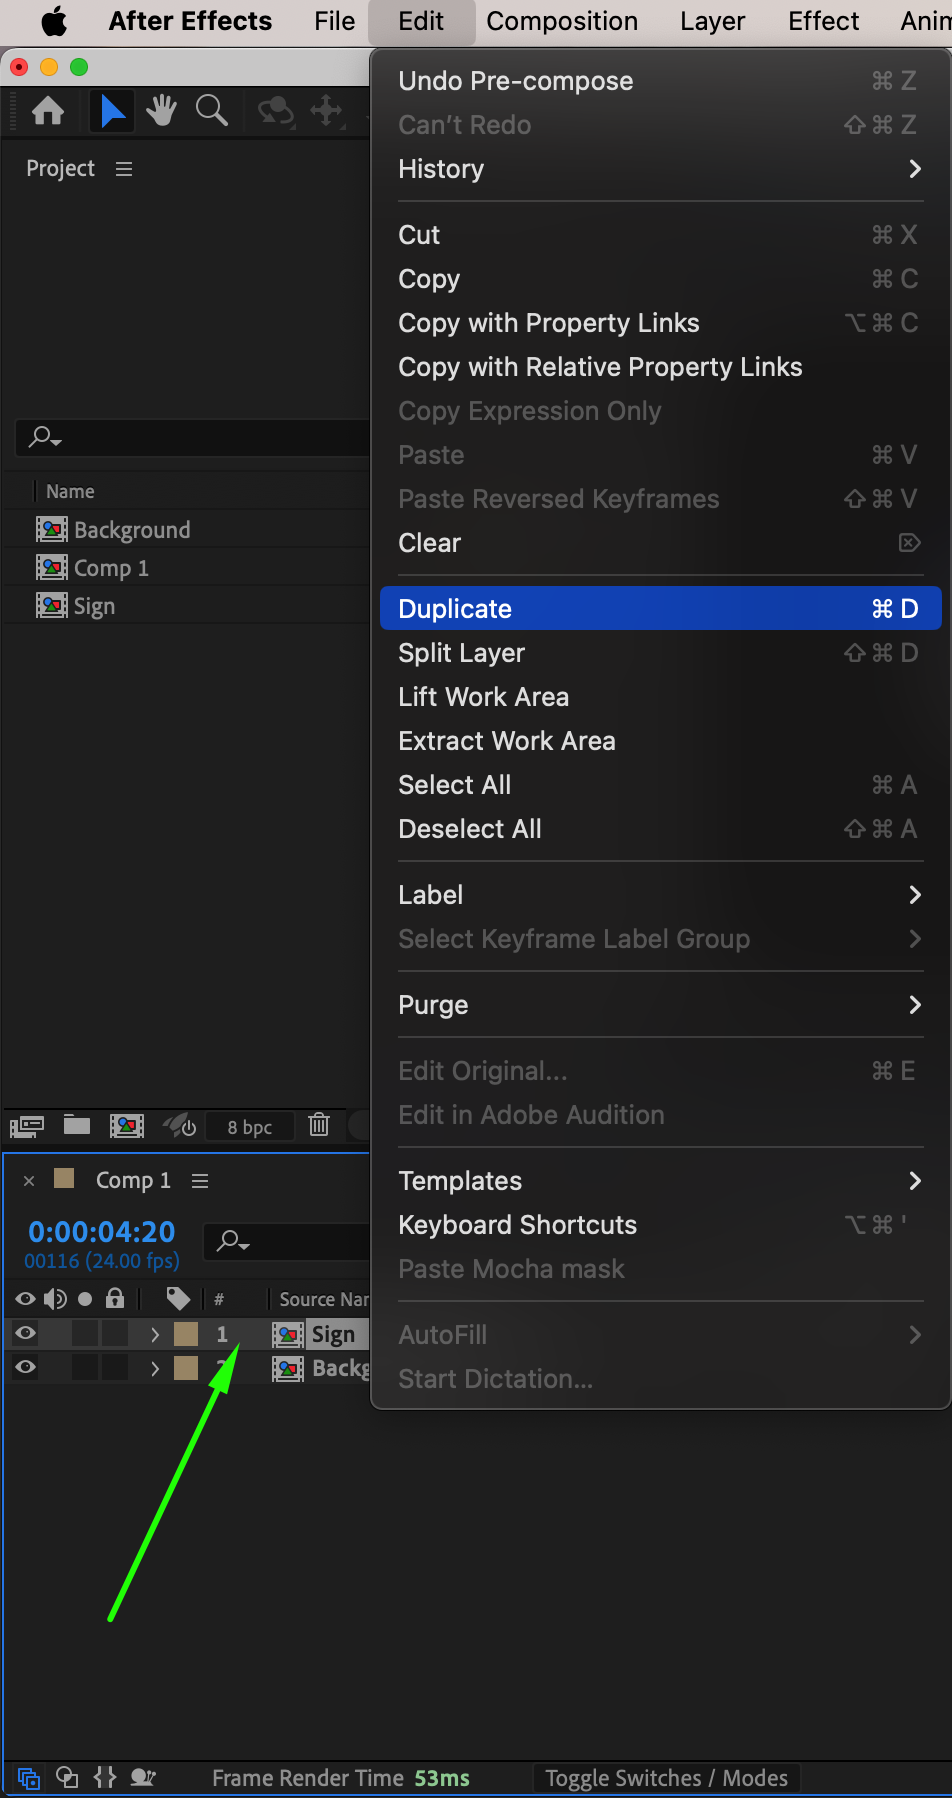
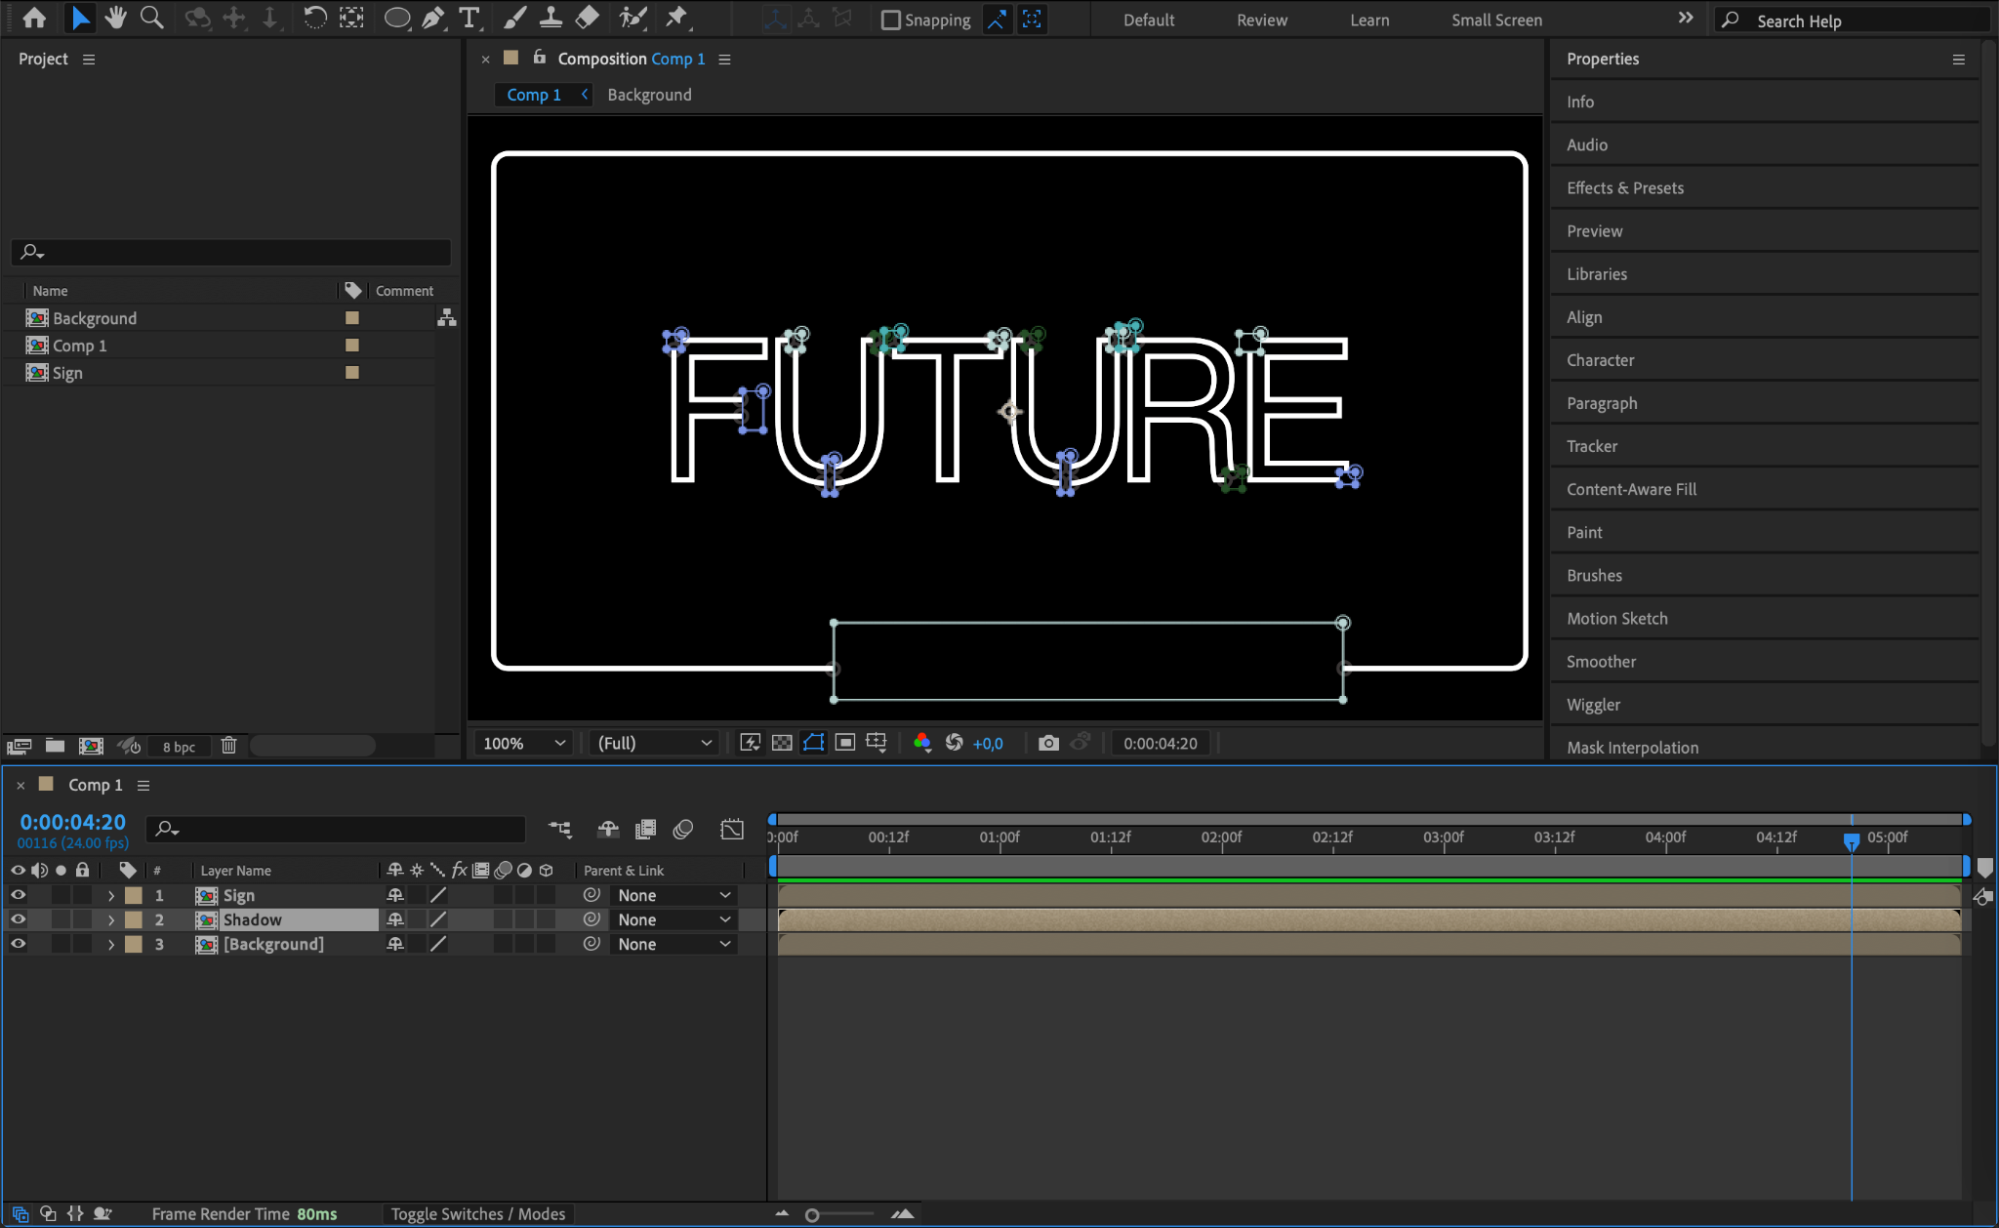
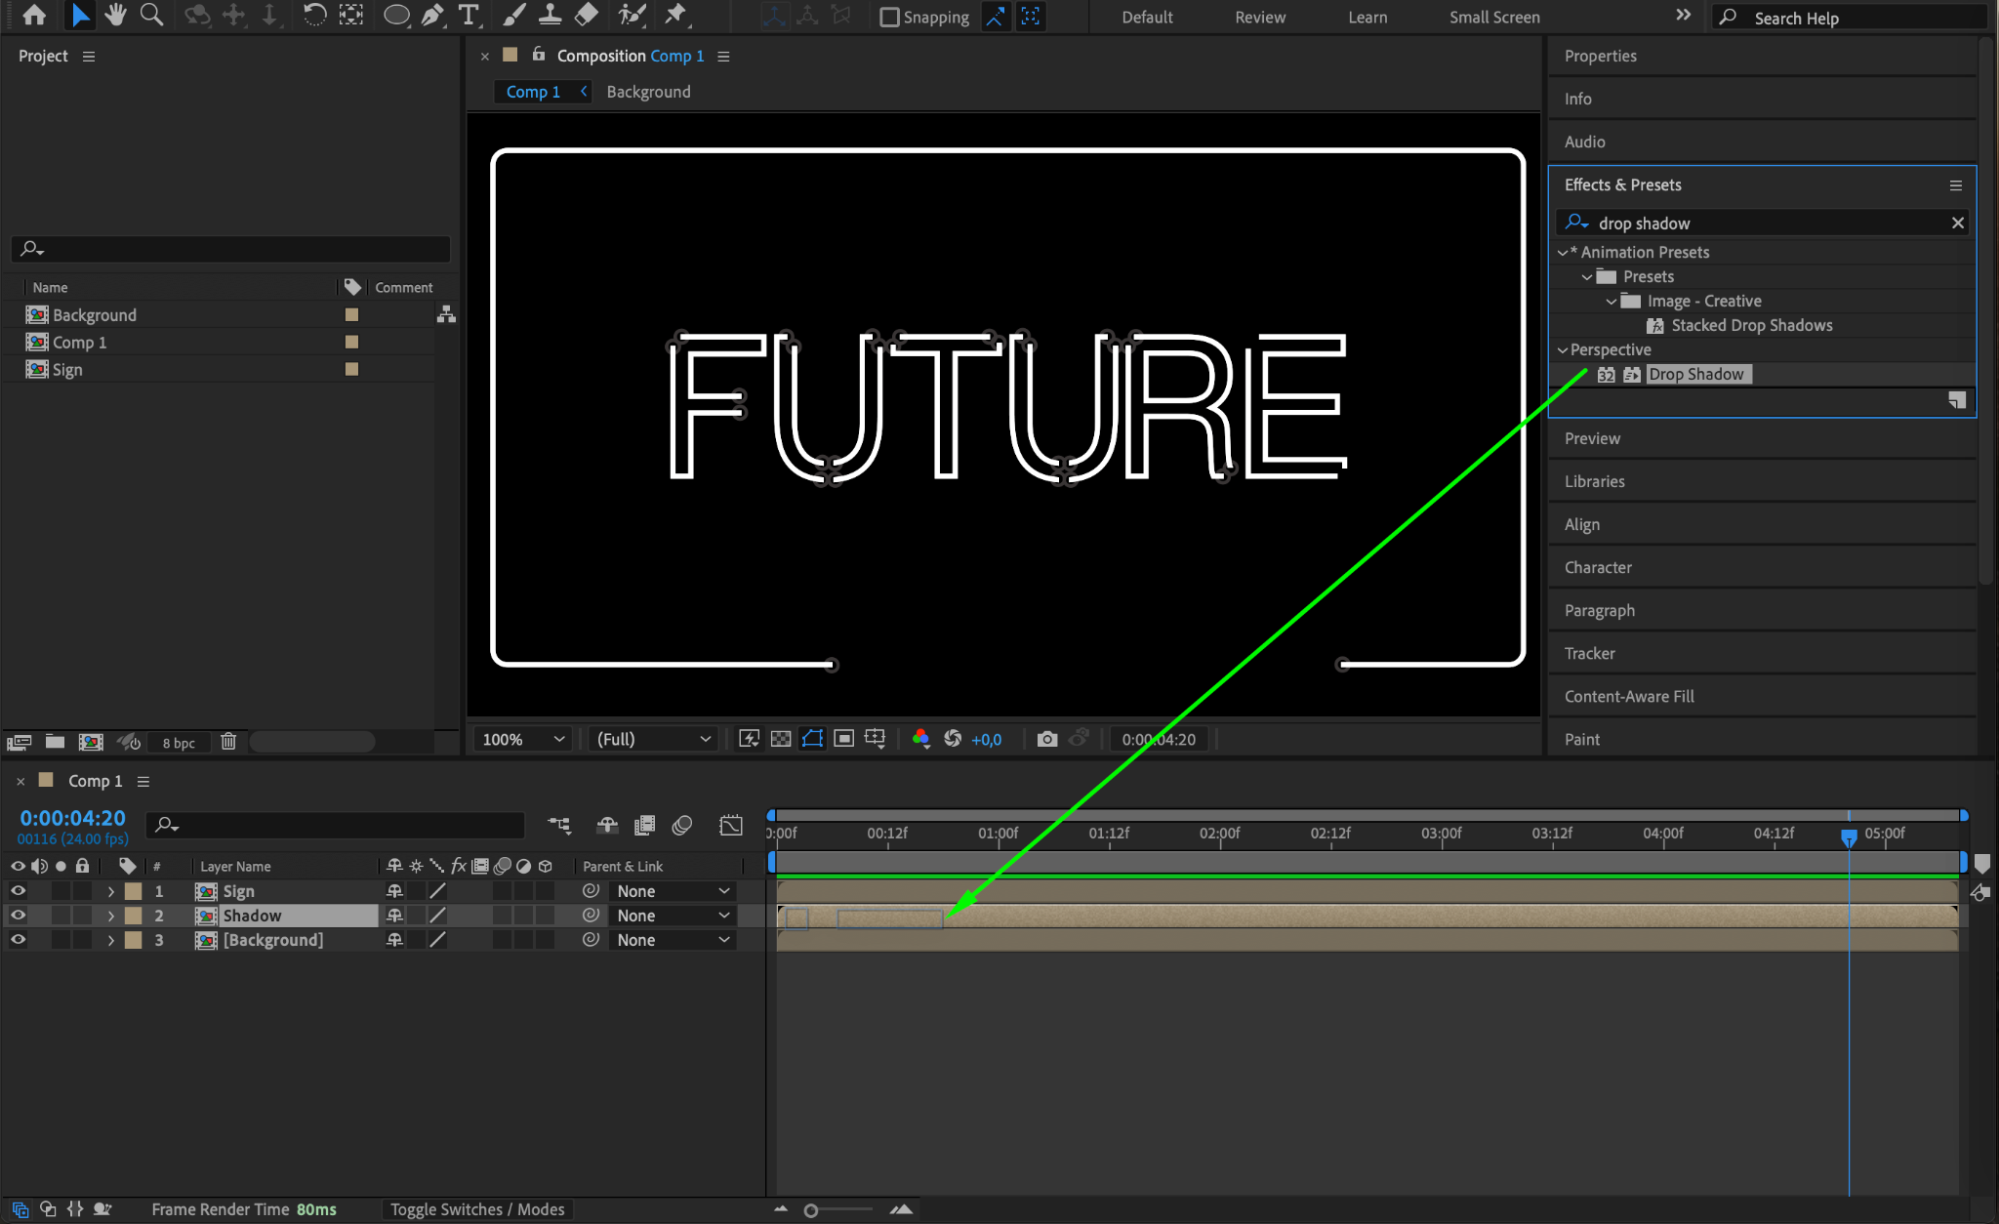
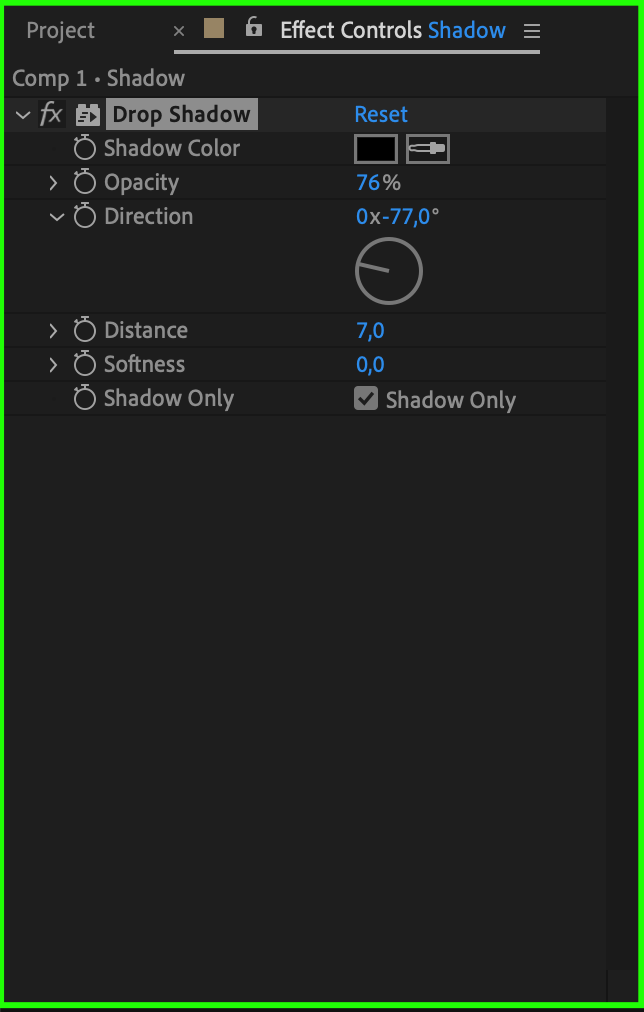
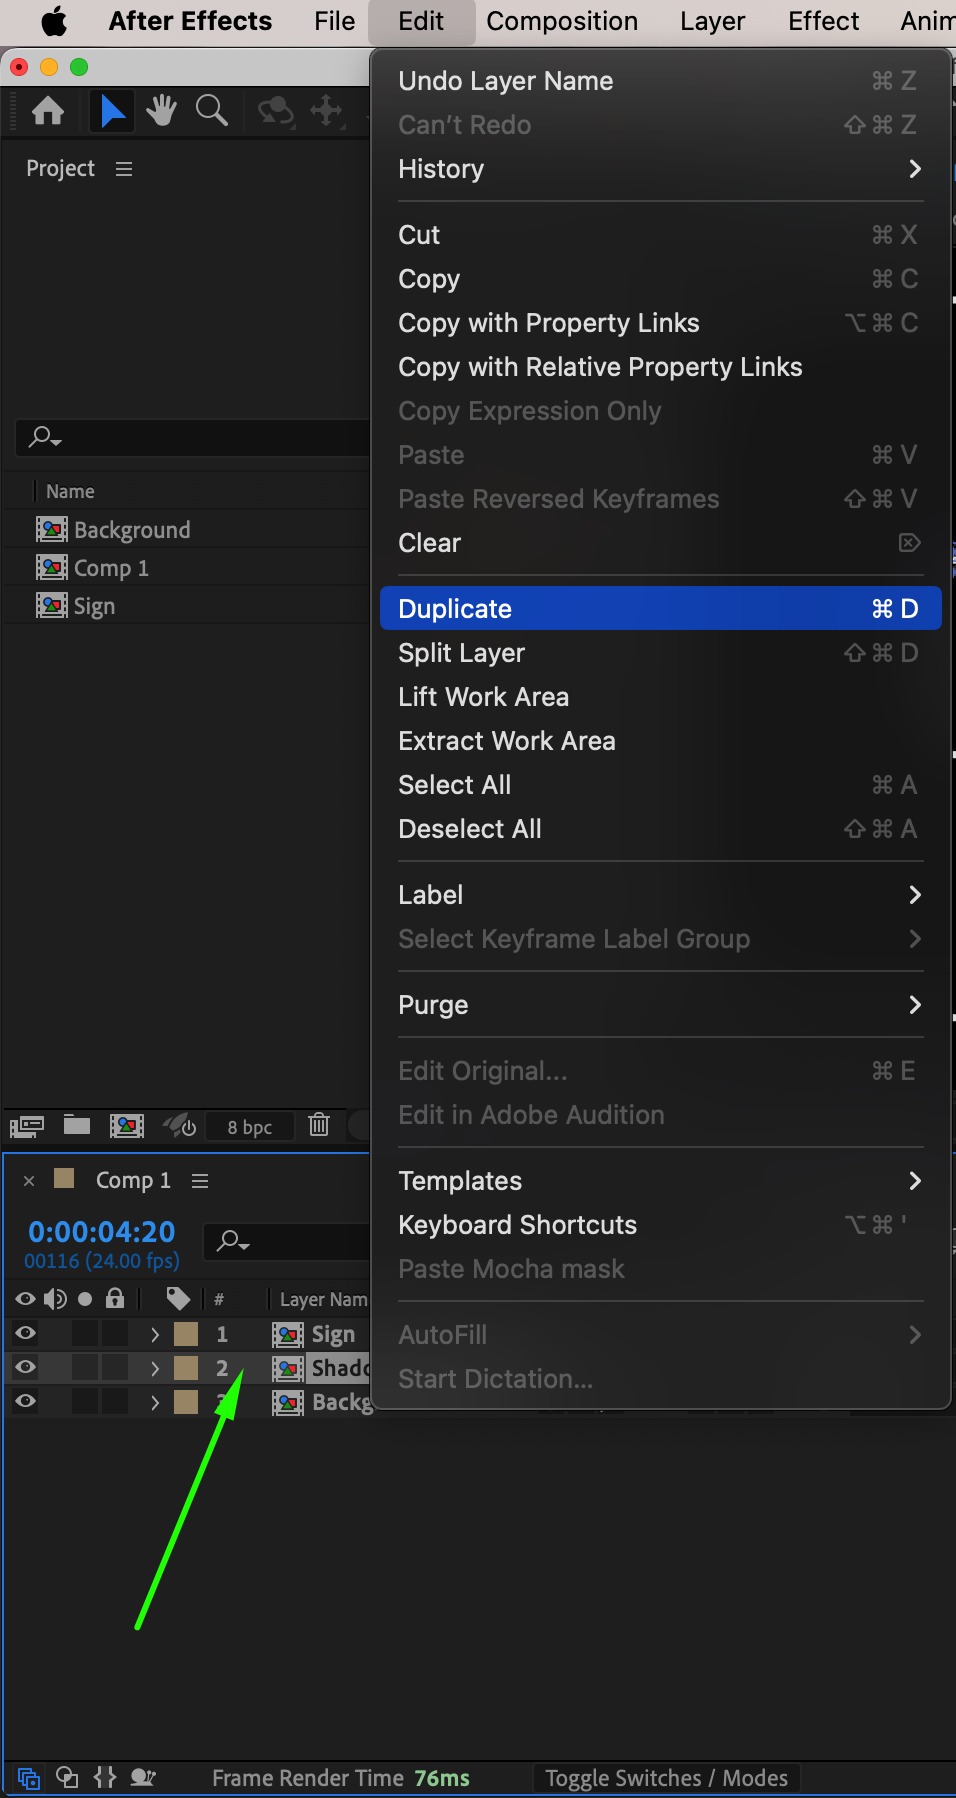
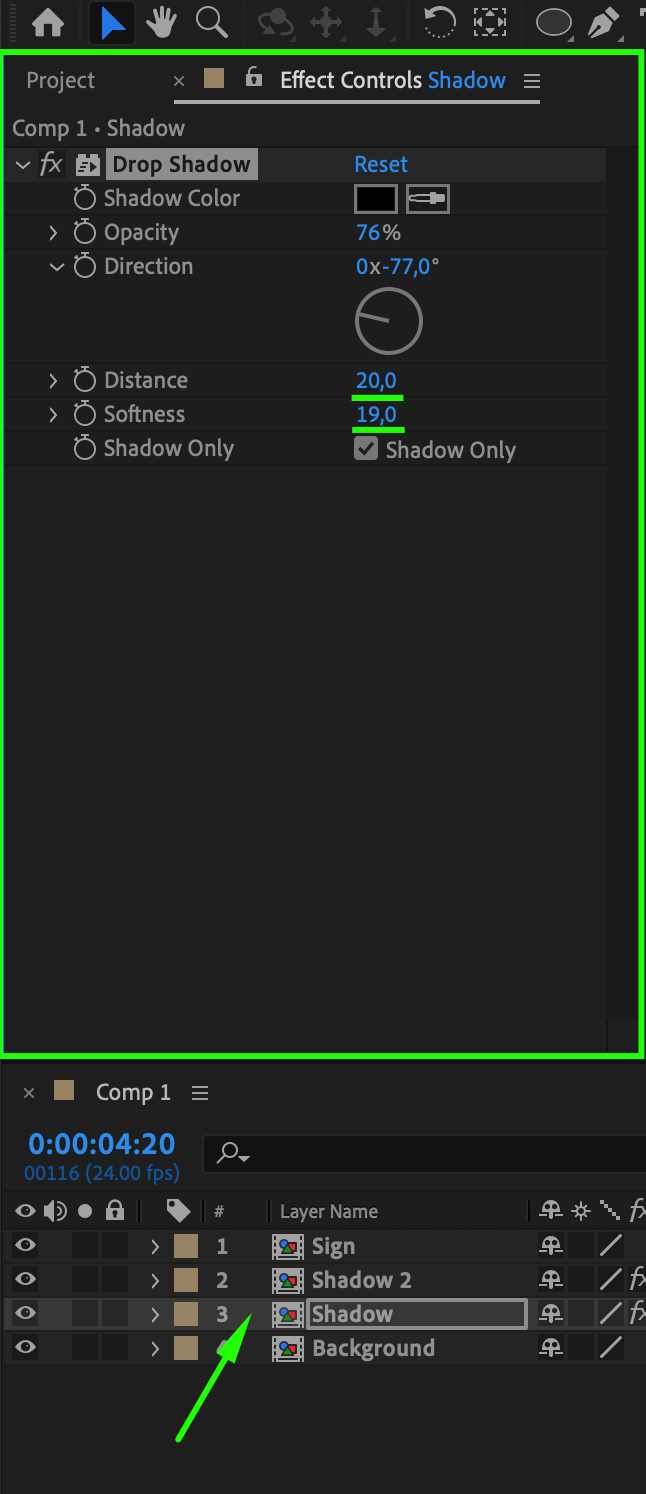
Duplicate the “Sign” composition and name the duplicate “Shadow.” Go to Effects & Presets and add Drop Shadow. In Effect Controls, set Opacity to 76, Direction to -77, Distance to 7, and check Shadow Only to create a soft shadow that follows the shape of the text.
 Step 8: Add a Softer Shadow Layer
Duplicate the “Shadow” composition again and adjust the Distance to 20 and Softness to 19. This extra shadow layer will add depth and make the sign appear more three-dimensional.
Step 9: Add an Inner Glow
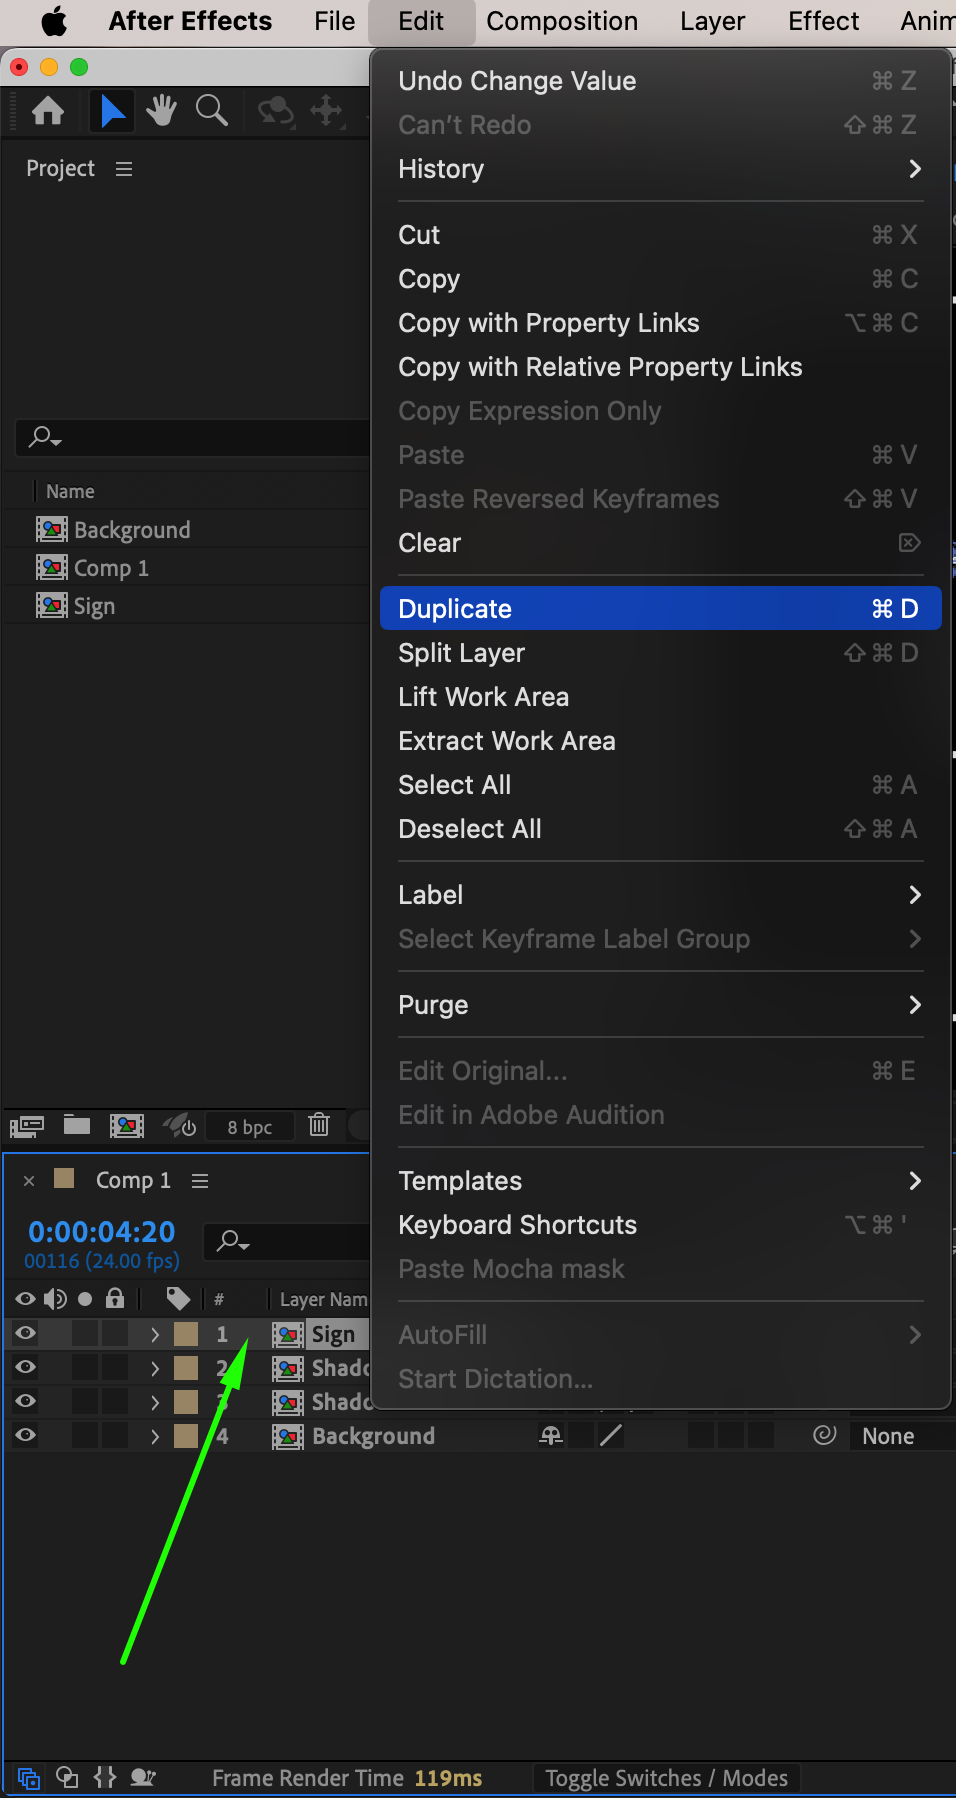
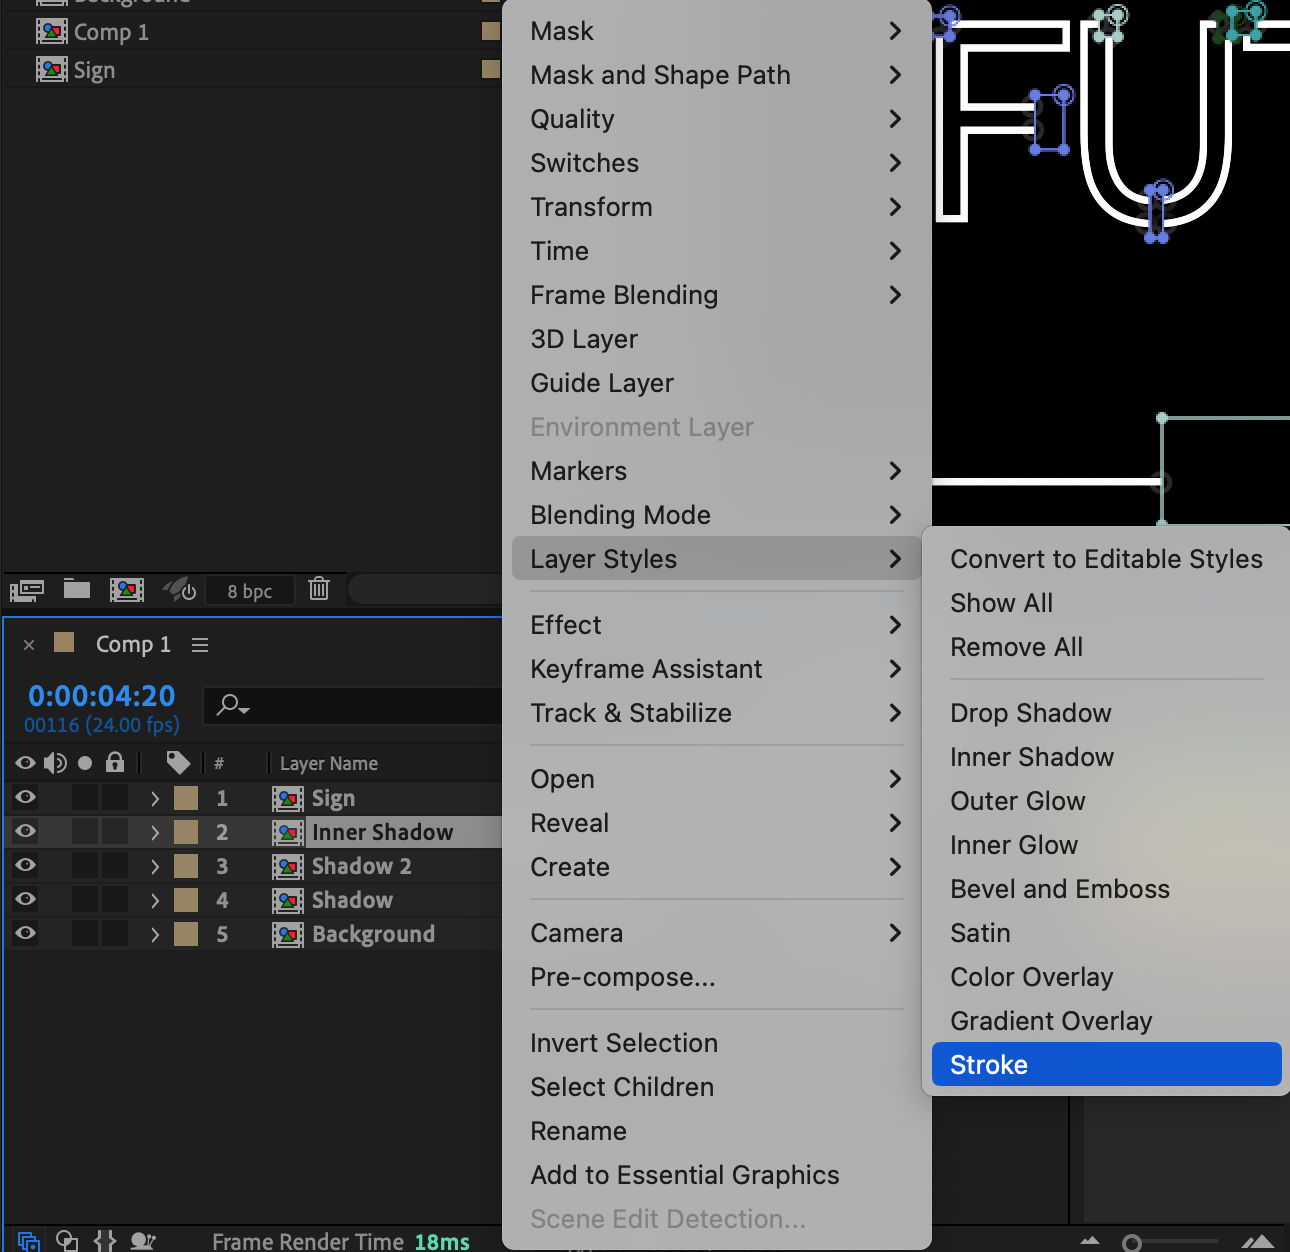
Duplicate the “Sign” composition and name it “Inner Shadow.” Right-click on the layer, choose Layer Styles > Stroke, and set Stroke Color to white, with Position set to Inside. This adds an inner glow effect, giving a realistic appearance of illuminated tubing.
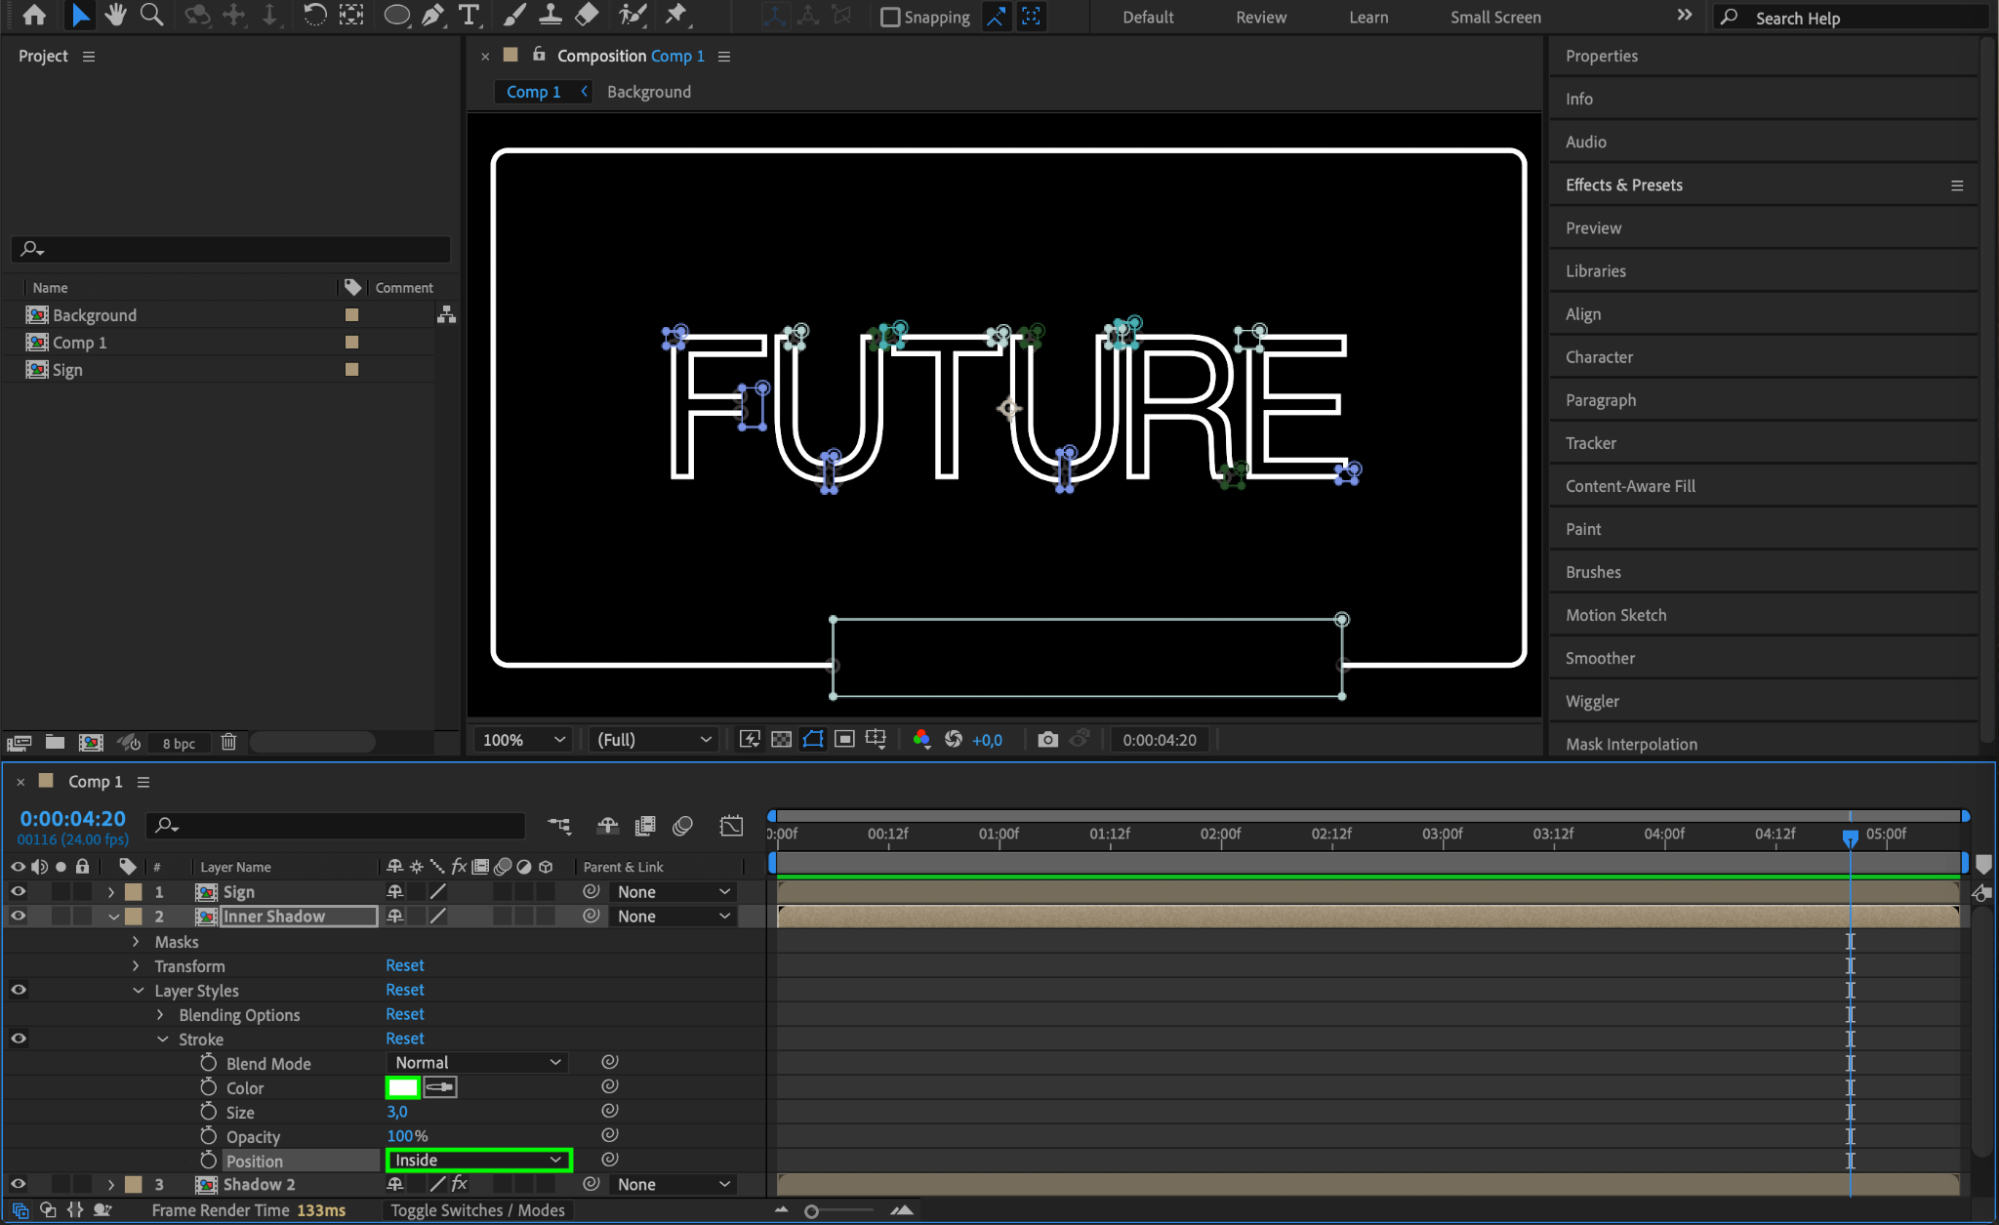 Step 10: Add Gaussian Blur
Add the Gaussian Blur effect to the “Inner Shadow” layer and set Blurriness to 20. This will soften the inner edges and simulate the effect of light diffusion inside the neon tubing.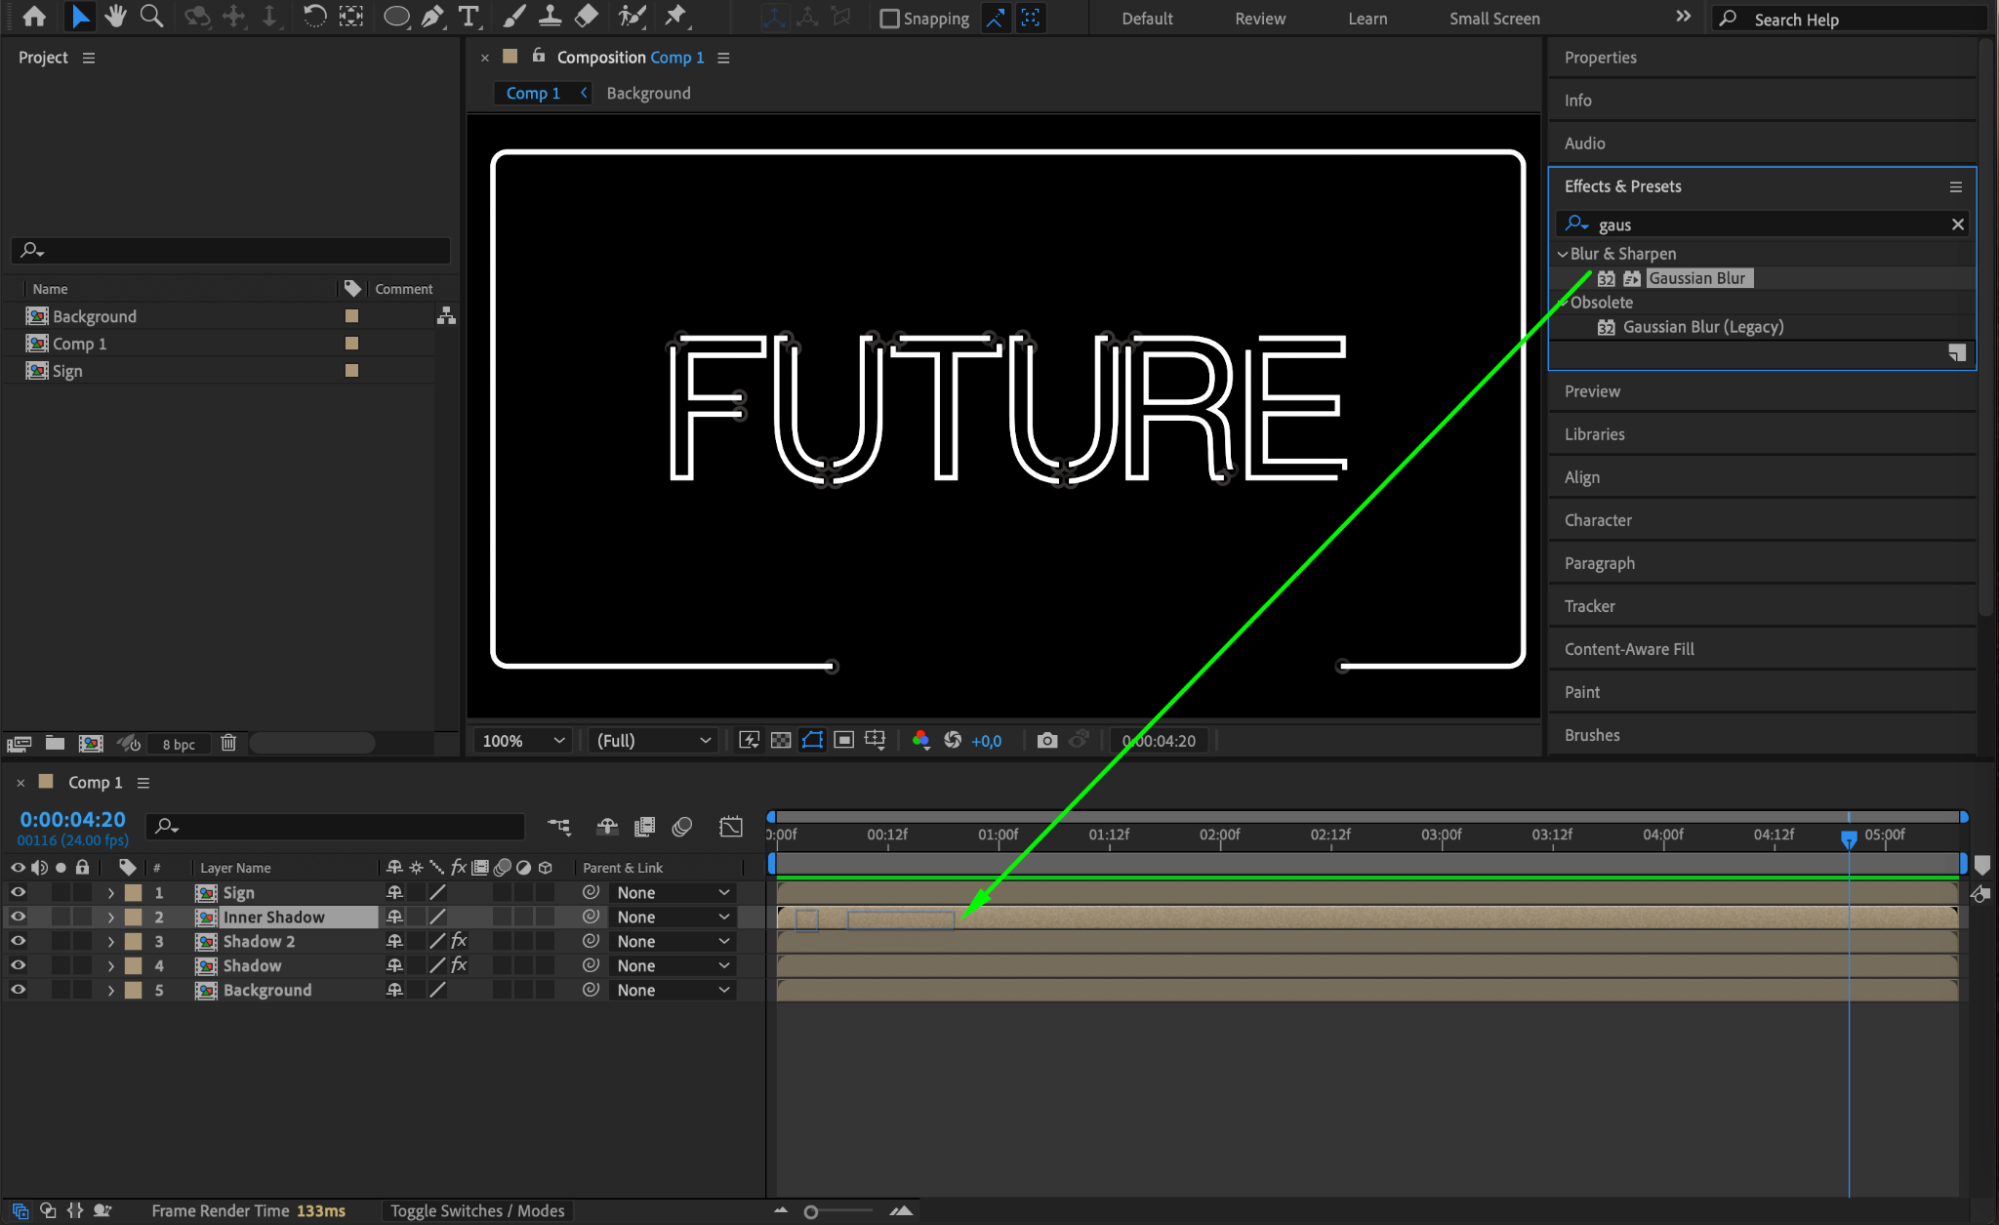
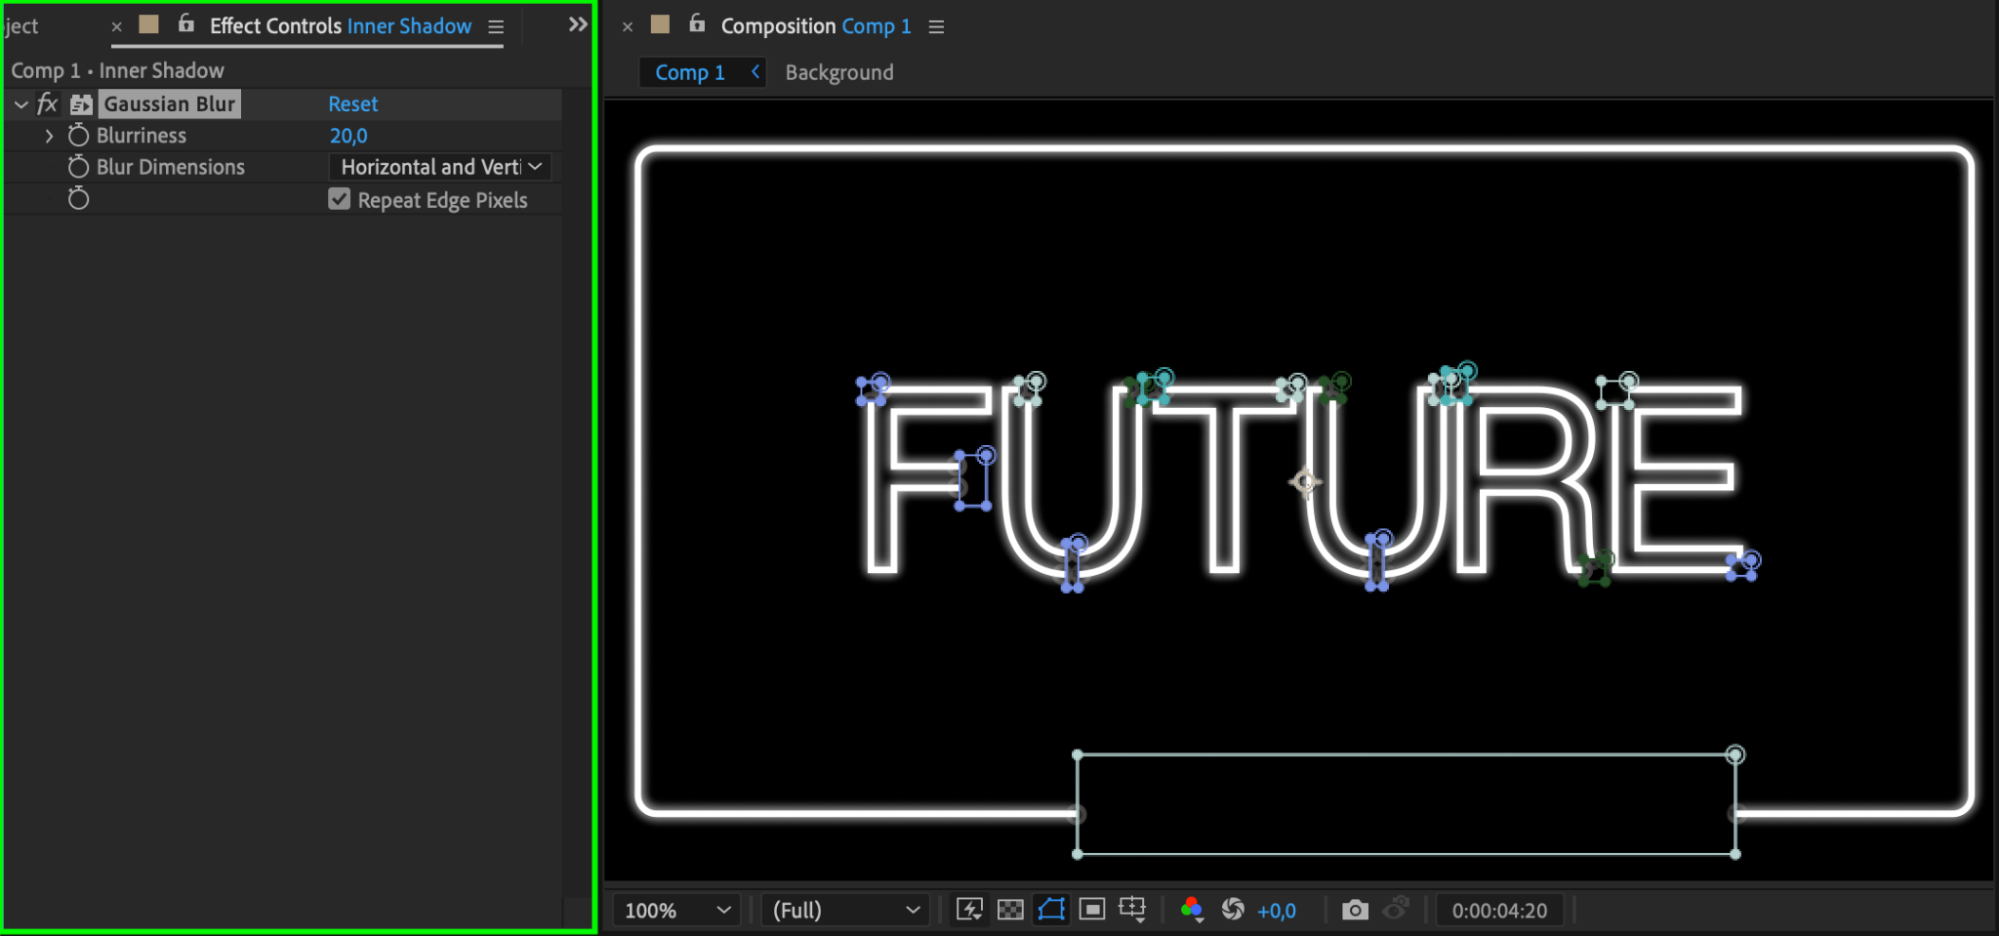 Step 11: Create an Outer Glow
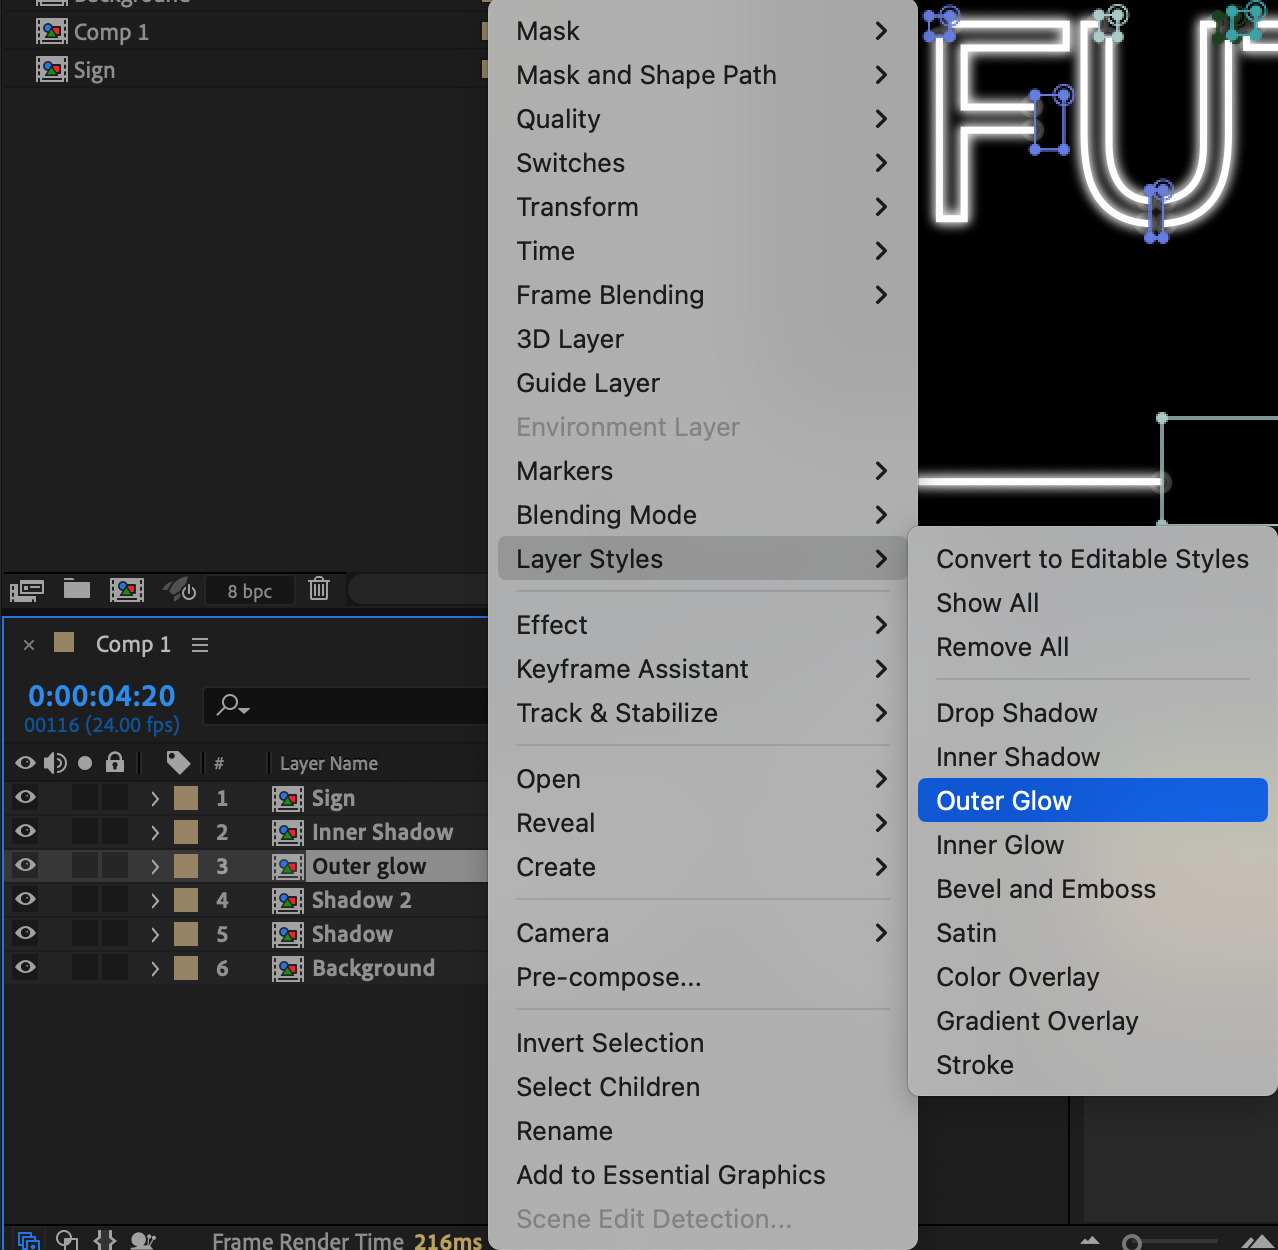
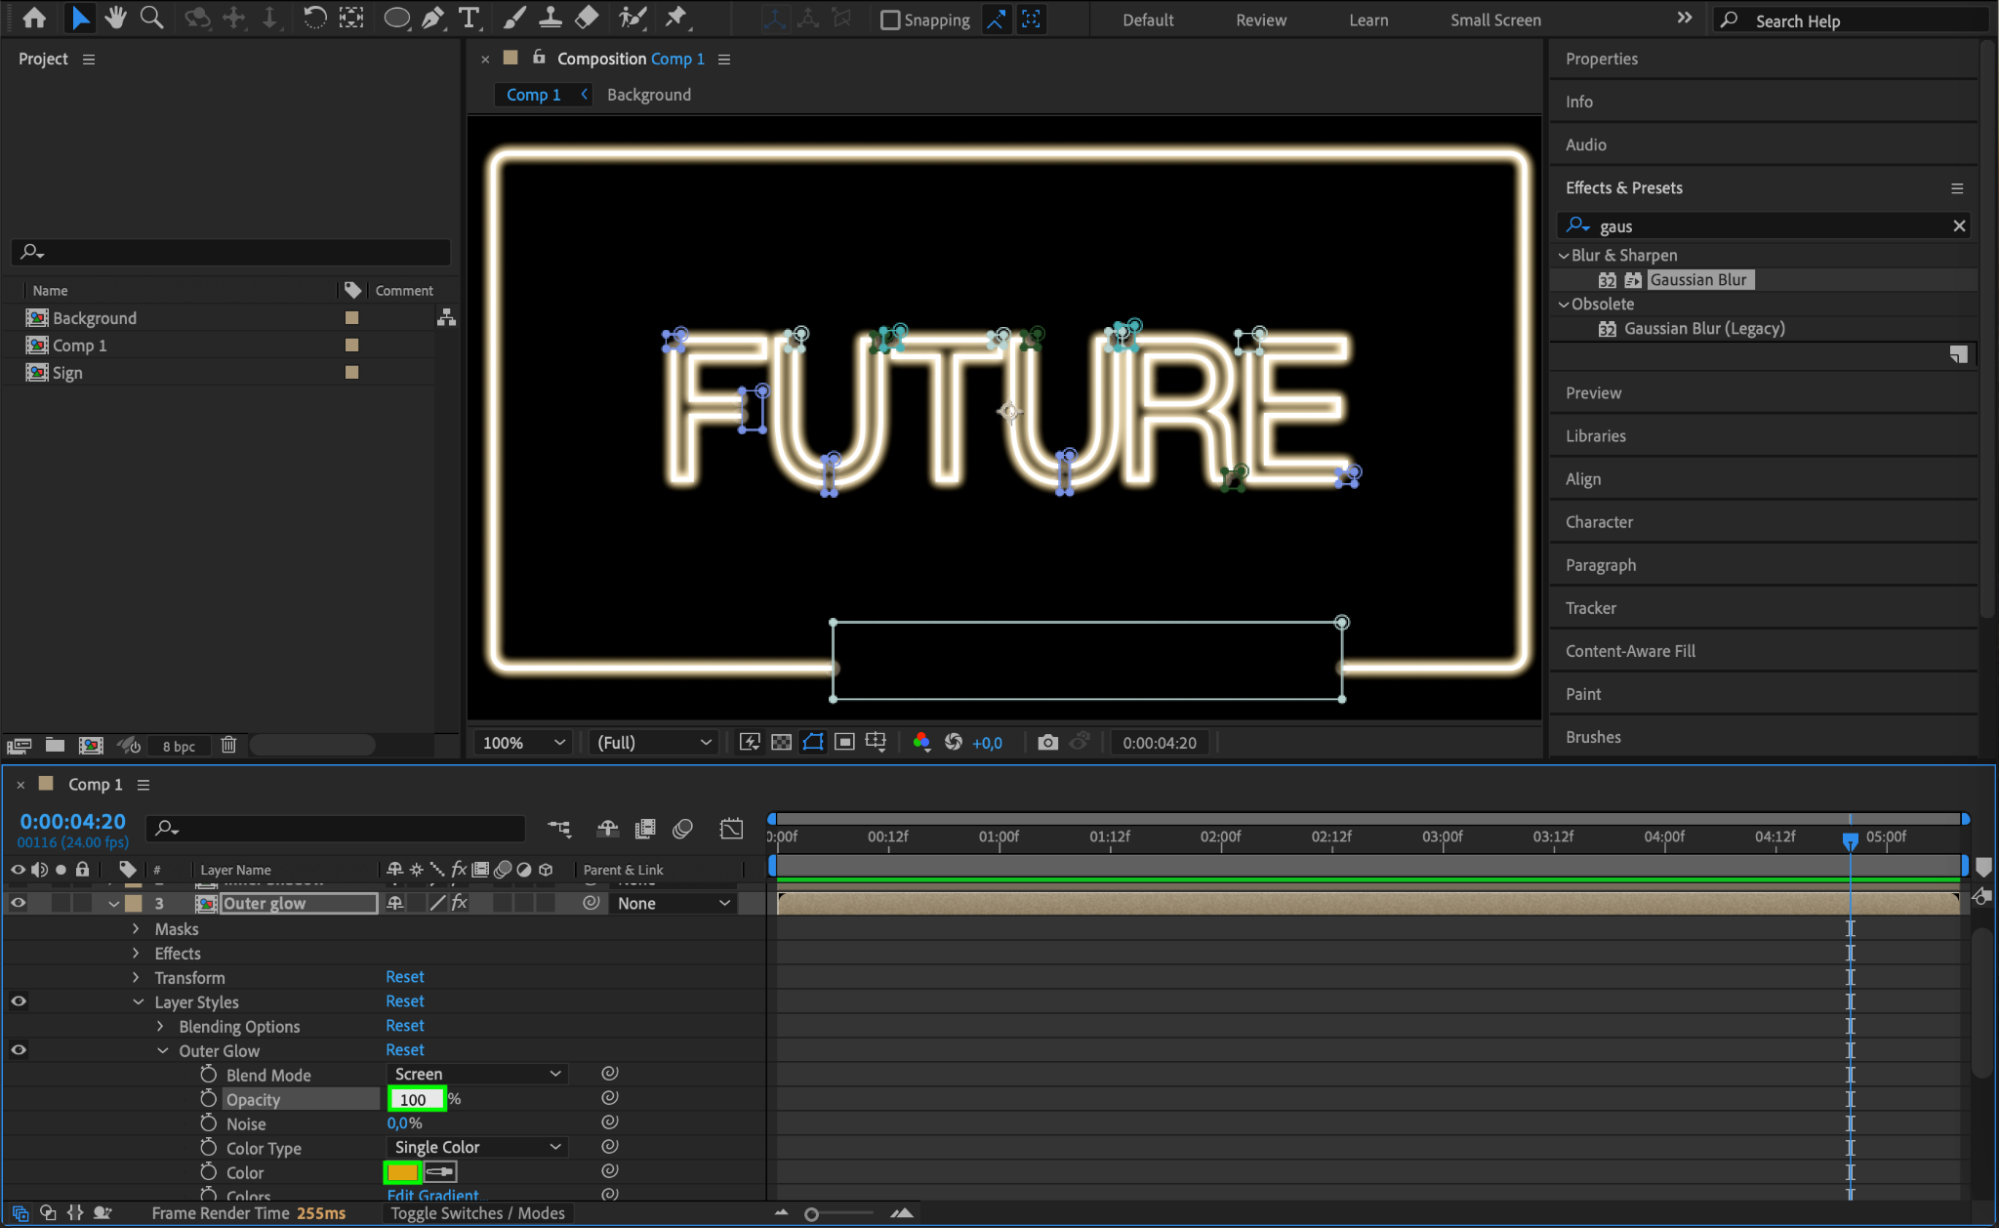
Duplicate the “Inner Shadow” layer and rename it “Outer Glow.” Go to Layer Styles > Outer Glow and set Opacity to 100. Choose a glow color that suits your neon theme. This layer will create the vibrant glow typical of neon signs.
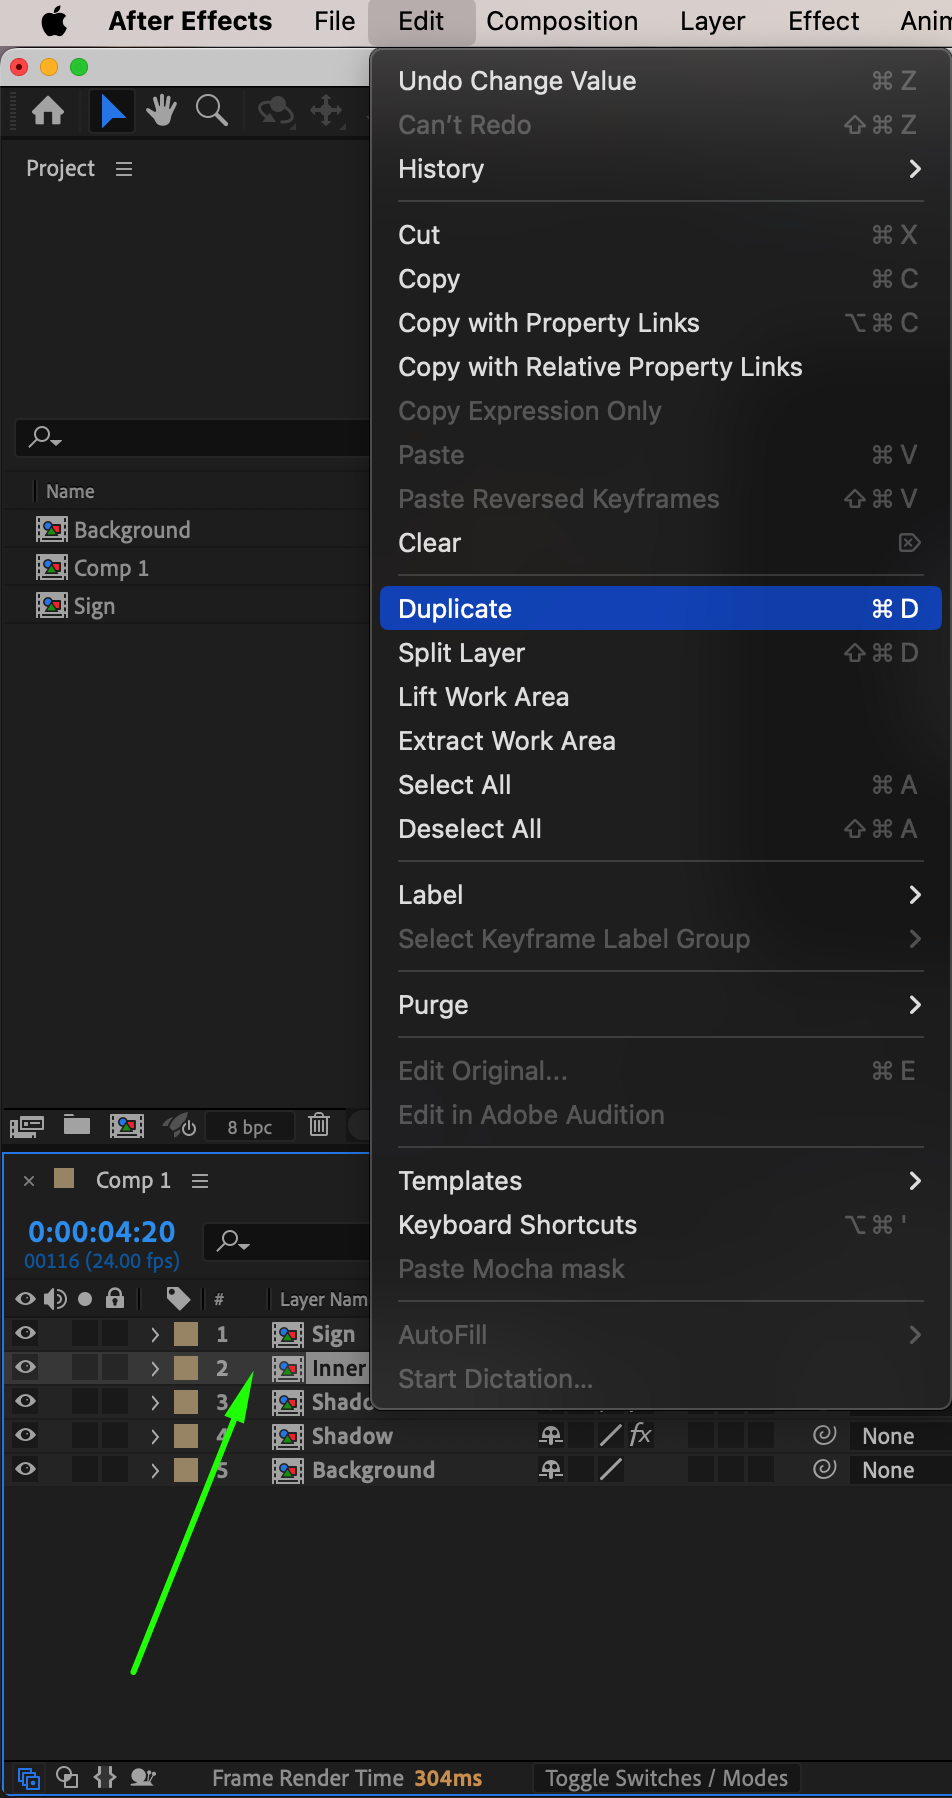
 Step 12: Add a Fast Blur for Radial Effect
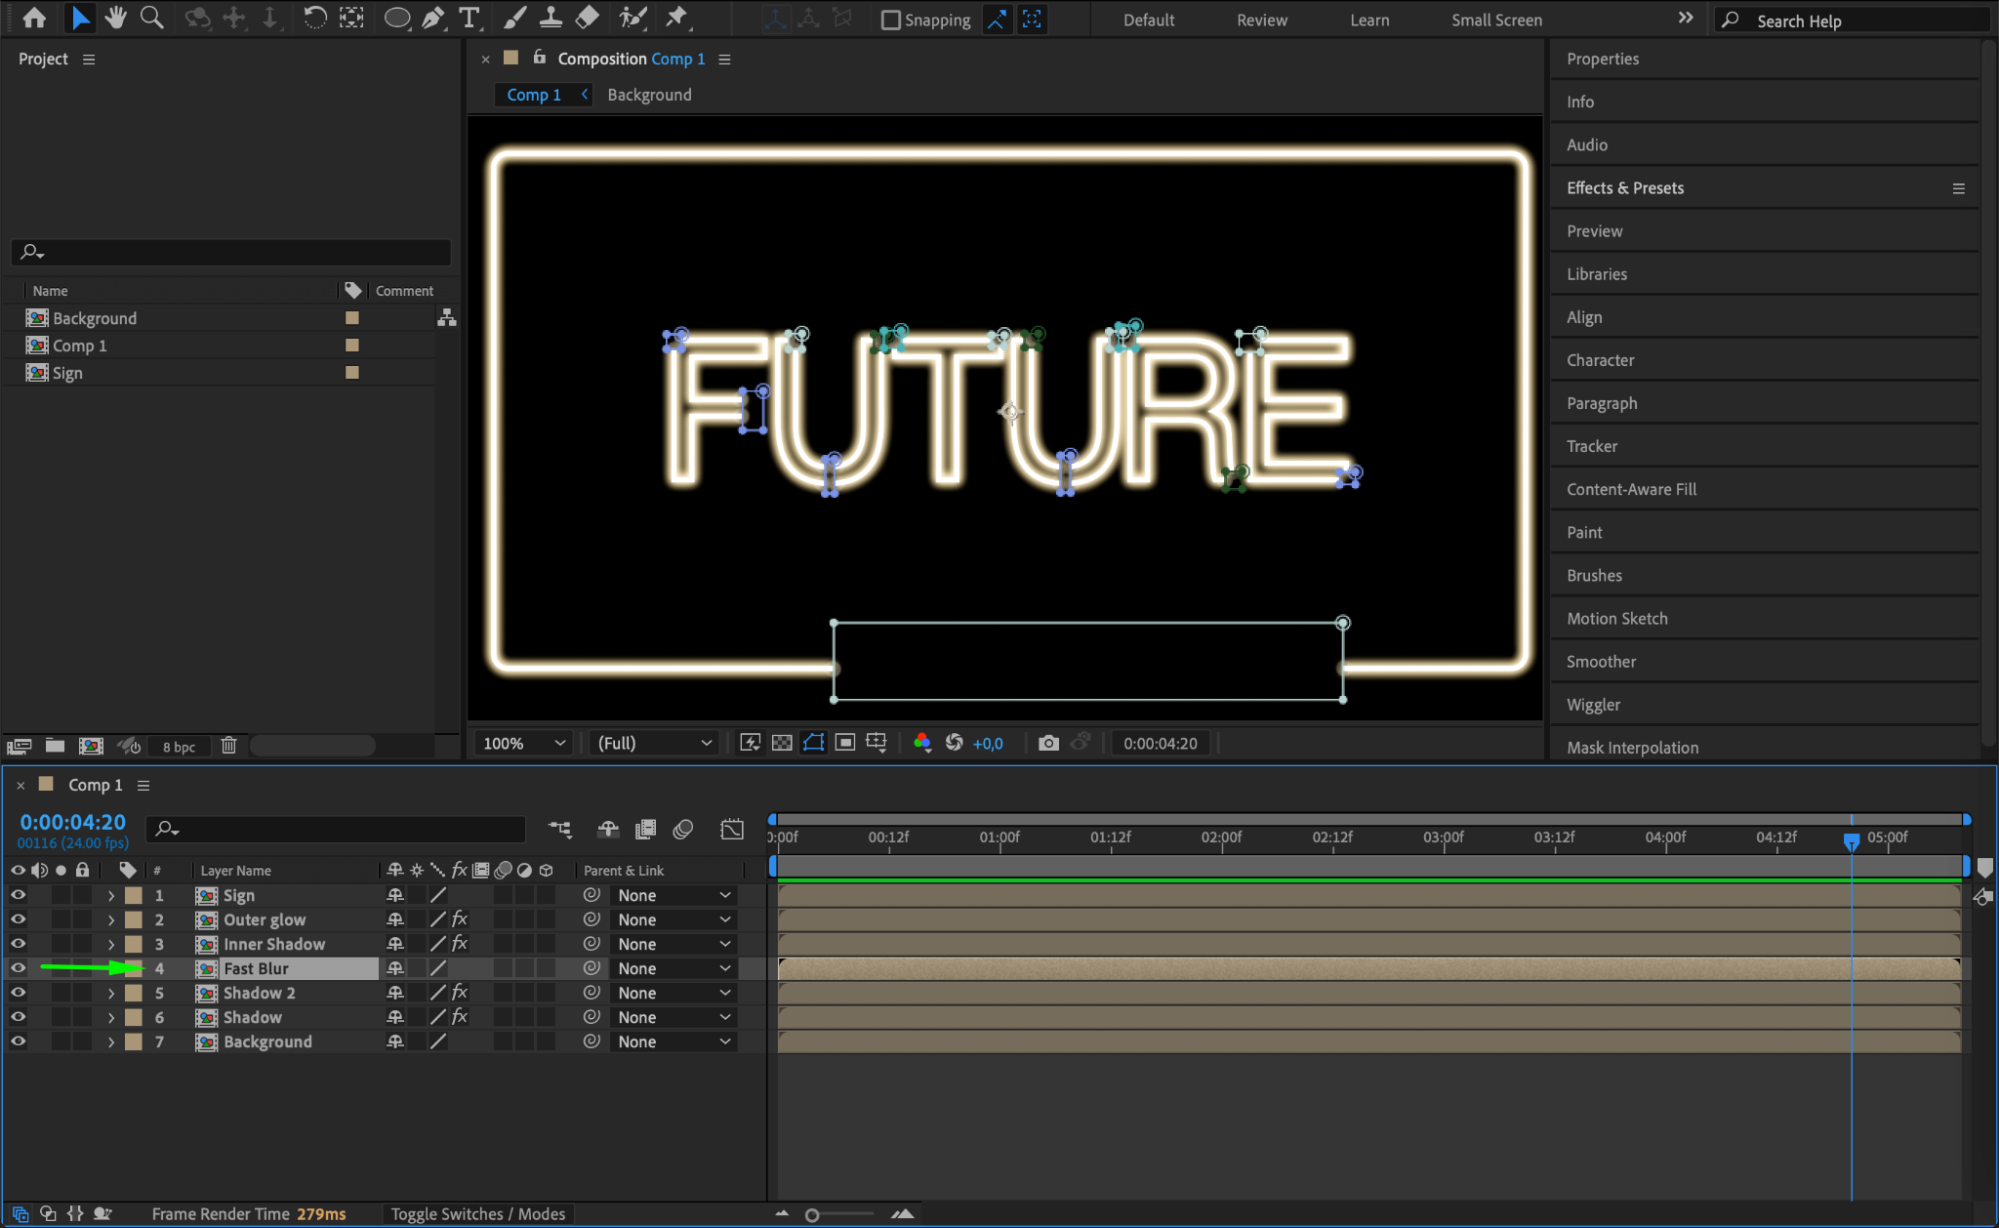
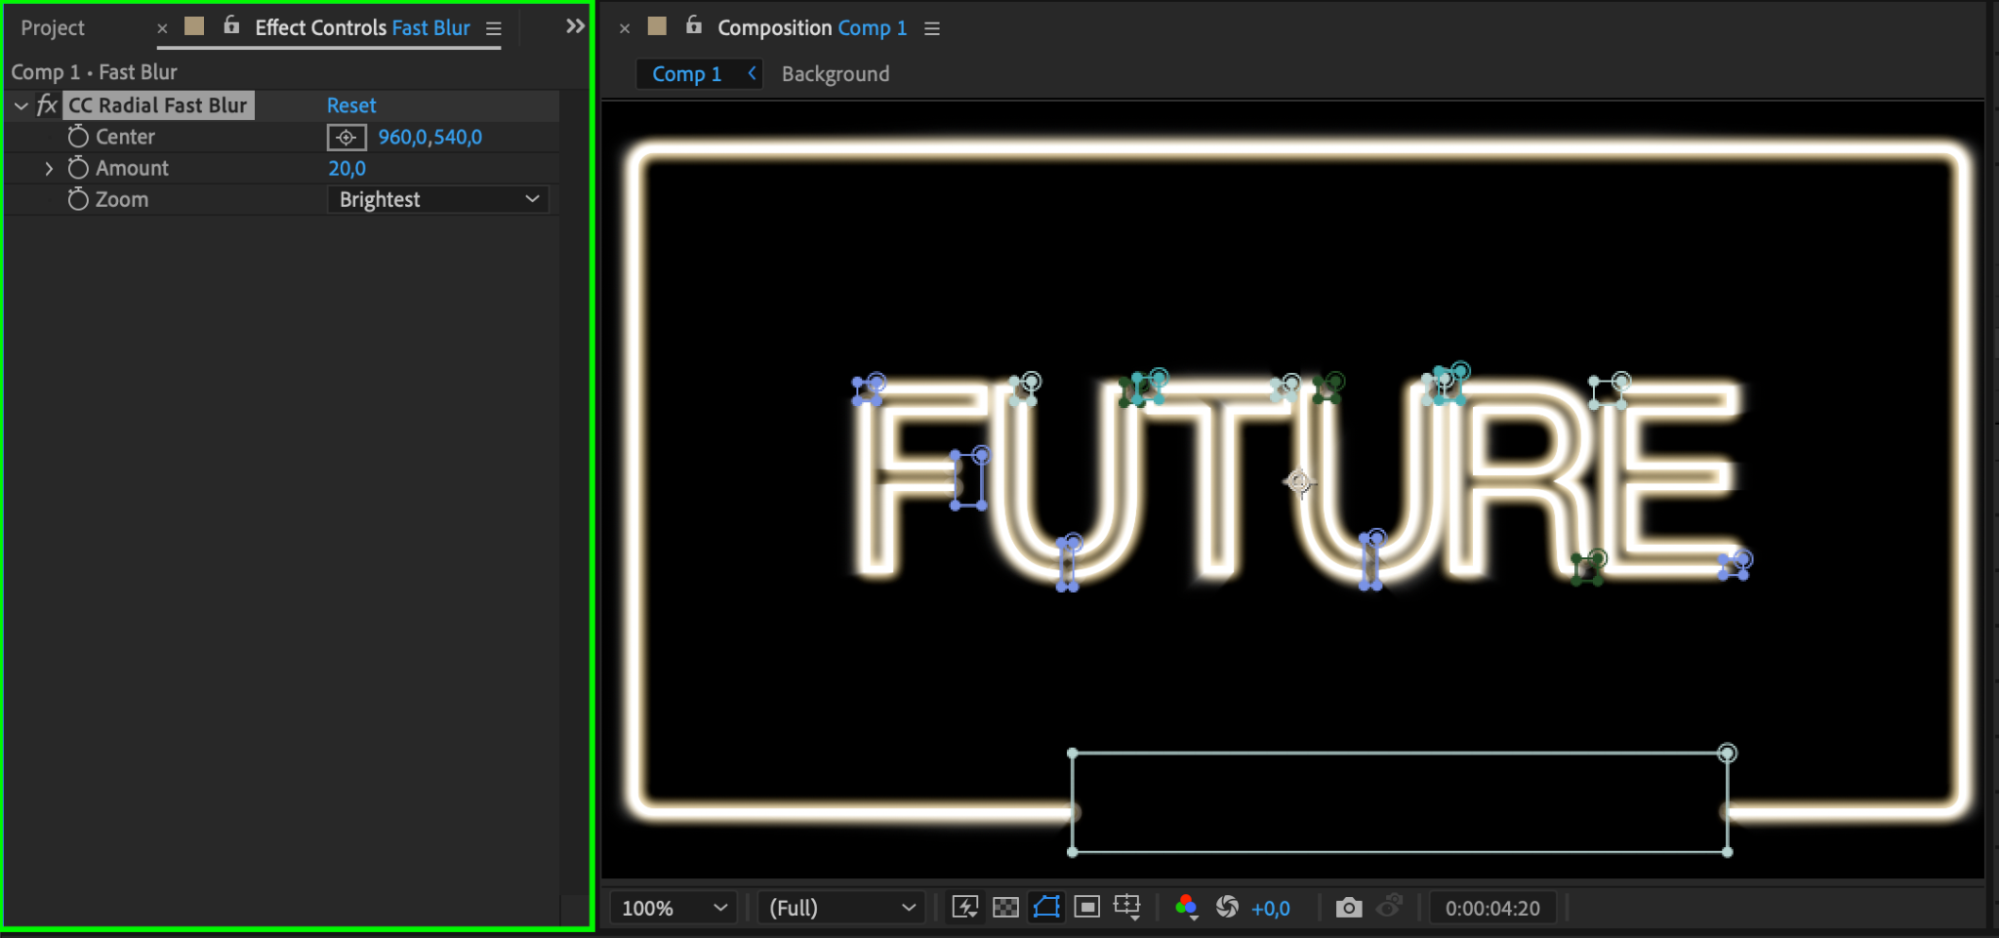
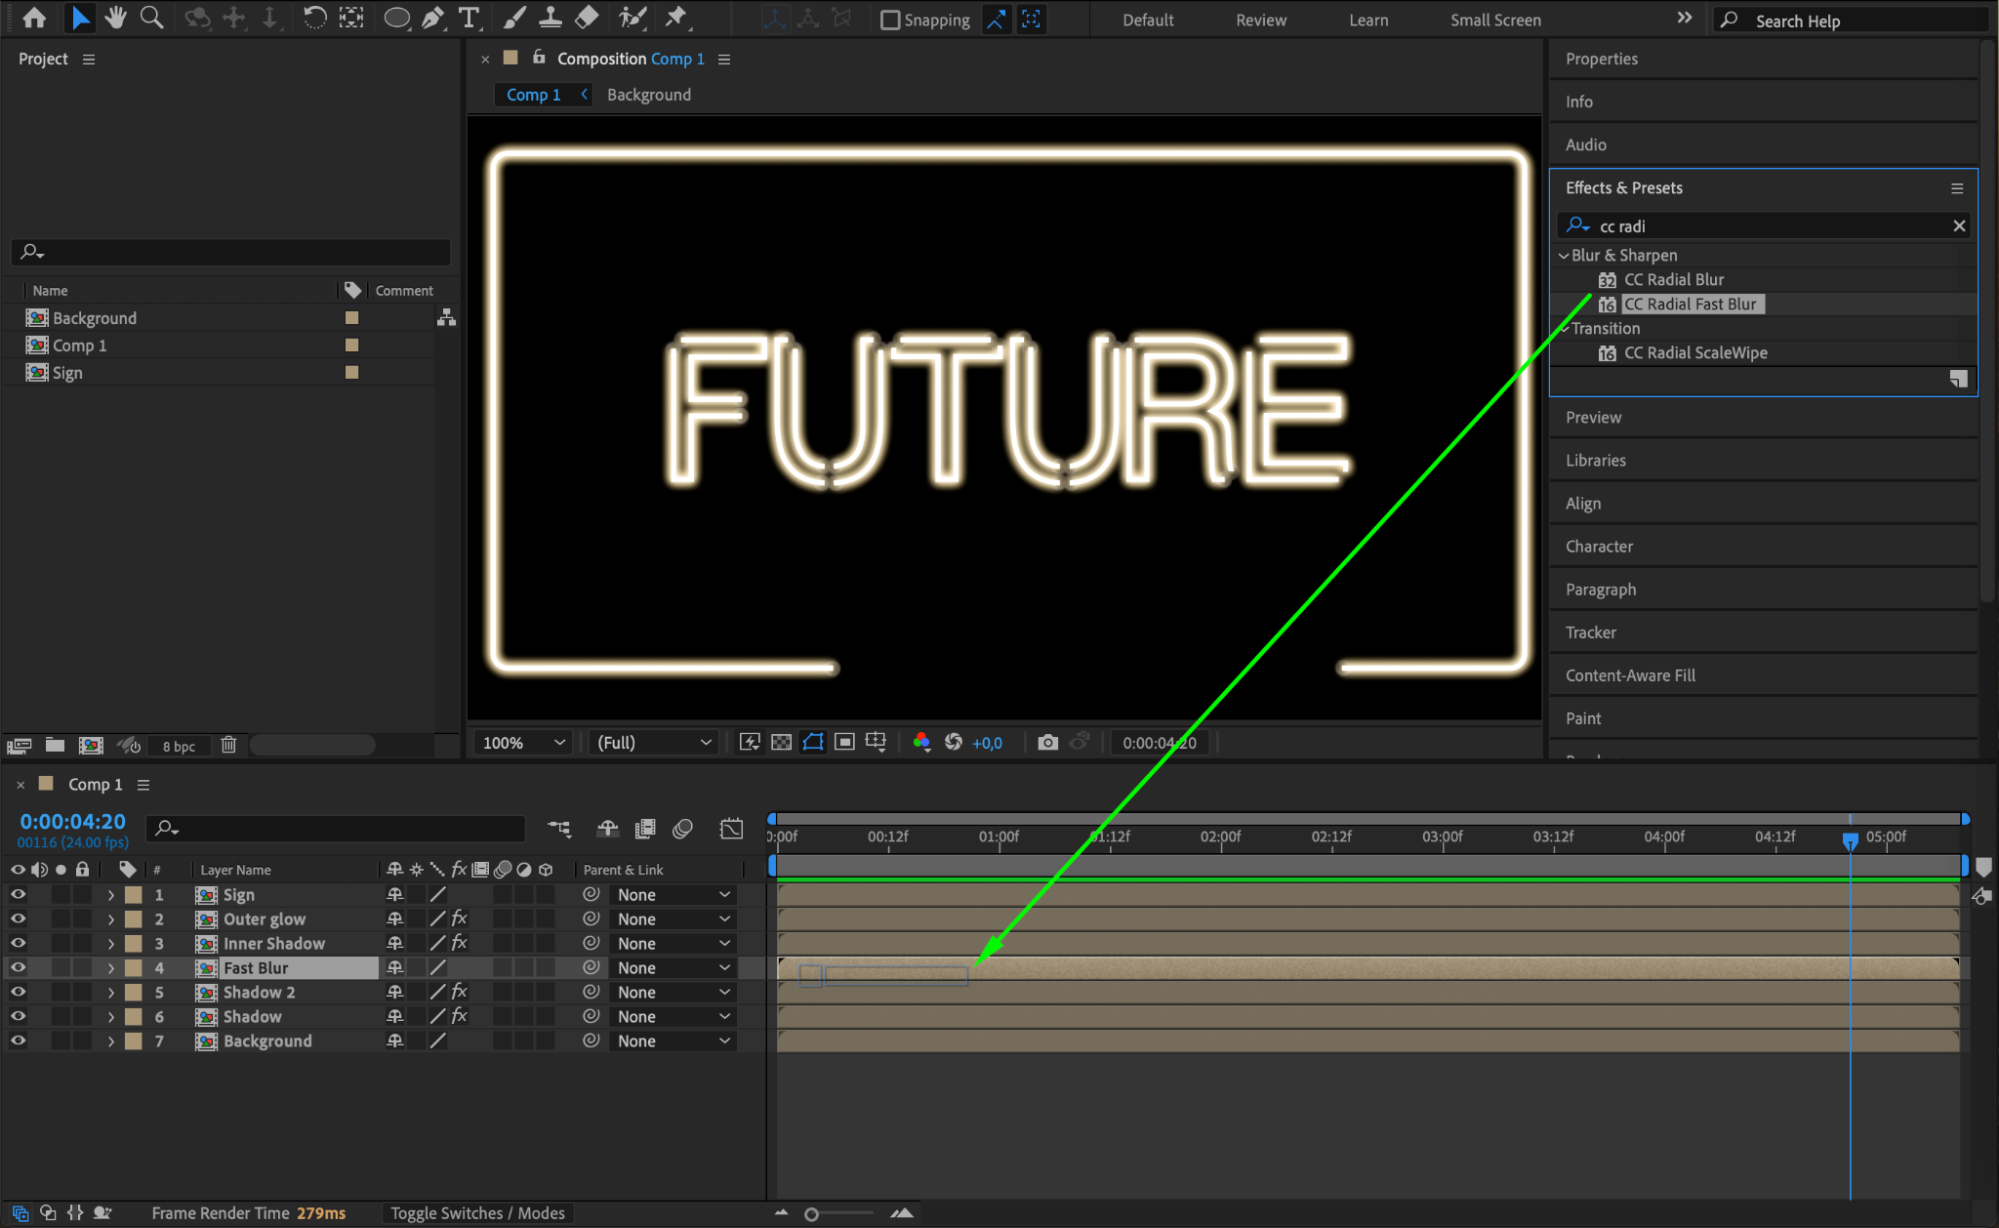
Duplicate the “Sign” composition again and name it “Fast Blur.” Place this layer beneath “Inner Shadow.” Apply the CC Radial Fast Blur effect, setting Amount to 20 and Zoom to Brightest. This gives a diffused light effect from the sign.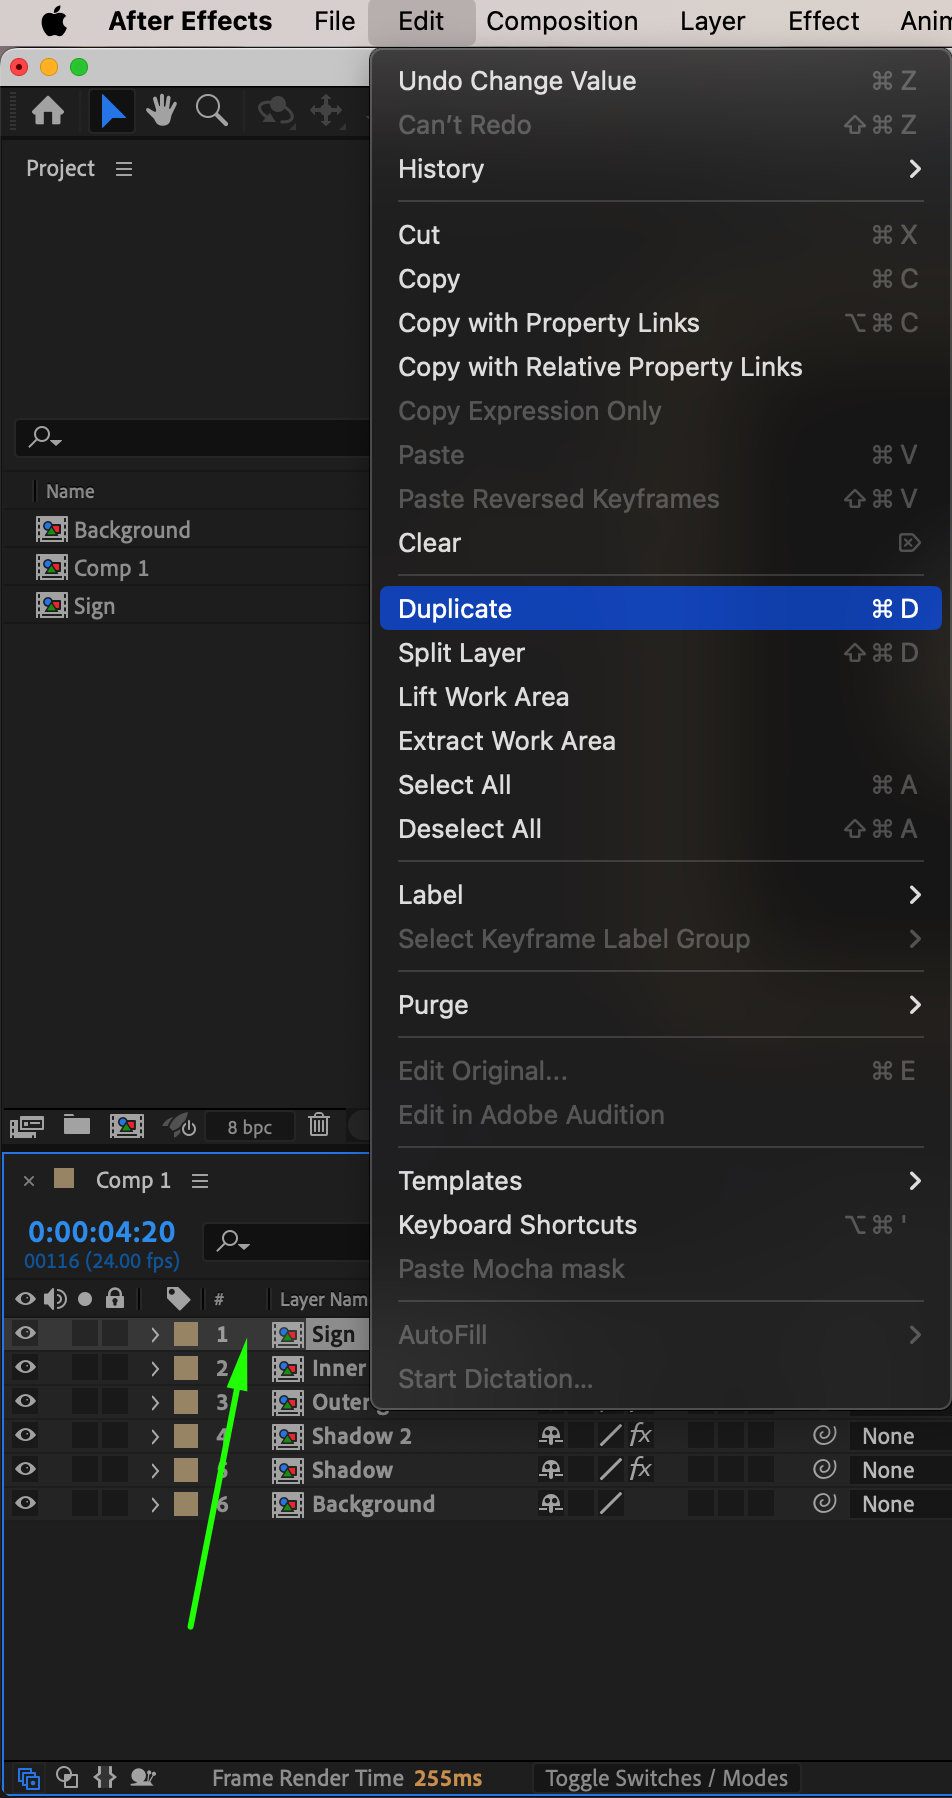
 Step 13: Apply an Adjustment Layer with Glow
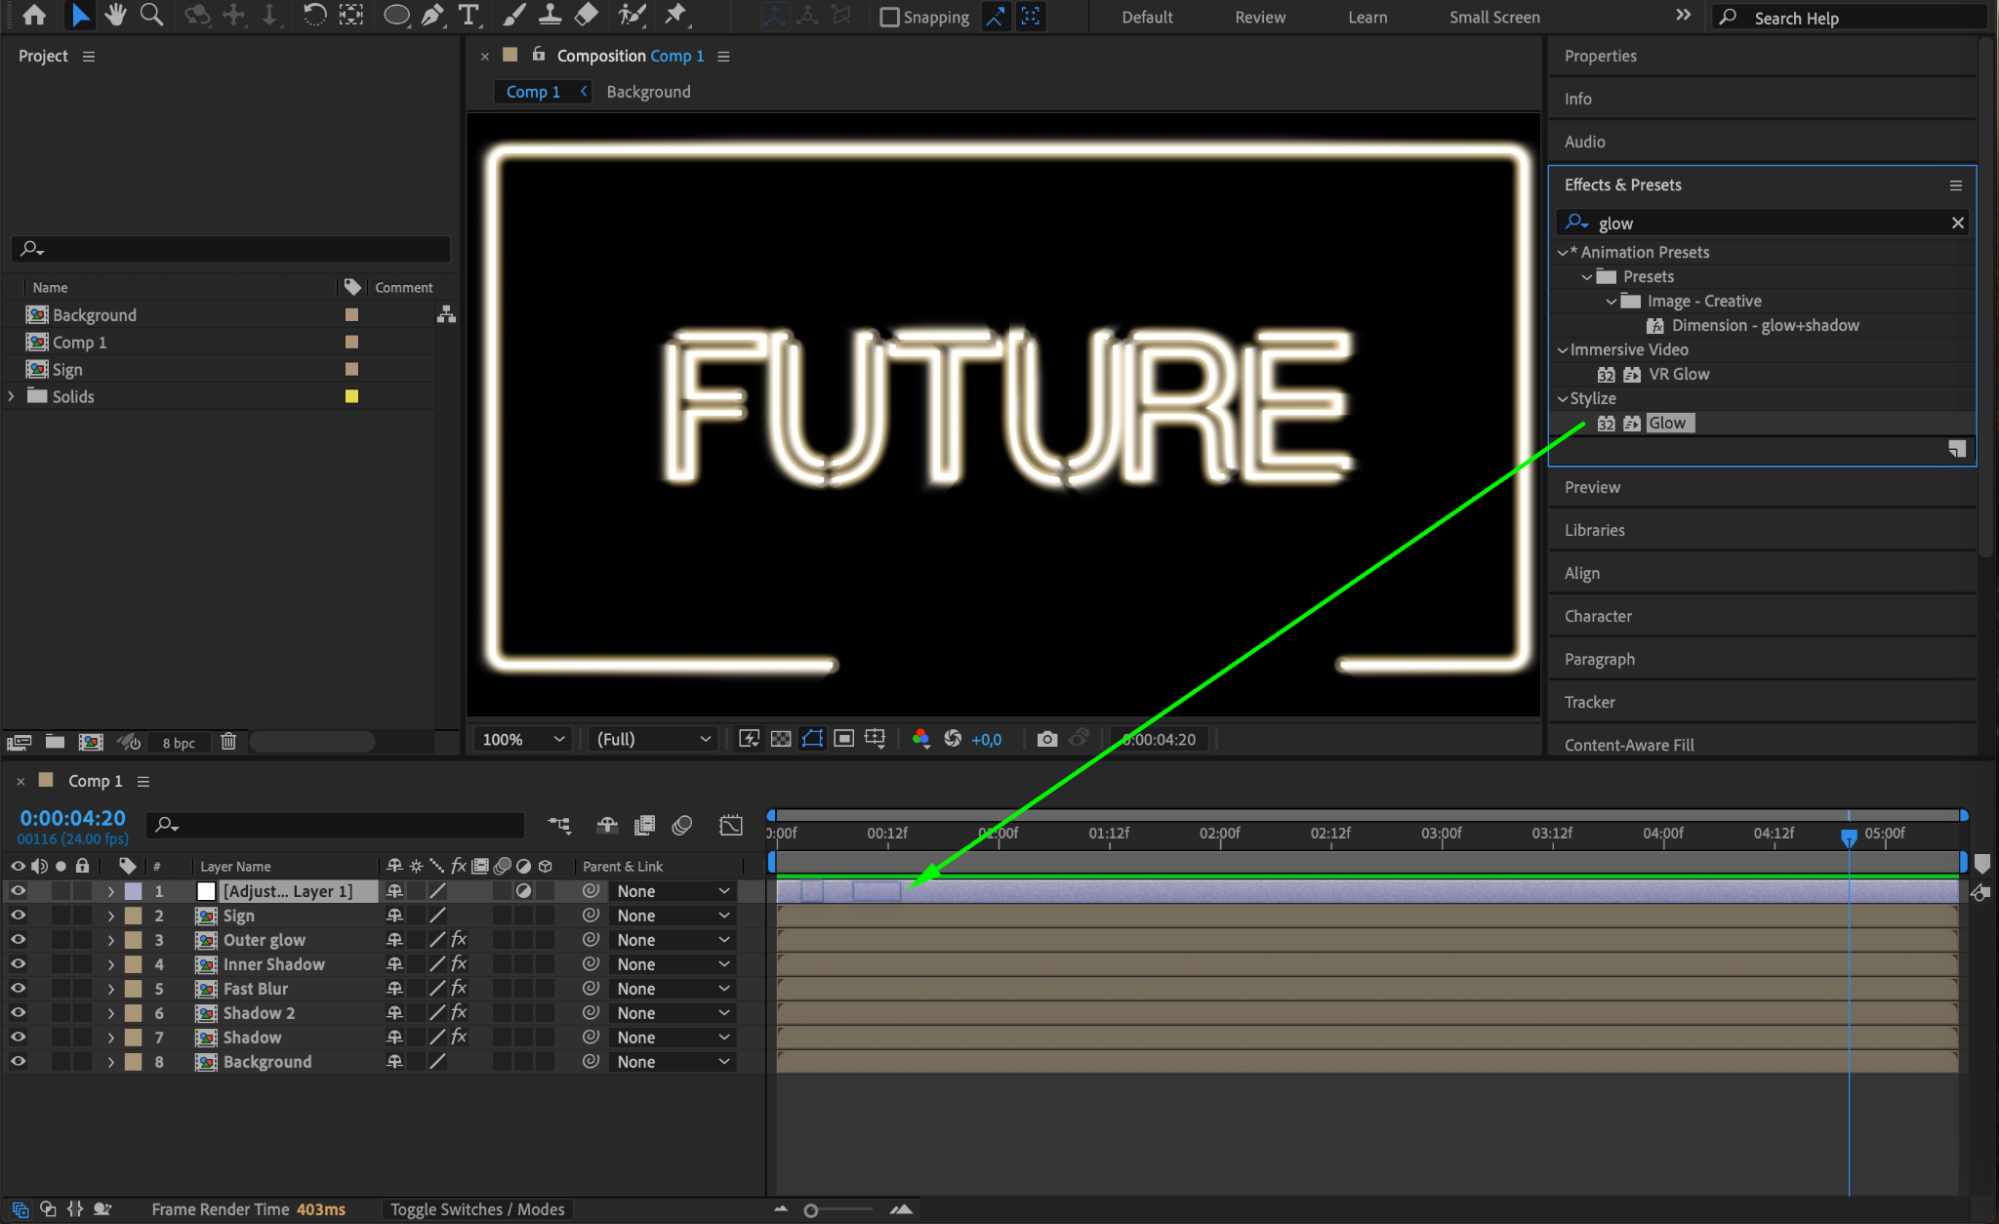
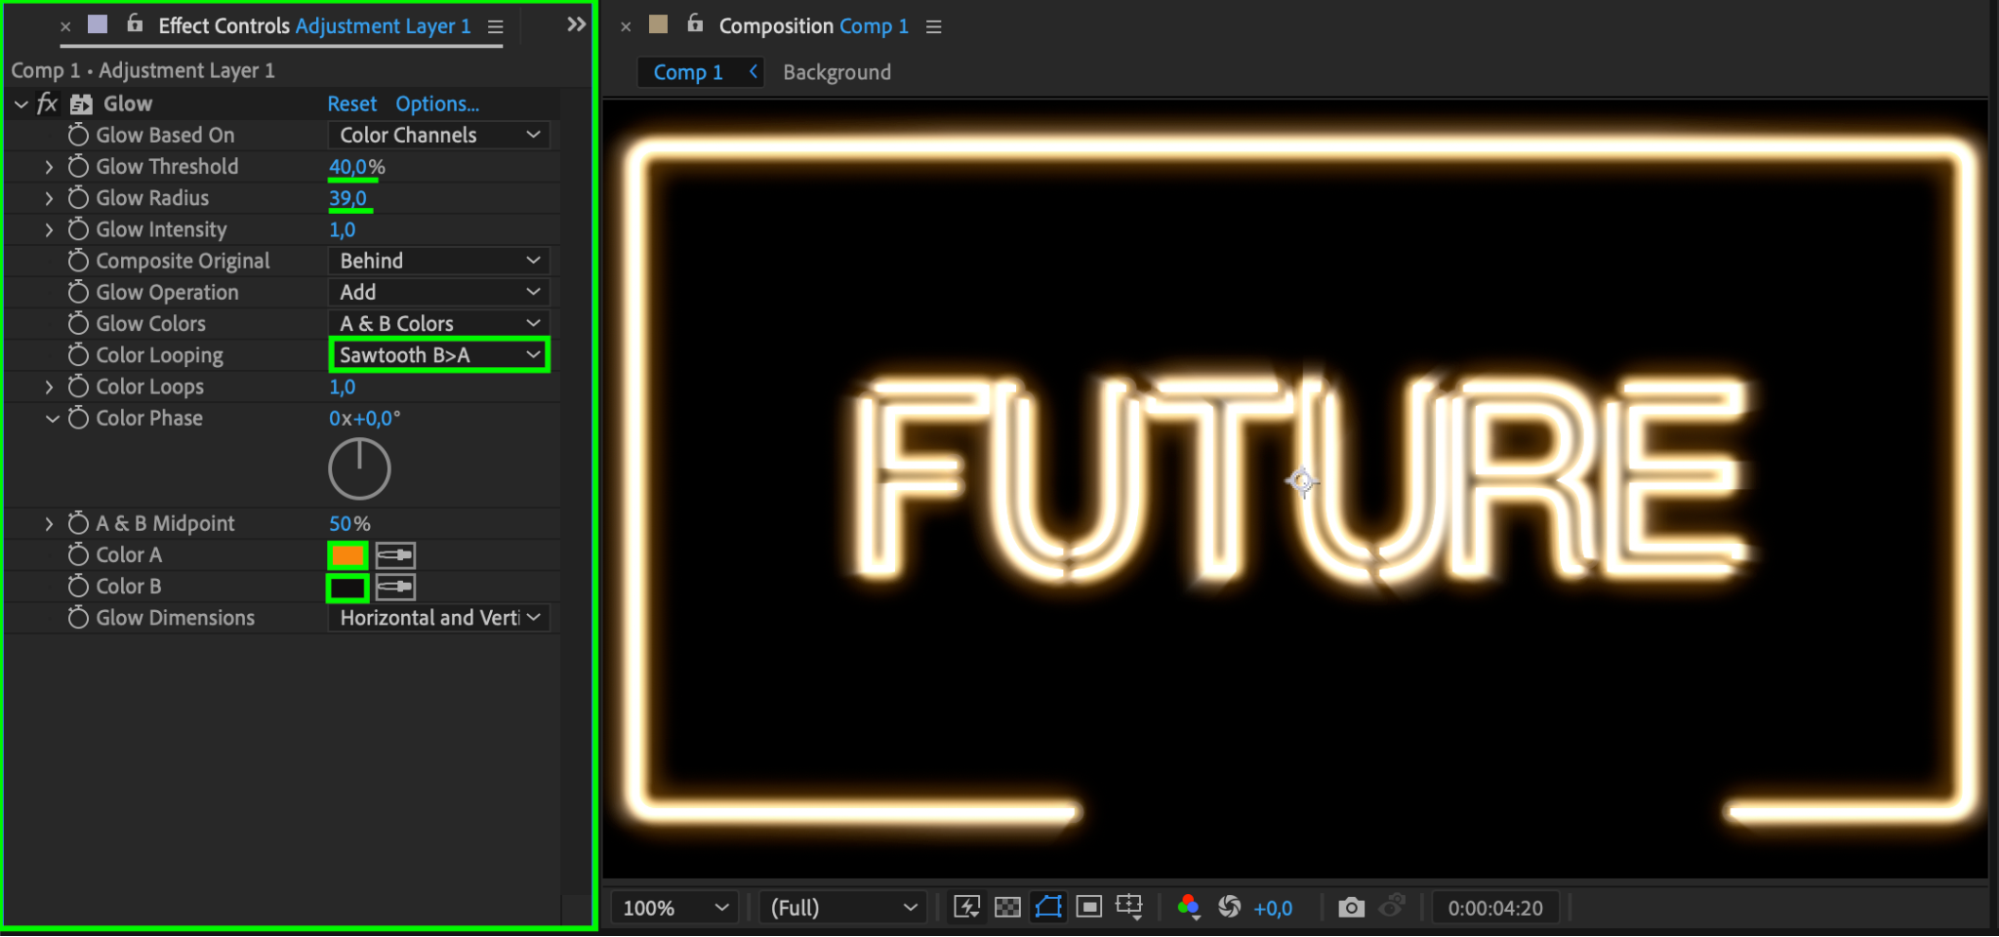
Create a new Adjustment Layer (Layer > New > Adjustment Layer) and add the Glow effect. In Effect Controls, set Glow Threshold to 40, Glow Radius to 39, and Color Looping to Sawtooth B > A. Set Color A and Color B to your desired neon colors.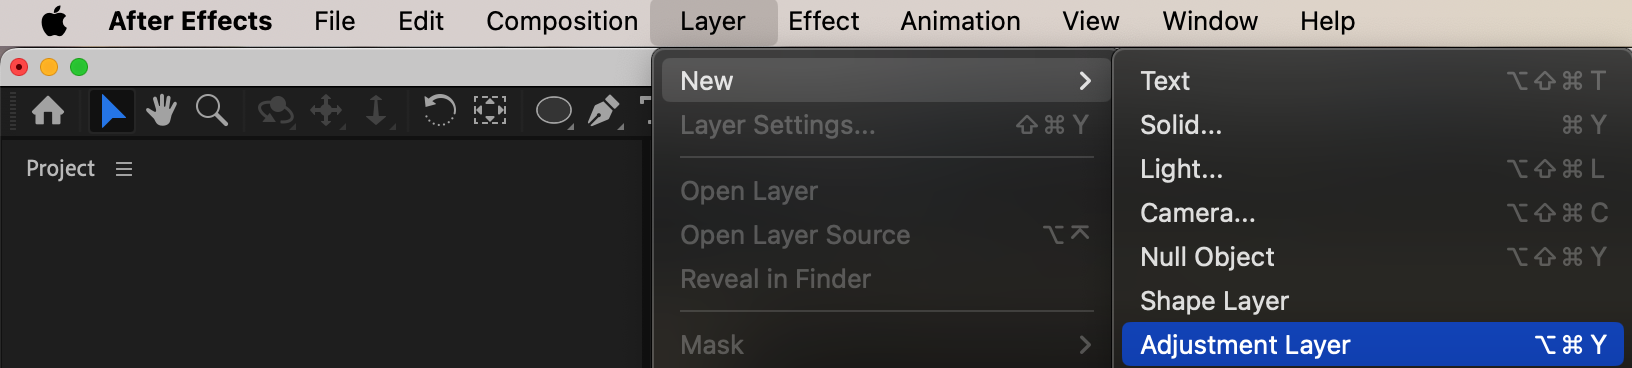
 Step 14: Enhance the Glow Effect
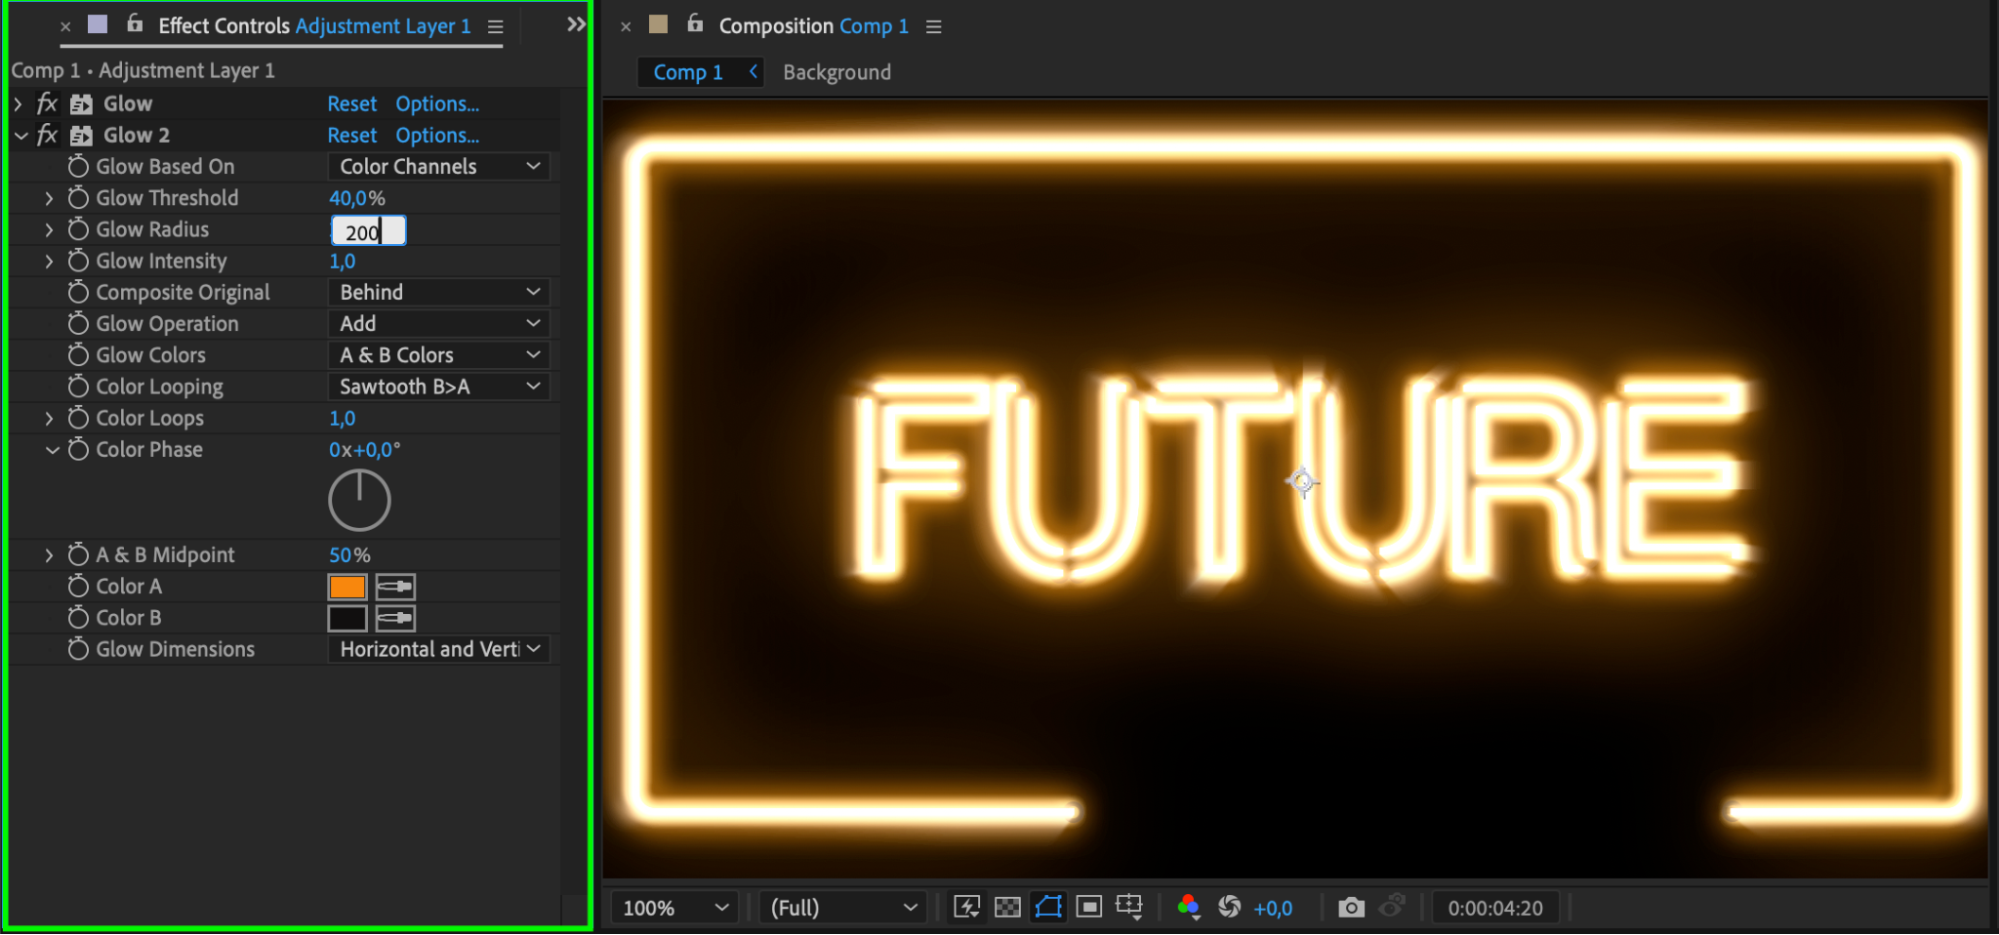
Duplicate the Glow effect on the adjustment layer and increase the Glow Radius to 200. This will make the glow effect stronger, creating the characteristic brightness of neon signs.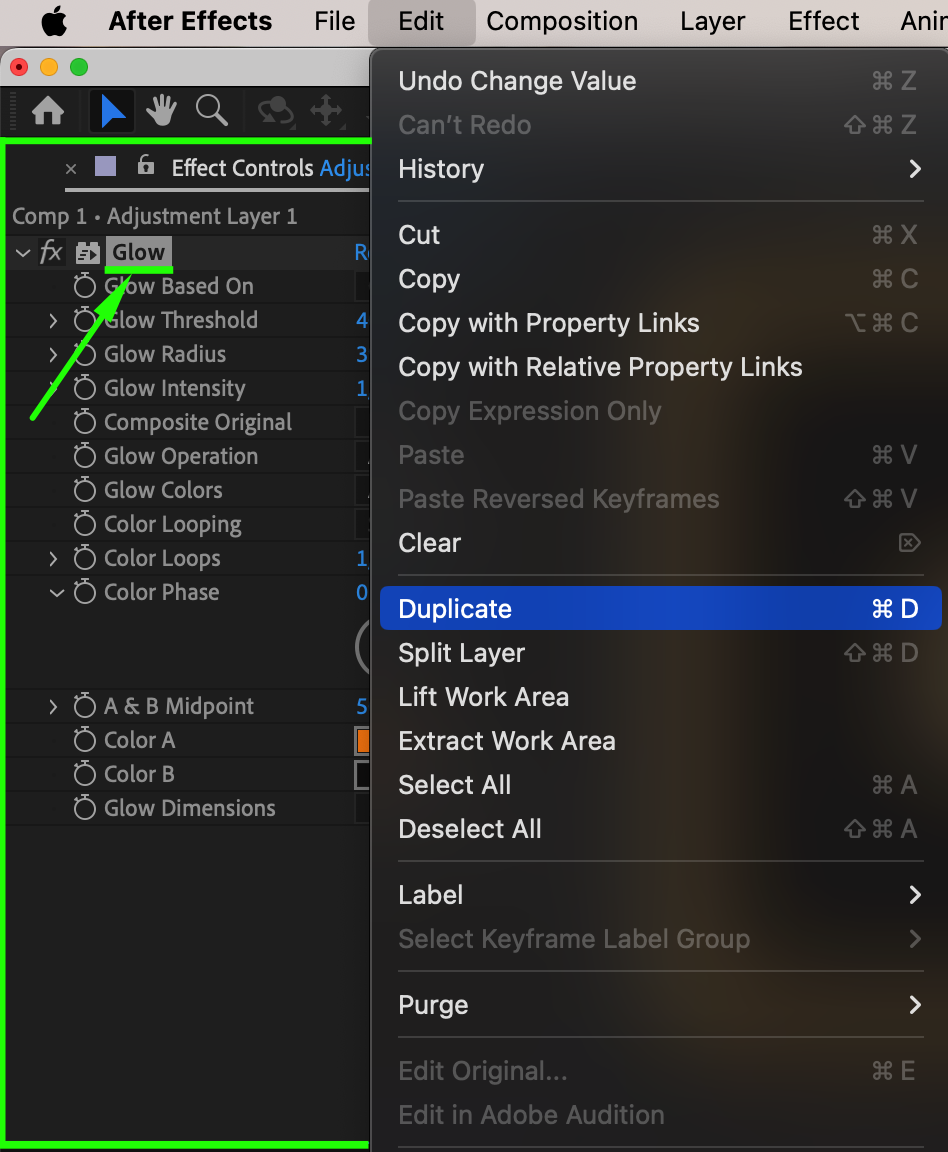
 Step 15: Preview the Animation
Press the Spacebar to preview your composition. Adjust the effect settings as needed to achieve the ideal neon look for your sign.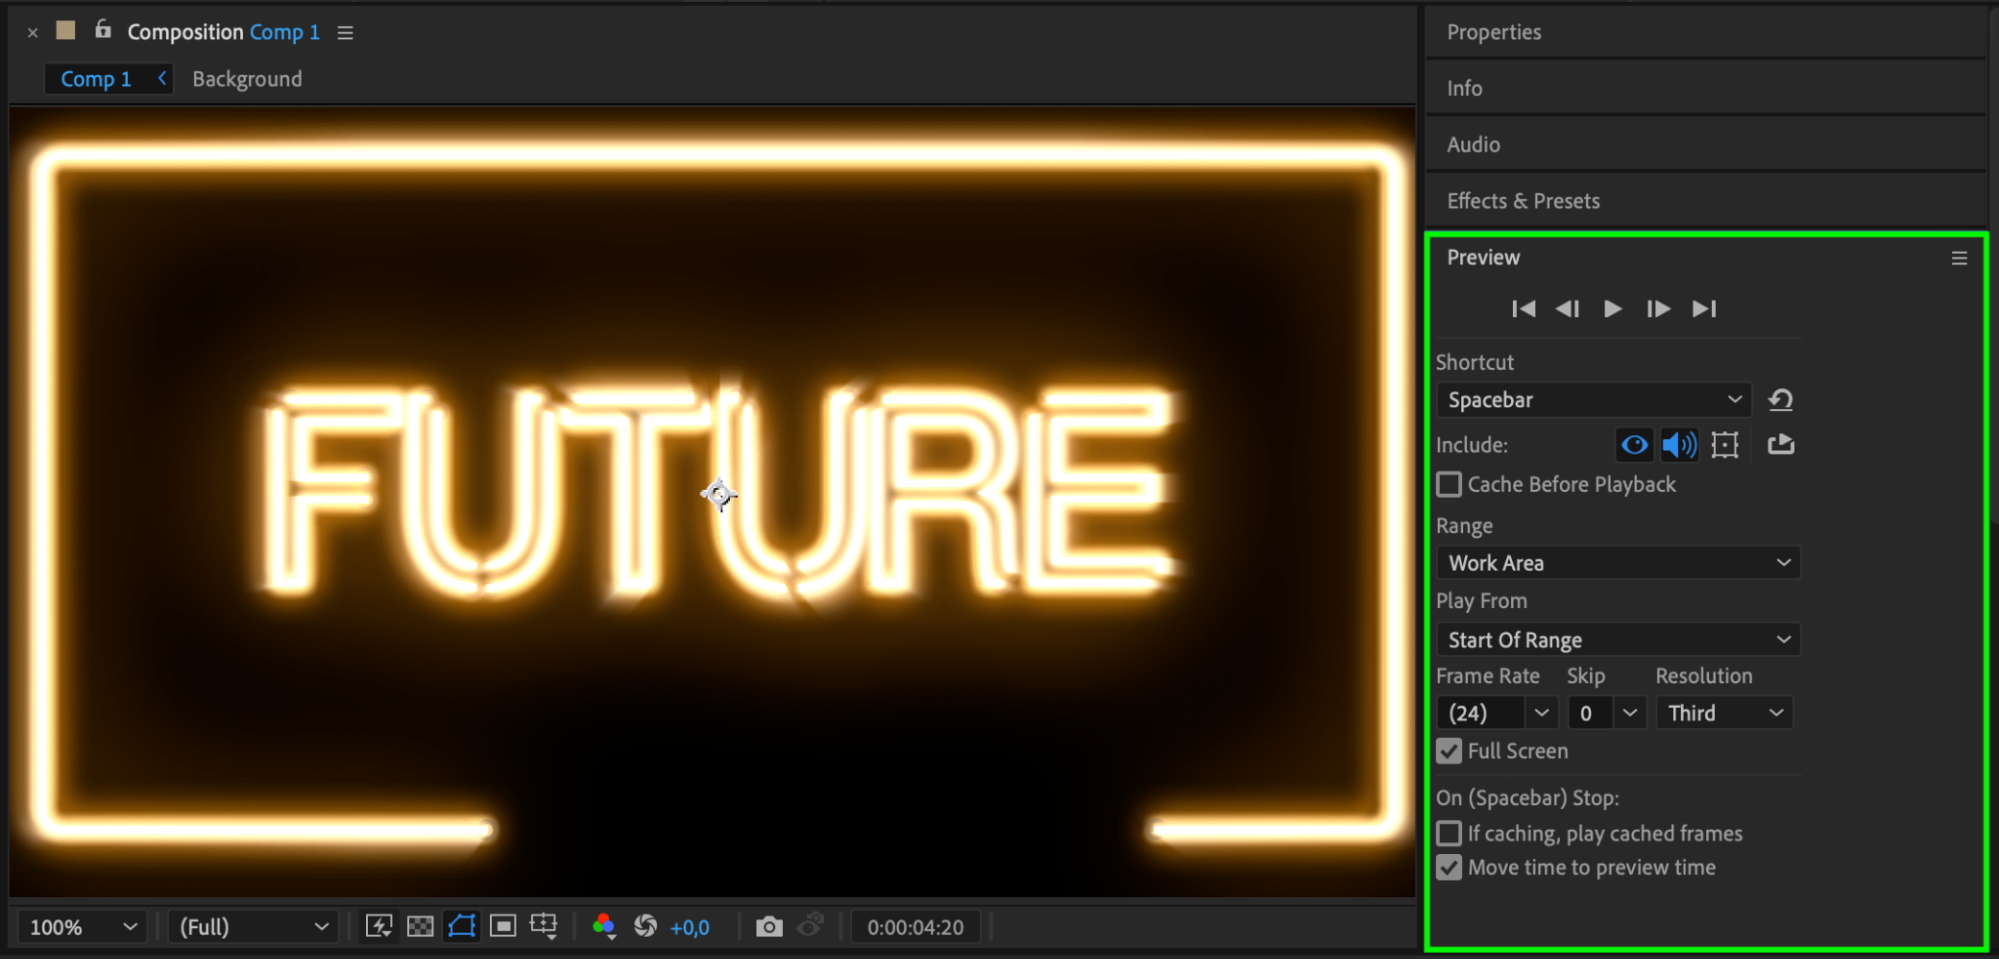 Step 16: Export the Composition
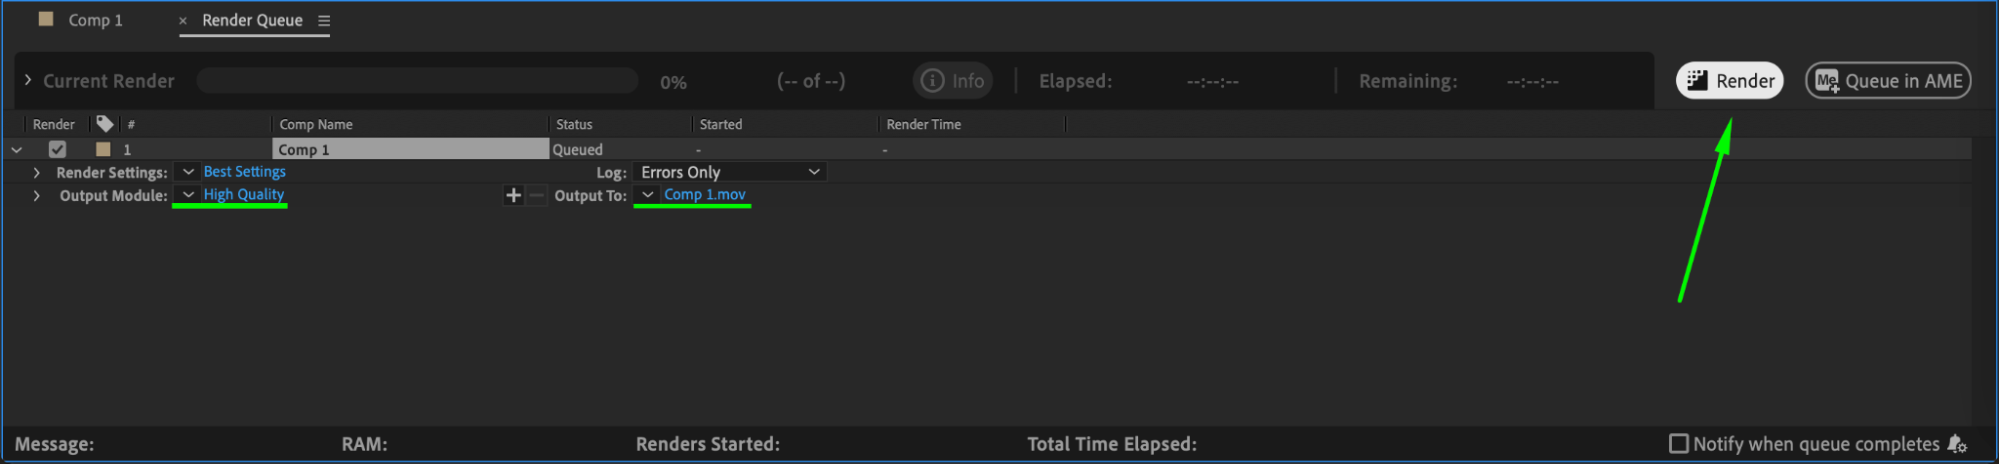
Once satisfied, export the animation by going to Composition > Add to Render Queue. Select your preferred export settings and format, then click Render to save your final neon sign effect.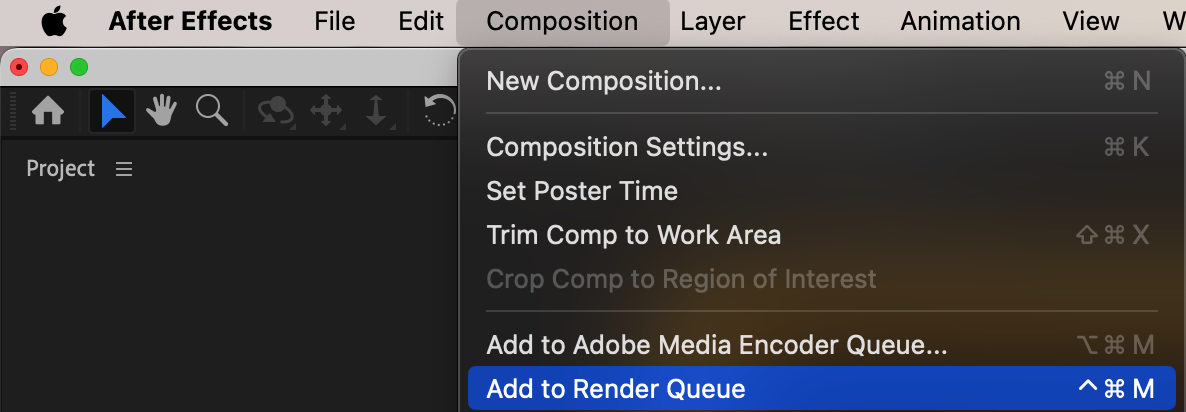
 Conclusion
Creating a neon sign effect in After Effects involves layering glow effects, shadows, and using adjustment layers to produce a realistic and eye-catching design. This effect can be customized to create various neon colors and lighting styles to fit your project.
Our Bestsellers
Our Bestsellers

