“Step-by-Step Guide to Making Glitter Effects in After Effects”
“Introduction – Adding Sparkling Magic to Your Projects”
Glitter effects can add a dynamic, shimmering touch to your animations or motion graphics. In After Effects, you can achieve a realistic glitter effect by combining noise, particles, and color enhancements. This guide walks you through the steps to create your own dazzling glitter effect.
Step 1: Create a New Composition
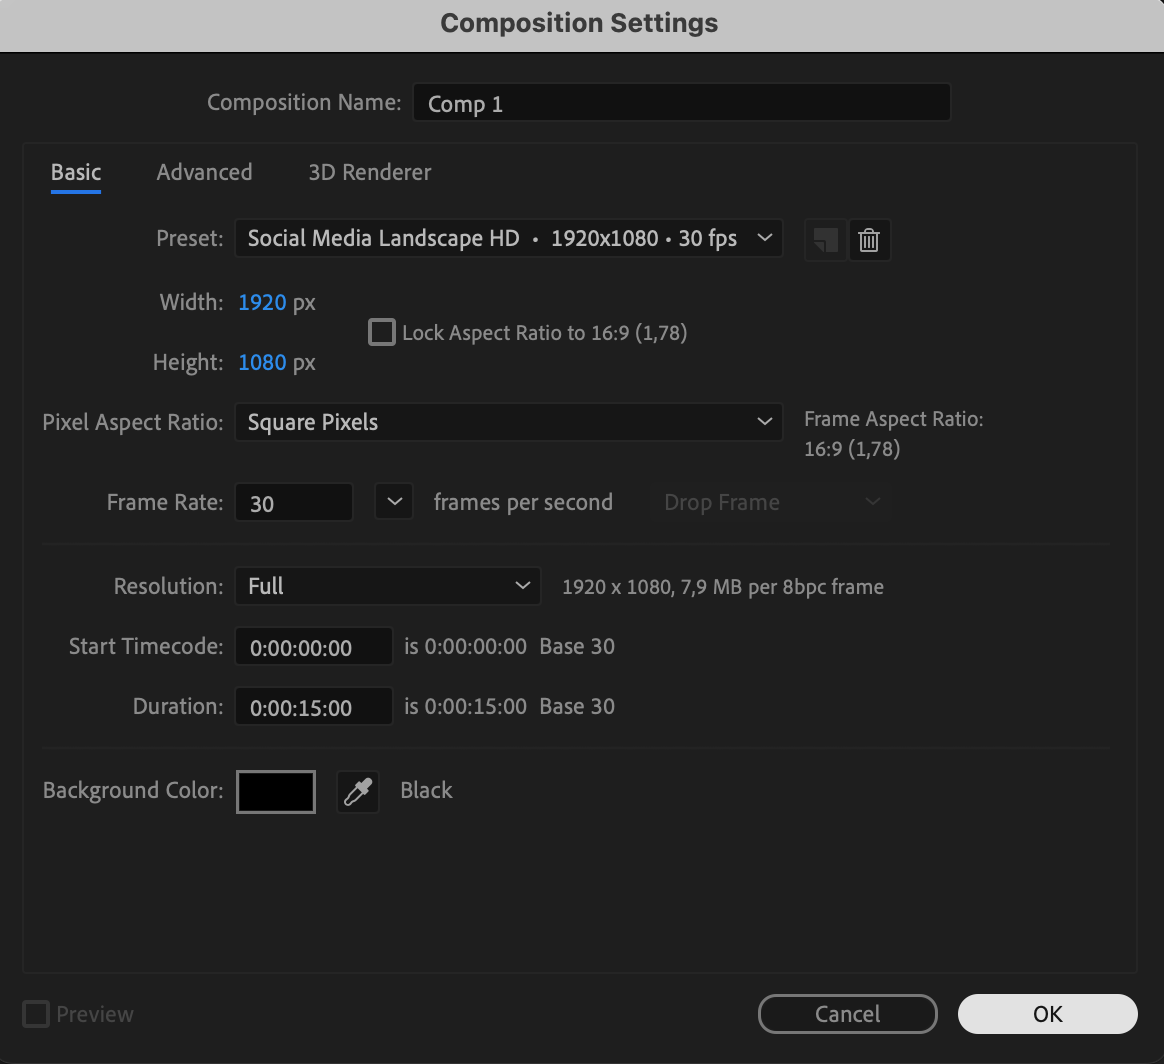
Start by creating a new composition. Go to Composition > New Composition, and set the desired resolution (e.g., 1920×1080), frame rate, and duration. This will serve as the canvas for your glitter effect.
Get 10% off when you subscribe to our newsletter


Step 2: Add a Black Solid Layer
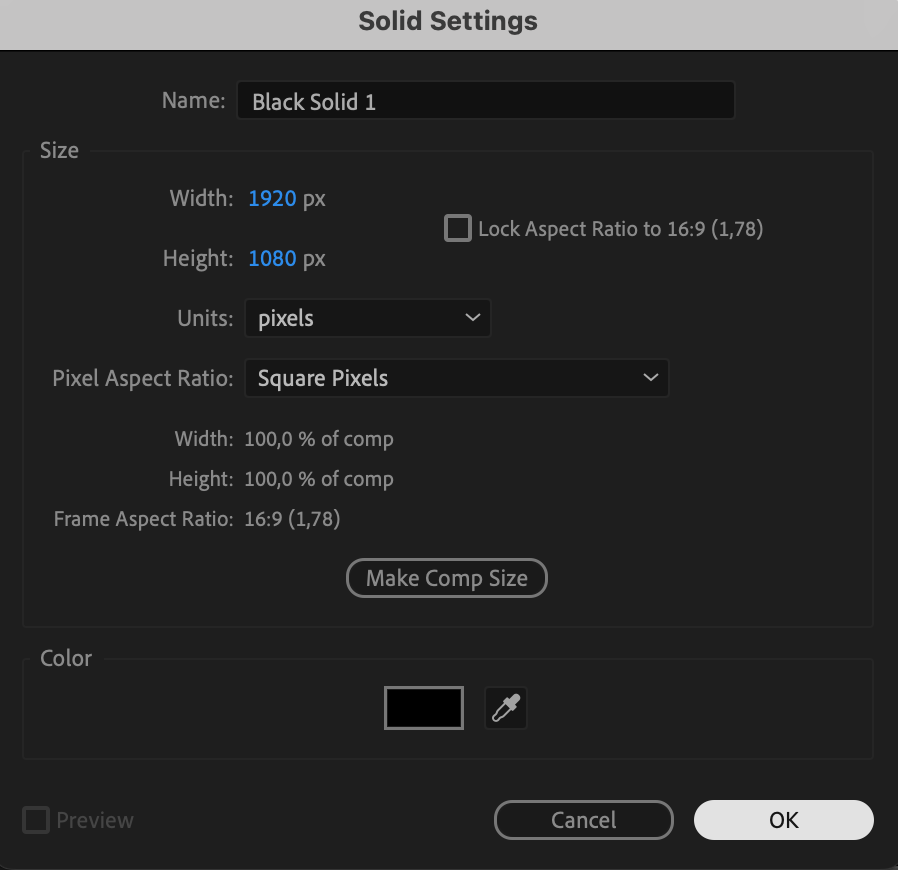
Go to Layer > New > Solid, and set the solid color to black. This layer will act as the base for your glitter effect.

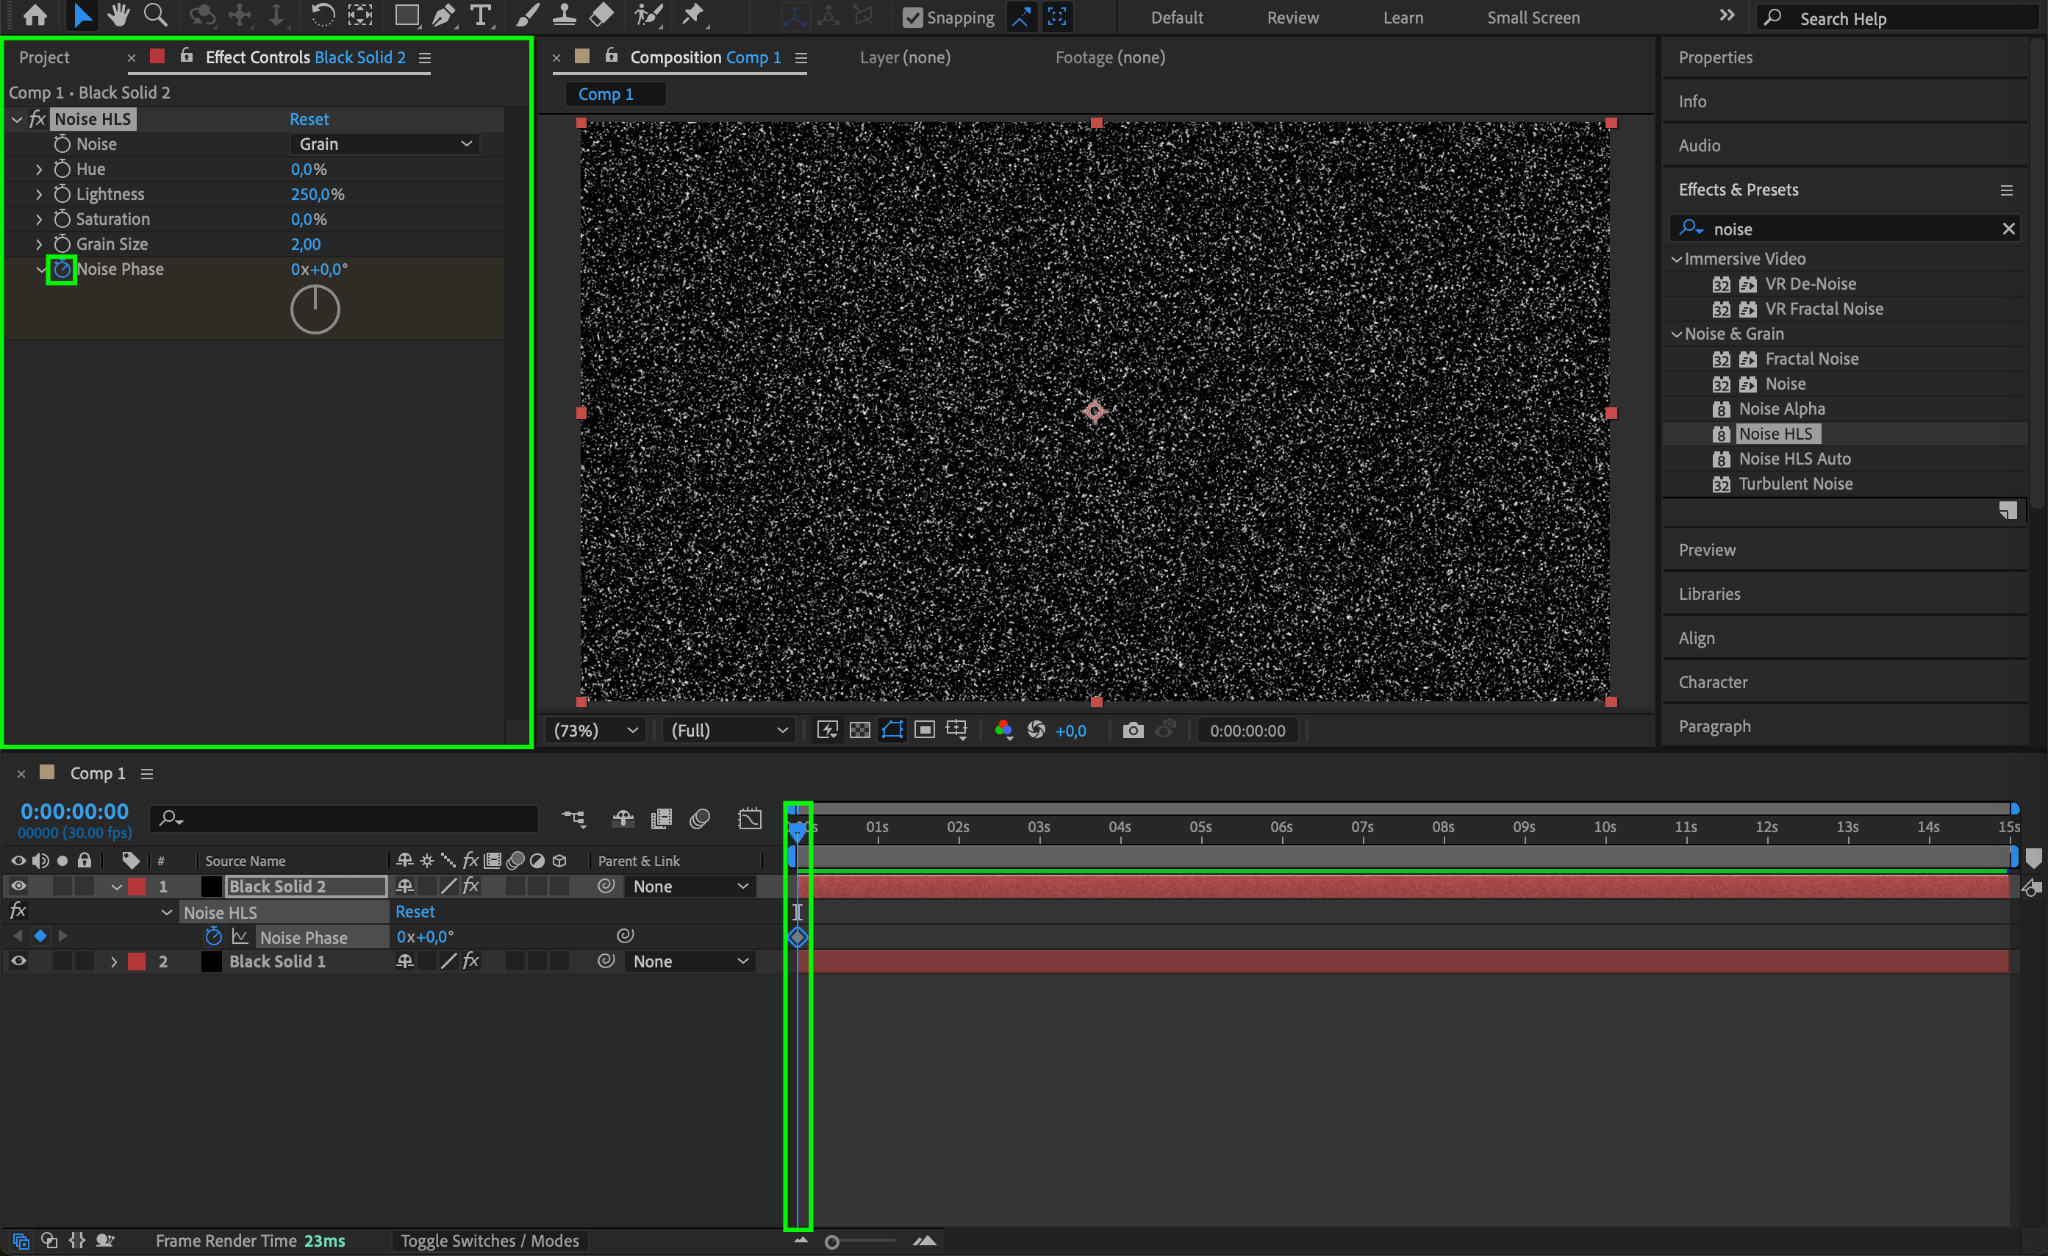
Step 3: Apply Noise HLS Effect to the First Solid
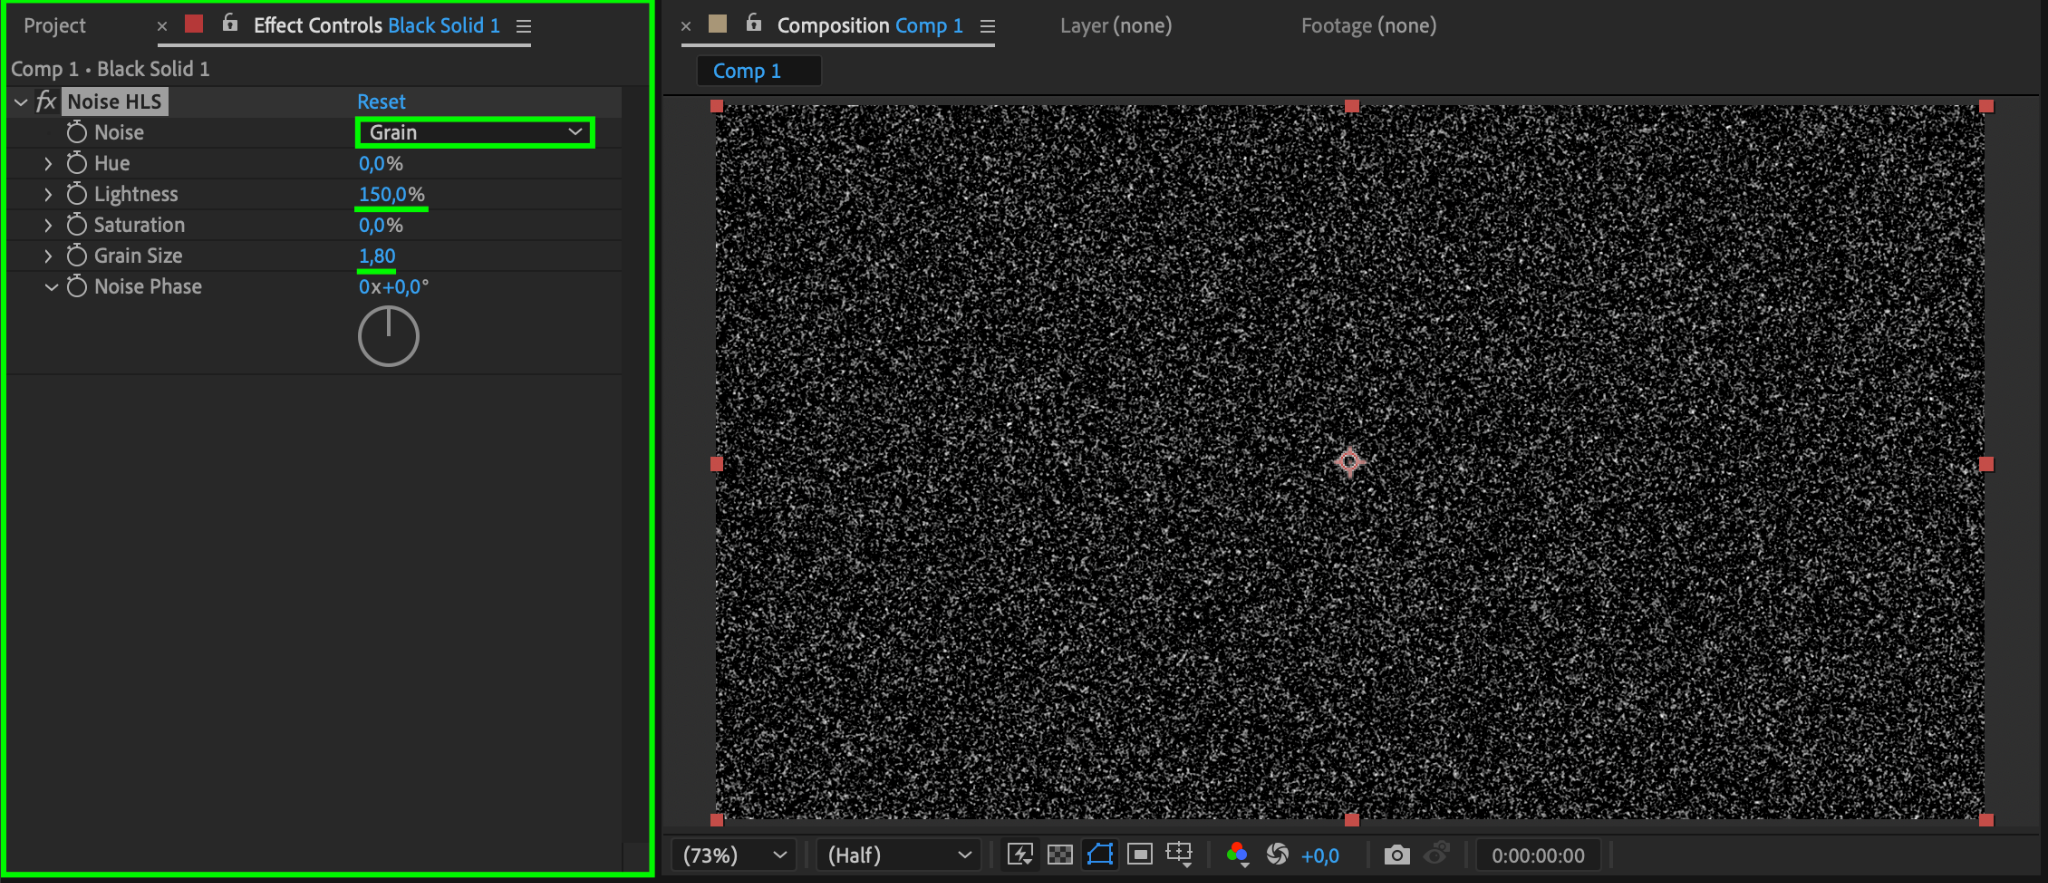
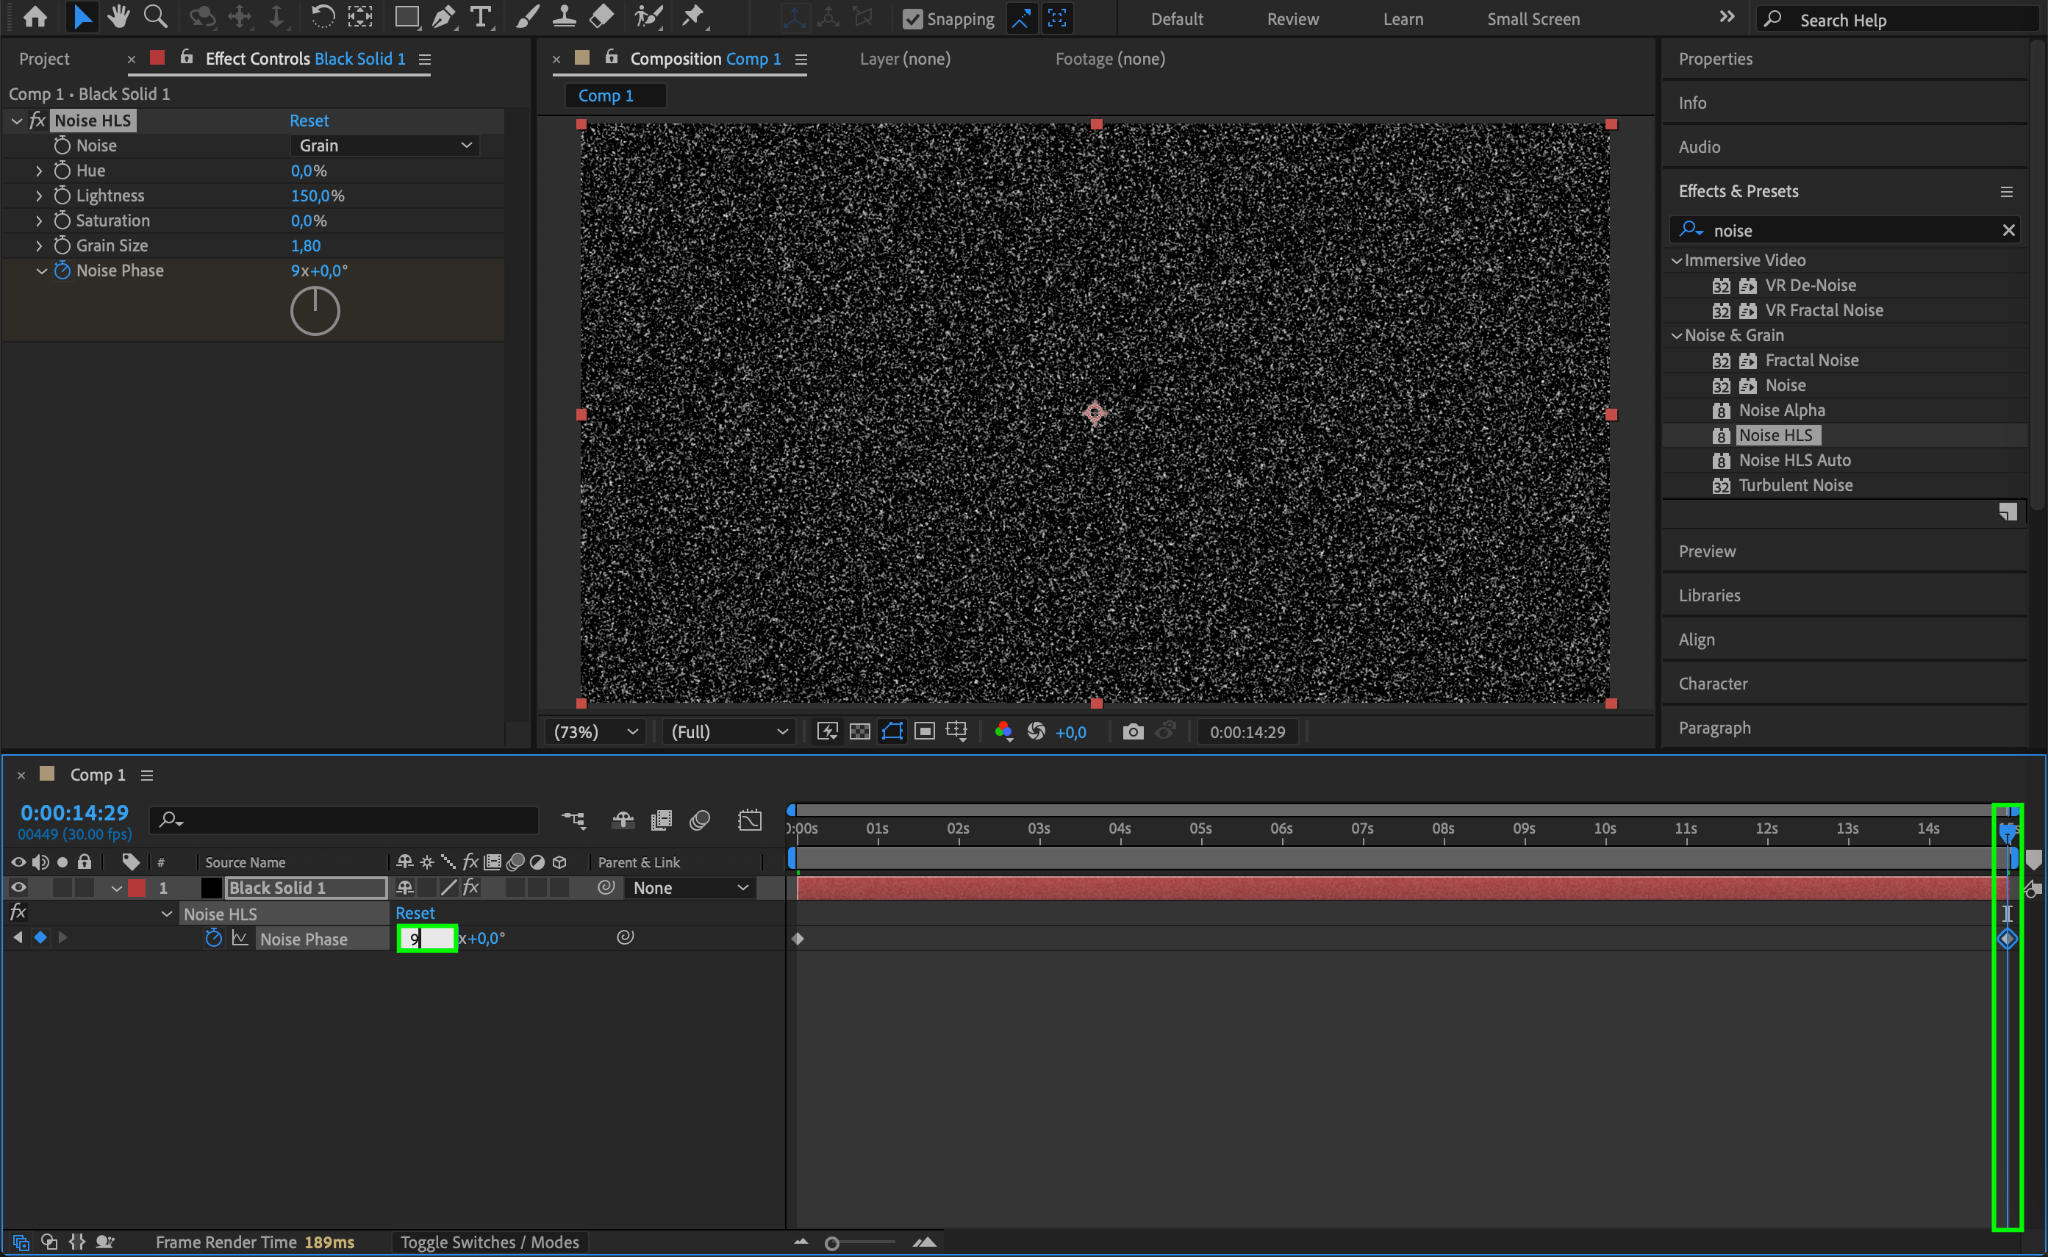
Select the first black solid layer and apply the Noise HLS effect by dragging it from the Effects & Presets panel. Adjust the settings in the Effect Controls Panel as follows:
Noise: Grain
Lightness: 150
Grain Size: 1.8
This creates a subtle noise pattern that serves as the base texture for your glitter.

Step 4: Animate the Noise Phase for the First Solid
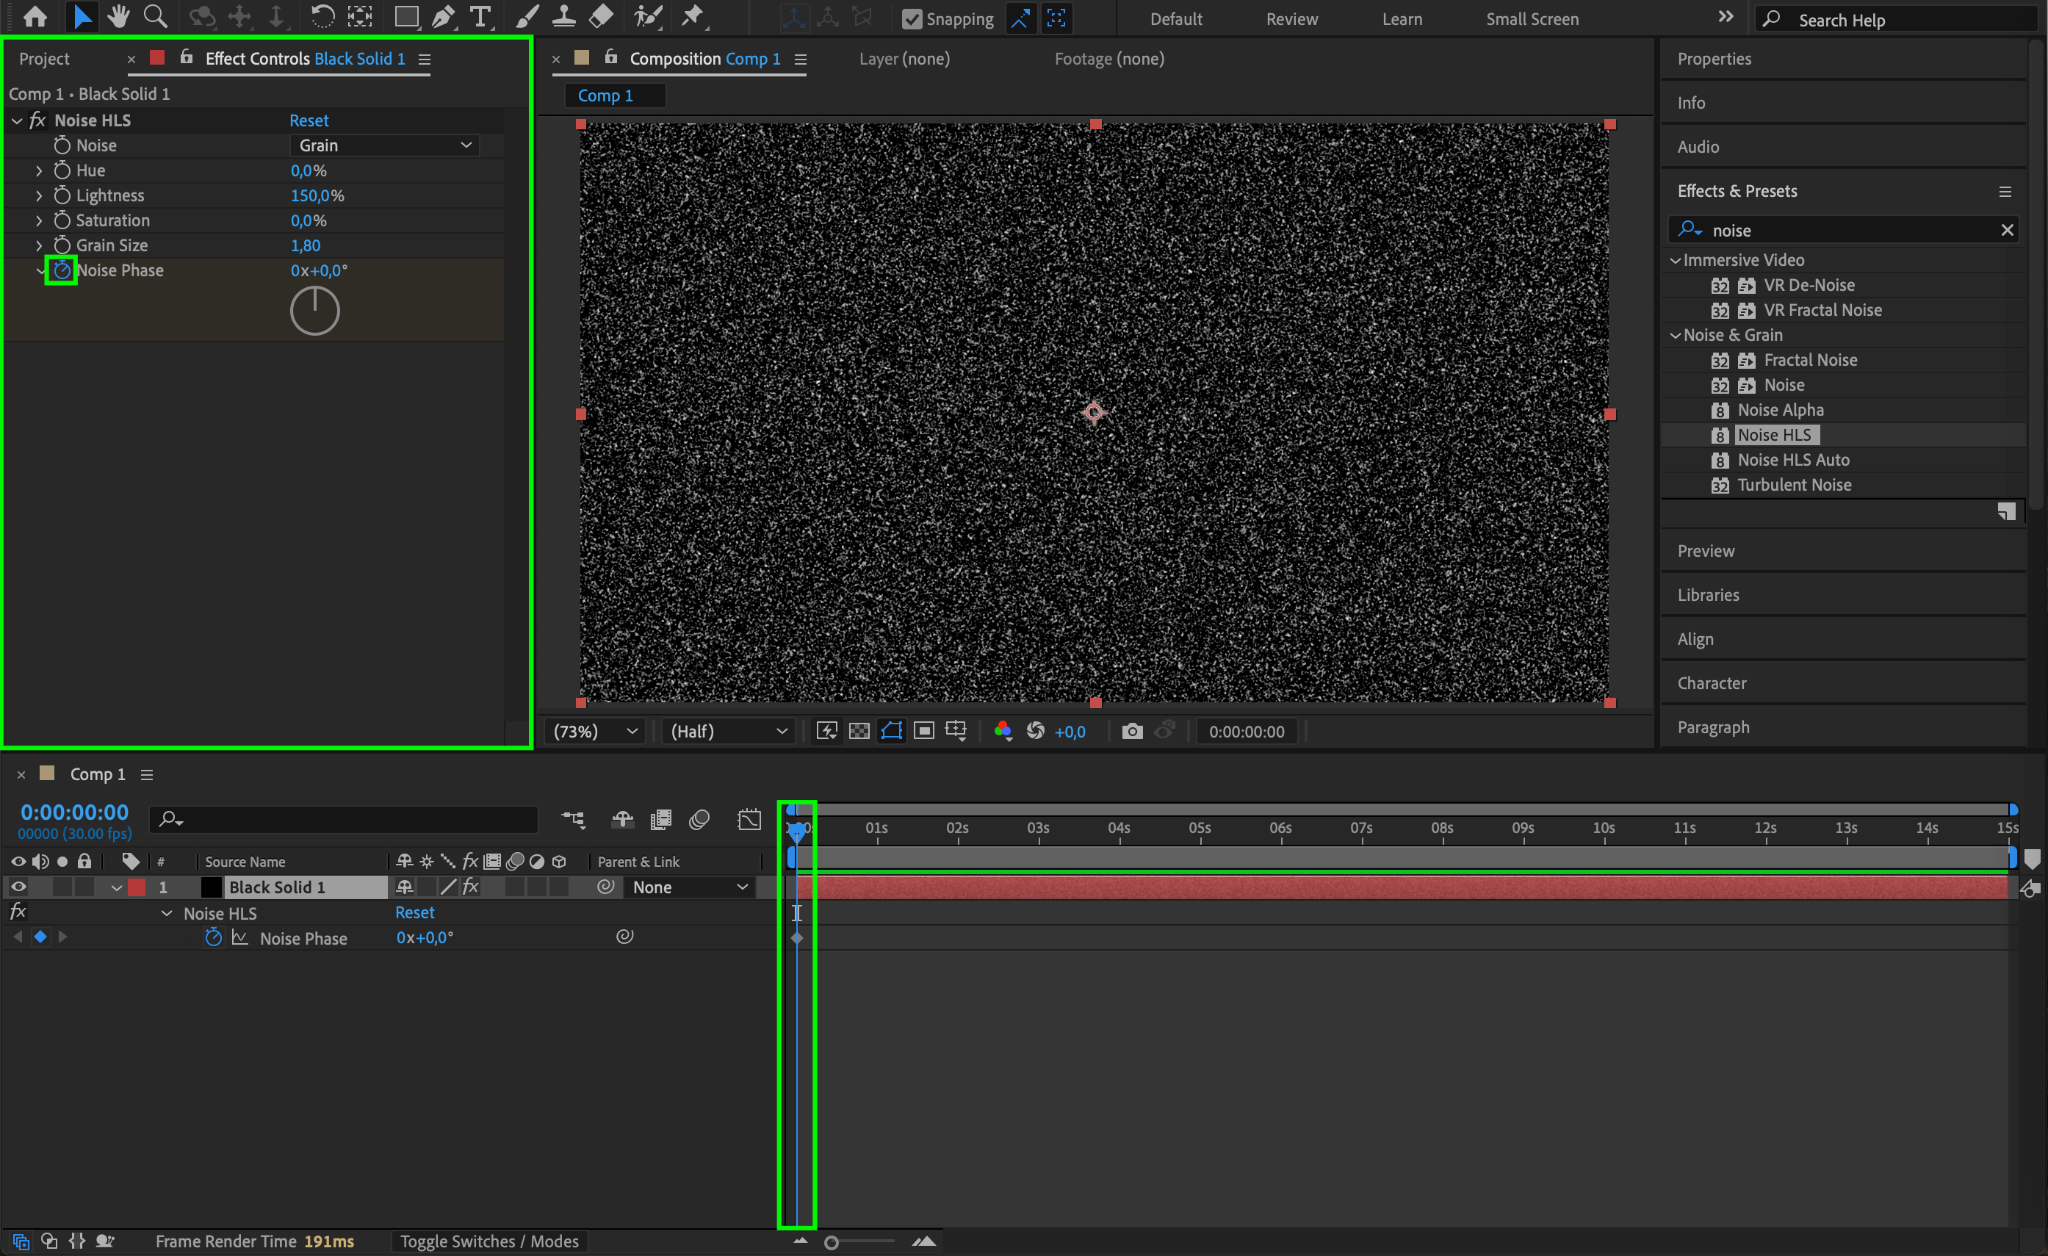
To add movement to the glitter, animate the Noise Phase parameter.
Move the CTI (Current Time Indicator) to the beginning of the composition and set Noise Phase to 0.
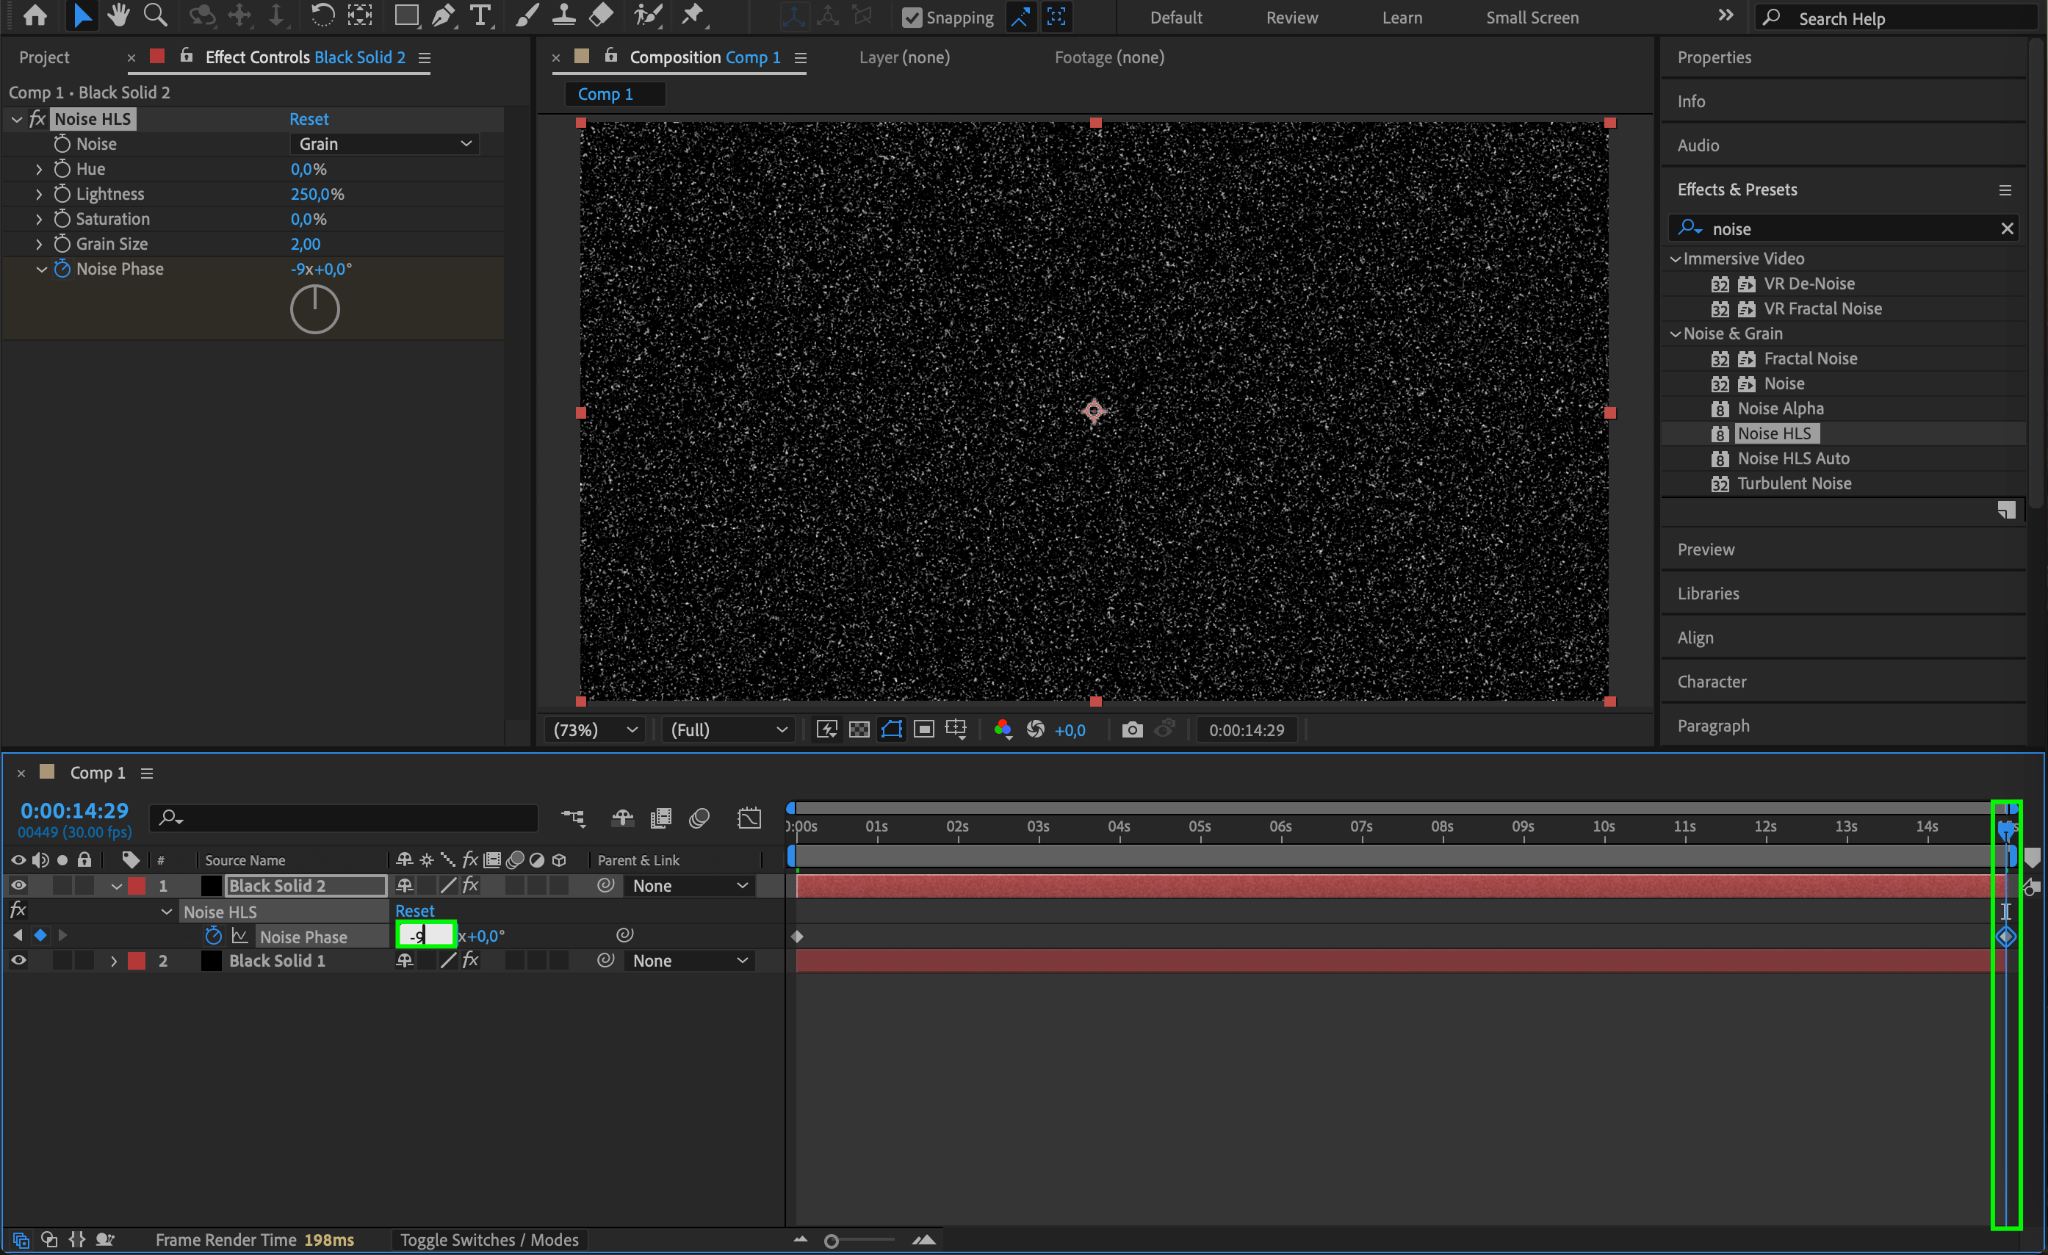
Move the CTI to the end of the composition and set Noise Phase to 9 rotations.
This creates a looping motion that mimics shimmering glitter.
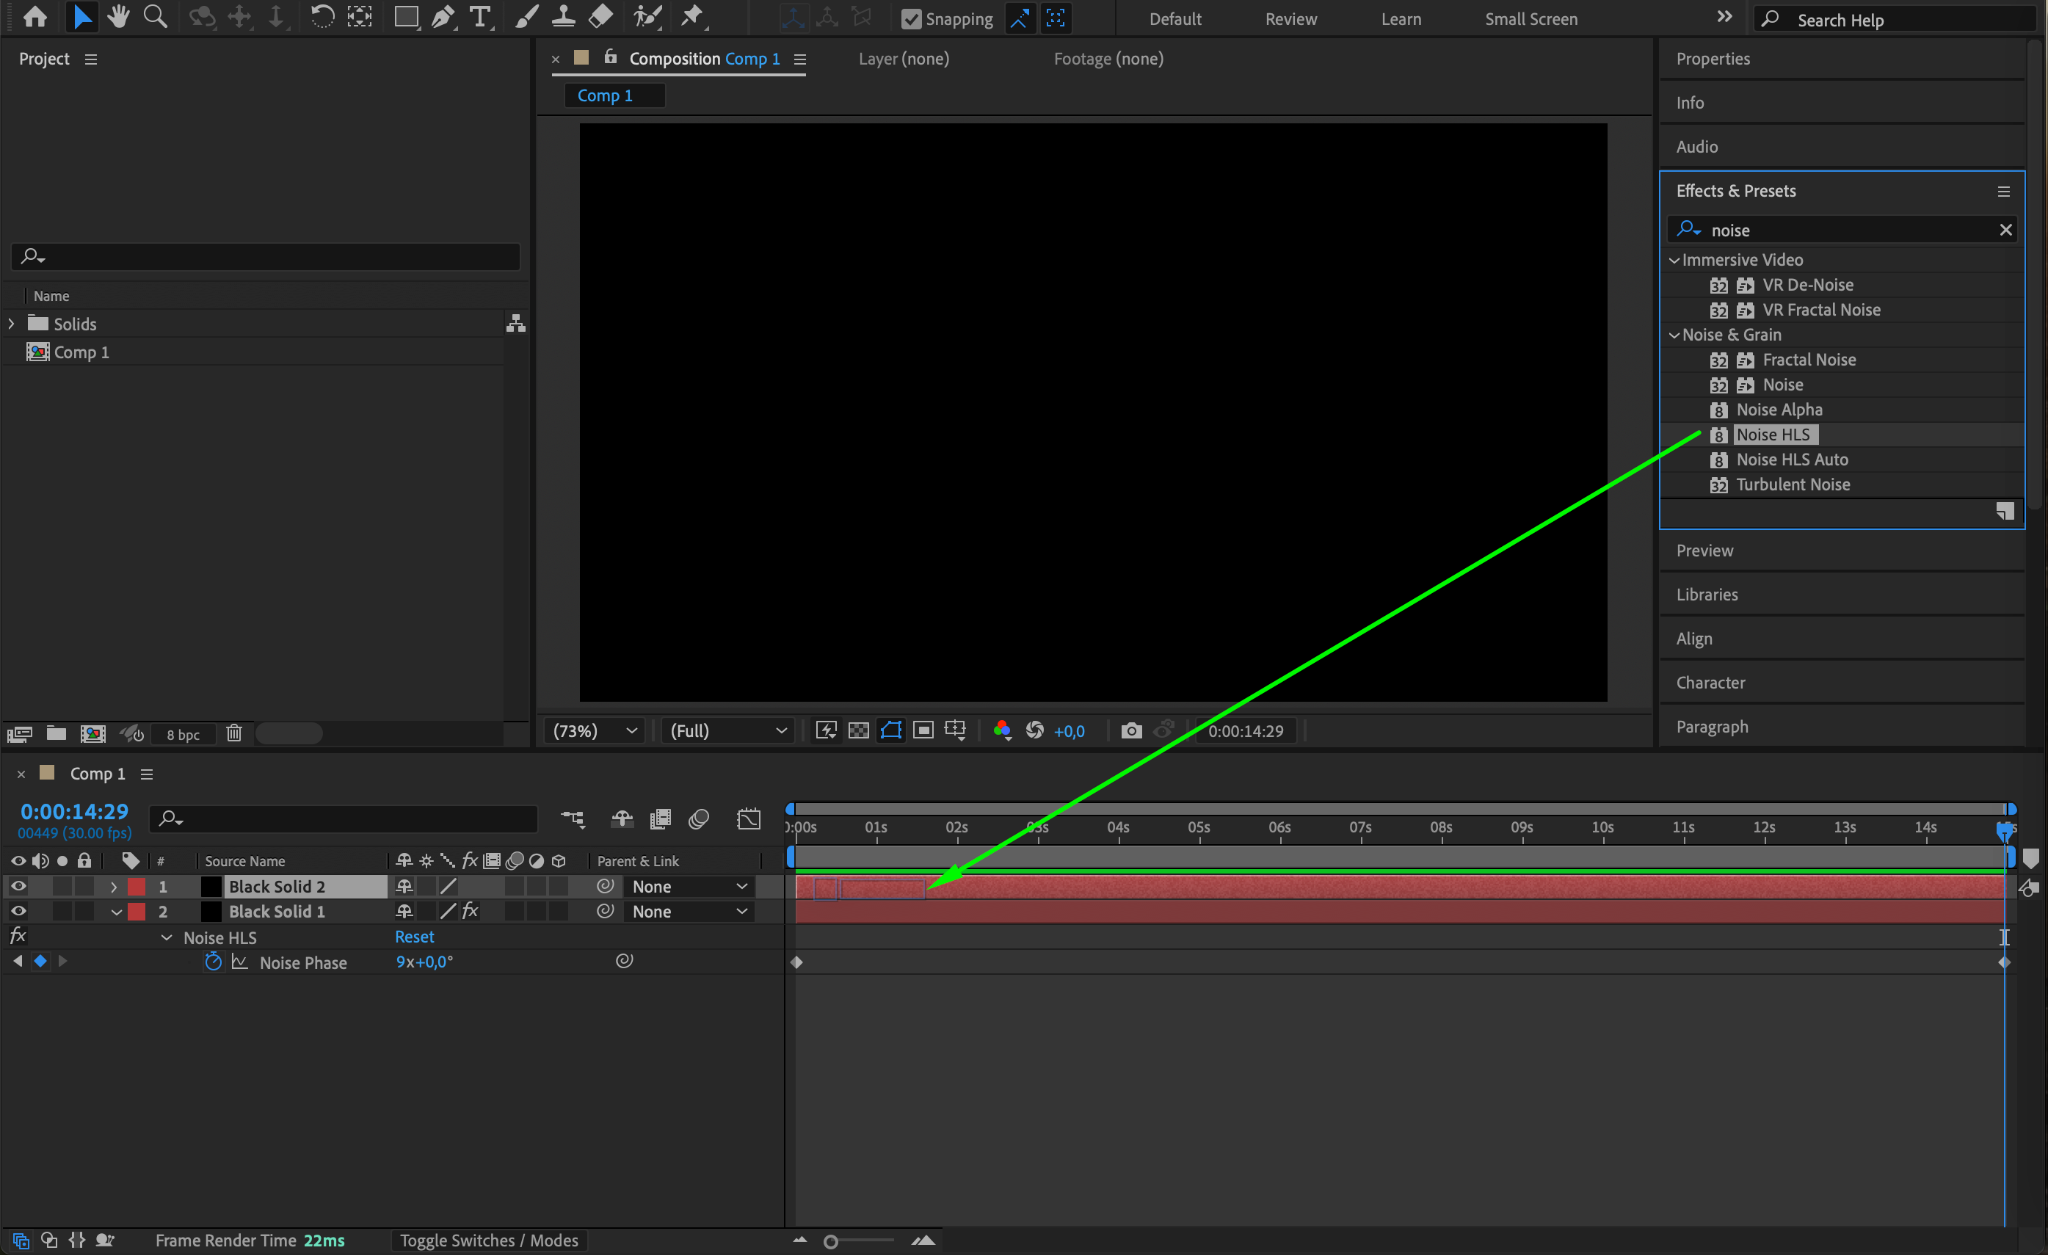
Step 5: Add a Second Black Solid Layer
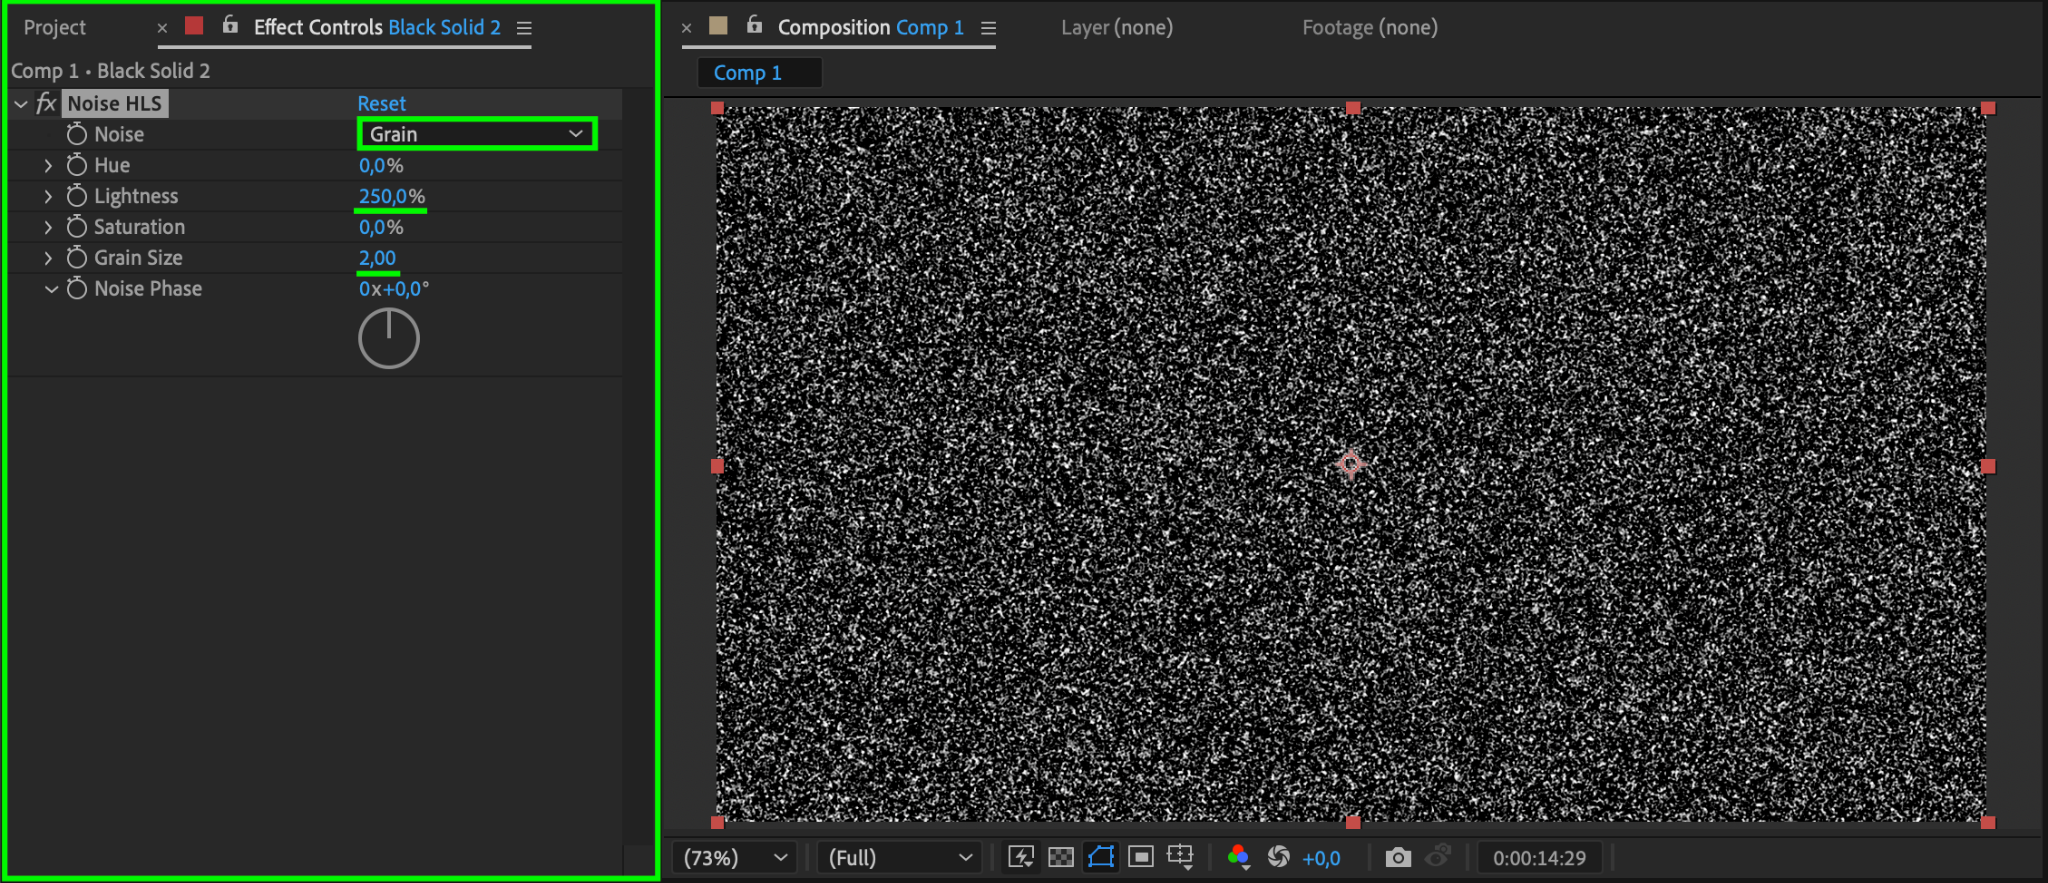
Create another black solid layer, and apply the Noise HLS effect with the following settings:
Noise: Grain
Lightness: 250
Grain Size: 2
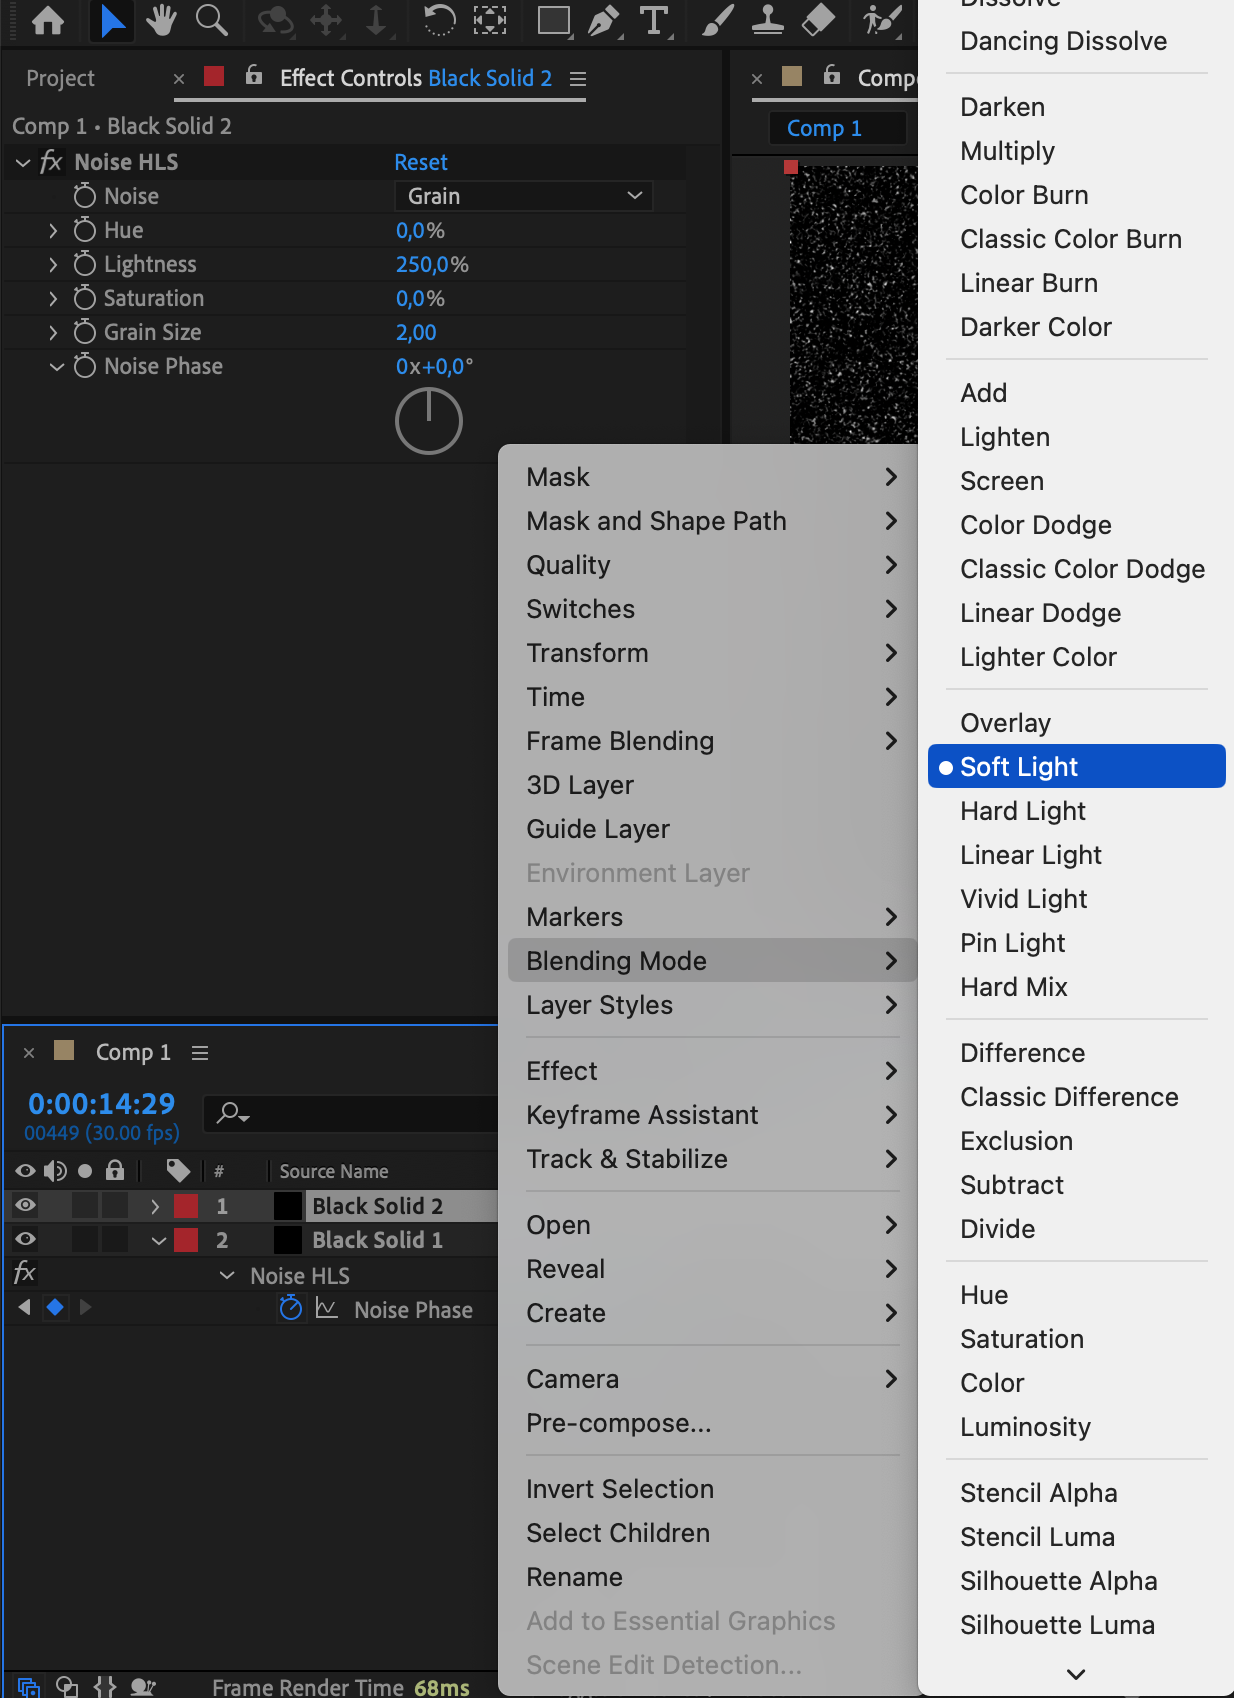
Blending Mode: Soft Light (Right-click on the layer and select Blending Mode > Soft Light).
This layer enhances the glitter by adding brighter, more defined sparkles.


Step 6: Animate the Noise Phase for the Second Solid
Animate the Noise Phase parameter for the second solid:
At the beginning of the composition, set Noise Phase to 0.
At the end of the composition, set Noise Phase to -9 rotations.
This creates an alternating motion for additional depth and variation in the glitter effect.
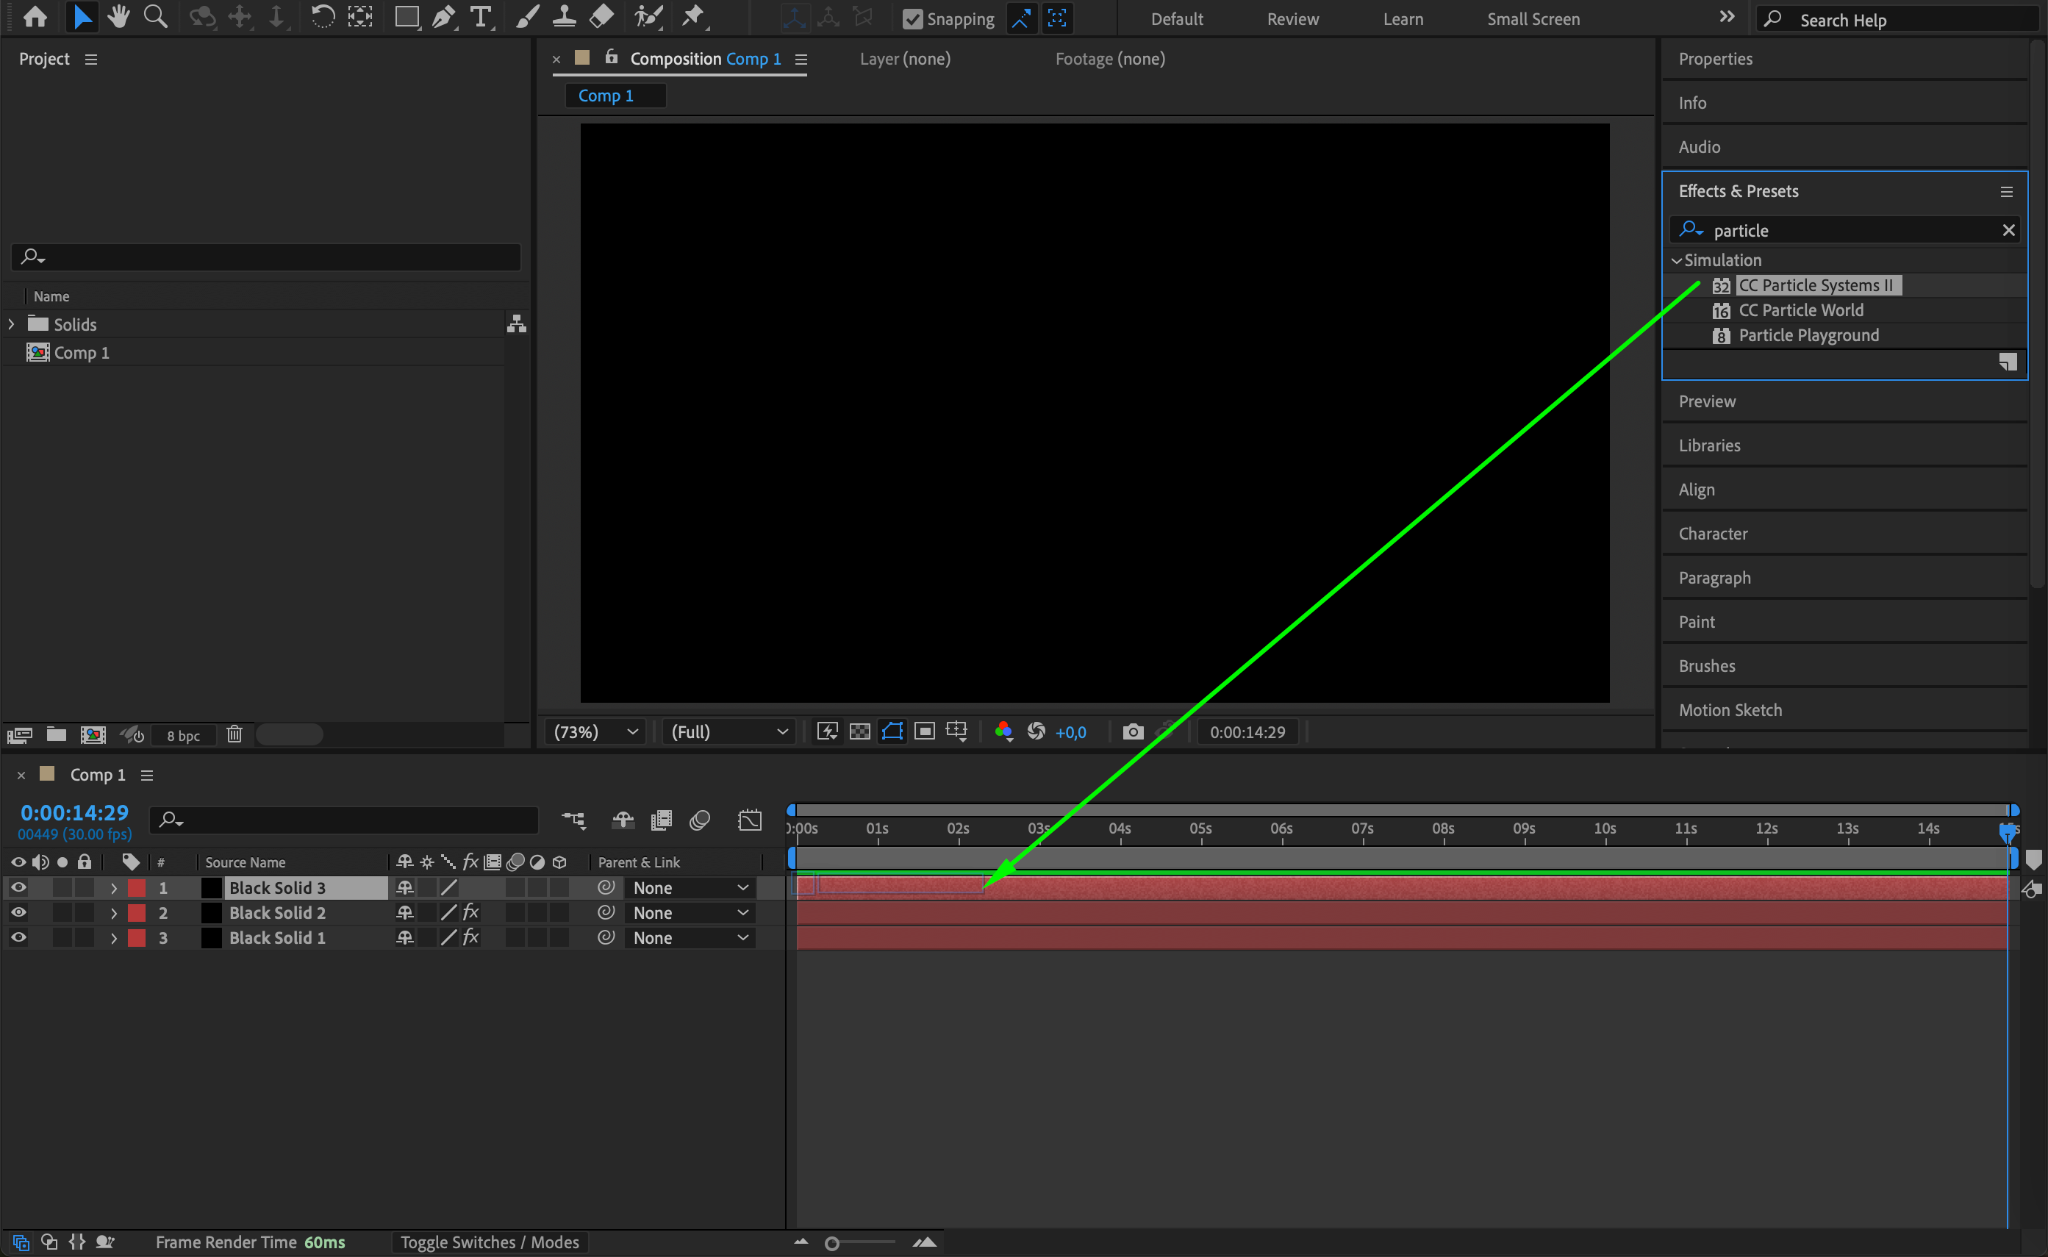
Step 7: Create a Particle Layer
Add a third black solid layer. Apply the CC Particle System II effect. Adjust the following settings in the Effect Controls Panel:
Birth Rate: 5.7
Longevity: 0.7
Radius X: 94
Radius Y: 93
Velocity: 0
Gravity: 0
Particle Type: Star
Birth Size: 0.05
Death Size: 0.20
Color: White
This layer adds small, star-shaped particles that simulate glitter.


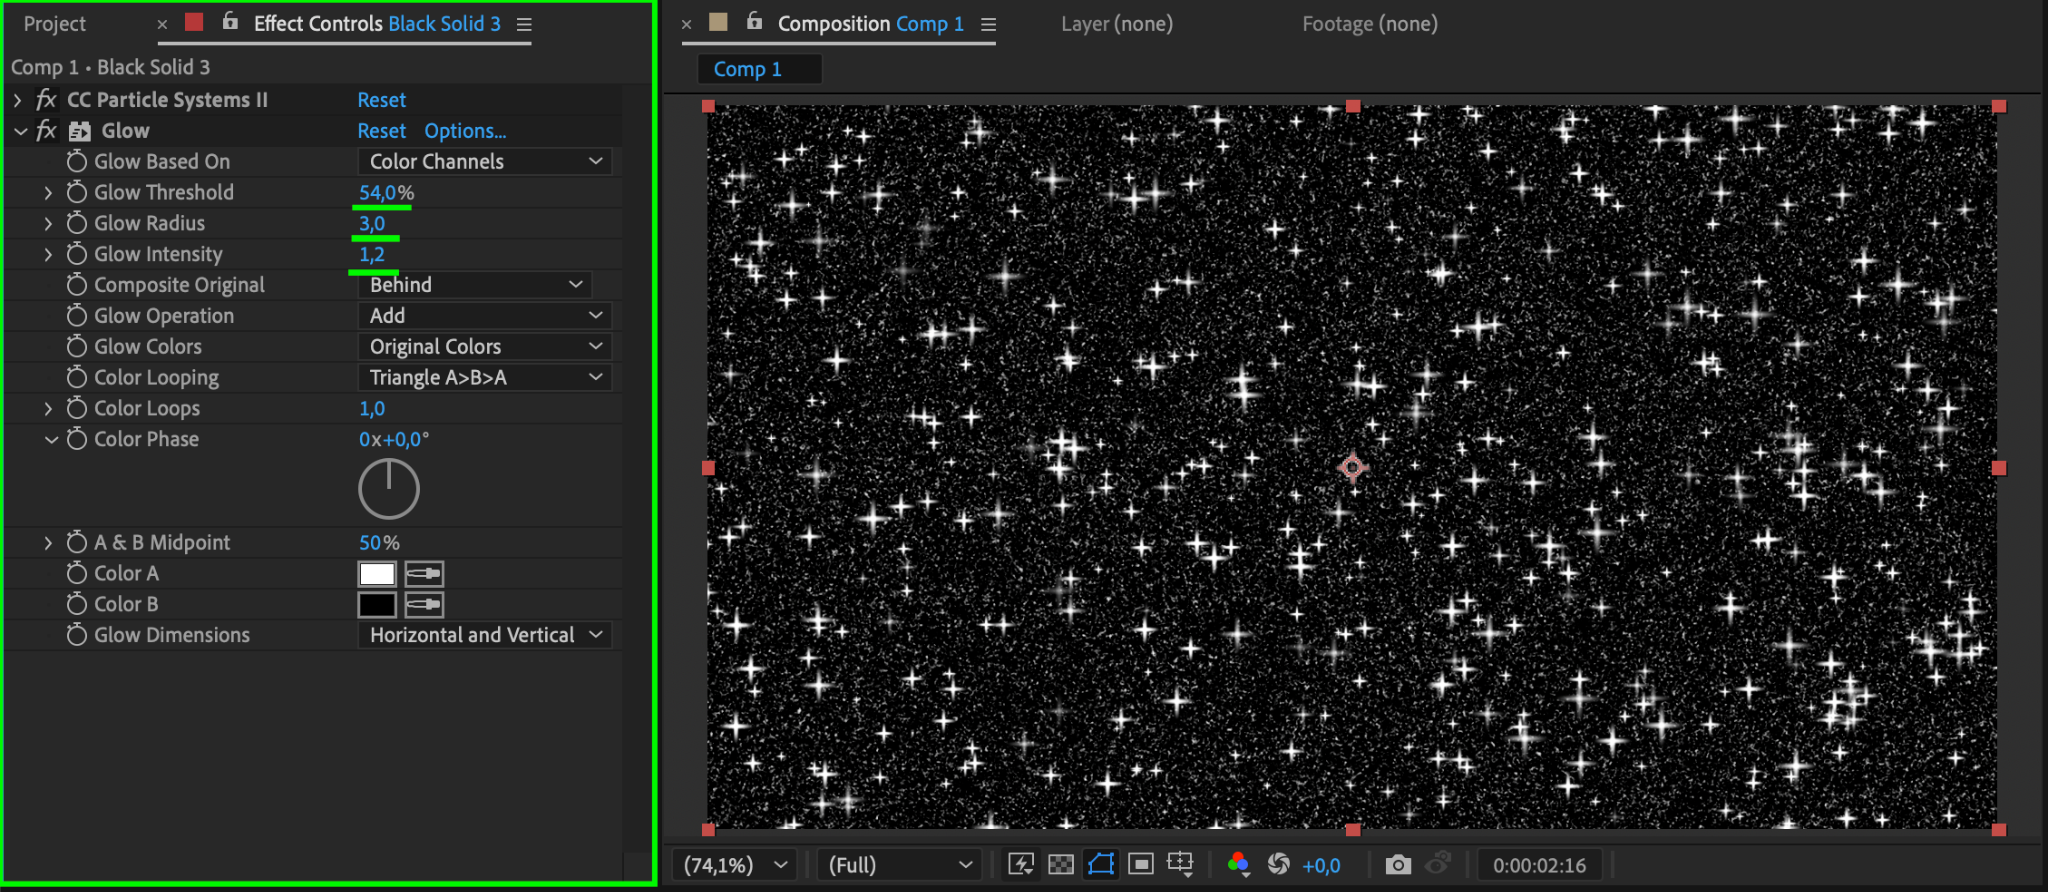
Step 8: Apply Glow to the Particle Layer
Select the particle layer and apply the Glow effect. Set the parameters as follows:
Glow Threshold: 54
Glow Radius: 3
Glow Intensity: 1.2
This enhances the sparkle effect, making the particles stand out.

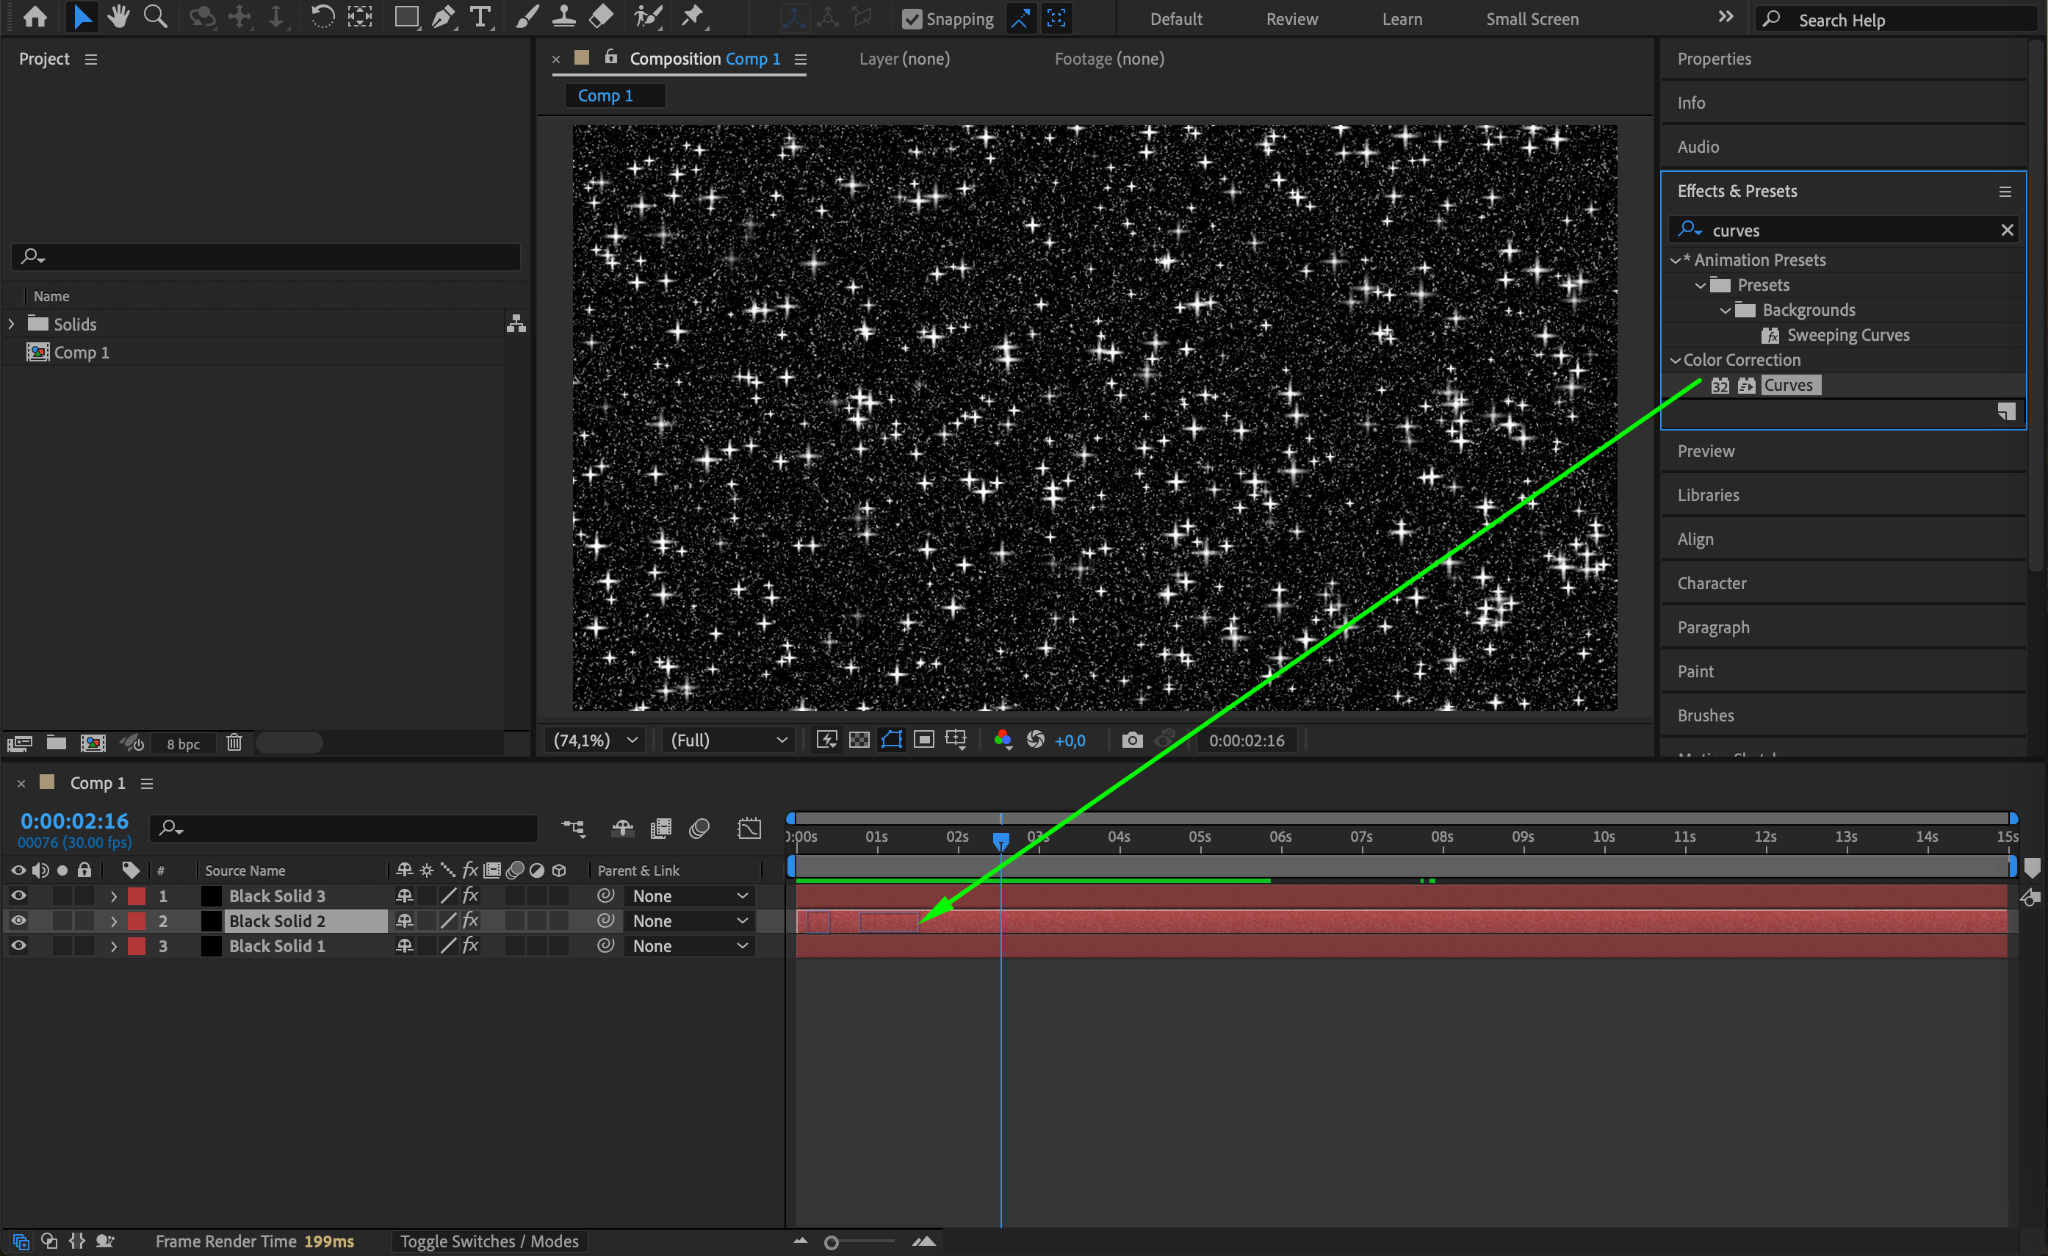
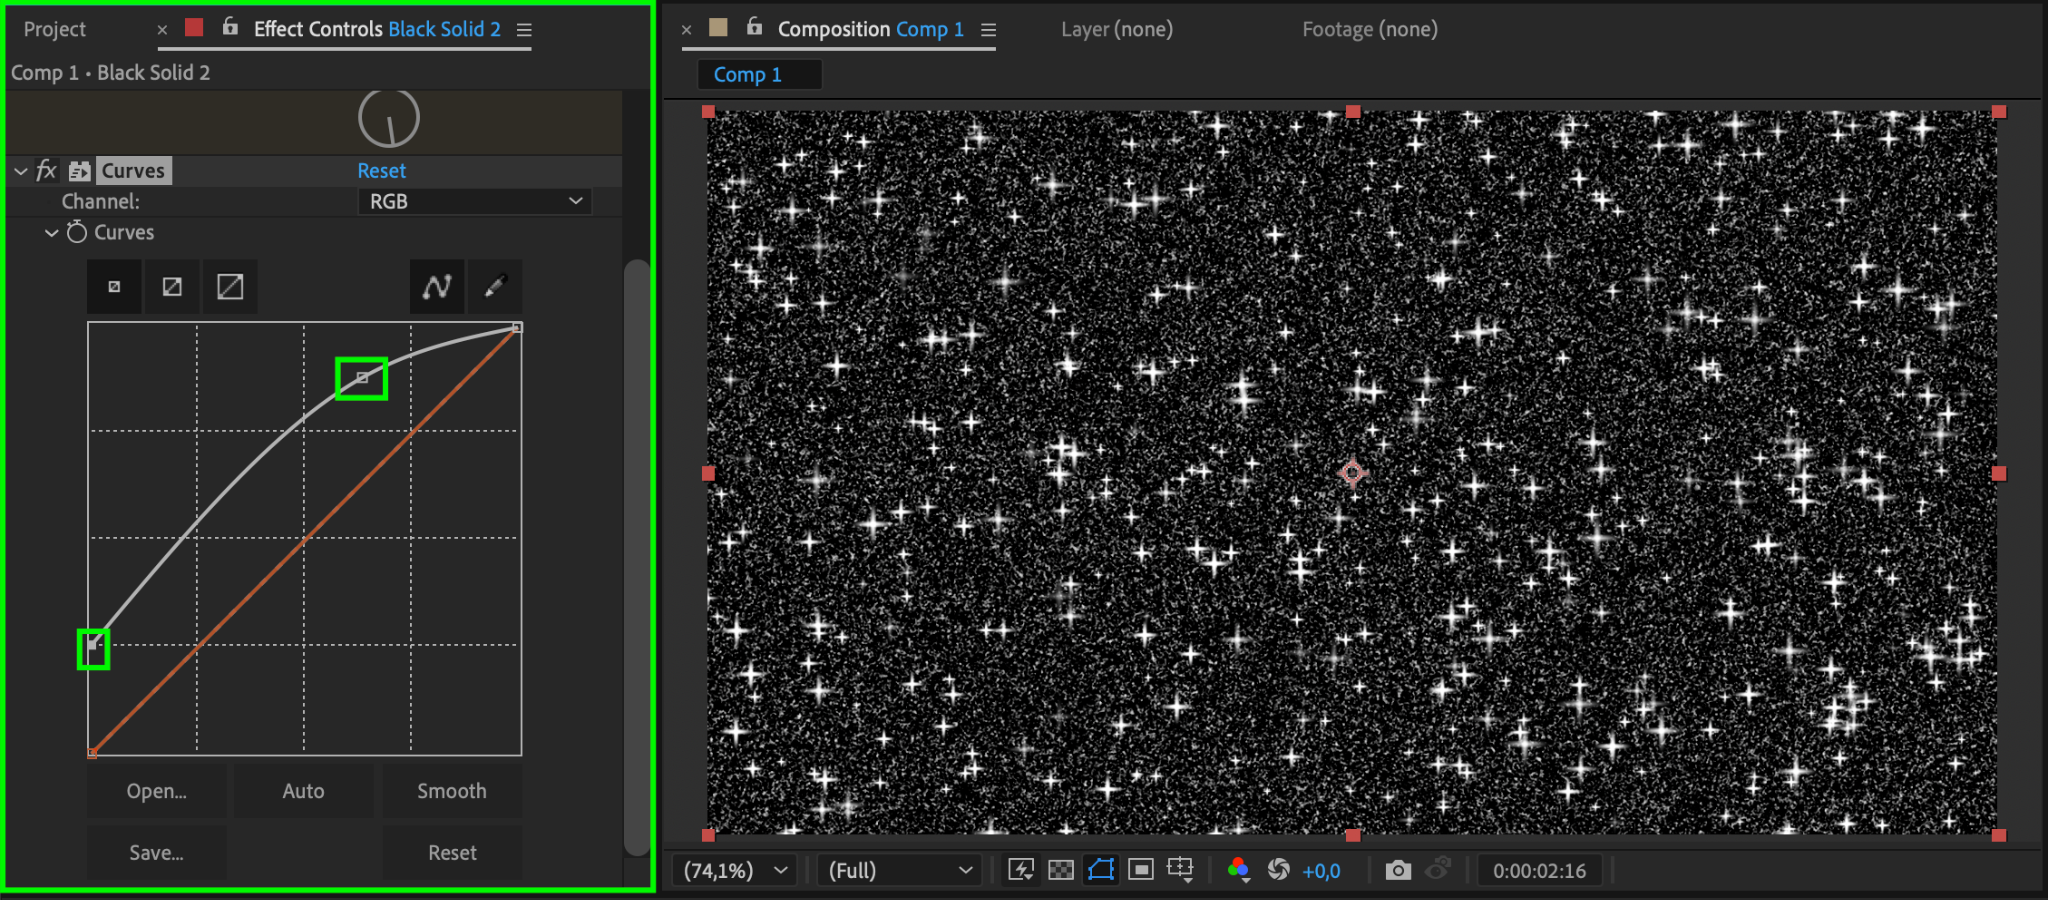
Step 9: Adjust Curves for the Second Solid
Apply the Curves effect to the second solid layer. In the Effect Controls Panel, adjust the curve so that the arc significantly rises above the red line. This increases the brightness and contrast of the glitter sparkles.
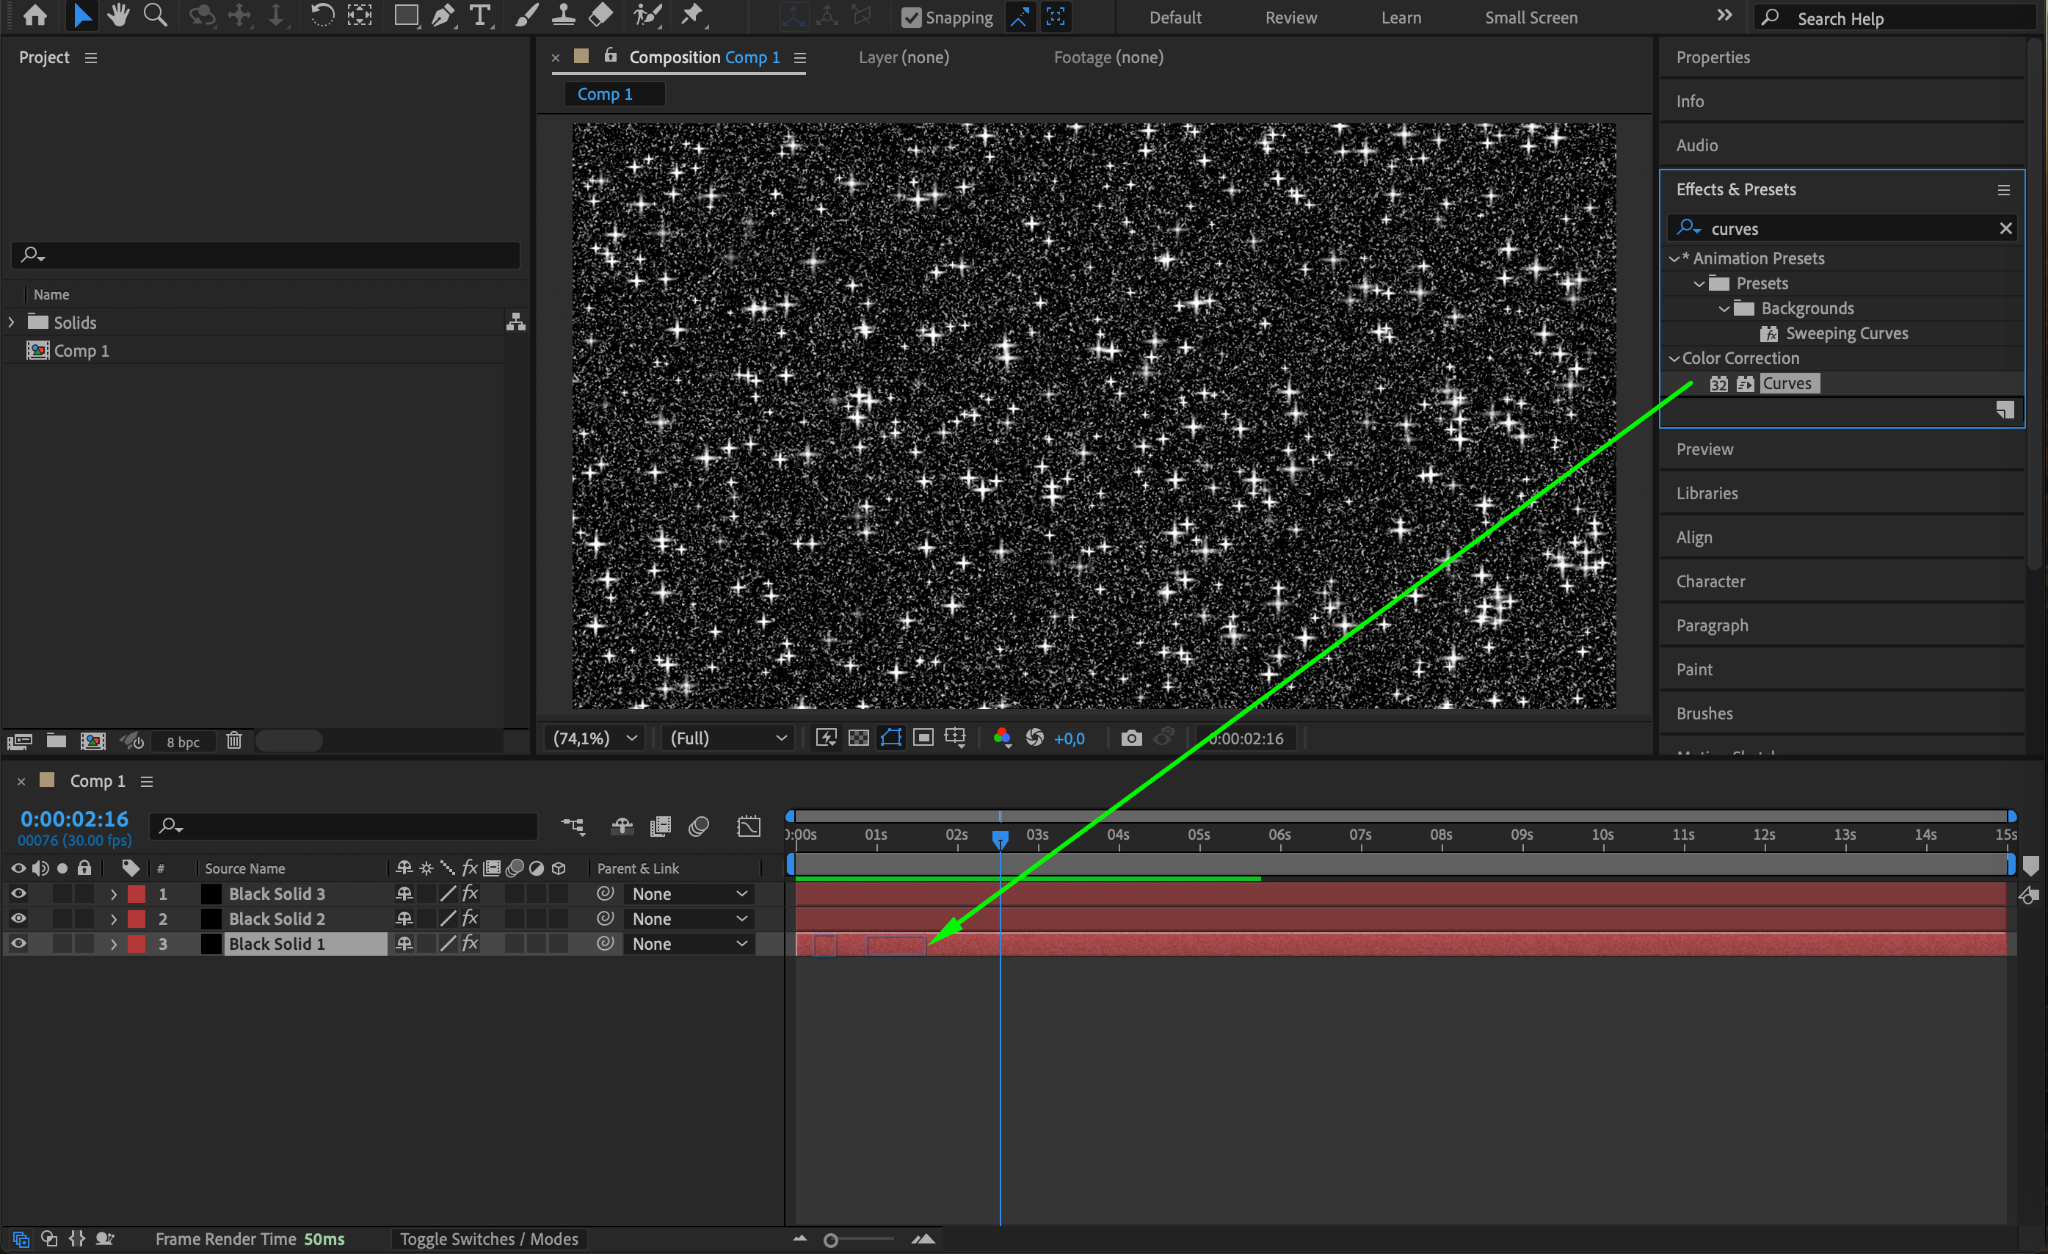
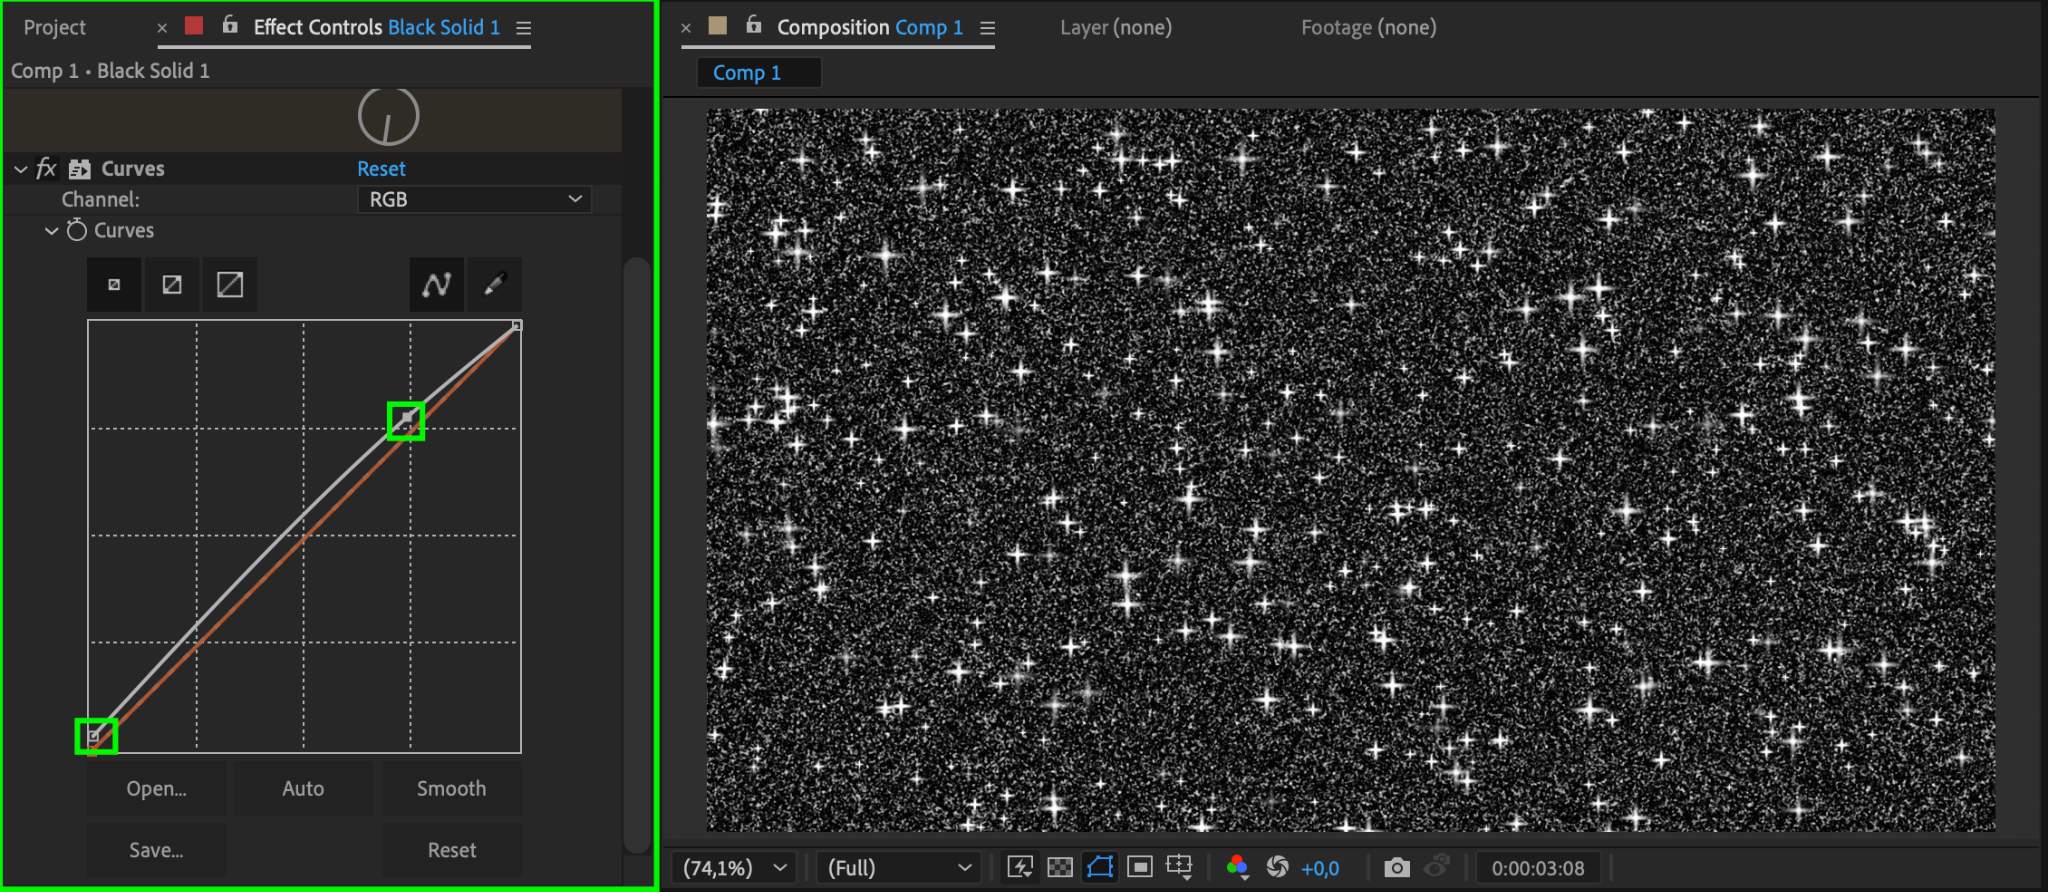
Step 10: Adjust Curves for the First Solid
Apply the Curves effect to the first solid layer as well. Adjust the curve to create a subtle lift above the red line, enhancing the base noise texture without overpowering the effect.
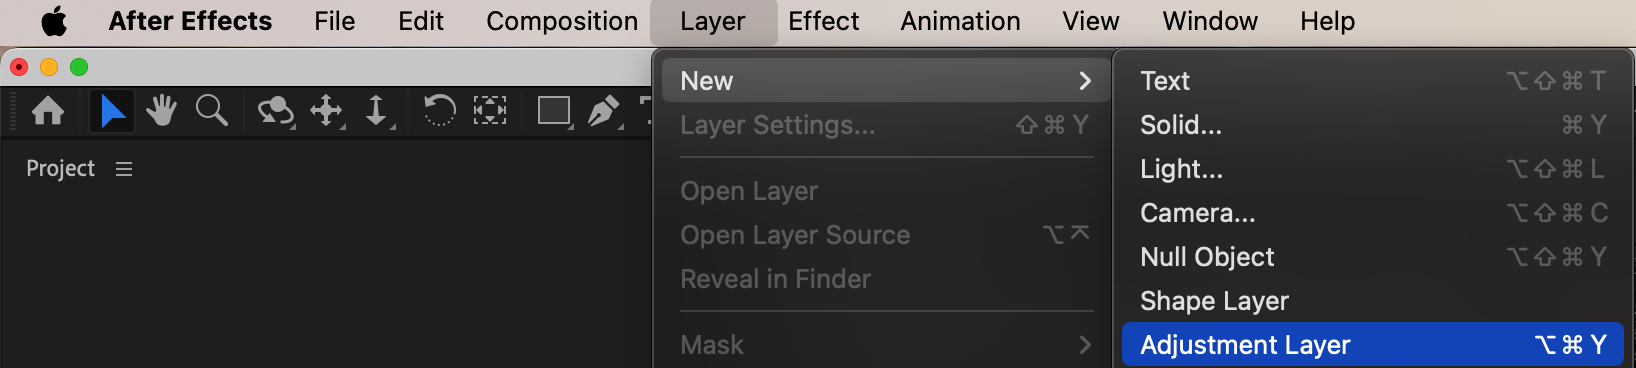
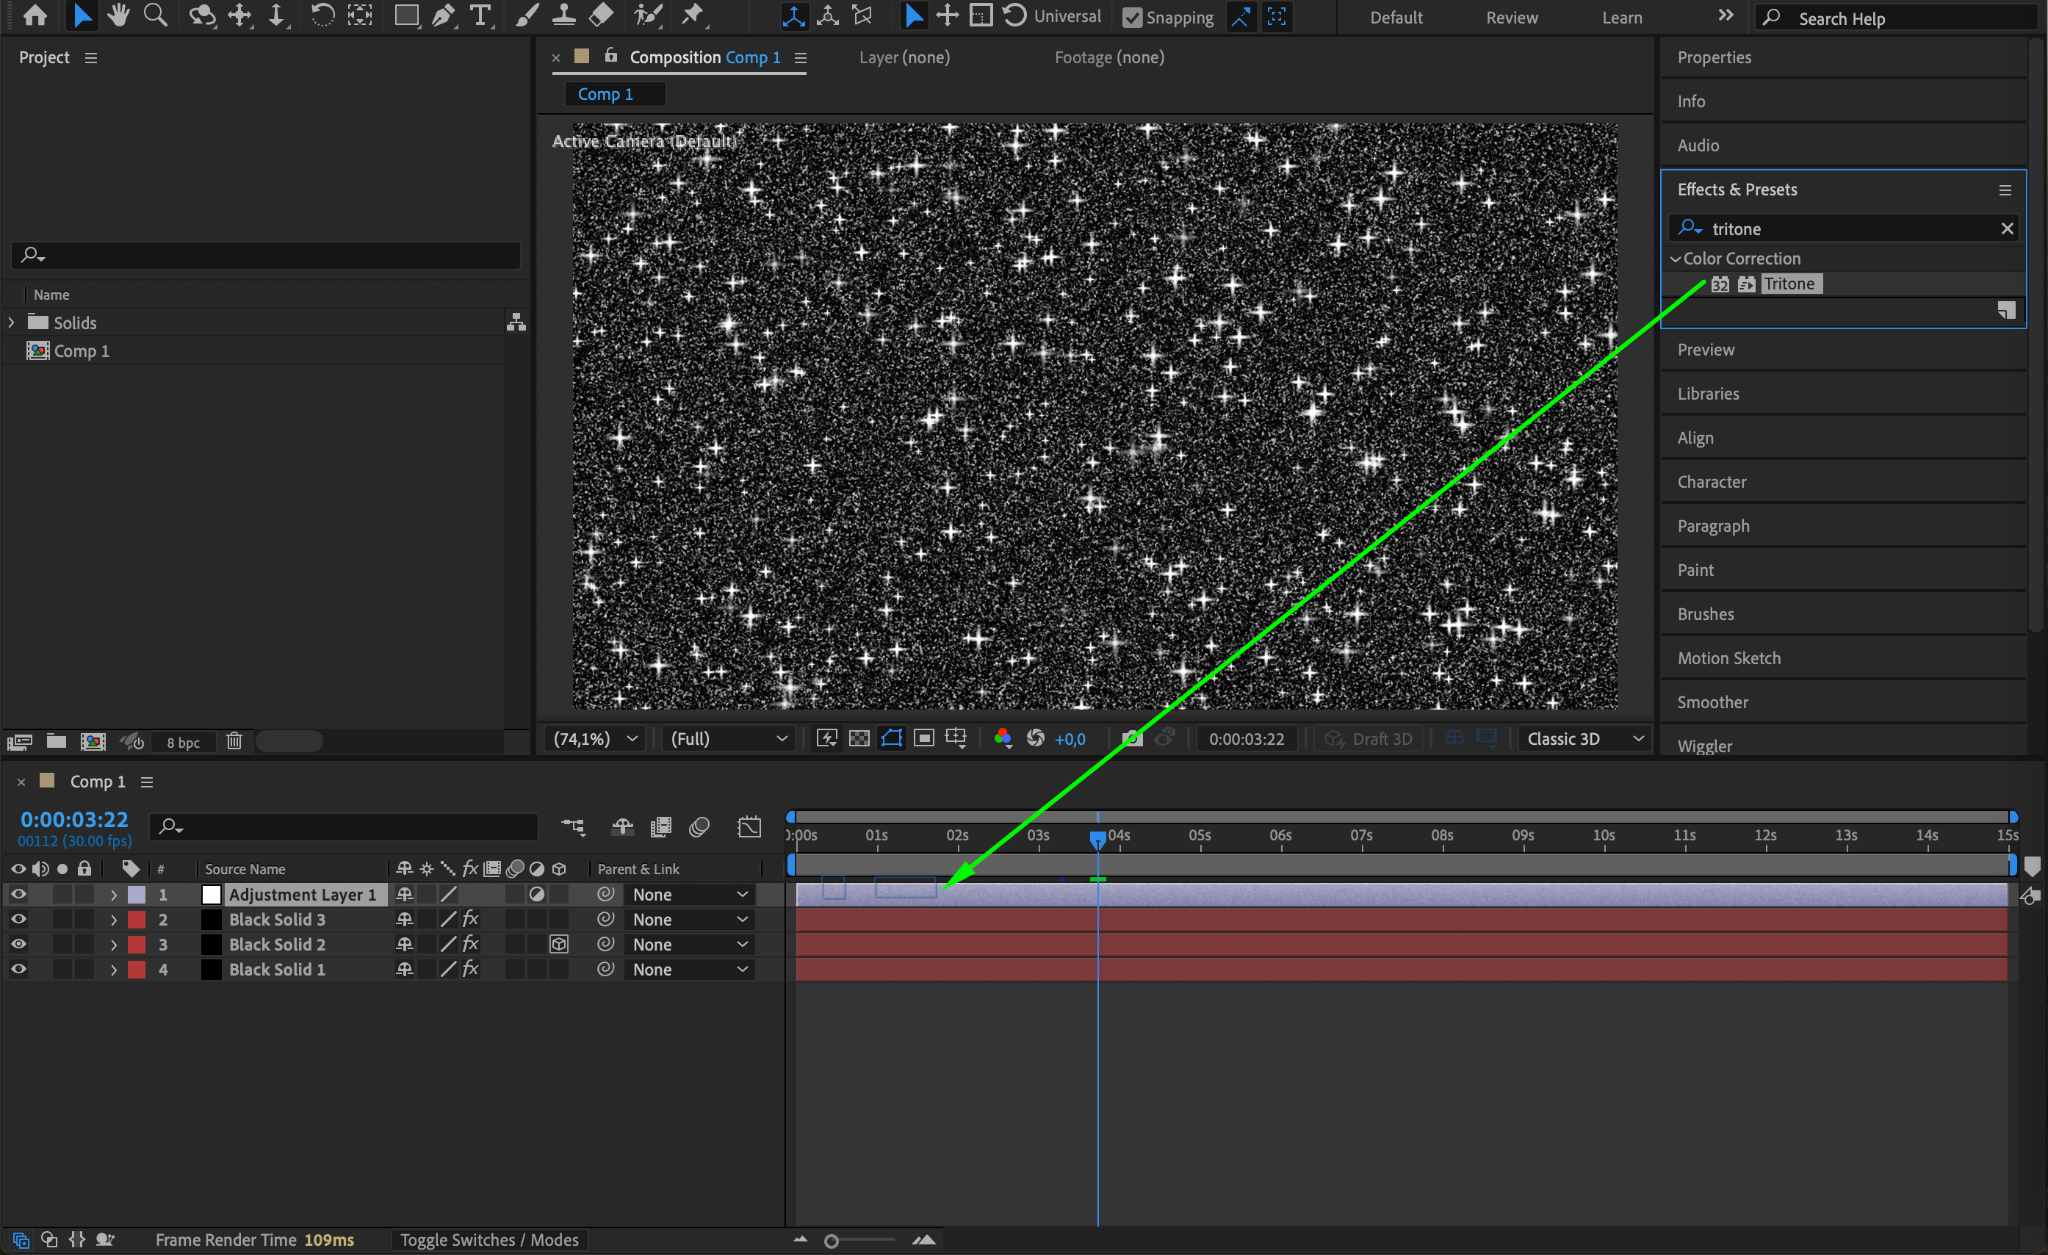
Step 11: Add an Adjustment Layer with Tritone Effect
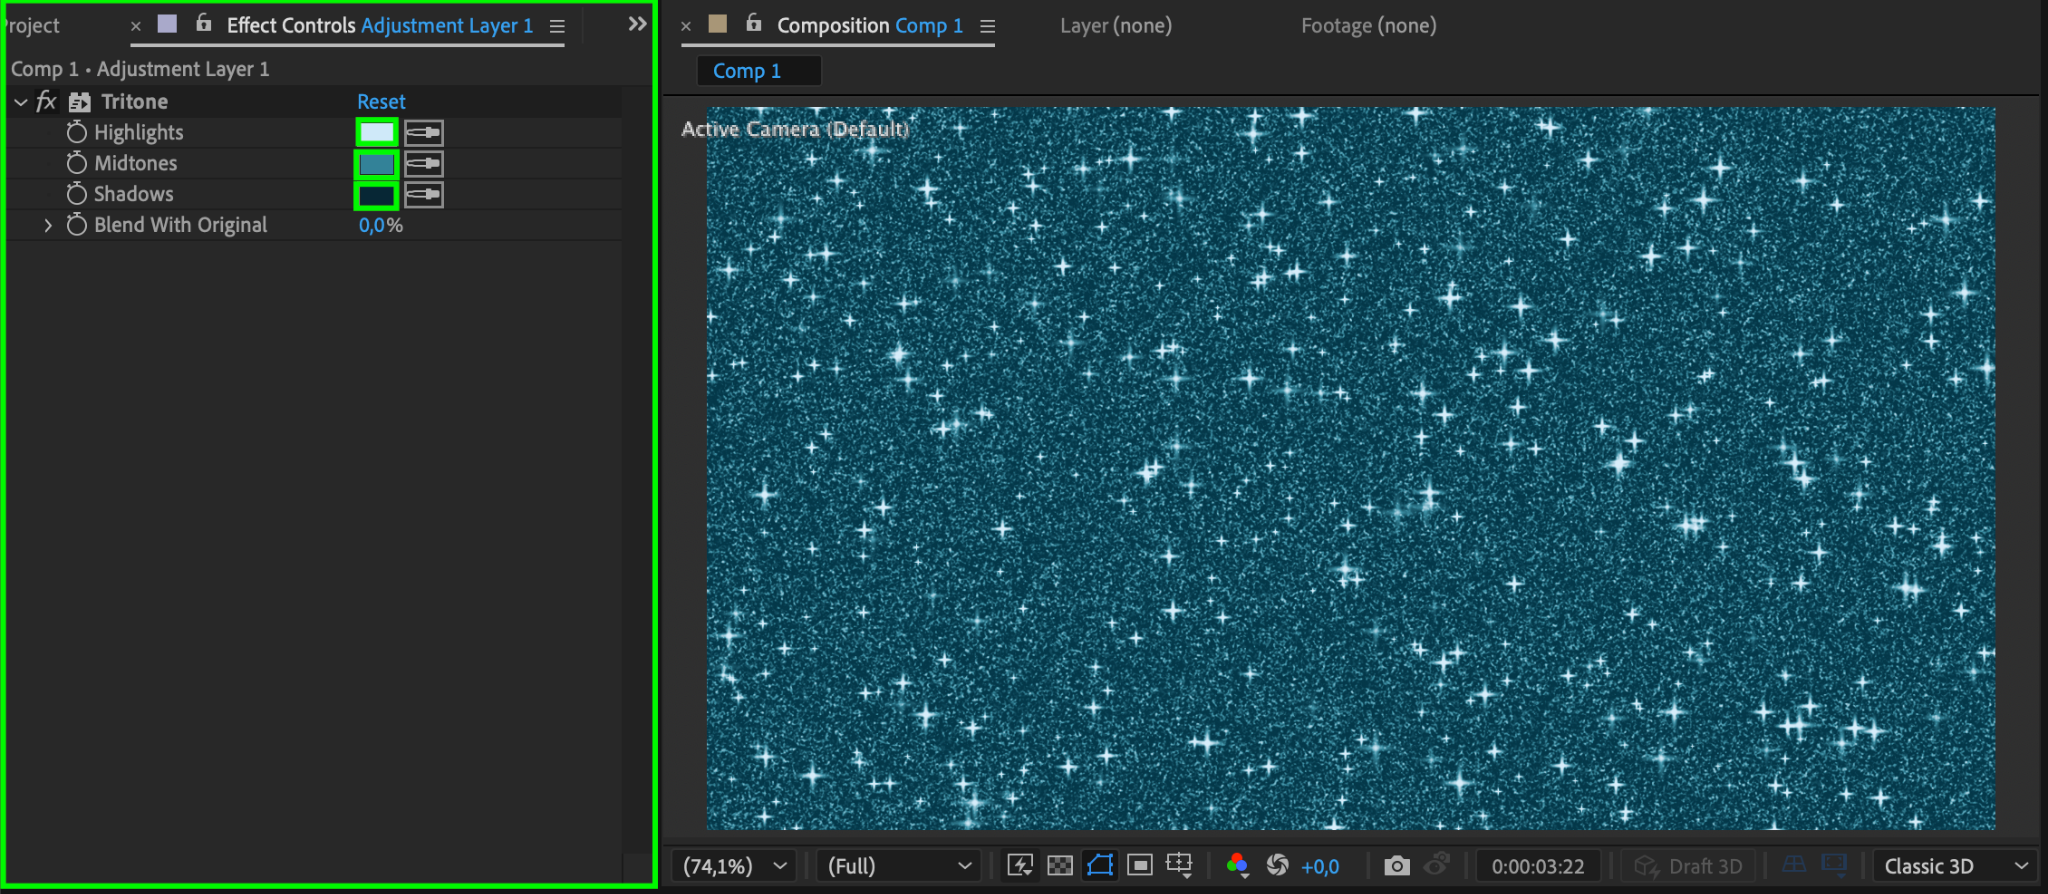
Go to Layer > New > Adjustment Layer and apply the Tritone effect. In the Effect Controls Panel, set the colors as follows:
Highlights: Light Blue
Midtones: Blue
Shadows: Dark Blue
This gives the glitter effect a cohesive color theme, such as a blue shimmering tone.
Step 12: Adjust the Work Area Start Slider
In the timeline, move the Work Area Start Slider slightly to the right so the glitter effect begins precisely at the start of the composition. This ensures a clean introduction to your animation.

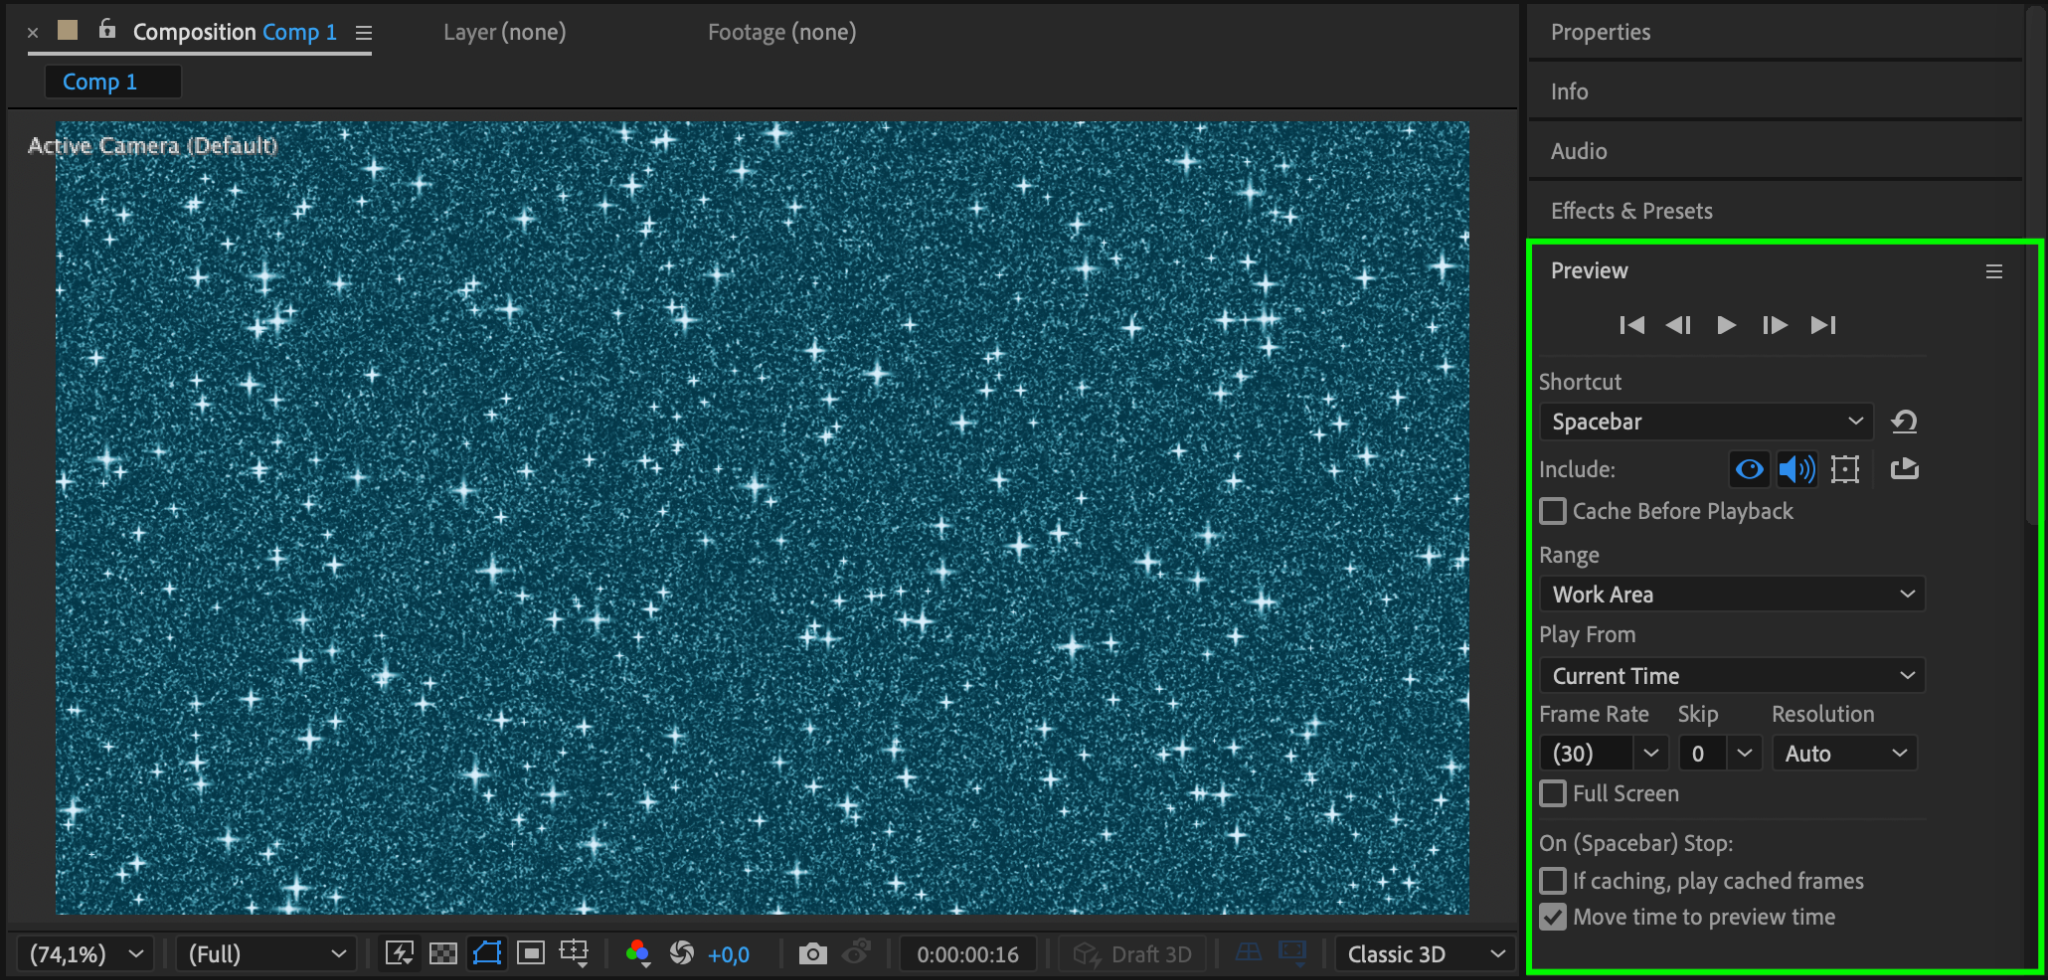
Step 13: Preview Your Glitter Effect
Press the spacebar to preview your composition. Check for smooth transitions, proper animation, and color balance. Make adjustments if necessary to achieve the desired look.
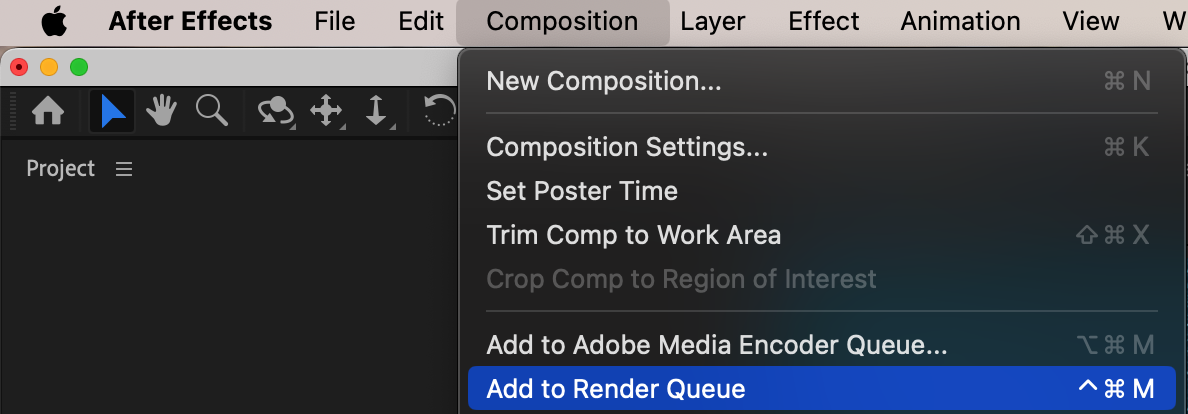
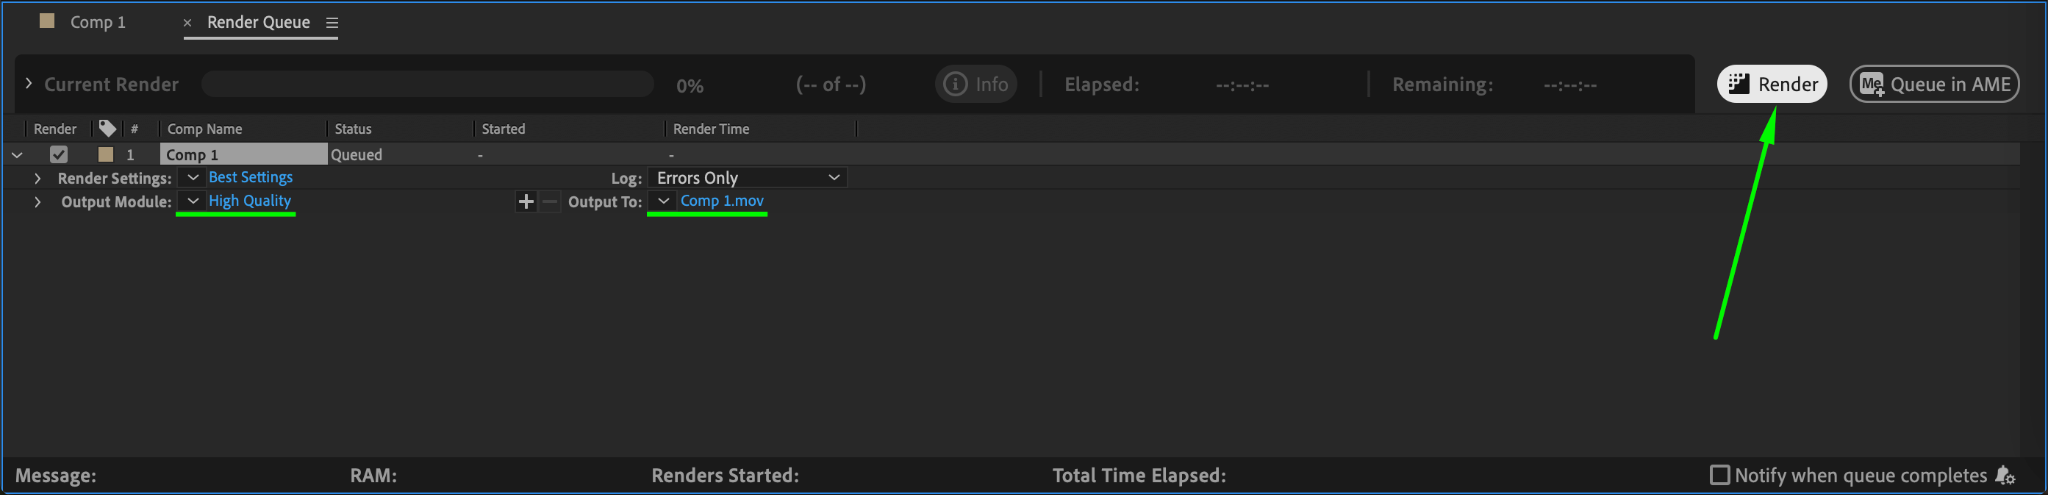
Step 14: Render Your Project
When satisfied with your glitter effect, render the composition. Go to Composition > Add to Render Queue, set the output format and location, and click Render.
Conclusion
Creating glitter effects in After Effects is a simple yet effective way to add a touch of magic to your animations. By combining noise layers, particles, and color adjustments, you can achieve a professional, sparkling effect suitable for any project. Follow this guide to create your own glitter masterpiece!
Our Bestsellers


