Create Stylish Stinger Transitions in After Effects
Introduction – Build Dynamic, Animated Transitions Using Simple Shapes
In this tutorial, you’ll learn how to design and animate a vibrant stinger transition — a quick and stylish wipe used to transition between scenes or graphics. These transitions are often seen in esports, streaming, and broadcast content. We’ll use basic shape layers, the Linear Wipe effect, and color timing to build a smooth motion effect.
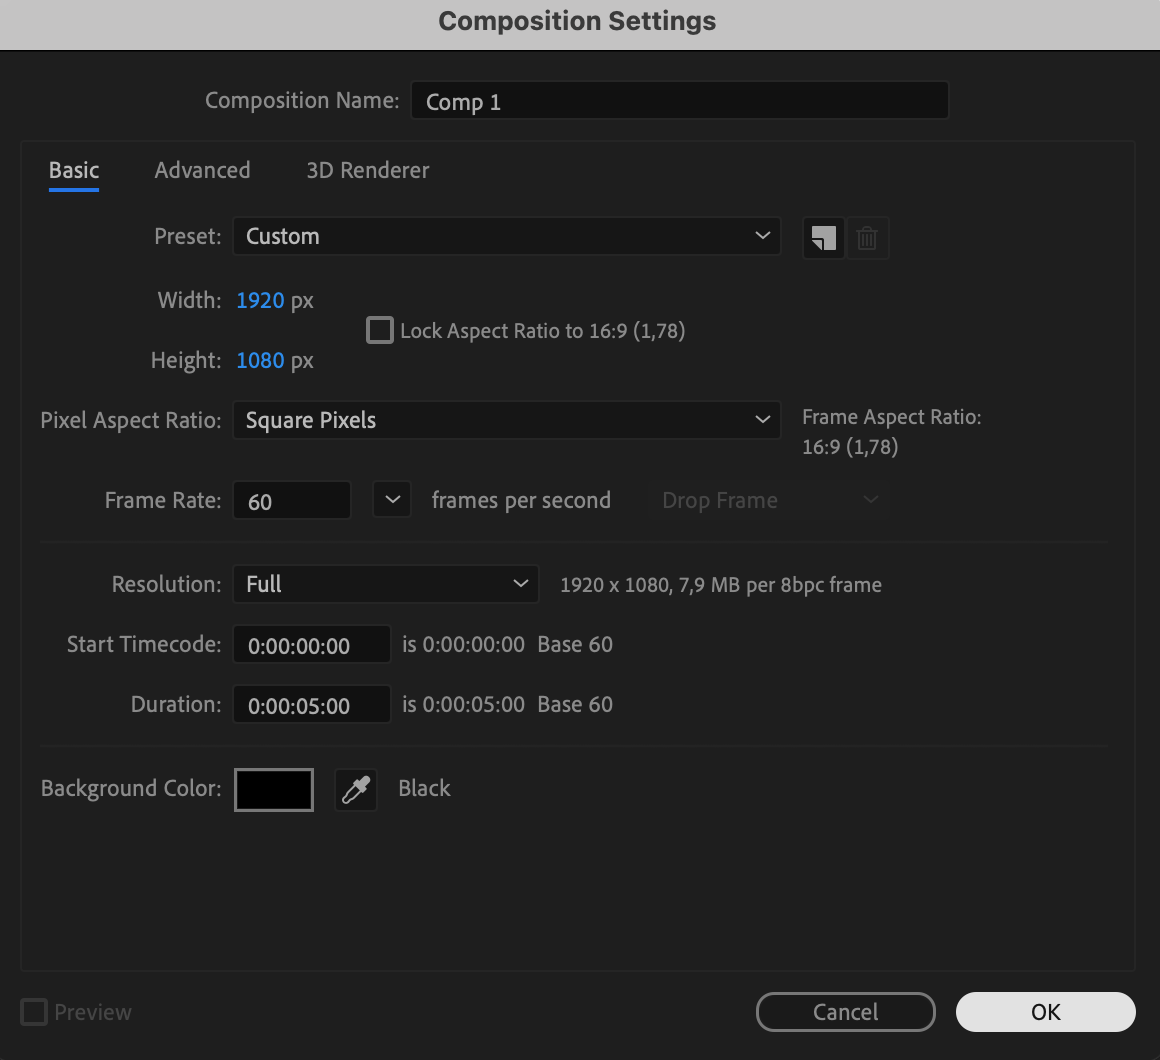
Step 1: Create a New Composition
Start by creating a new composition. Go to Composition > New Co mposition. Set the resolution to 1920×1080, frame rate to 30fps (or match your project), and the duration to around 5 seconds.
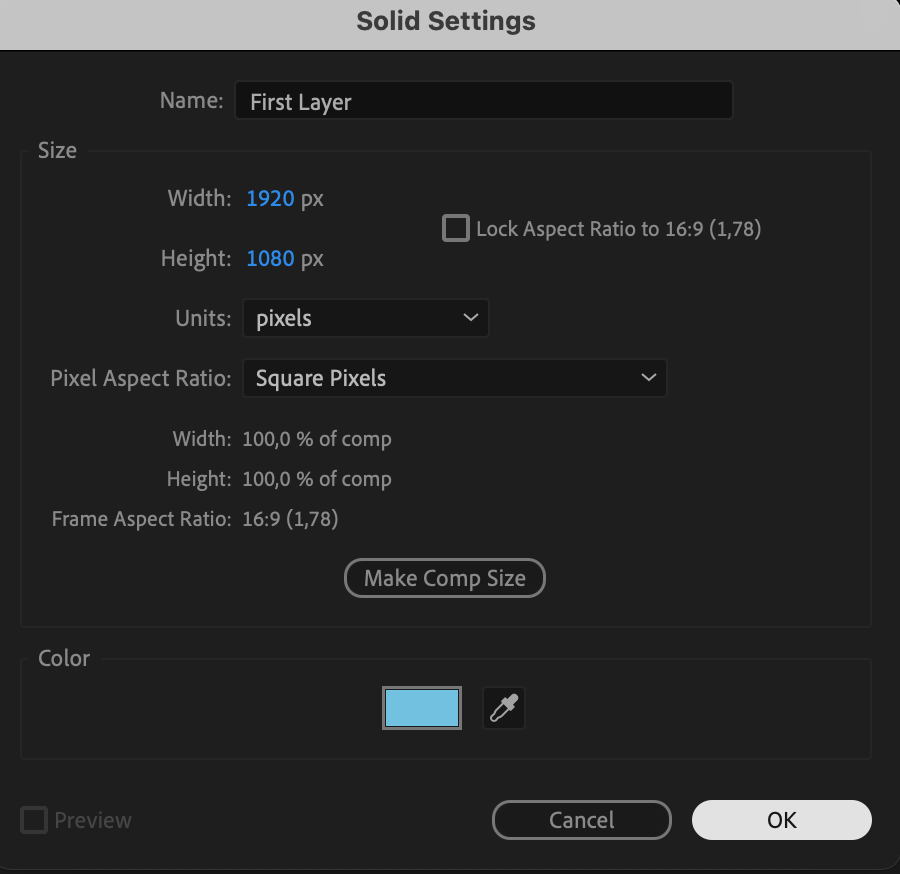
 Step 2: Add a Solid Layer
Go to Layer > New > Solid, choose a color for your transition (such as red or blue), and name it “First Layer”. This will be the base layer of your stinger animation.