Discover easy steps and techniques to slow down a clip in After Effects and create stunning slow-motion effects with precision and control. Whether you are a professional video designer or a beginner, this guide will help you achieve smooth and captivating slow-motion shots.
Whether you’re a professional video designer or a beginner, this tutorial will equip you with the knowledge and skills to enhance the visual dynamics of your projects. So, let’s dive in and explore the art of slowing down clips in After Effects!
Get 10% off when you subscribe to our newsletter

There are a few straightforward methods you can use. Let’s explore them in detail:
1. Time Stretch:
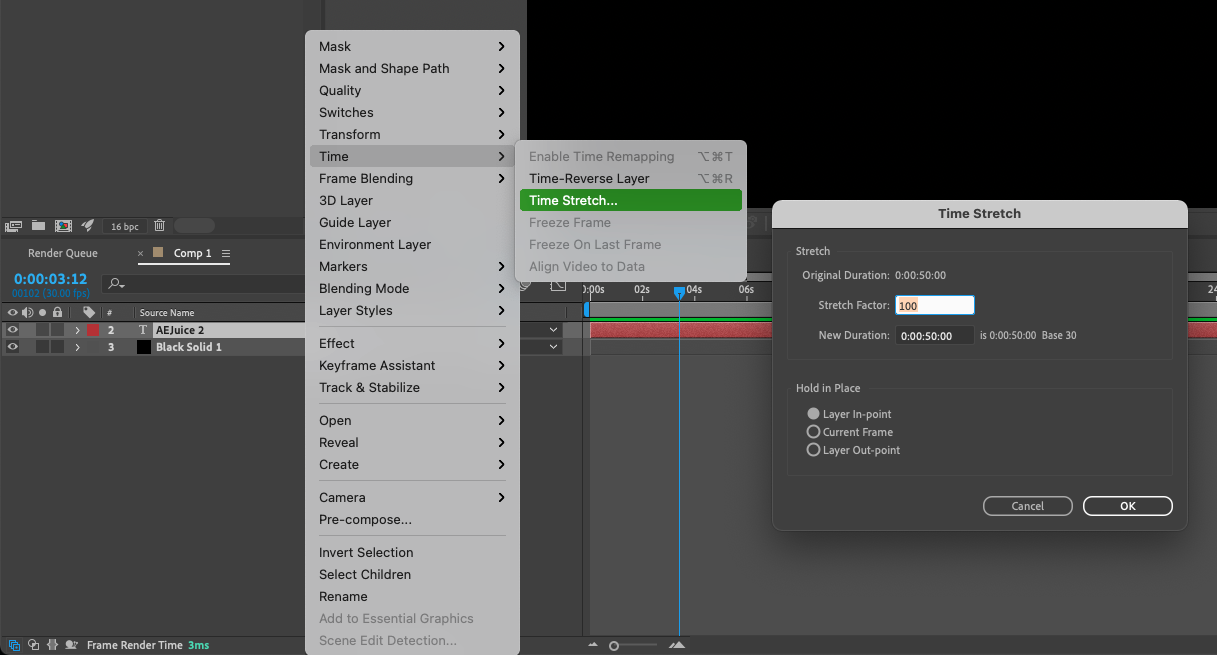
The easiest and most common way to slow down a clip is by using the Time Stretch feature. Here’s how you can do it:
1. Select your clip in the composition timeline.
2. Right-click and navigate to “Time” > “Time Stretch.”
3. In the Time Stretch dialog box, adjust the “Stretch Factor” to your desired speed. A value below 100% will result in a slower motion.
4. Preview the clip to see if the speed is as desired. If not, make further adjustments until you achieve the desired effect.
2. Time Remapping:
Another powerful tool in After Effects for slowing down clips is Time Remapping. This technique allows you to have more control over the speed, ramping, and timing of your footage. To use Time Remapping:
1. Select your clip in the composition timeline.
2. Right-click and go to “Time” > “Enable Time Remapping.”
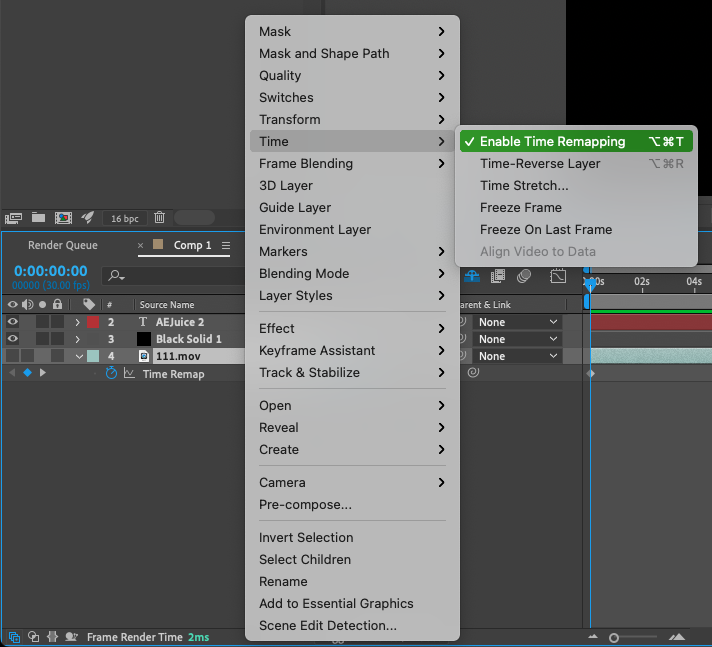
3. A keyframe will appear at the beginning and end of the clip’s time range. Move the playhead to the point where you want to slow down the clip.
4. Set a new keyframe and convert it by right-clicking on it > “Keyframe Assistant” > “Easy Ease In.”
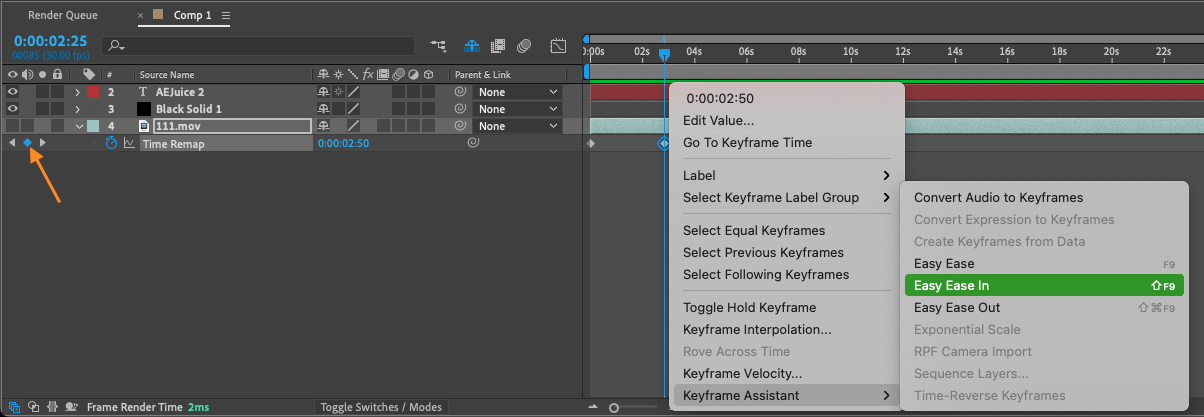
5. Drag the keyframe horizontally to create a smoother transition
6. Repeat this process at the end of the clip to maintain consistency.
7. Adjust the keyframes as necessary to control the speed and flow of the slow-motion effect.
3. Frame Blending:
When slowing down footage, enabling frame blending can enhance the visual quality and smoothness of the slow motion effect. To enable frame blending:
1. Select your clip in the composition timeline.
2. Navigate to the “Layer” menu and choose “Frame Blending.”
3. Enable the “Frame Mix” option.
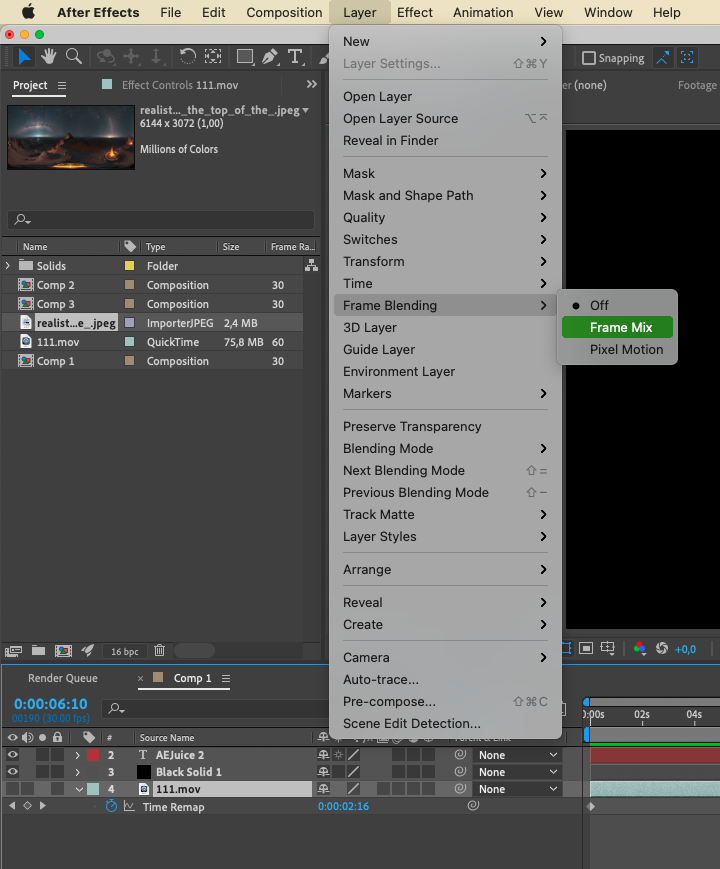 4. Preview the clip to see the improved motion blur and fluidity.
4. Frame Rate Adjustment:
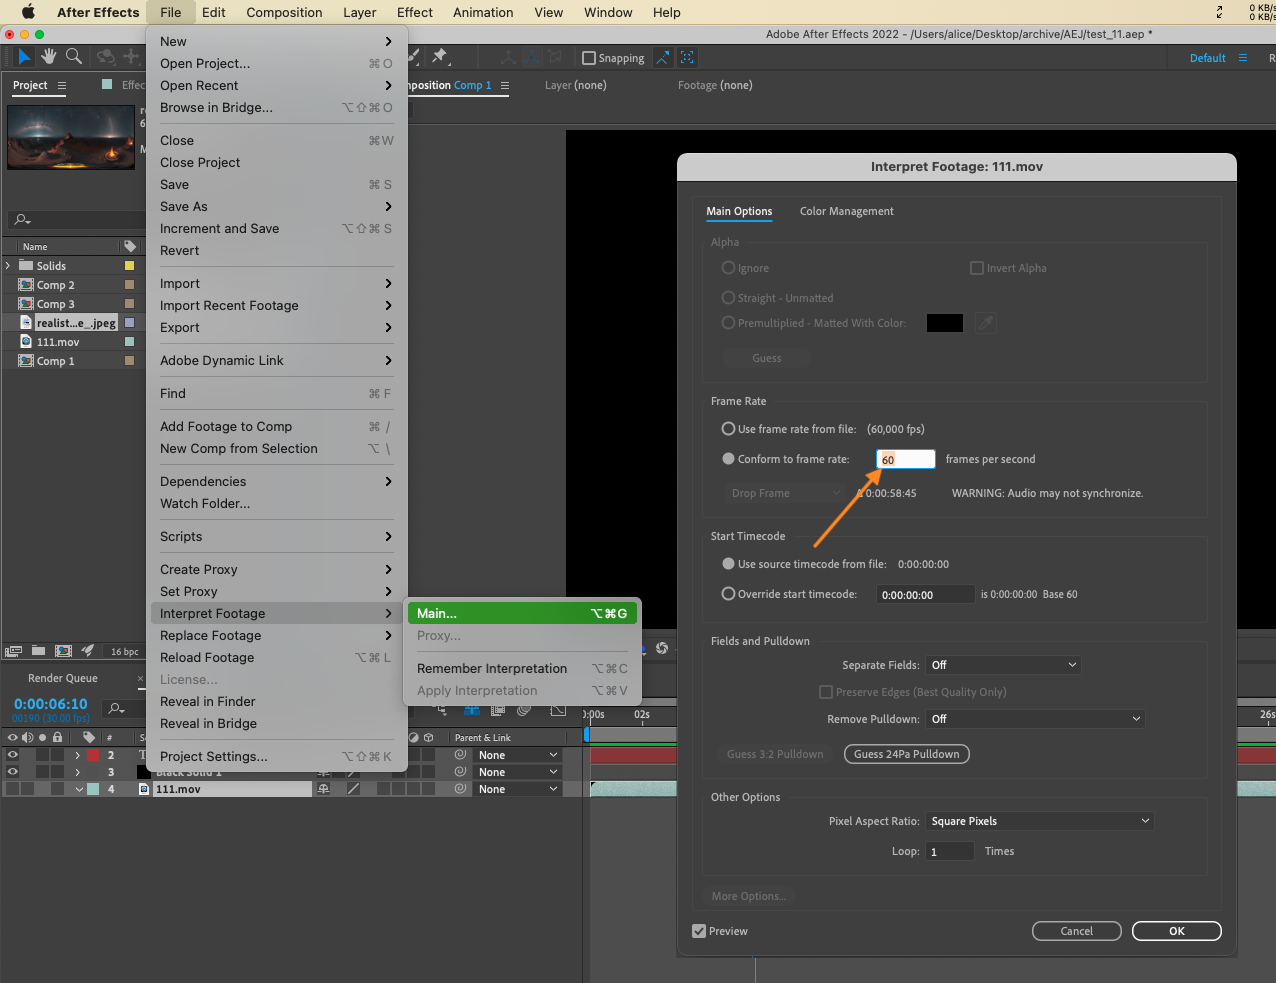
If you shot your footage at a higher frame rate, such as 60fps or 120fps, you can create slow-motion by reducing the frame rate in After Effects. Here’s how:
1. Select your clip in the composition timeline.
2. Go to “File” > “Interpret Footage” > “Main”.
3. In the dialog box, change the “Conform to frame rate” value to your desired slower frame rate.
4. Click “OK” to apply the changes.
Remember, the effectiveness of these techniques may vary based on factors such as the original frame rate, footage quality, and the specific motion you’re trying to achieve. Experimentation is key to finding the perfect slow-motion effect for your project.
By following these steps and exploring various techniques, you can easily slow down a clip in After Effects and create stunning slow-motion effects. Remember to fine-tune your adjustments until you achieve the desired result. Happy editing!


