Getting Started with an After Effects Project
Introduction to Creating an After Effects Project
Adobe After Effects is a powerful tool for motion graphics and visual effects. Whether you’re new to the software or simply need a refresher, understanding how to properly start a project is essential for an efficient workflow. In this guide, you’ll learn the basic steps for setting up a new project in After Effects, from opening the software to configuring key project settings.
Step 1: Open Adobe After Effects
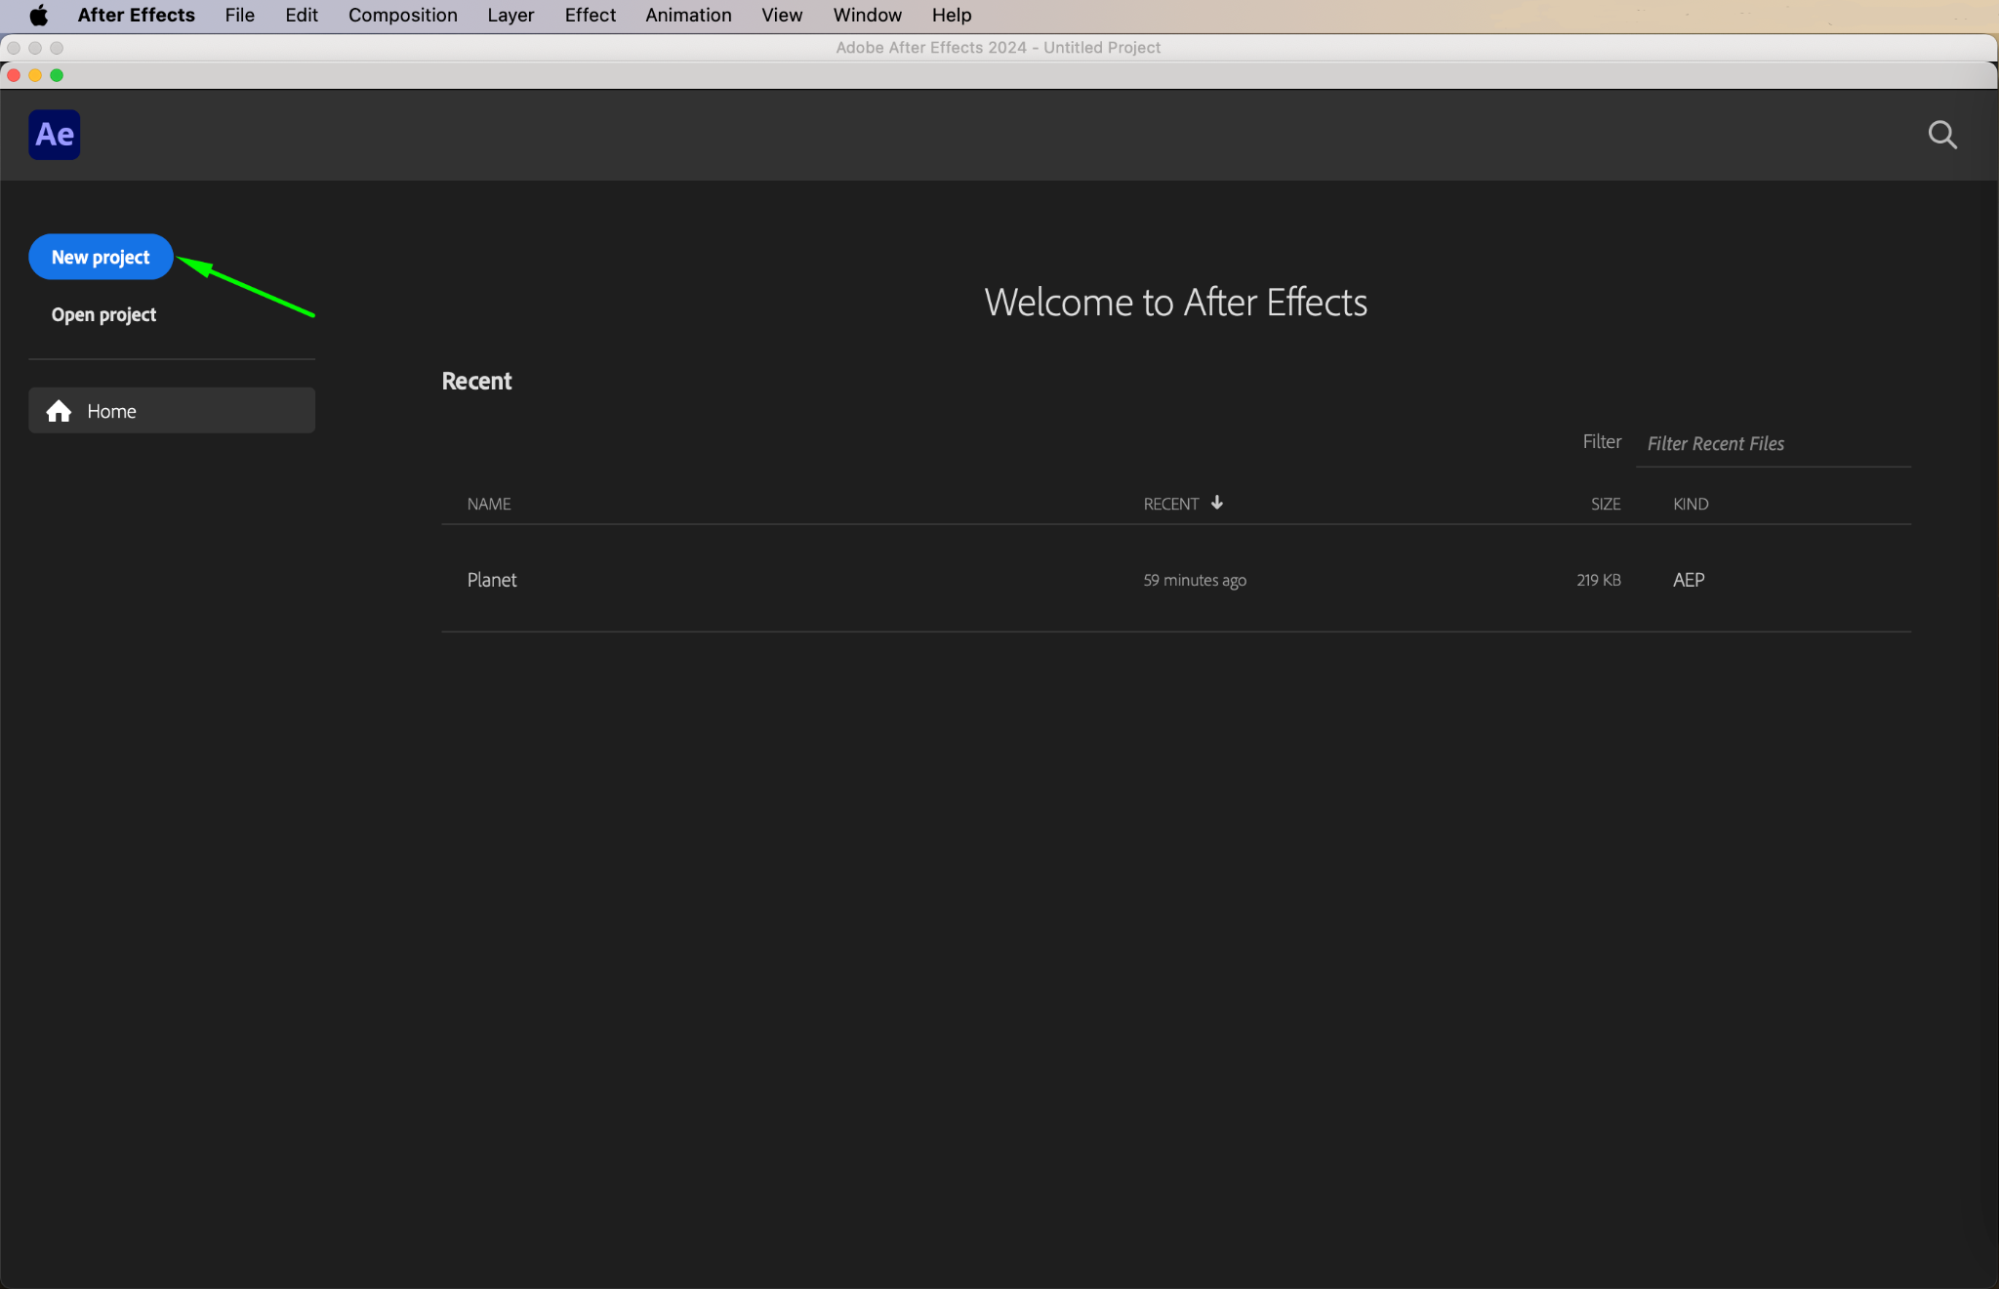
Begin by launching Adobe After Effects from your desktop or applications menu. Once the program opens, you will be greeted with the home screen, where you can create a new project. Click New Project to start with a fresh workspace. This is the first step in building your composition and organizing assets.
 Step 2: Set Up Your Project Settings
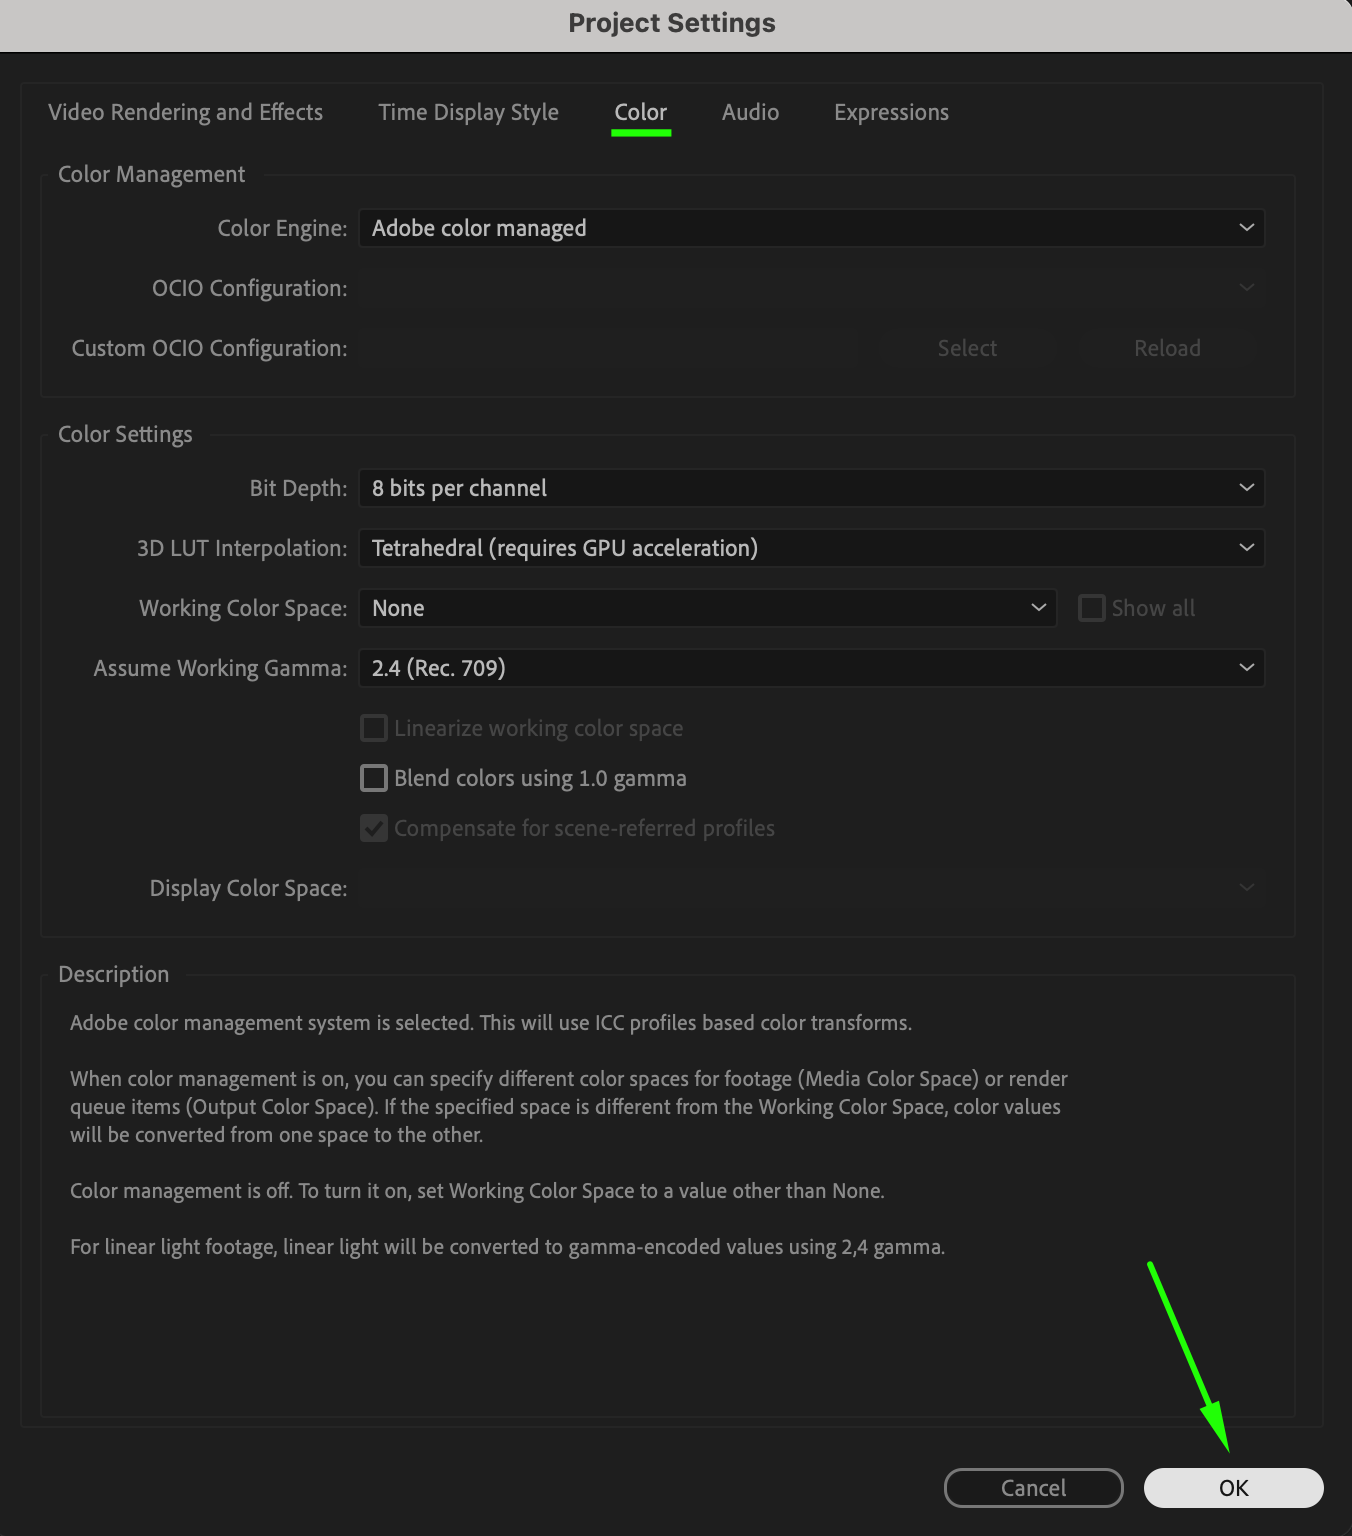
After starting a new project, it’s important to configure your project settings. Go to File > Project Settings to define the key parameters, such as color depth, timecode display format, and working space. For most beginner projects, the default settings work fine, but for more specific needs like color correction or high-resolution output, you may need to adjust these.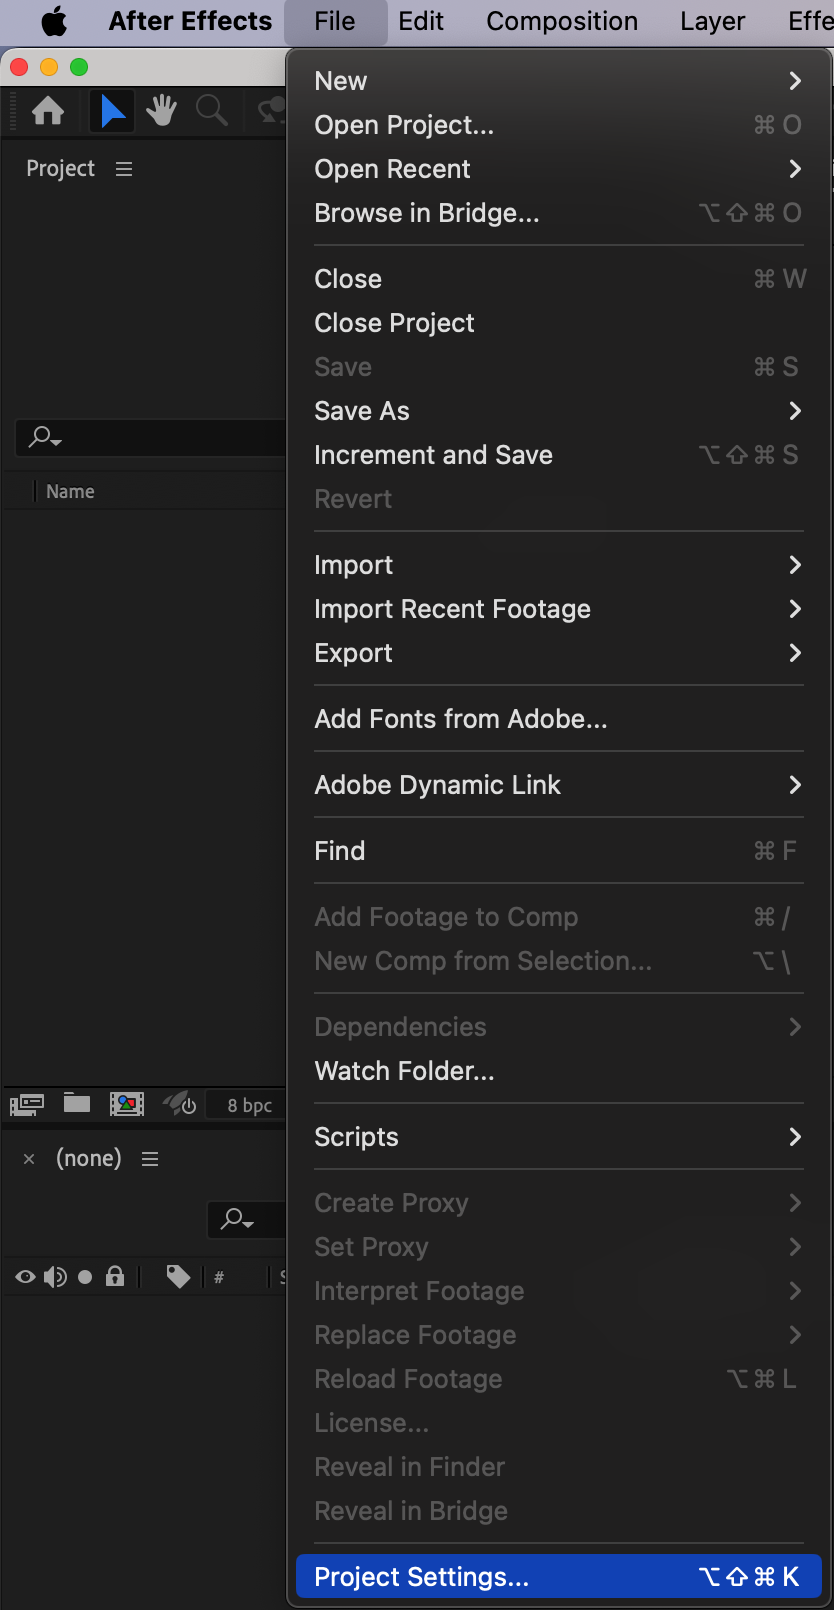
 Step 3: Create a New Composition
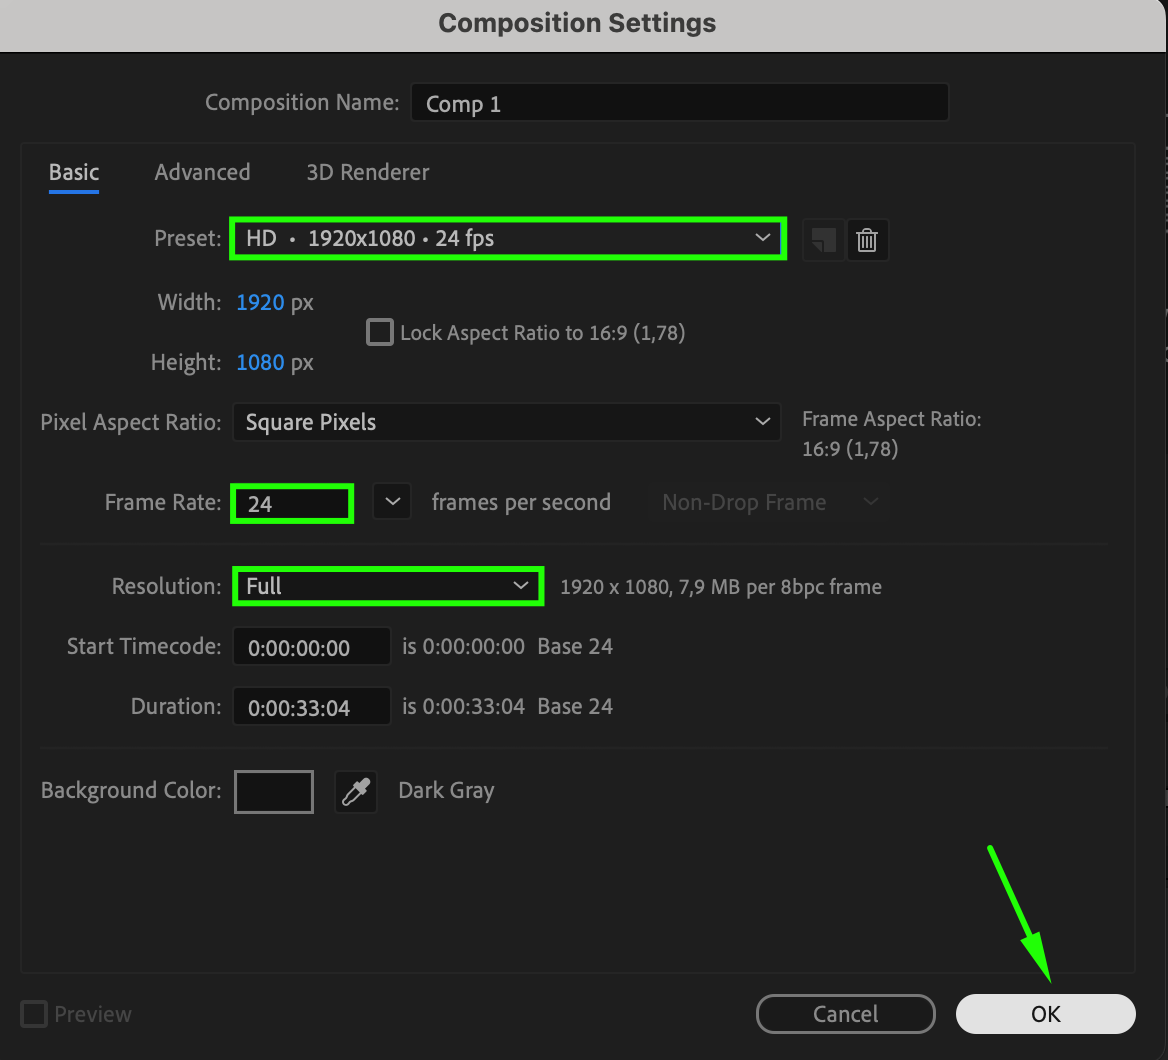
Next, you need to create a composition, which is the canvas where all your layers and effects come together. Click Composition > New Composition. In the New Composition window, choose your resolution, frame rate, and duration. A standard resolution is 1920×1080 with a frame rate of 24 fps, but this can be tailored to fit your project needs.
 Step 4: Organize Your Project Panel
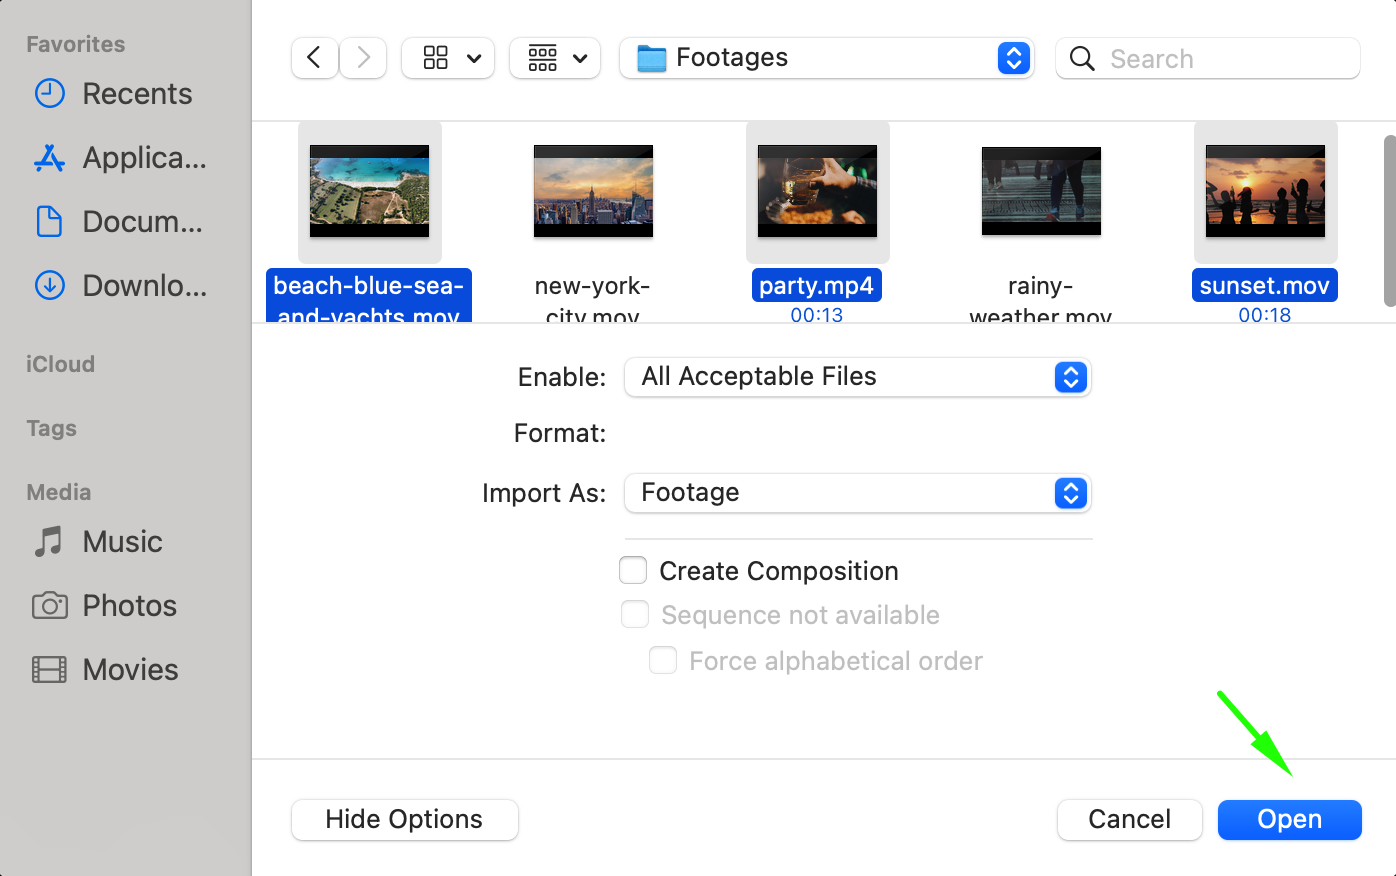
The Project Panel is where you import and manage all the media you will use in your composition. To import files, go to File > Import > File and select the assets you need, such as images, videos, or audio. 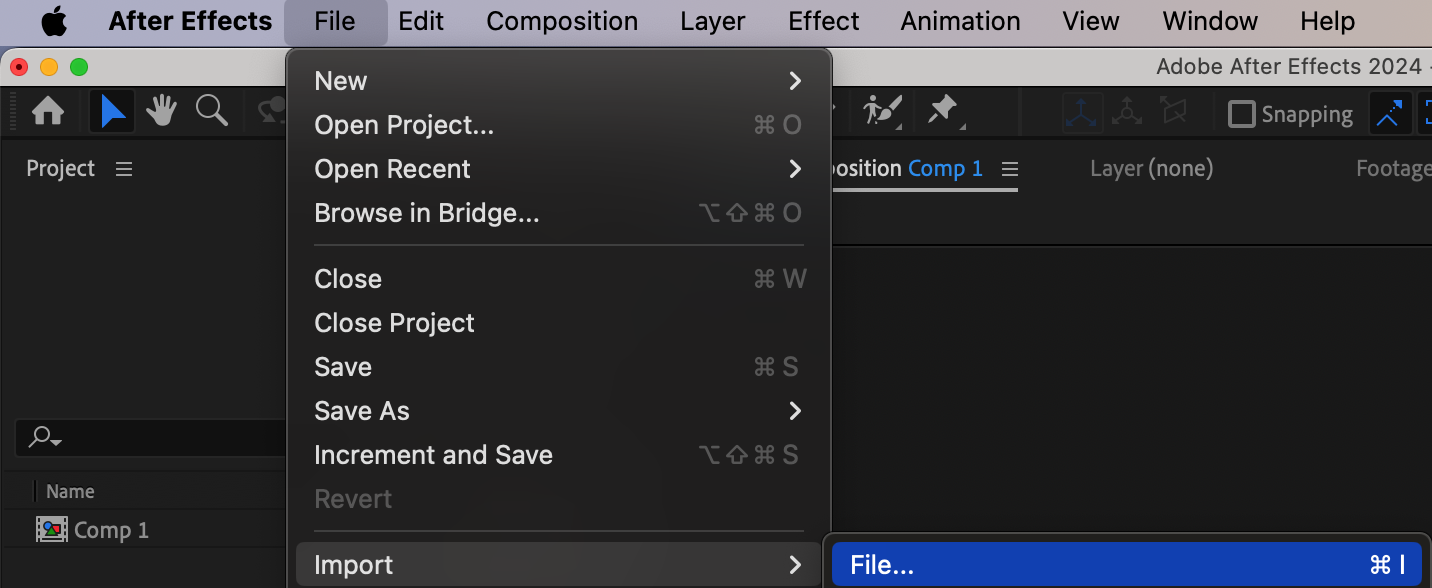
 Step 5: Add Layers to Your Composition
Get 10% off when you subscribe to our newsletter

With your composition set up and your assets imported, it’s time to start building your project by adding layers to the composition. Drag files from the Project Panel onto the Timeline to create layers. Layers can include video clips, images, text, shapes, or solid layers.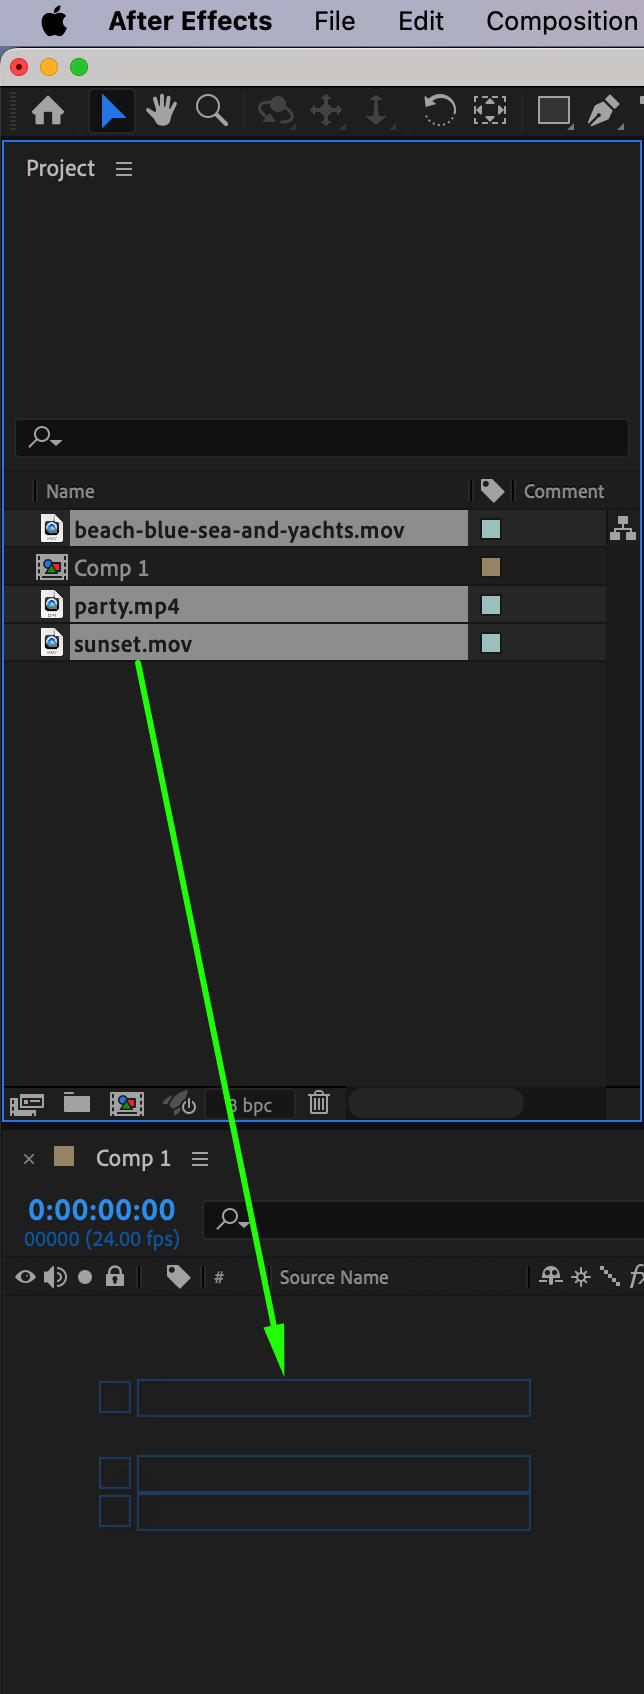
 Step 6: Adjust Timeline Settings and Preview
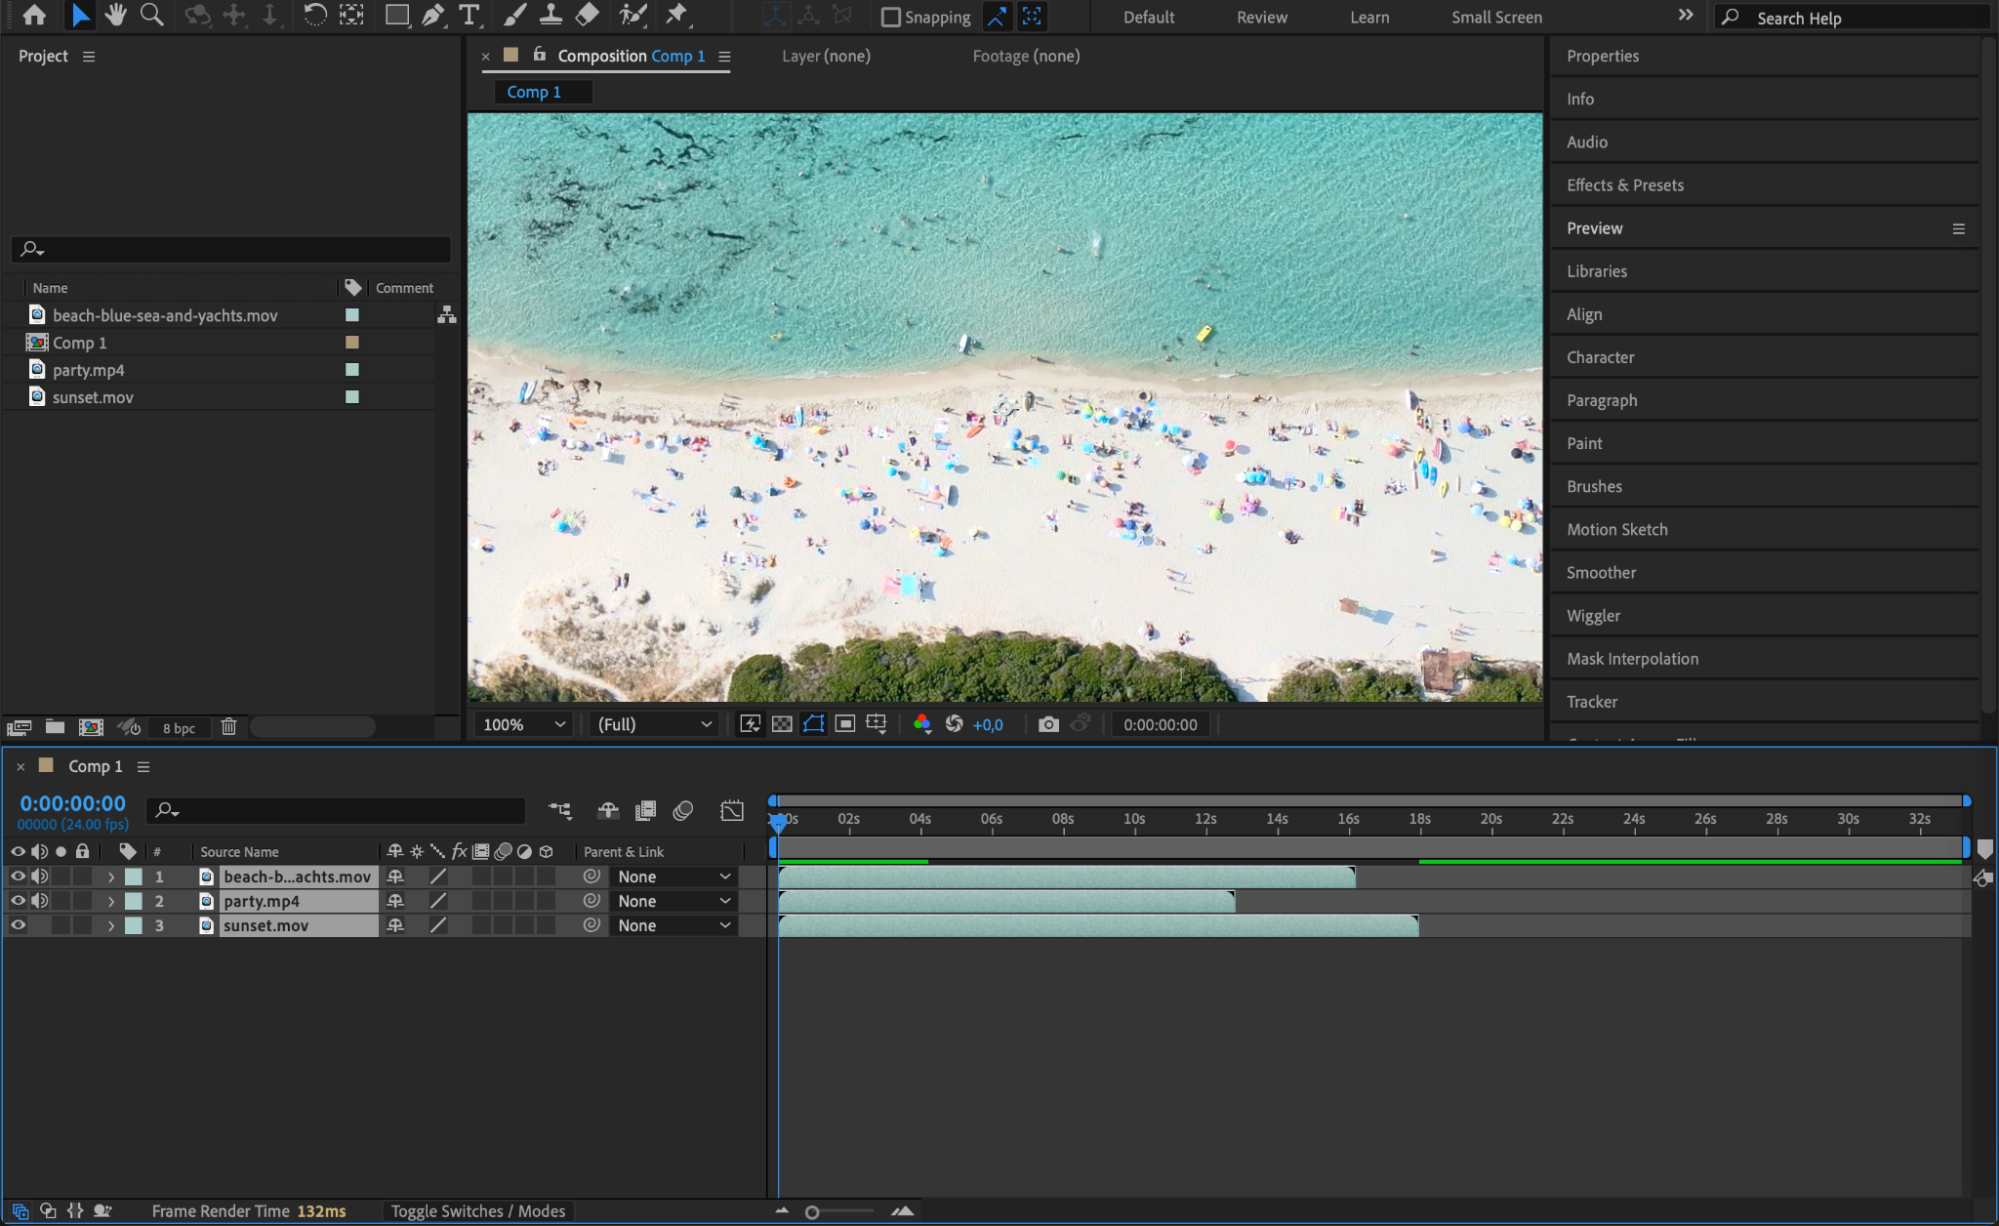
Once you’ve added your layers, use the Timeline Panel to adjust their duration and position. You can trim or extend layers by dragging the ends of the layer bars, and reposition them to change when they appear in the timeline. To preview your composition, press the Spacebar to play the animation. Make sure everything aligns with your desired sequence.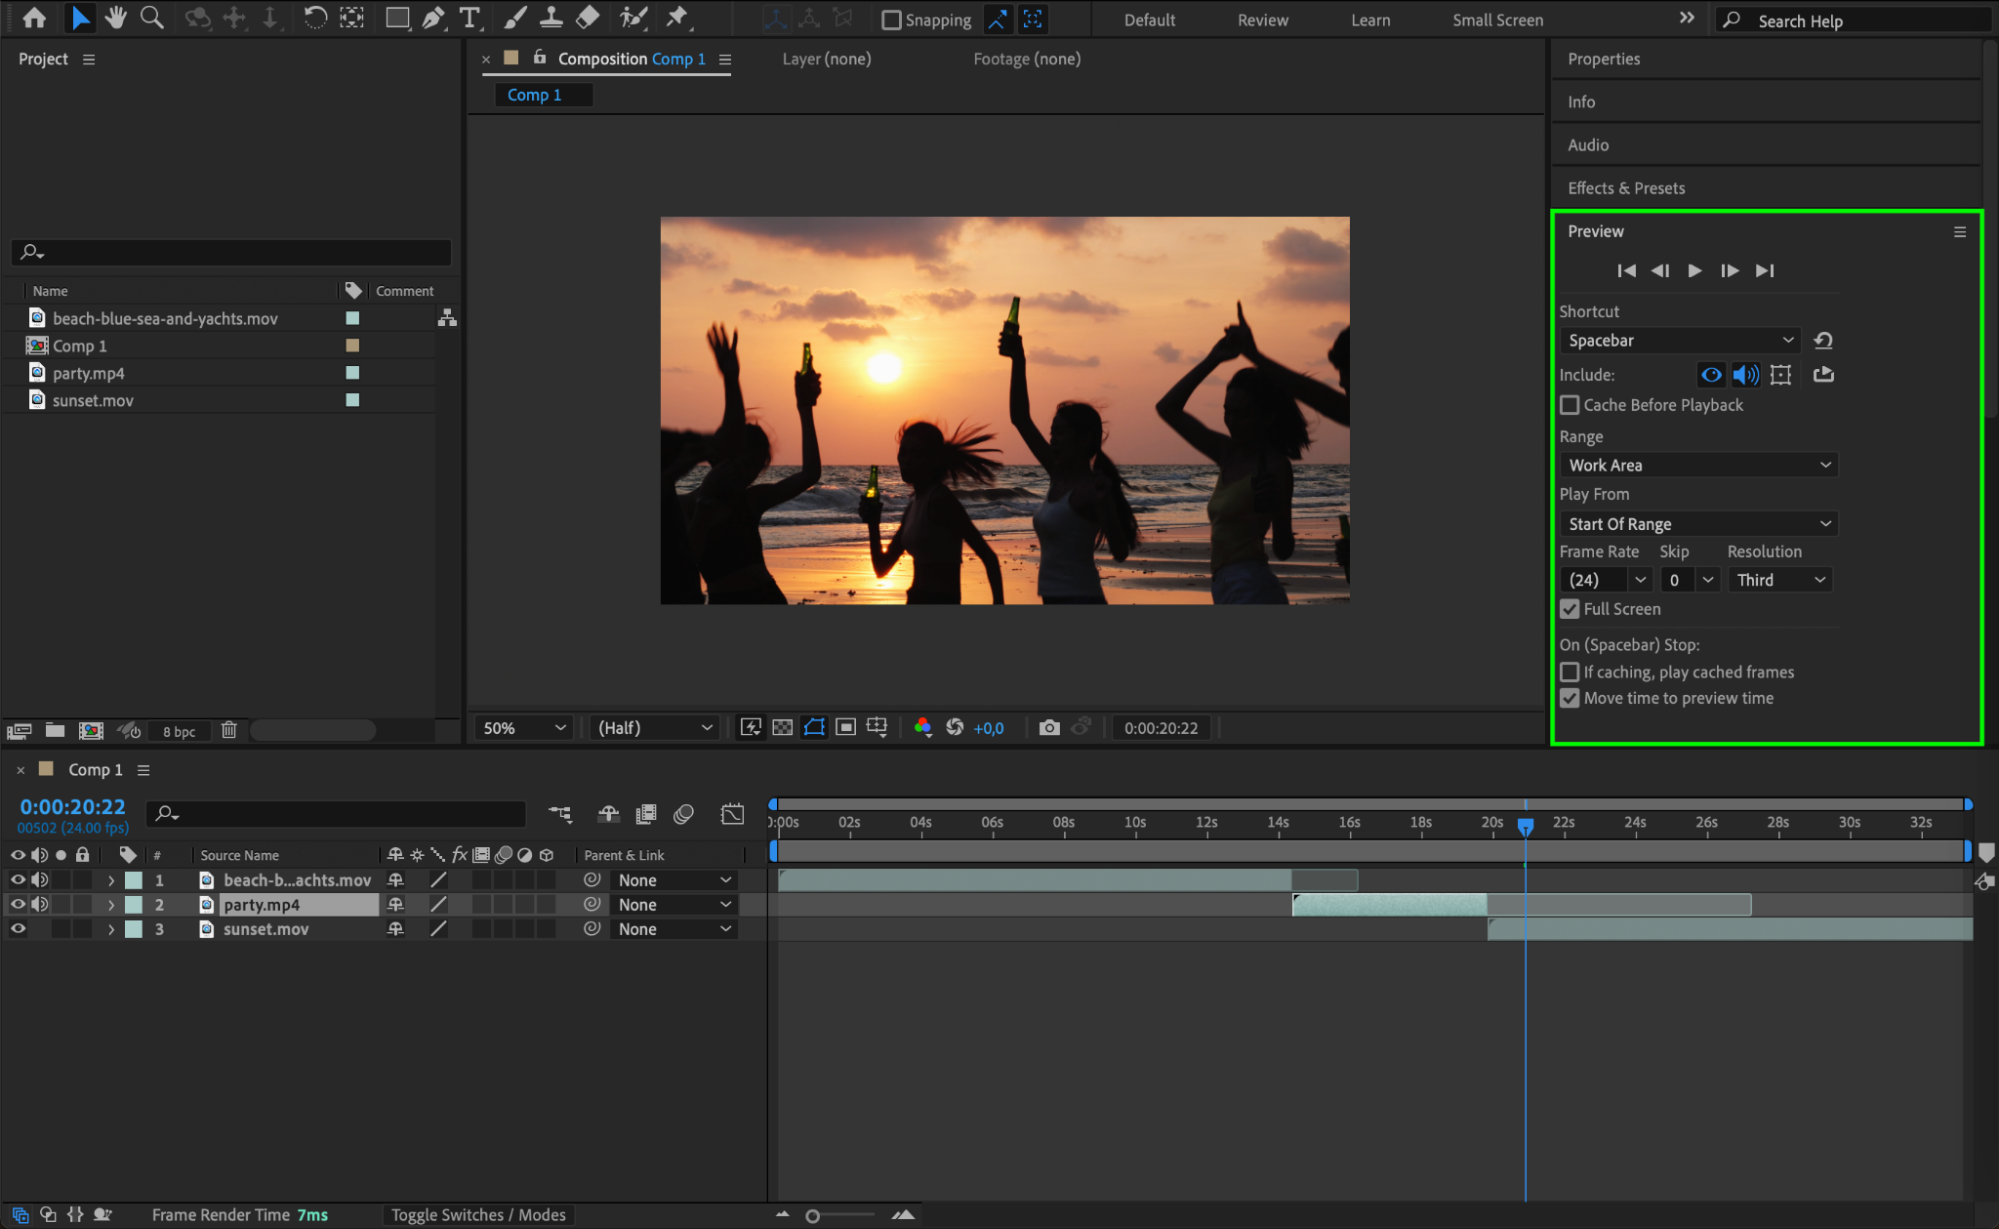 Step 7: Save Your Project
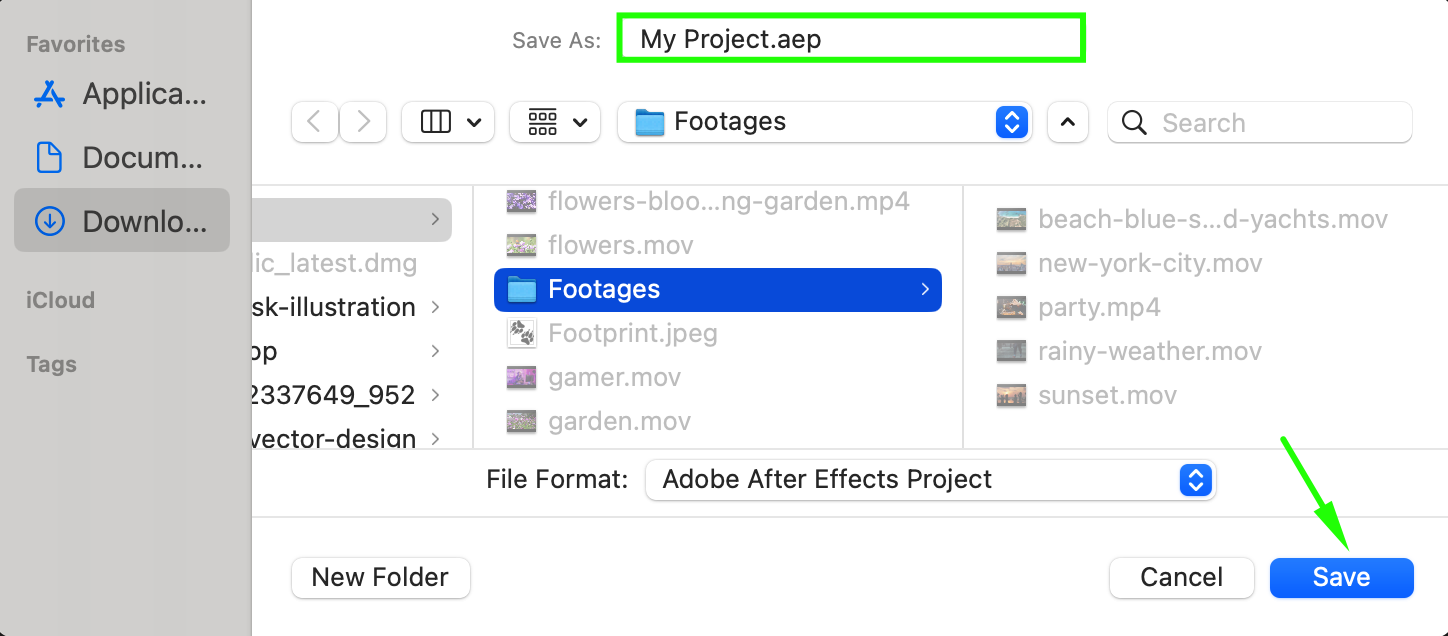
Saving your project regularly is crucial to avoid losing your work. Go to File > Save As to choose a location for your project file. After Effects saves the project as an .aep file, which you can open later to continue editing. It’s recommended to save your project in a dedicated folder, where you can also store all your media assets and output files.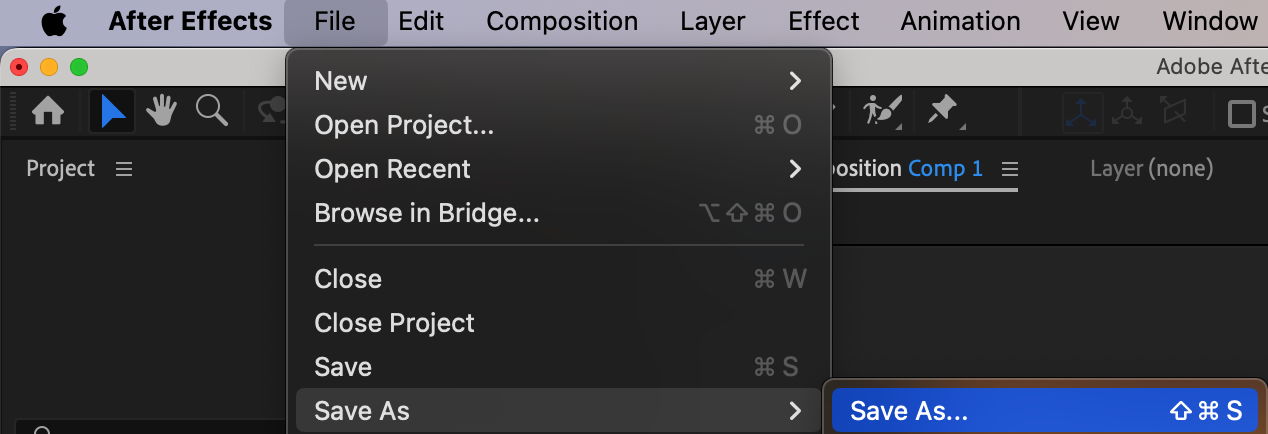
 Conclusion
Starting an After Effects project is a straightforward process that sets the foundation for all your creative work. By following these steps – opening the software, configuring settings, creating a composition, and organizing assets – you’ll be well on your way to building complex motion graphics and animations. Remember to save your project often and preview your work regularly to ensure a smooth and efficient workflow.


