A Comprehensive Guide to Time Stretching in After Effects
Introduction: “Unleashing Creativity Through Time Manipulation in After Effects
Time manipulation in After Effects is a powerful tool that allows animators to control the pace and duration of their compositions, offering endless creative possibilities. Whether you aim to slow down footage for dramatic effect or speed up sequences for comedic timing, mastering time-stretching techniques is essential for elevating your projects. In this comprehensive guide, we will walk you through the process of time stretching in After Effects, providing expert advice and practical examples to help you unleash your creativity and make the most of this feature.
Get 10% off when you subscribe to our newsletter

To stretch time in After Effects, you can utilize tools such as “Time Stretch” or “Time Remapping.” Here’s how to do it:
Step 1: Time Stretch
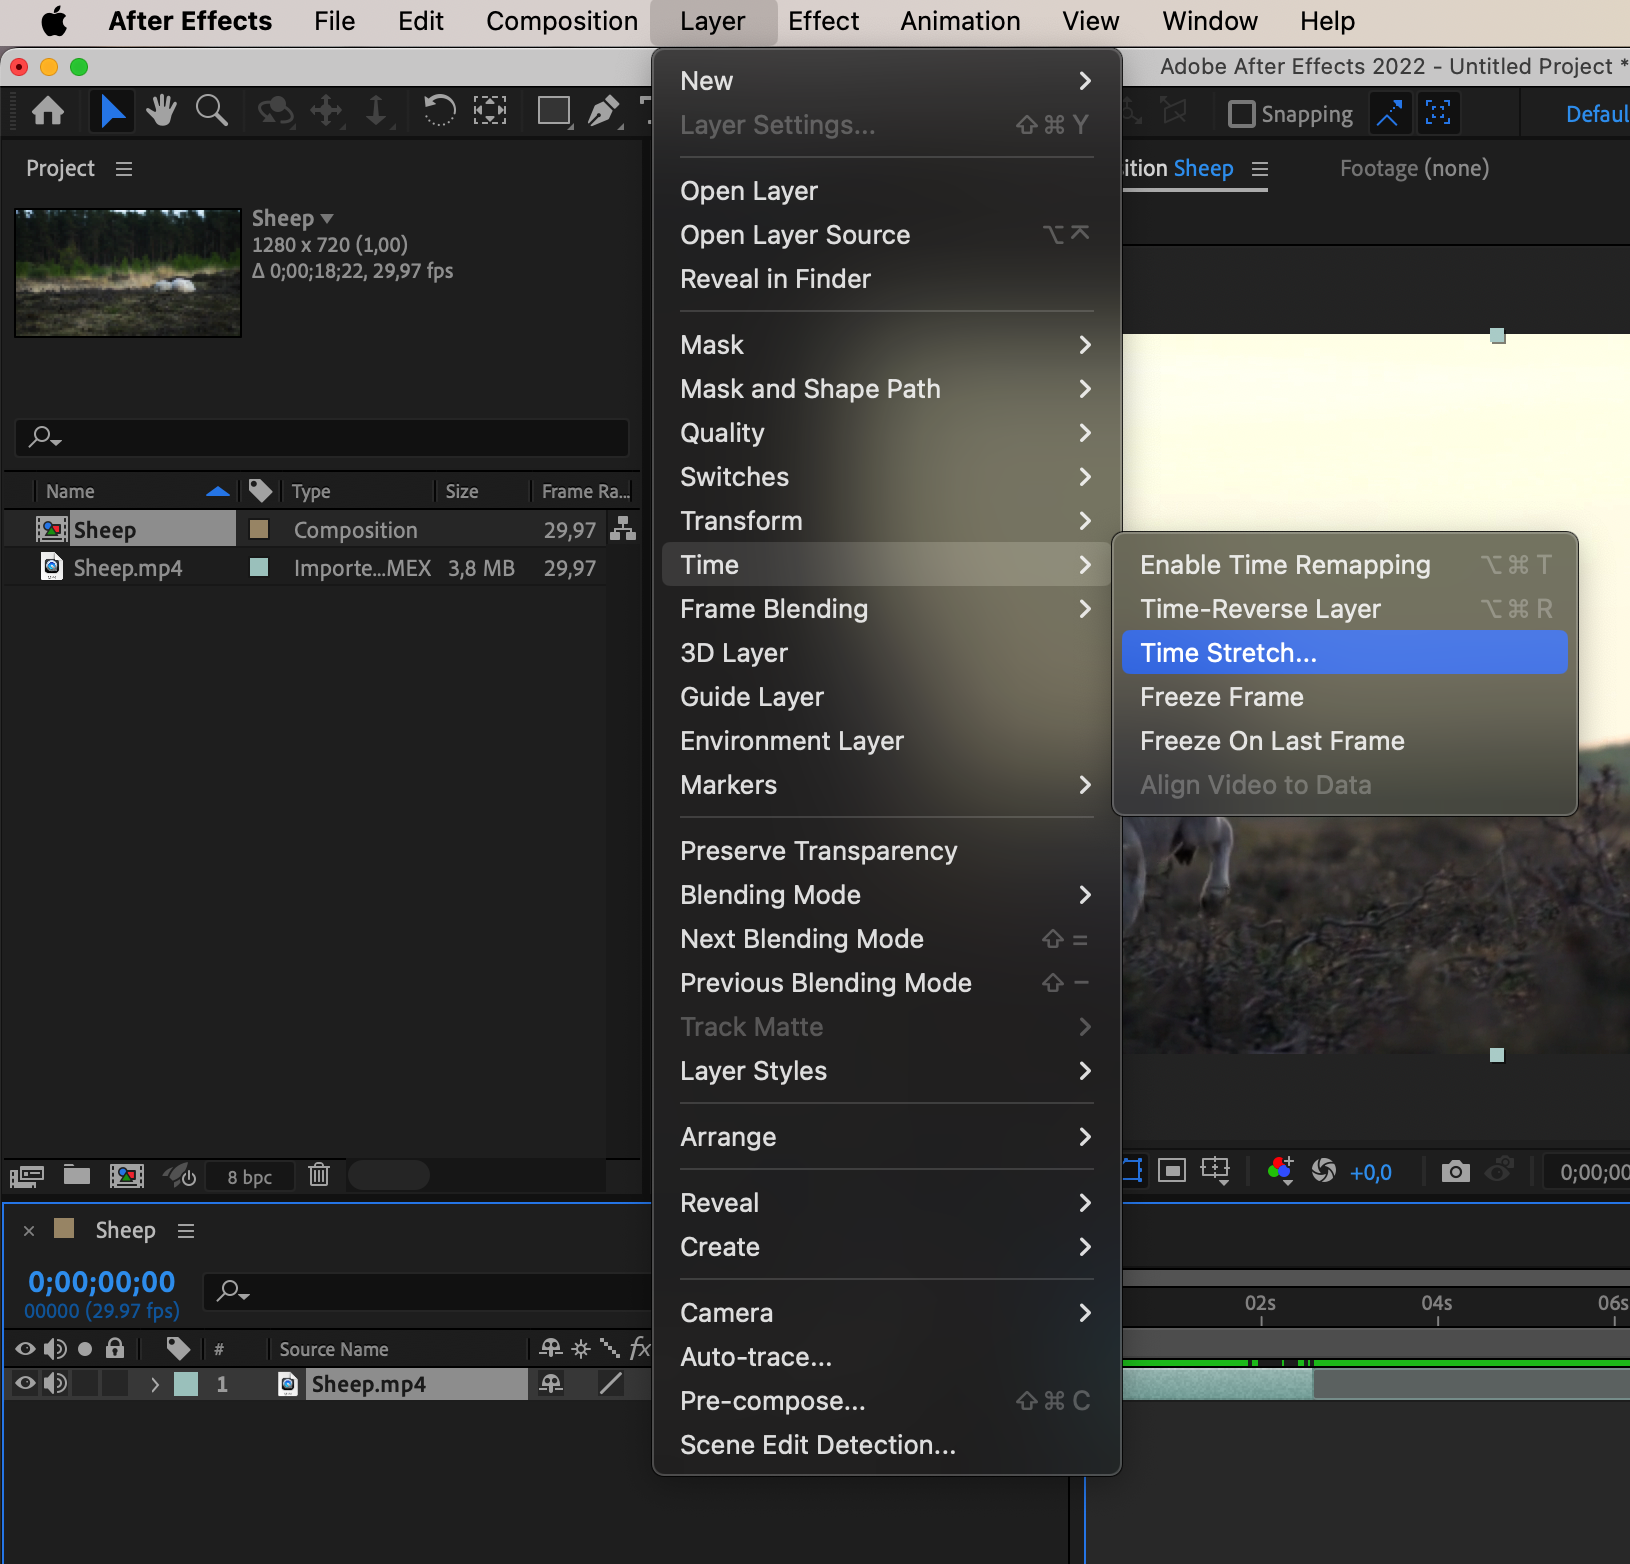
Place your video clip on the timeline.
Select the layer and navigate to “Layer” > “Time” > “Time Stretch.”
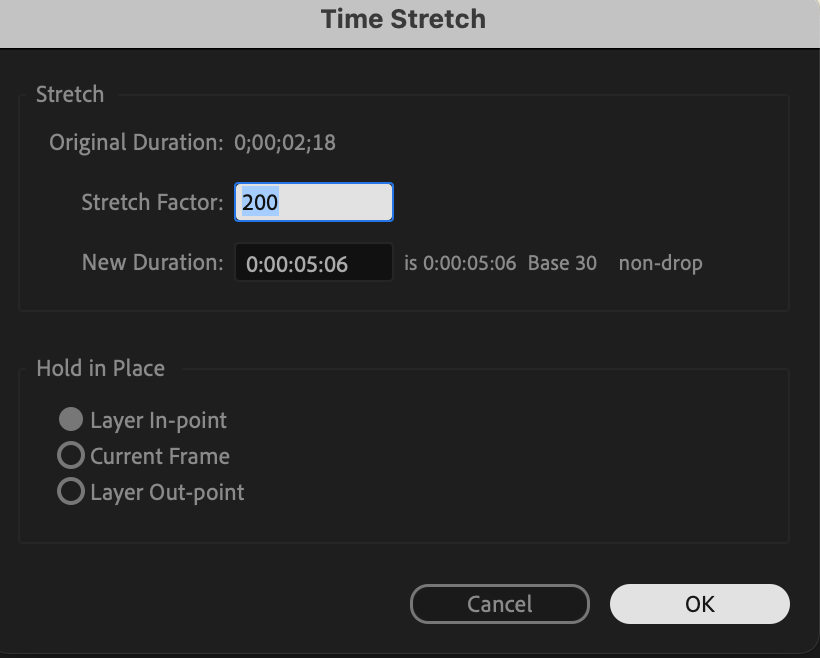
In the dialog box that appears, specify the new duration for your clip. For example, setting it to 200% will make your clip play at half speed, while 50% will make it play twice as fast.
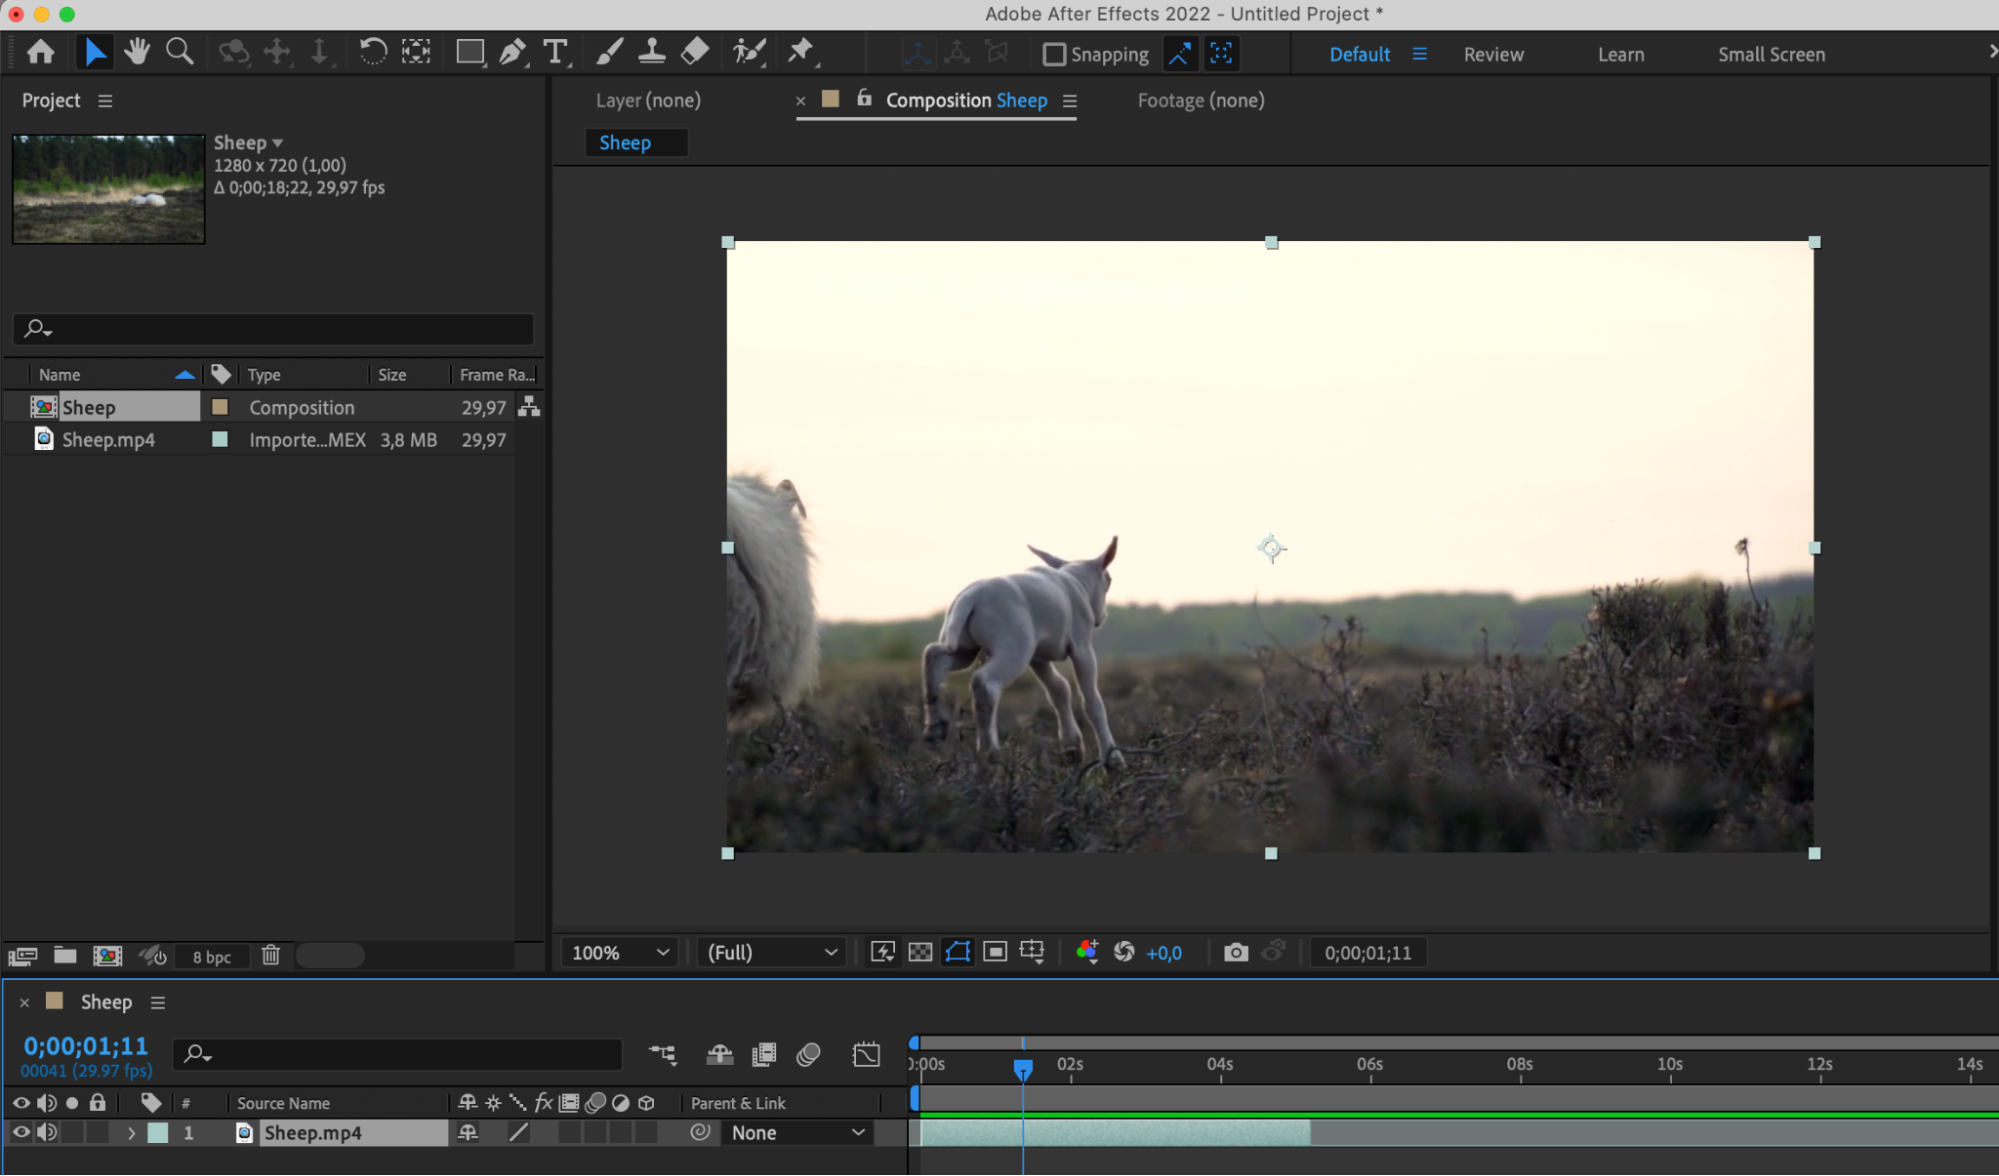
Click “OK” to apply the changes.

Get 10% off when you subscribe to our newsletter
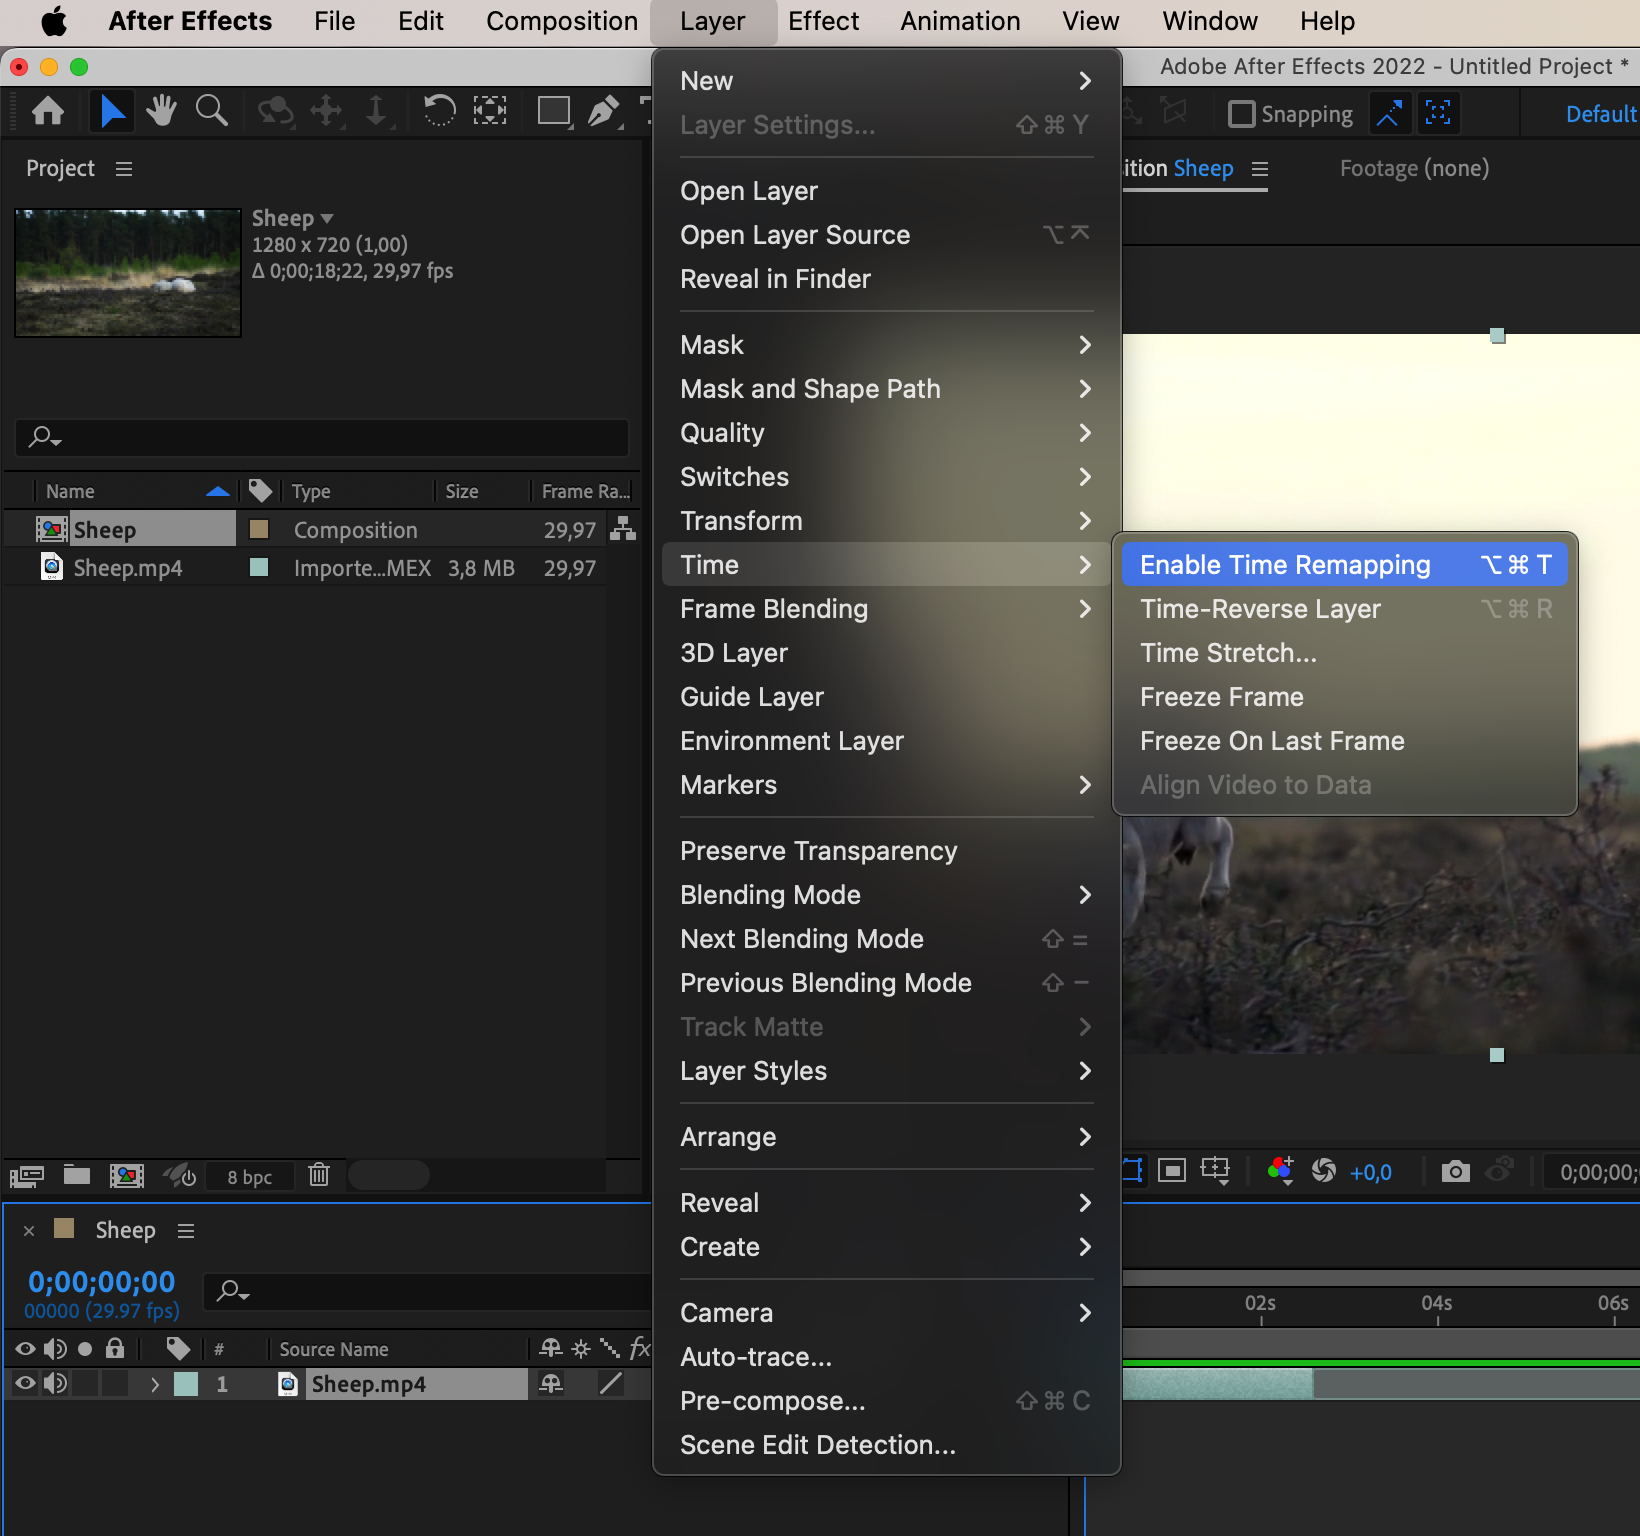
 Step 2: Time Remapping
Select the layer and navigate to “Layer” > “Time” > “Enable Time Remapping.”
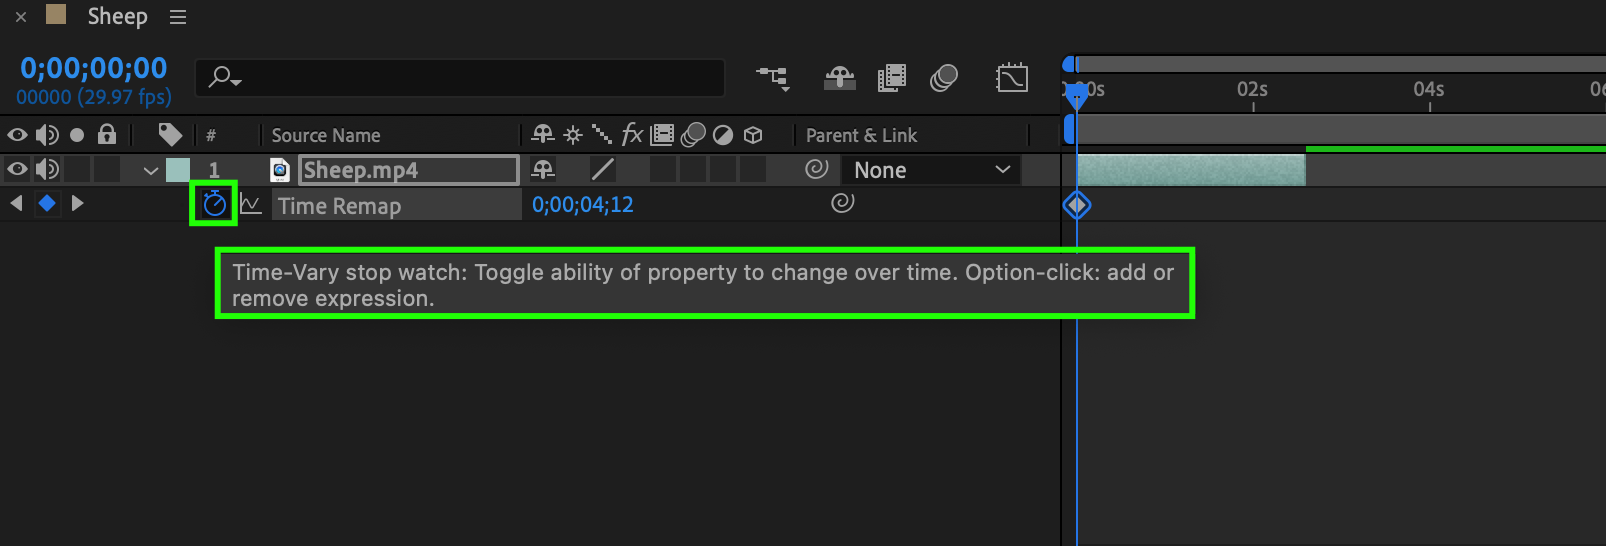
In the Time Remap section, at the end of the video layer on the timeline panel, an automatic keyframe is created. Using the stopwatch icon, create a keyframe at the beginning of the composition.
Get 10% off when you subscribe to our newsletter
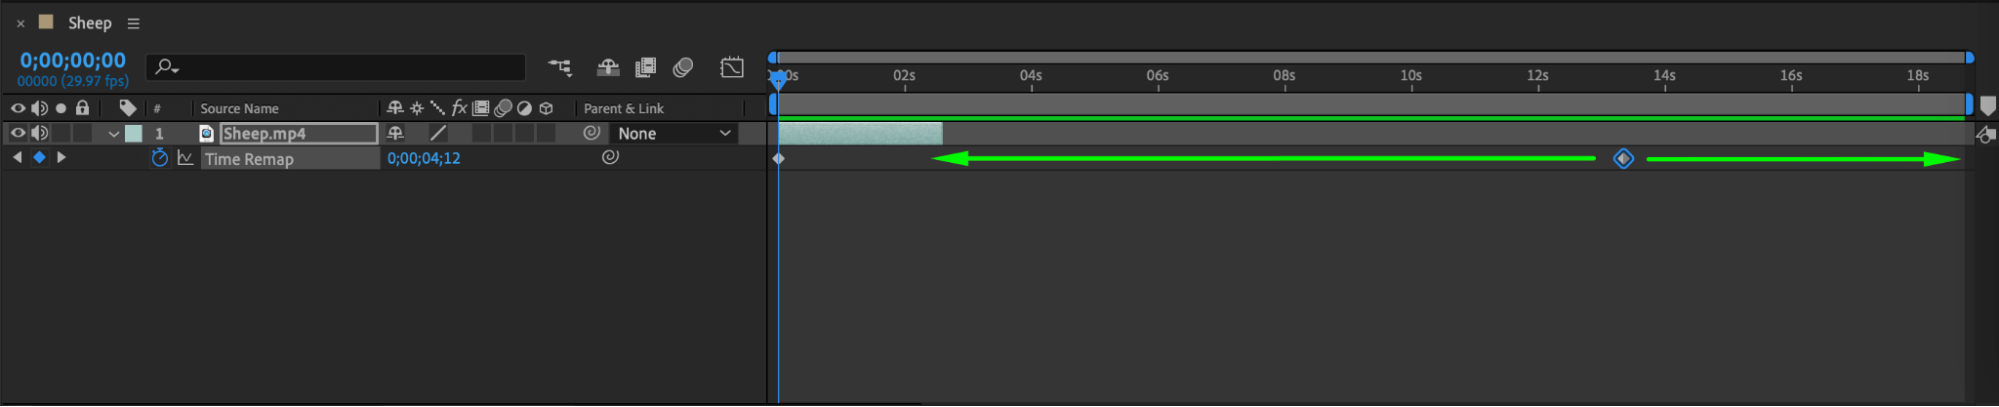
By adjusting the position of the second keyframe to the right or left, respectively, the video will slow down or speed up.
 Step 3: Adding Smoothness by Editing Keyframes
Add smoothness to your video by using the Easy Ease effect on created keyframes. Also, utilize the Graph Editor panel for precise adjustments.


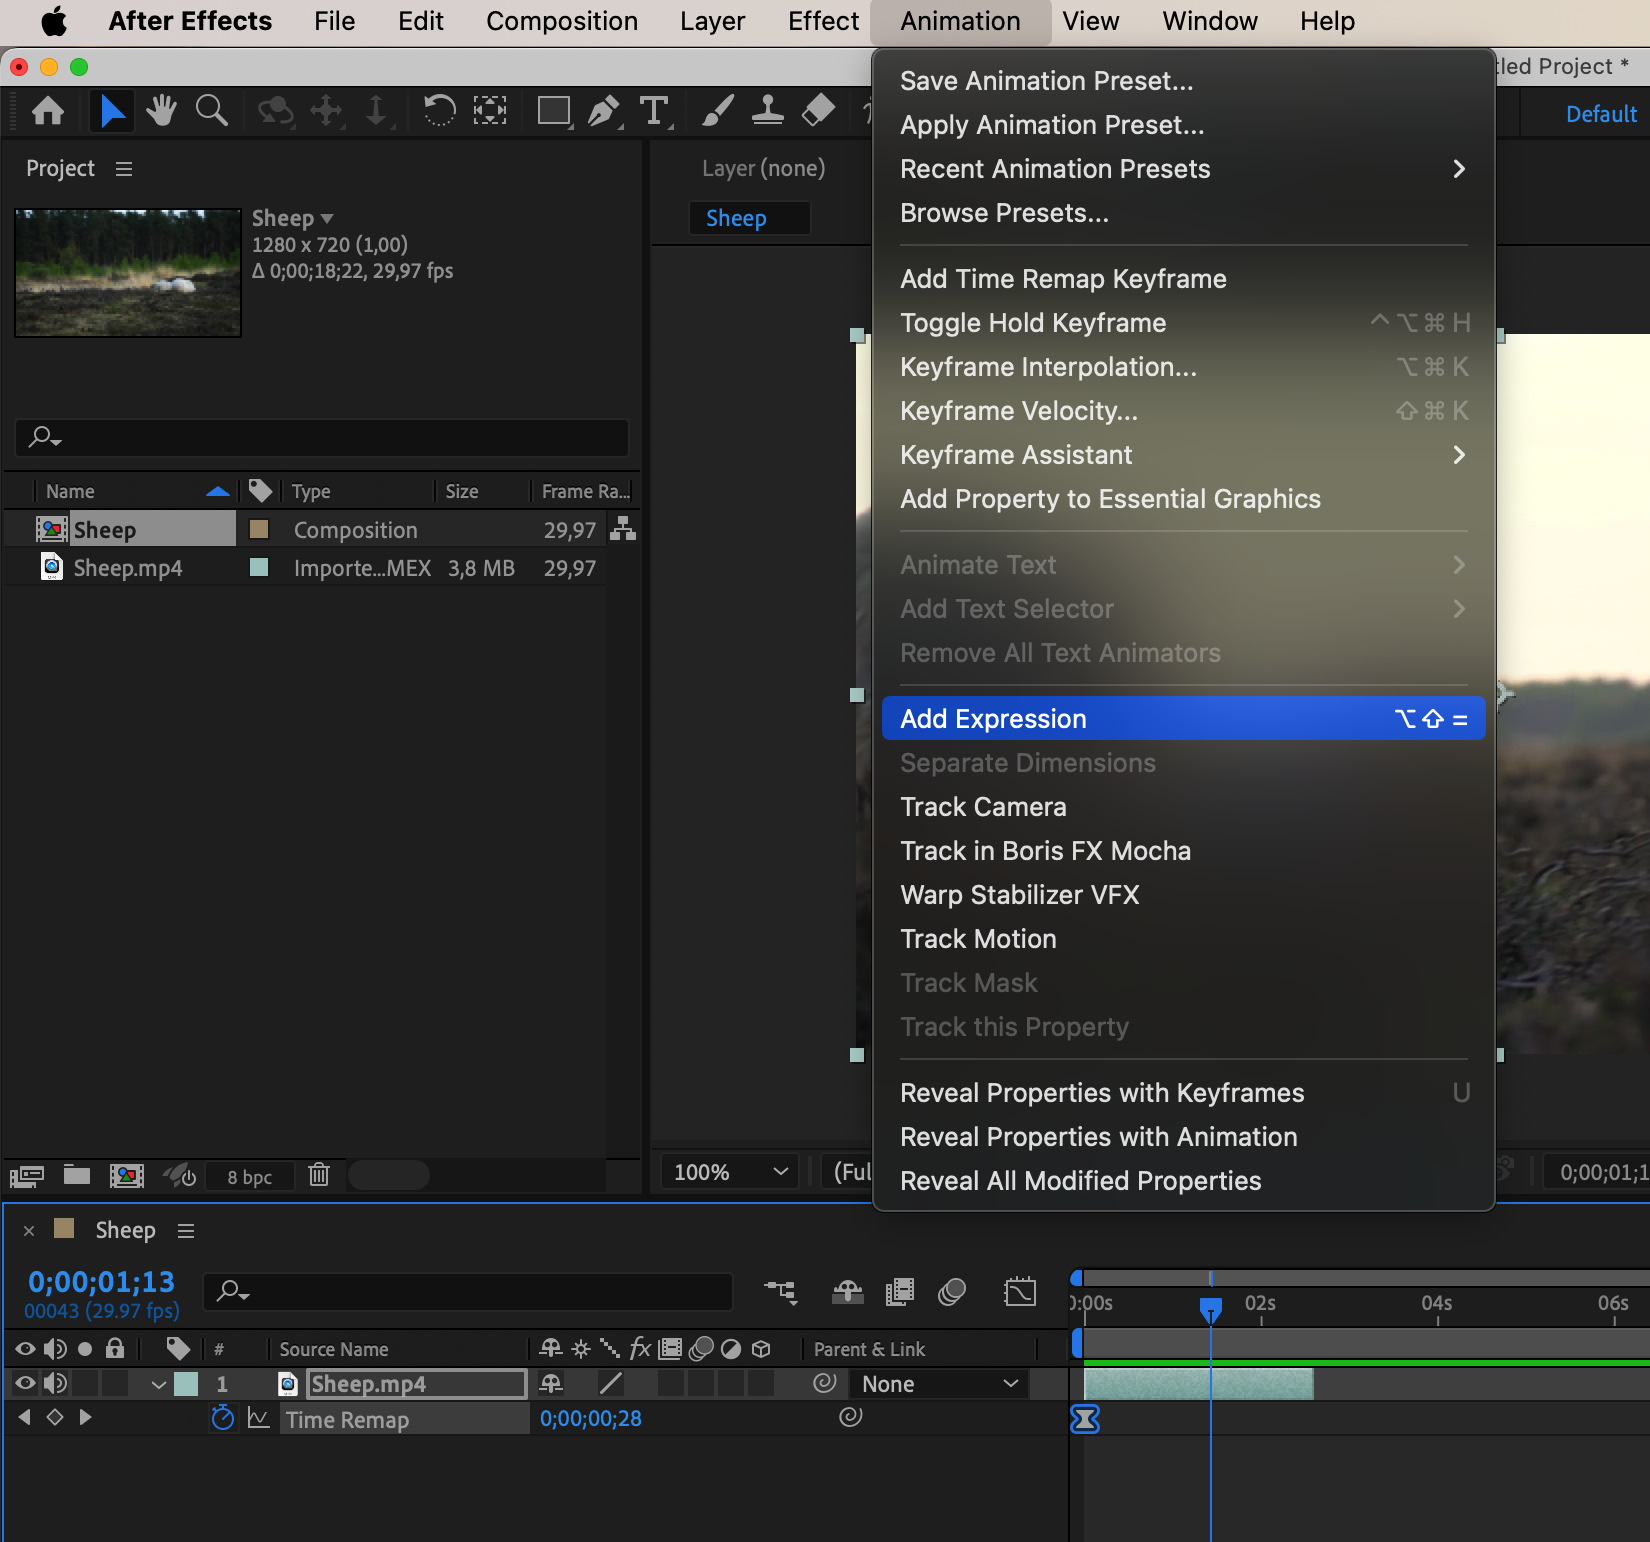
Step 4: Adding Time-Based Expressions
Experiment with various expressions to add depth and volume to your animation, pushing the boundaries of traditional storytelling and engaging your audience in unique ways. Highlight the property you want to add an expression to and use Animation > Add Expression to input your expression into the created line.

Step 5: Integrating Time Manipulation with Other Visual Effects
Discover how time-stretching intersects with other visual effects and animation techniques, such as motion graphics and color correction. Use the Effects & Presets panel to add preferred effects to the video layer by double-clicking on them.

Step 6: Embracing Curiosity and Experimentation
Embrace curiosity and playfulness as you explore new approaches to time manipulation. Experiment with different techniques and iterations to breathe life into your animations and resonate with viewers on a profound level.
Get 10% off when you subscribe to our newsletter
These methods will help you stretch or compress time in your video clips in After Effects, showcasing individuality and a creative approach.
Conclusion: Unlocking the Full Potential of Time-Stretching in After Effects
In conclusion, mastering time-stretching in After Effects opens up a world of creative possibilities. By shaping time as a medium for artistic expression, animators can reshape reality, manipulate perceptions, and craft unforgettable visual experiences. Through experimentation, iteration, and a storytelling mindset, animators can unlock the full potential of time-stretching to create animations that transcend traditional storytelling and captivate audiences.
Our Bestsellers


