Unlock the Full Power of After Effects for Your Project
Introduction to Maximizing Your Projects in After Effects
Adobe After Effects is one of the most powerful tools for video design, animation, and motion graphics. But to truly make the most of its potential, you need to unlock advanced customization features. In this guide, we’ll walk you through the process of importing projects, using essential plugins, and applying advanced effects to transform your After Effects workflow.
Step 1: Import Your Project or Video
The first step to enhancing your project is importing the video or assets you want to work on. Head to File > Import > File to bring in your desired footage, graphics, or project. After importing, drag and drop these files onto the timeline to begin editing. This is where you’ll arrange and modify your assets to shape your video.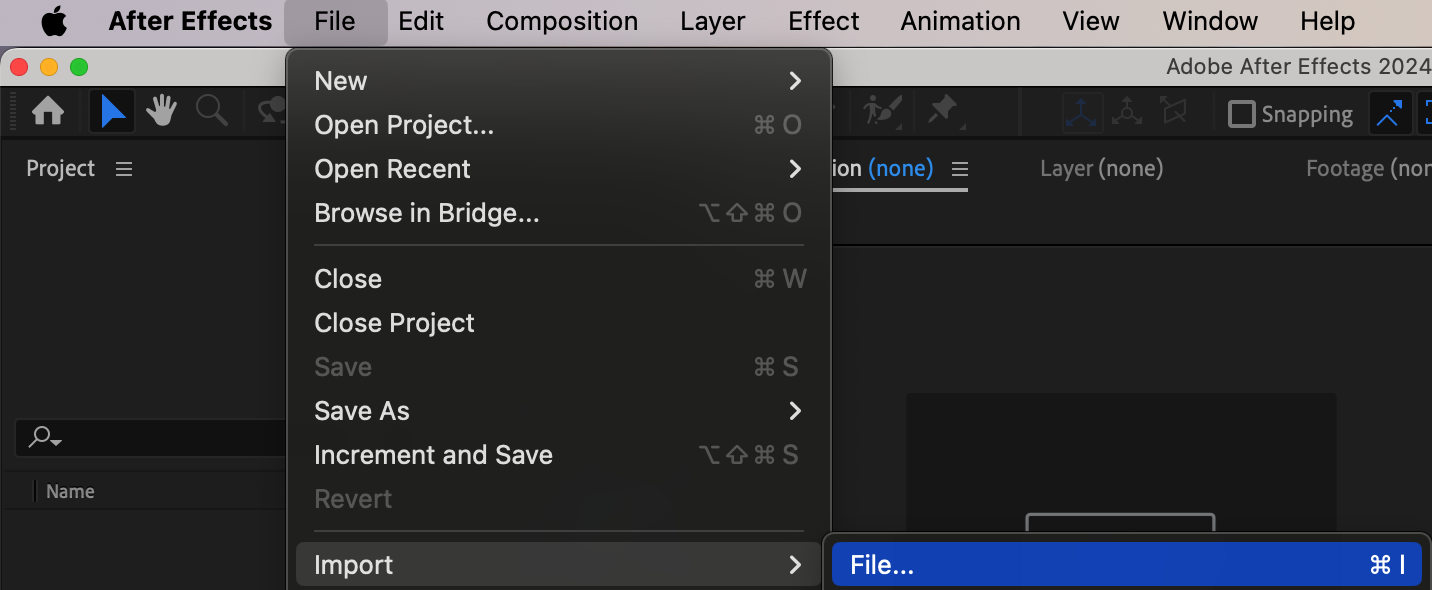
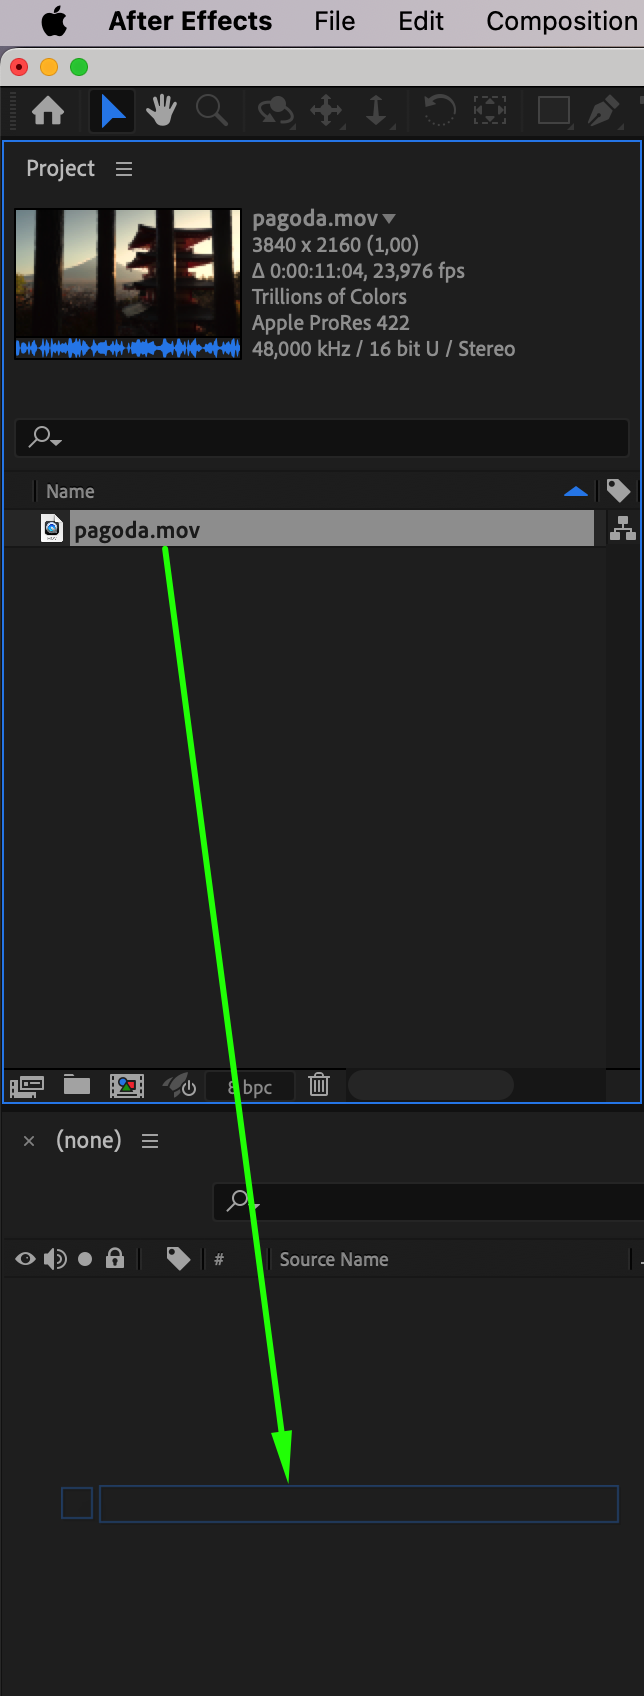 Step 2: Open AEJuice Pack Manager 4 Plugin
To access a wide variety of creative tools, navigate to Window > AEJuice Pack Manager 4. This plugin is essential for adding dynamic elements to your project such as text animations, transitions, and visual effects. AEJuice offers a massive library of pre-made packs that can elevate the look and feel of your content.
Step 3: Choose and Download a Creative Pack
Once the AEJuice Pack Manager is open, you’ll see a collection of packs tailored to different aspects of video editing. Whether you’re looking for text effects, color enhancements, or video transitions, there’s a pack for every need. Click on the desired pack to download it. These packs are designed to make it easier for you to enhance your project without starting from scratch.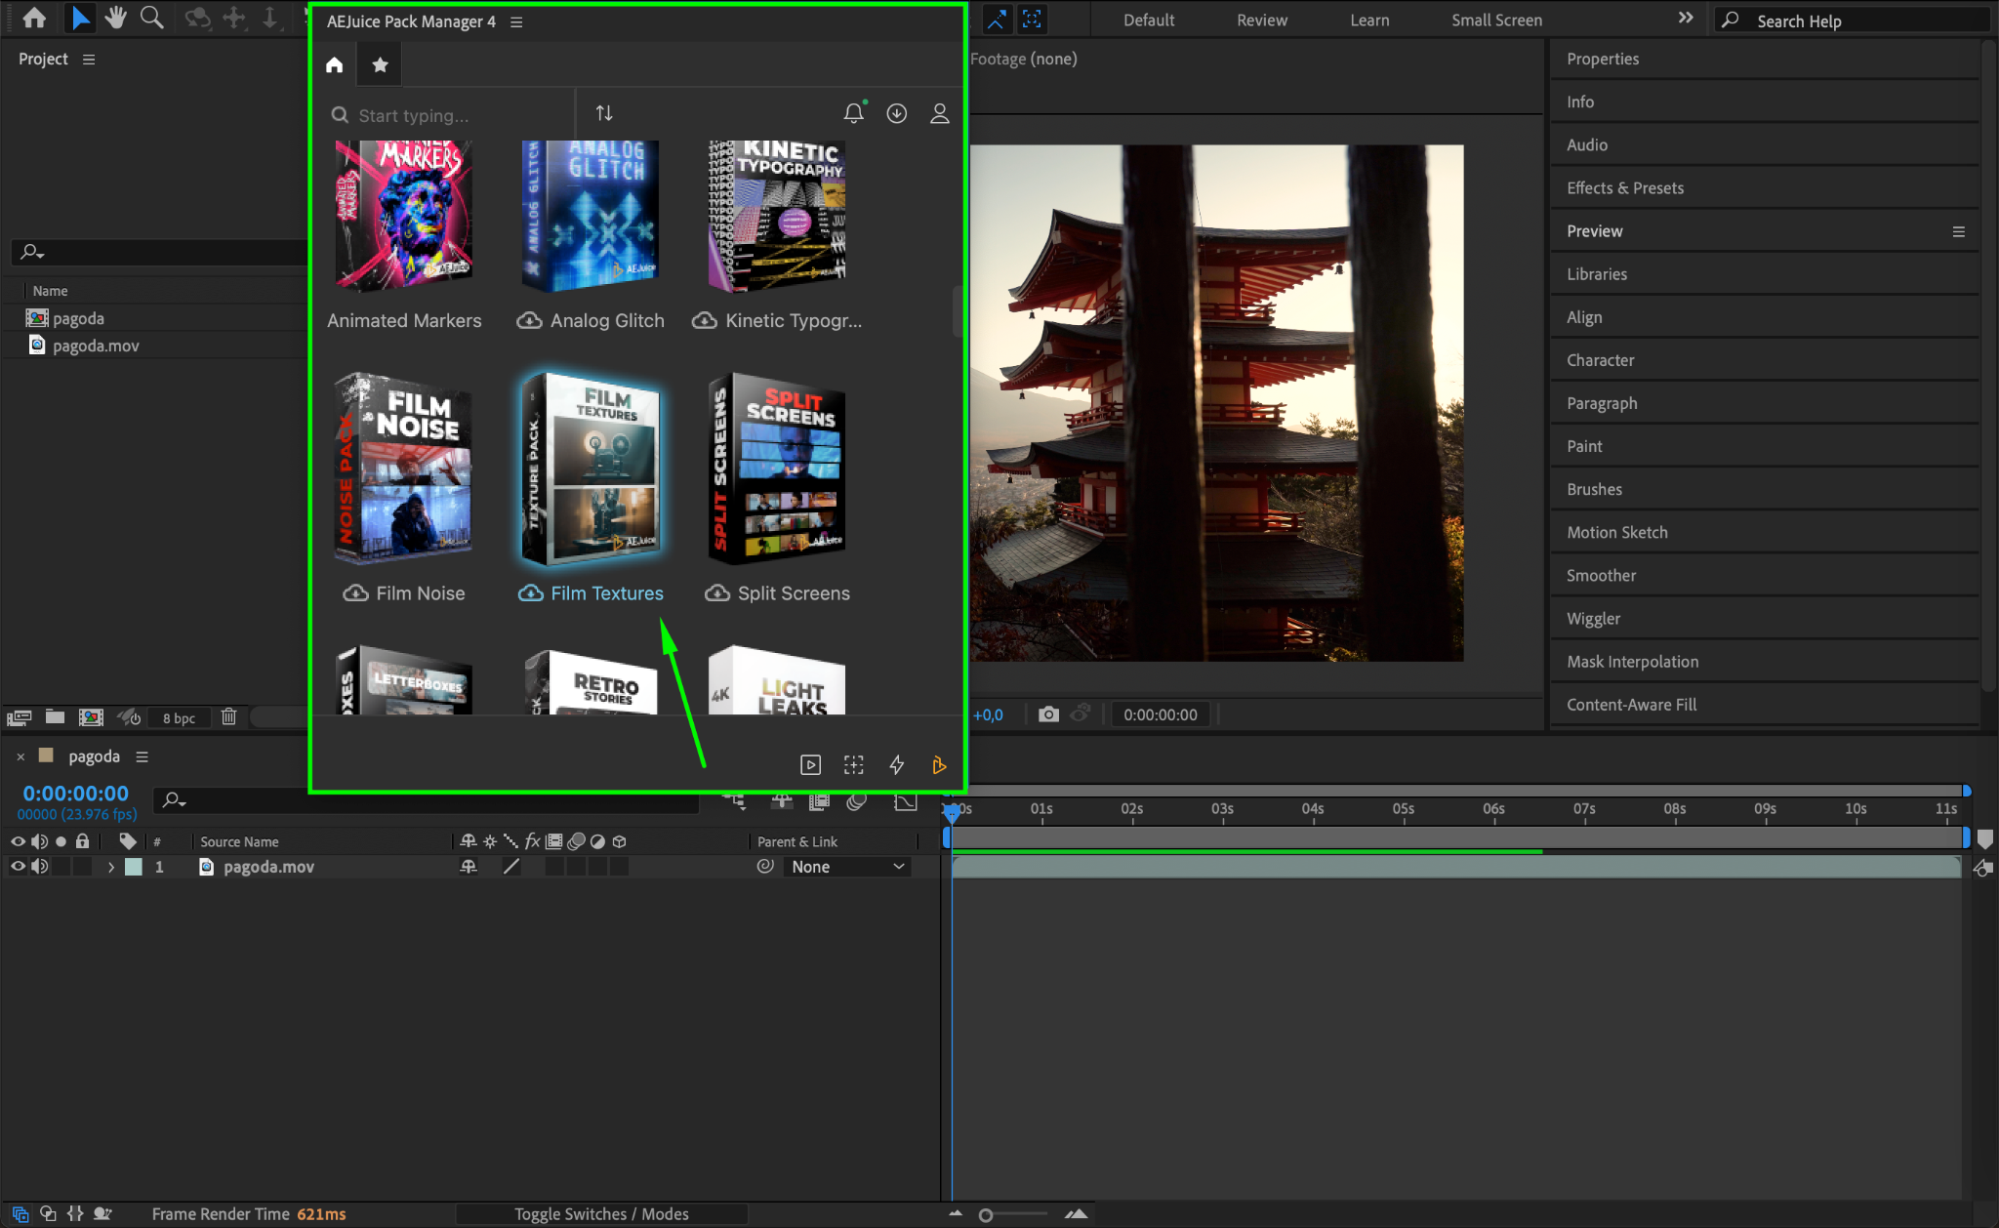 Step 4: Apply Effects from the Pack to Your Timeline
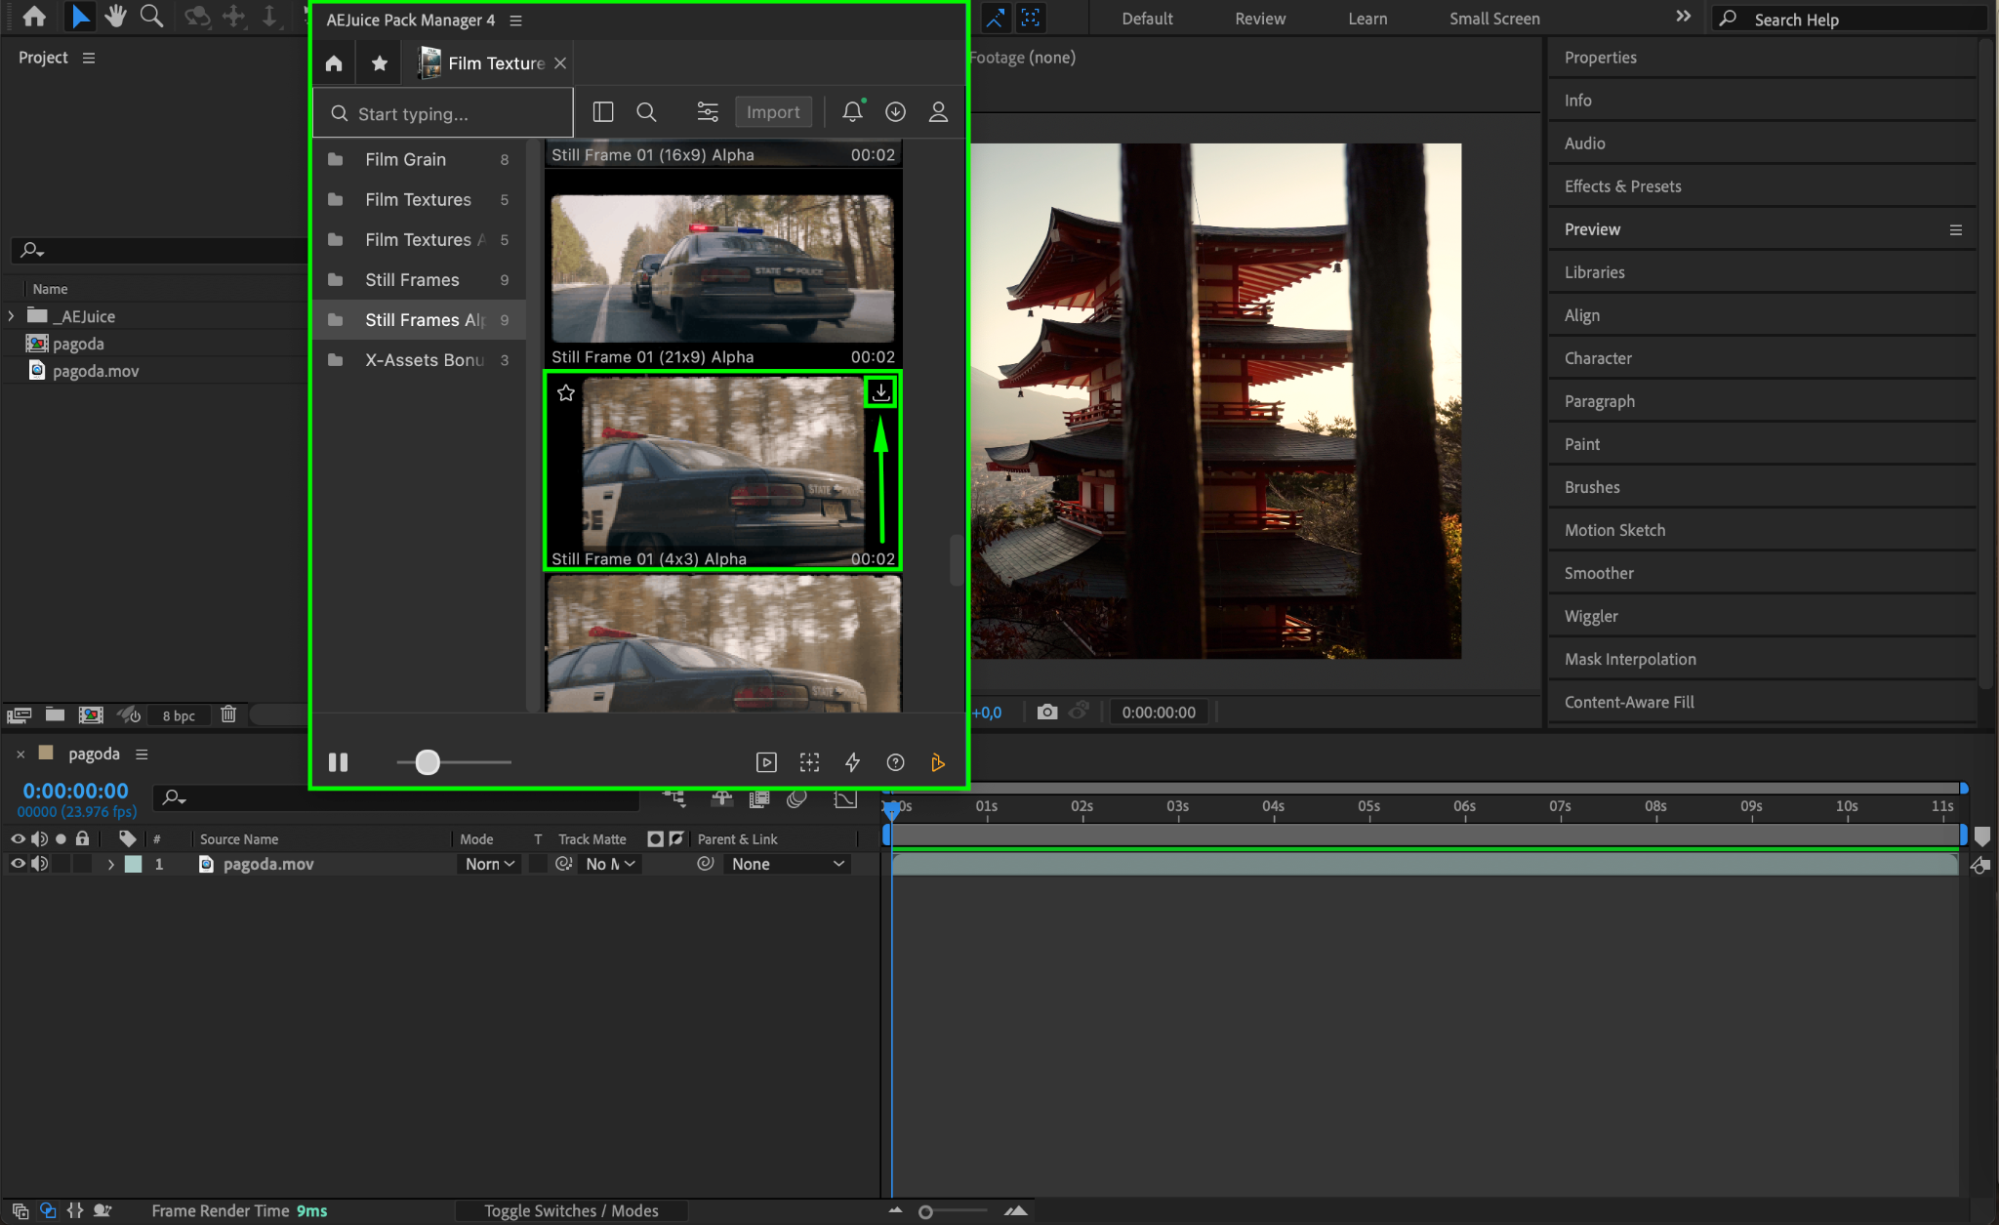
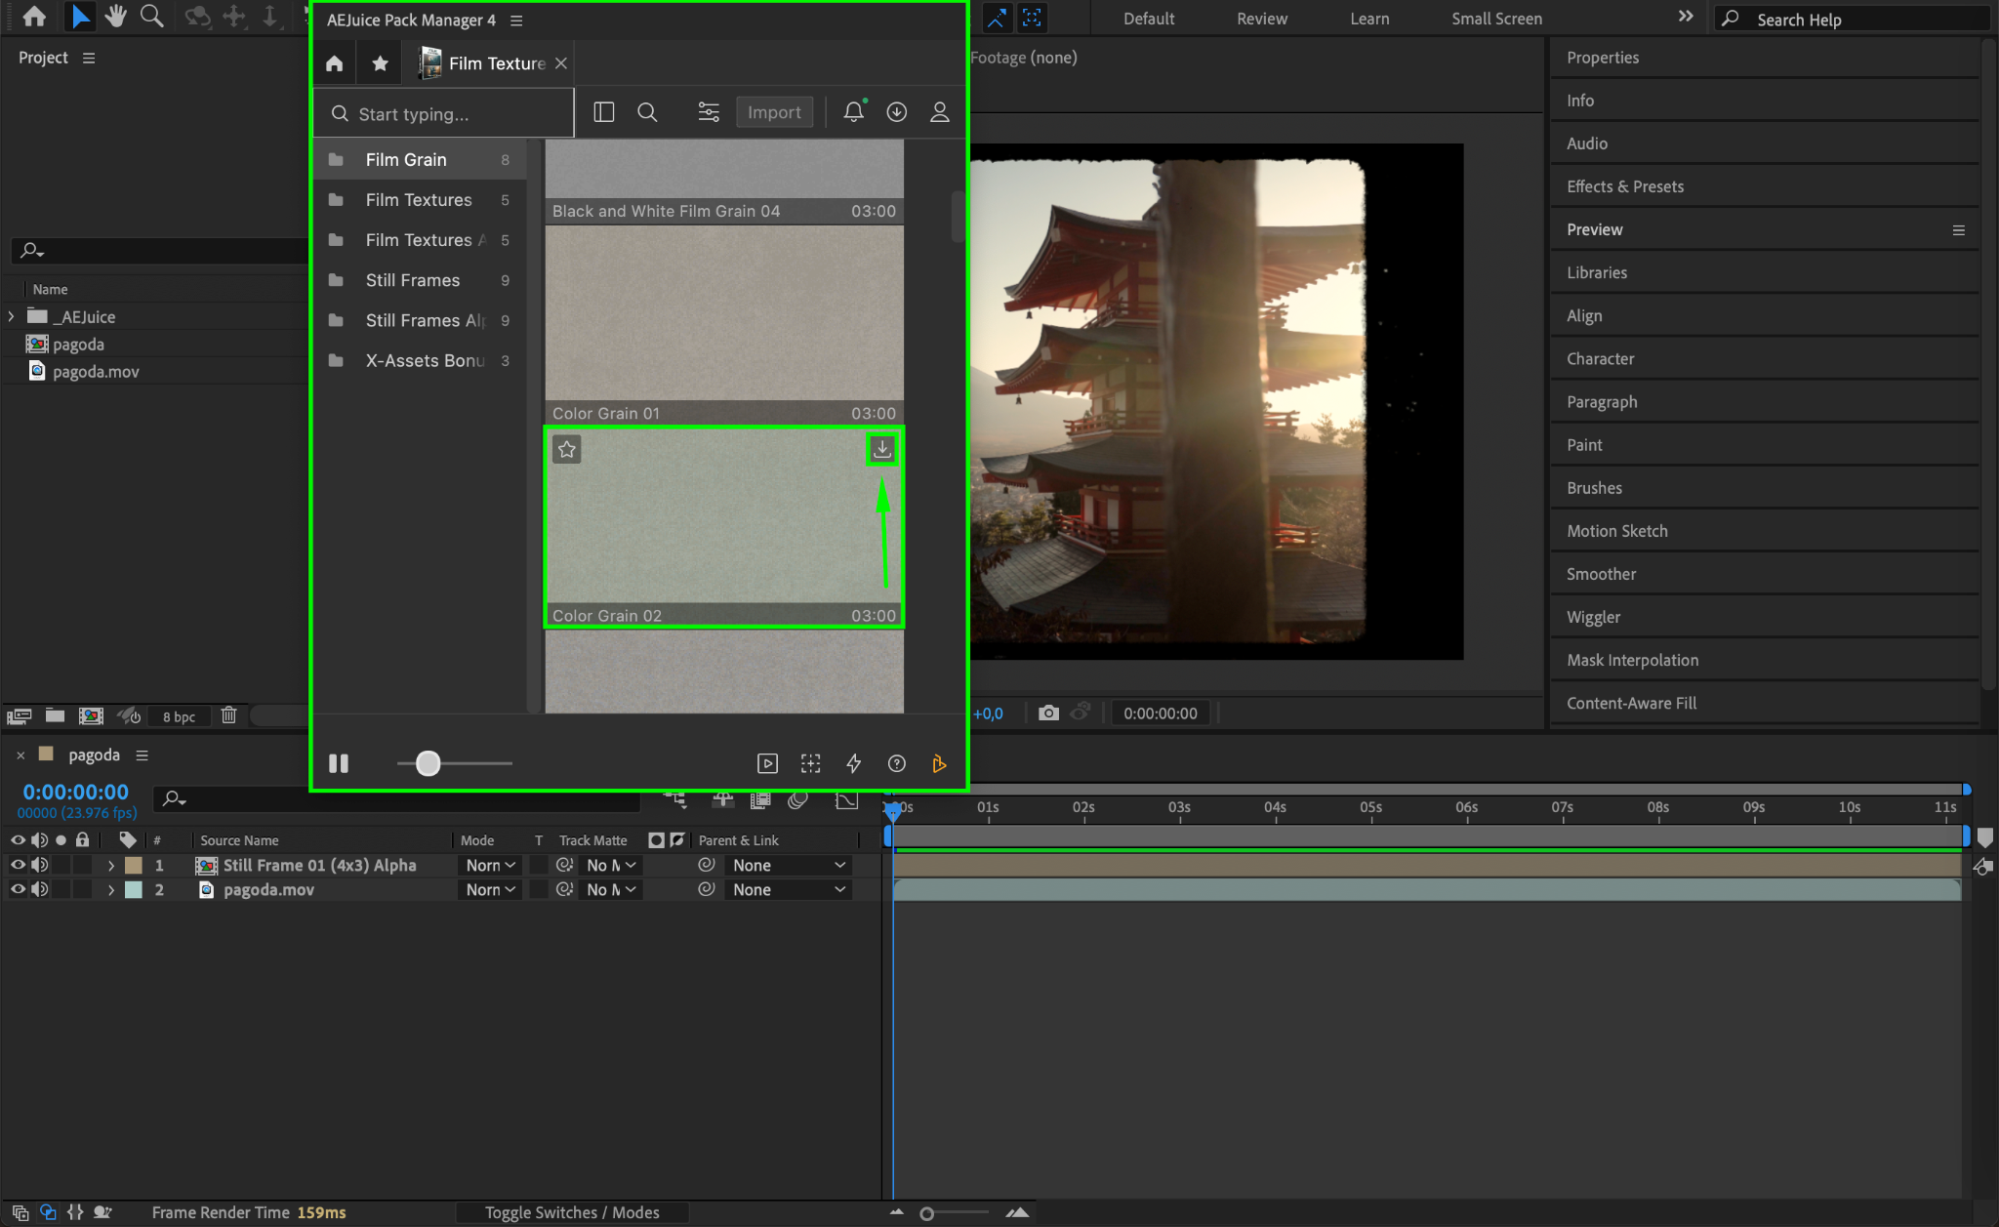
After downloading the chosen pack, you’ll find various effects inside. To apply one, click the download icon on the top right of the effect you want. It will automatically appear as a new layer in your timeline once it finishes downloading. You can now start experimenting by adding these effects to your video.
 Step 5: Customize the Effects and Elements
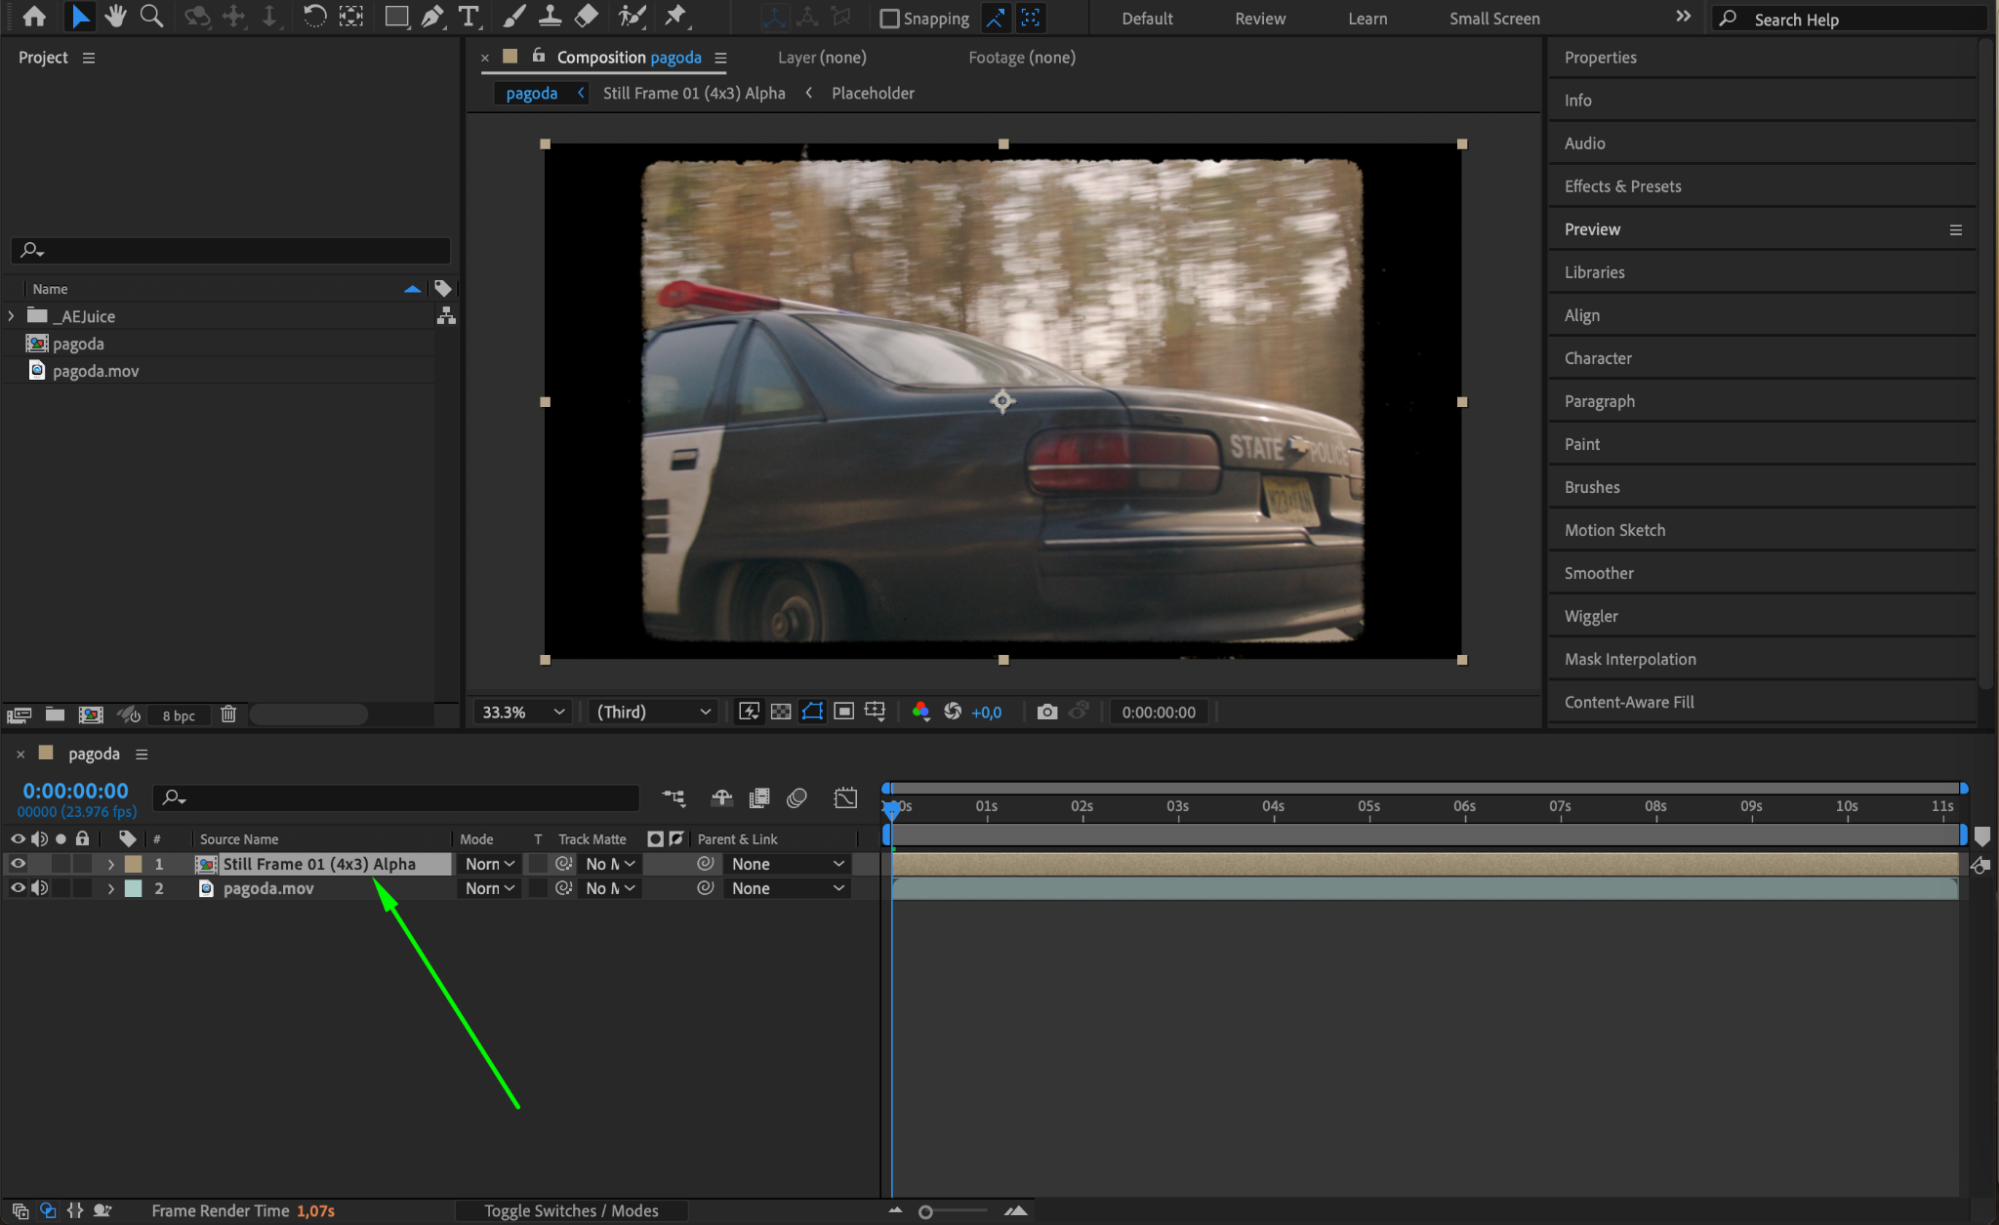
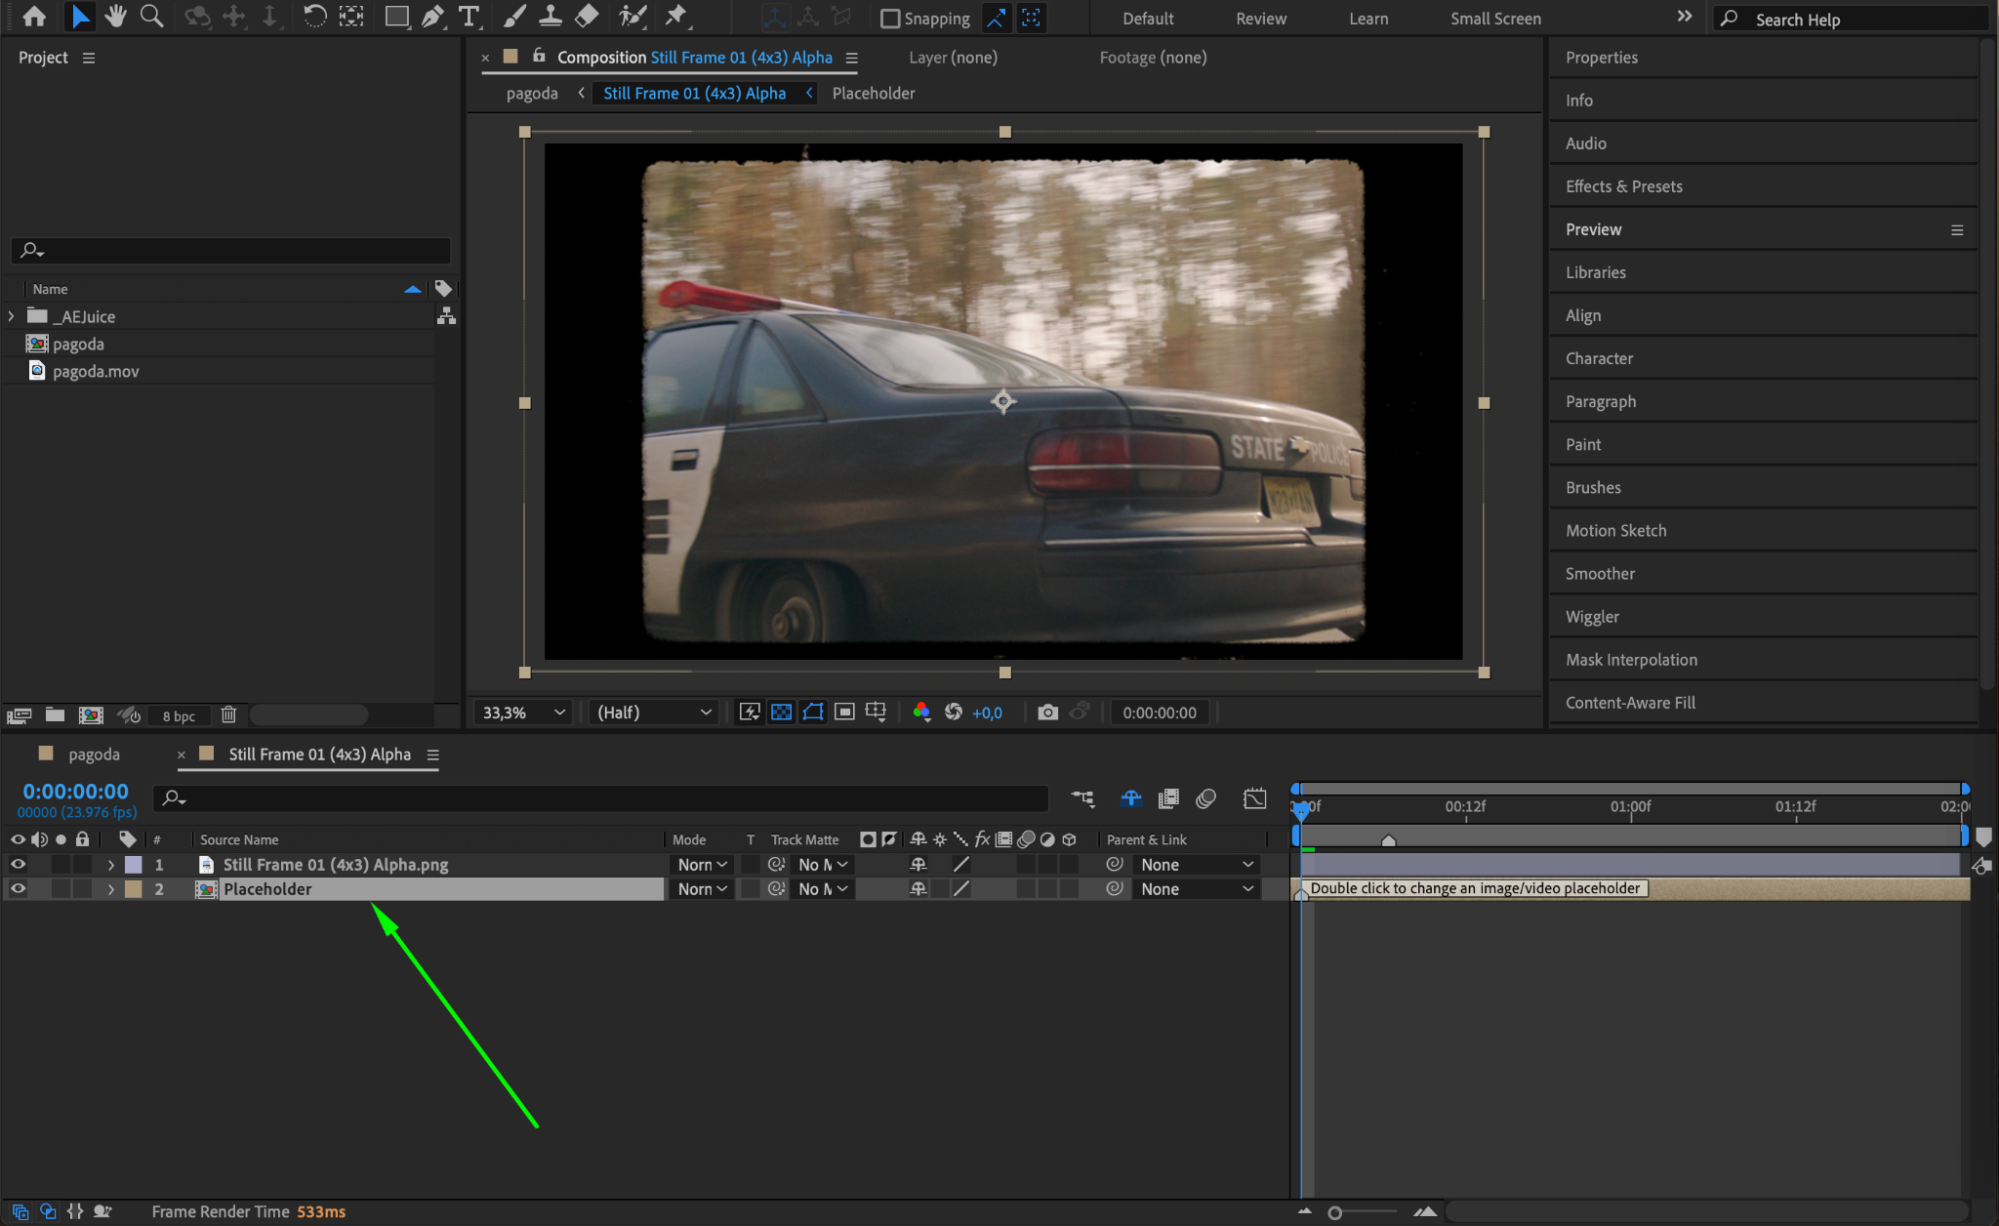
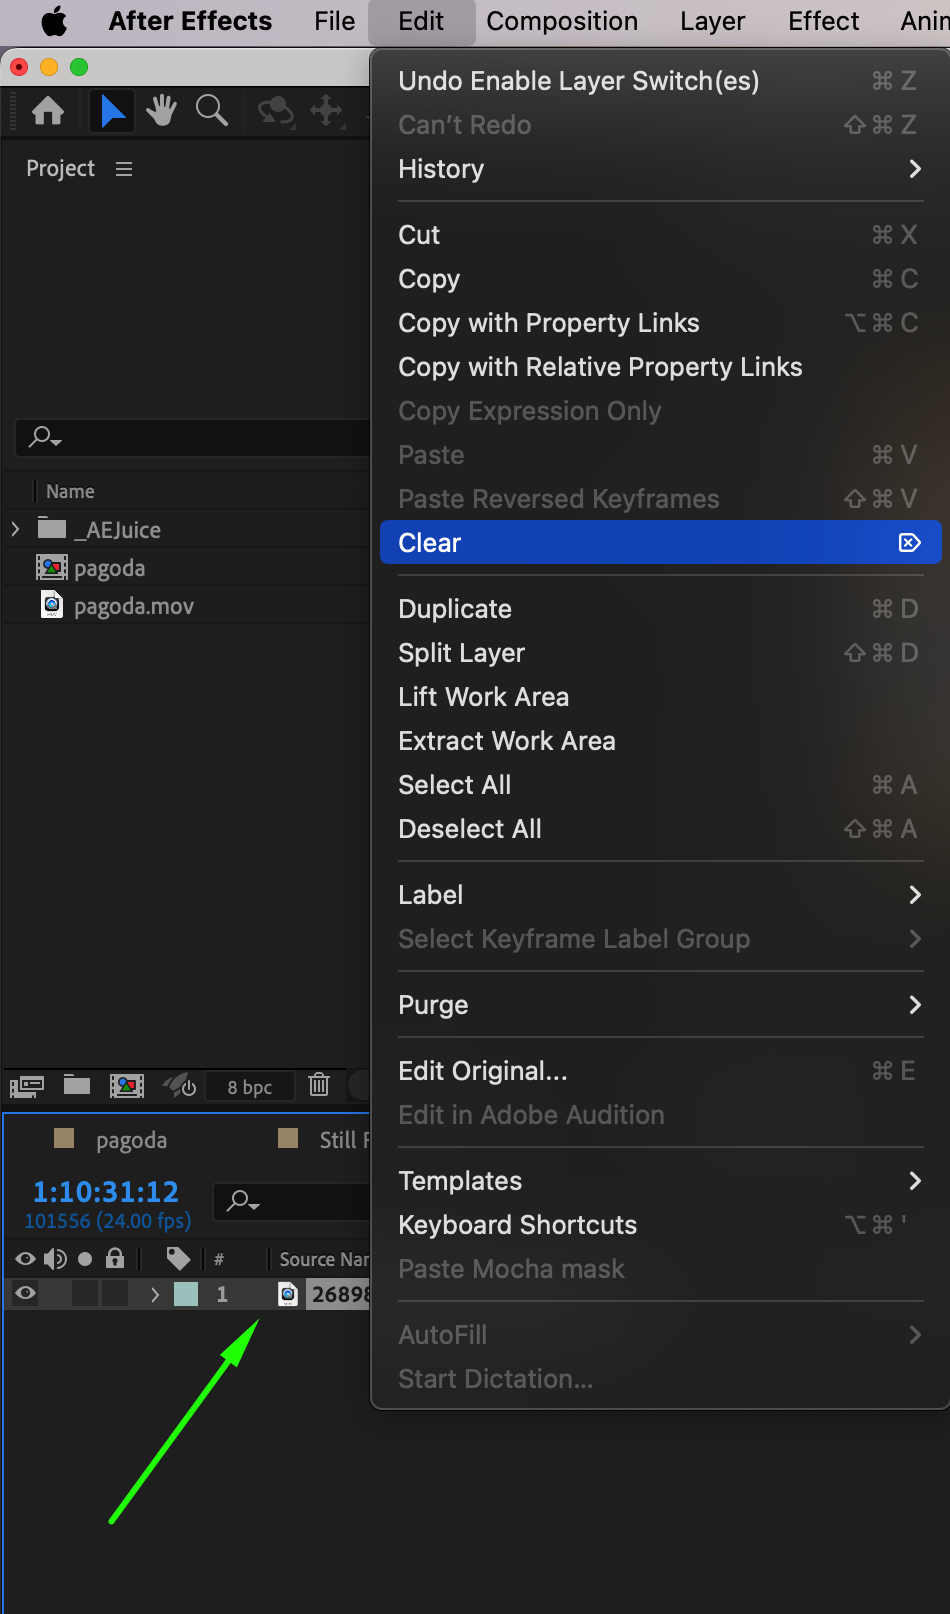
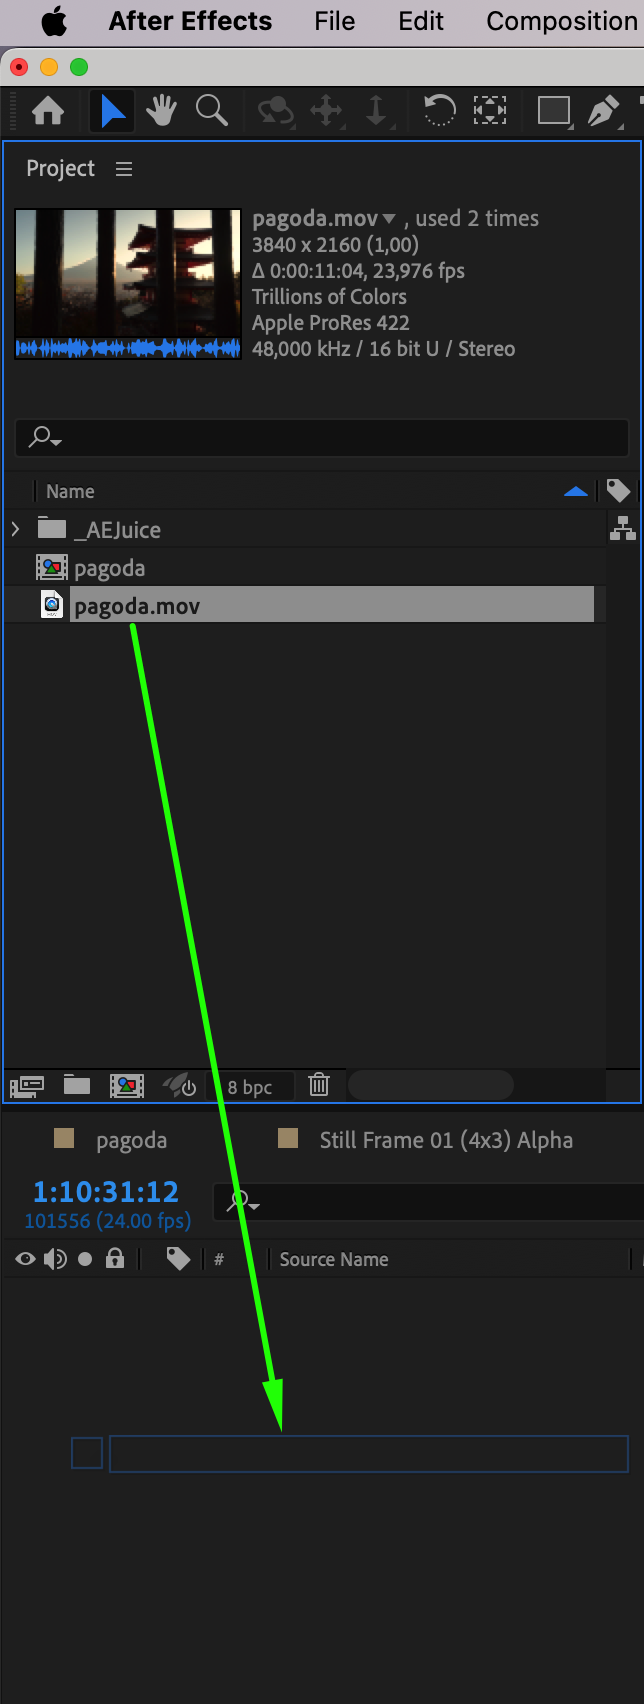
This is where the real fun begins! Customize the elements of the effect to match your project. Modify the text, replace placeholder images or videos, and adjust color schemes to fit your visual style. Don’t be afraid to explore different combinations – After Effects is all about creativity and flexibility.
Step 6: Combine Effects for Greater Impact
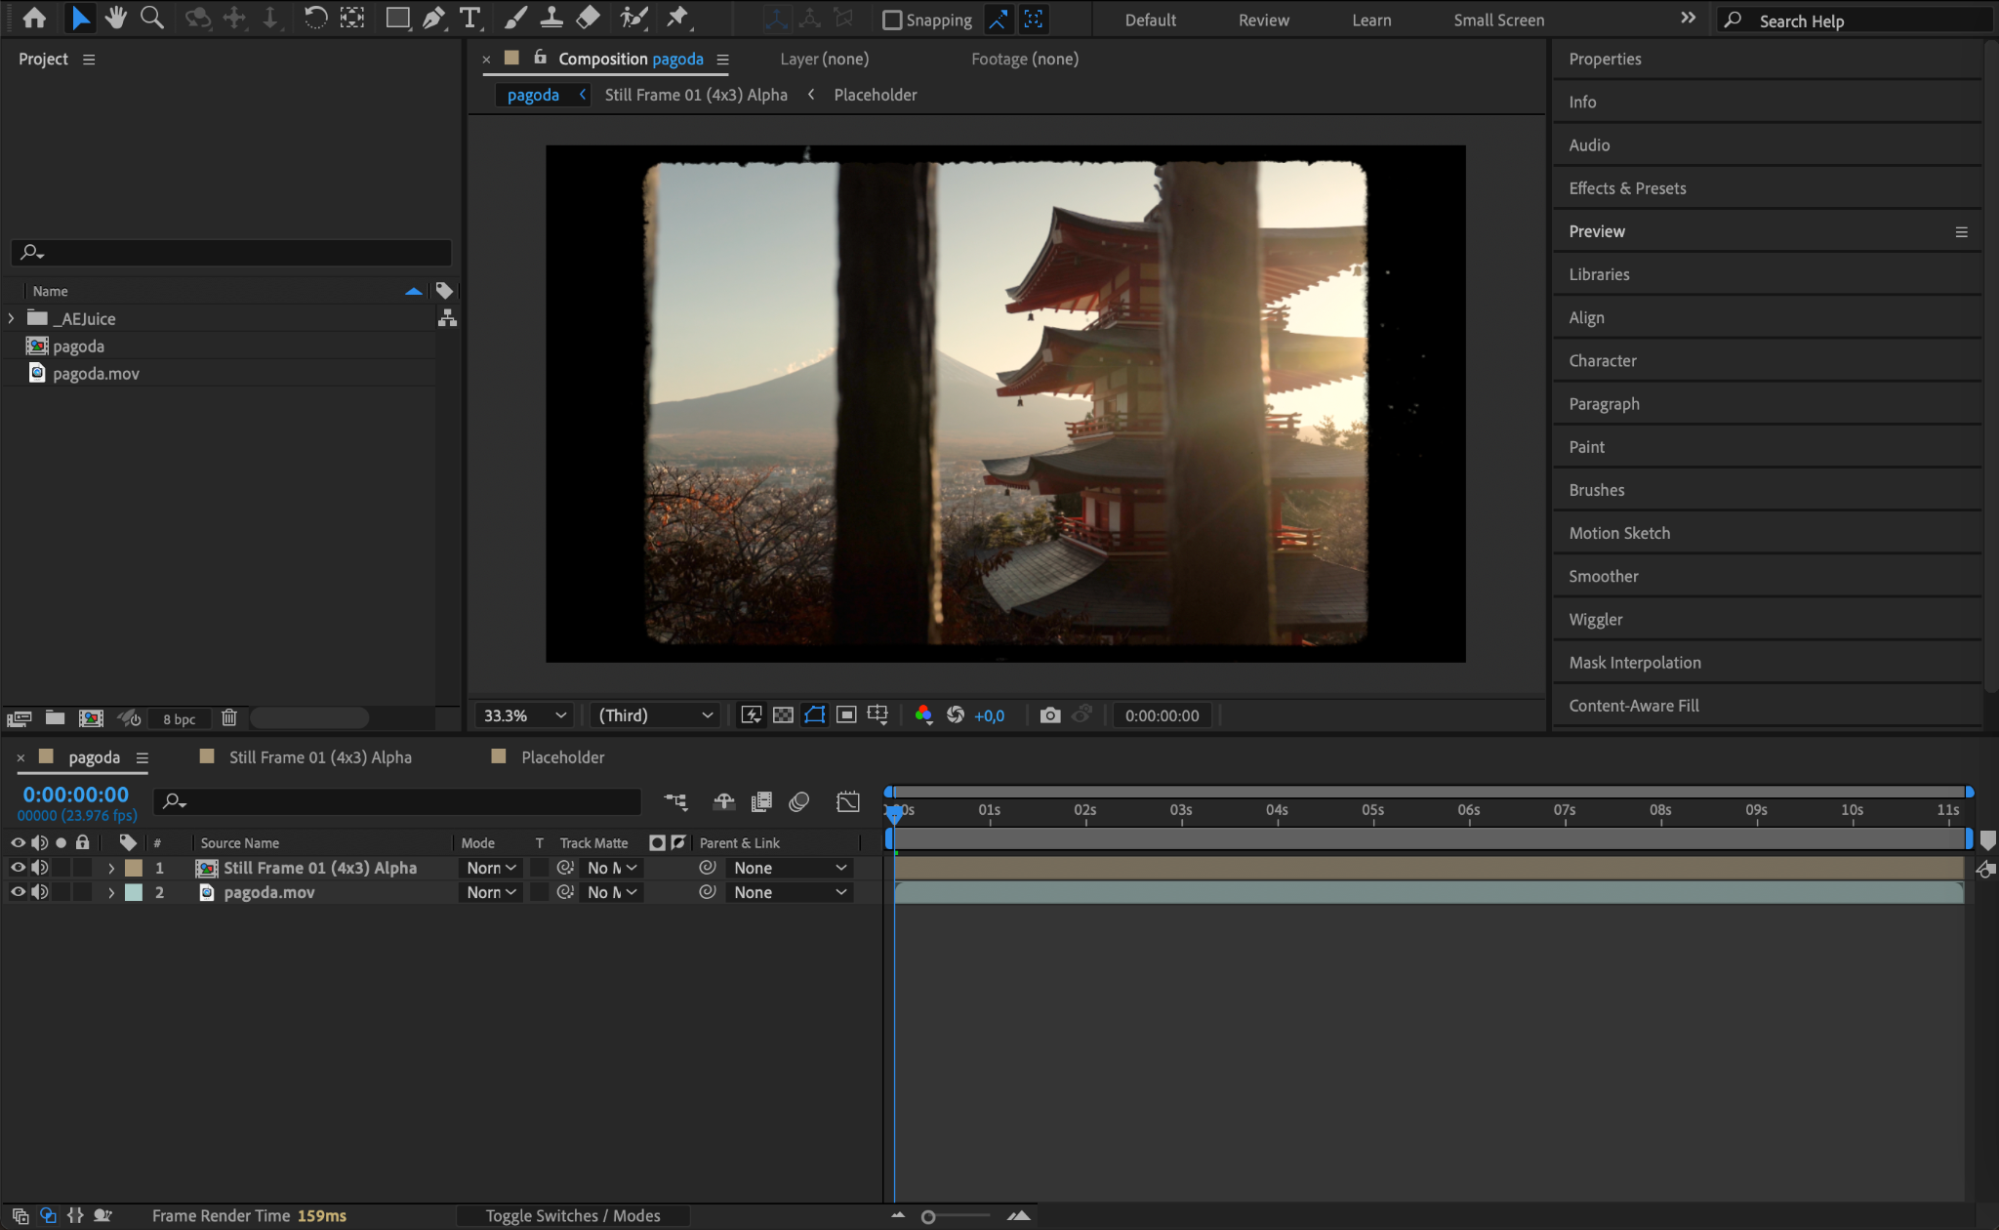
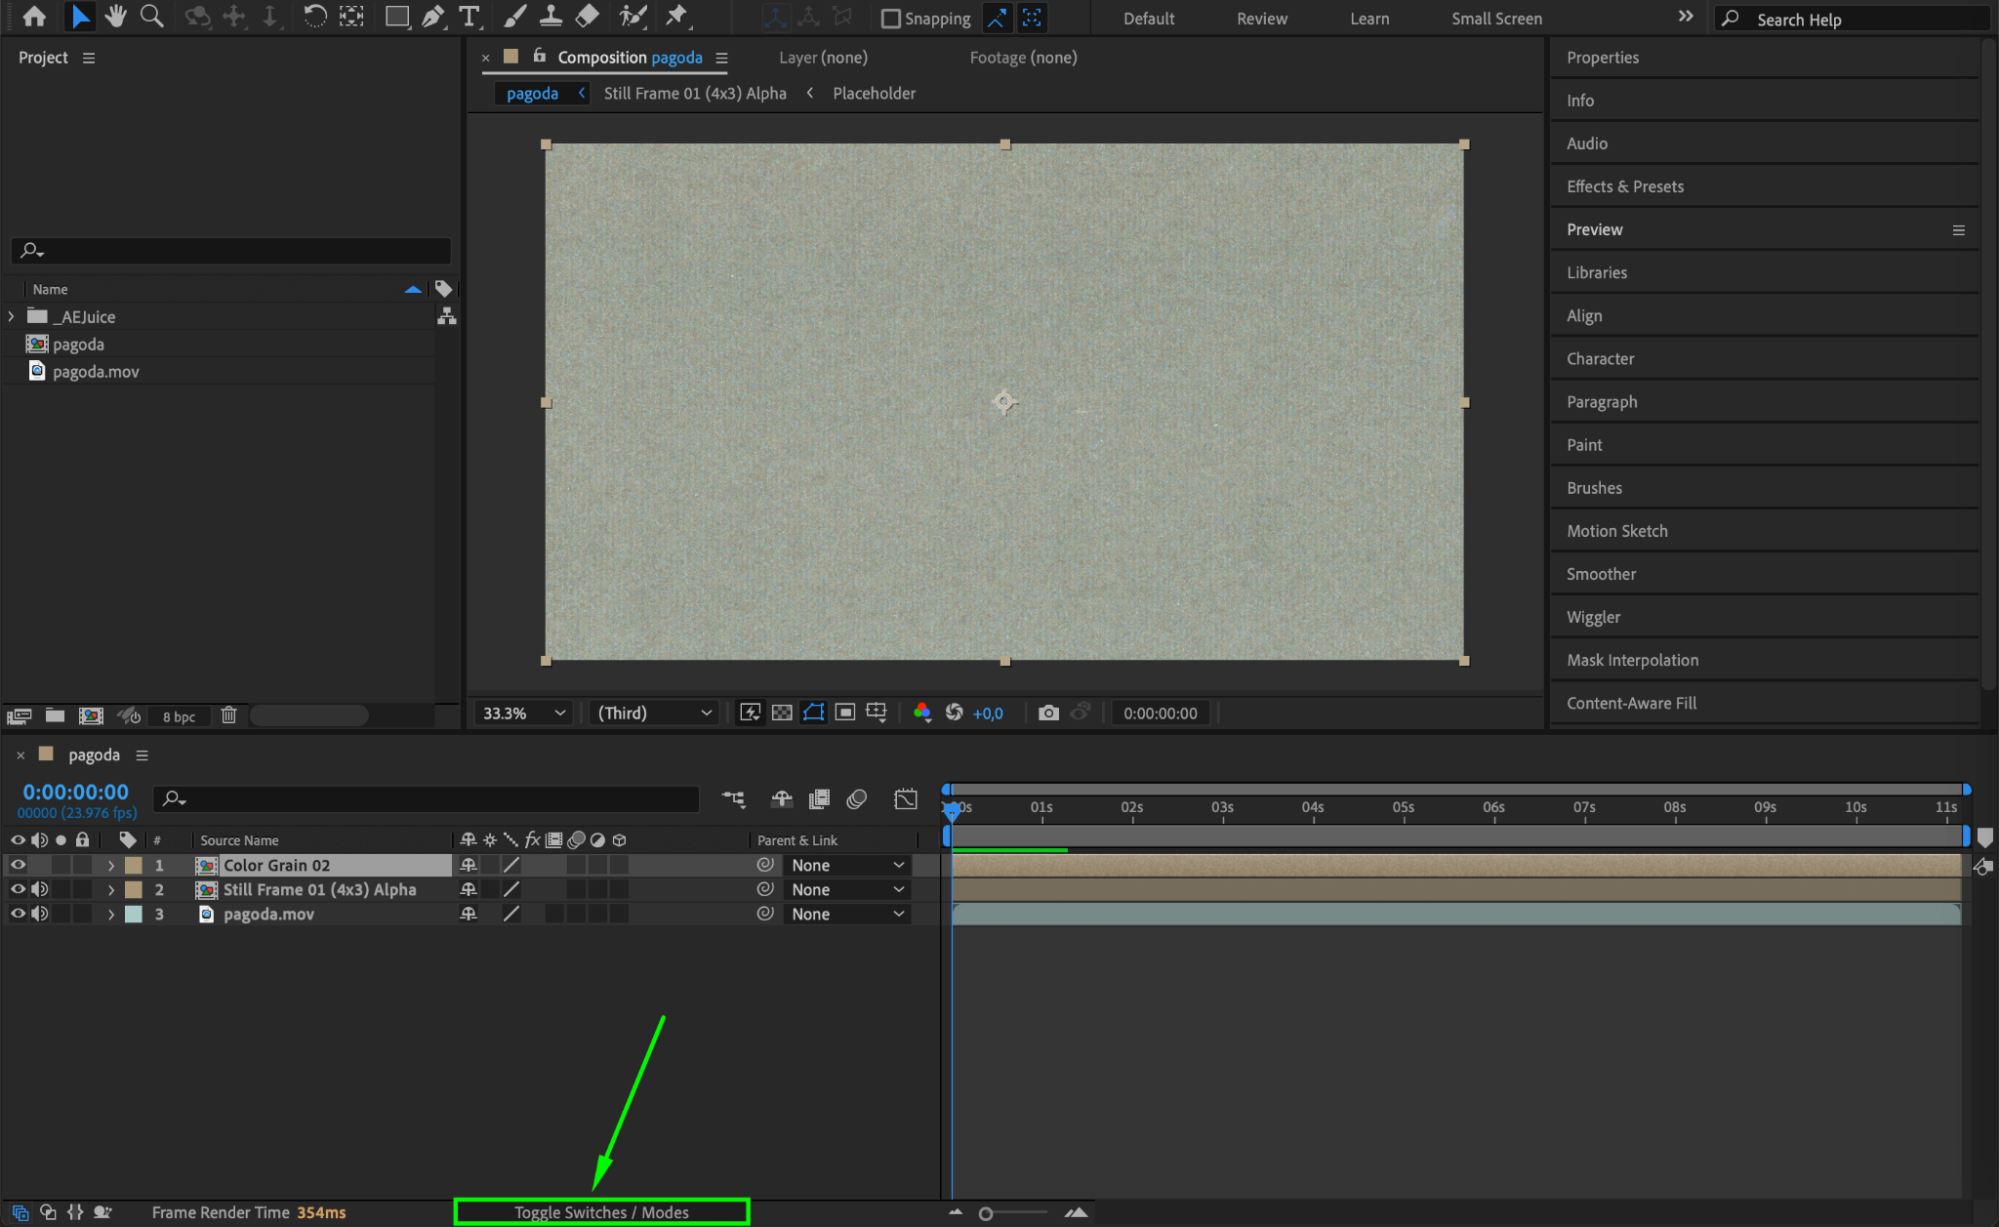
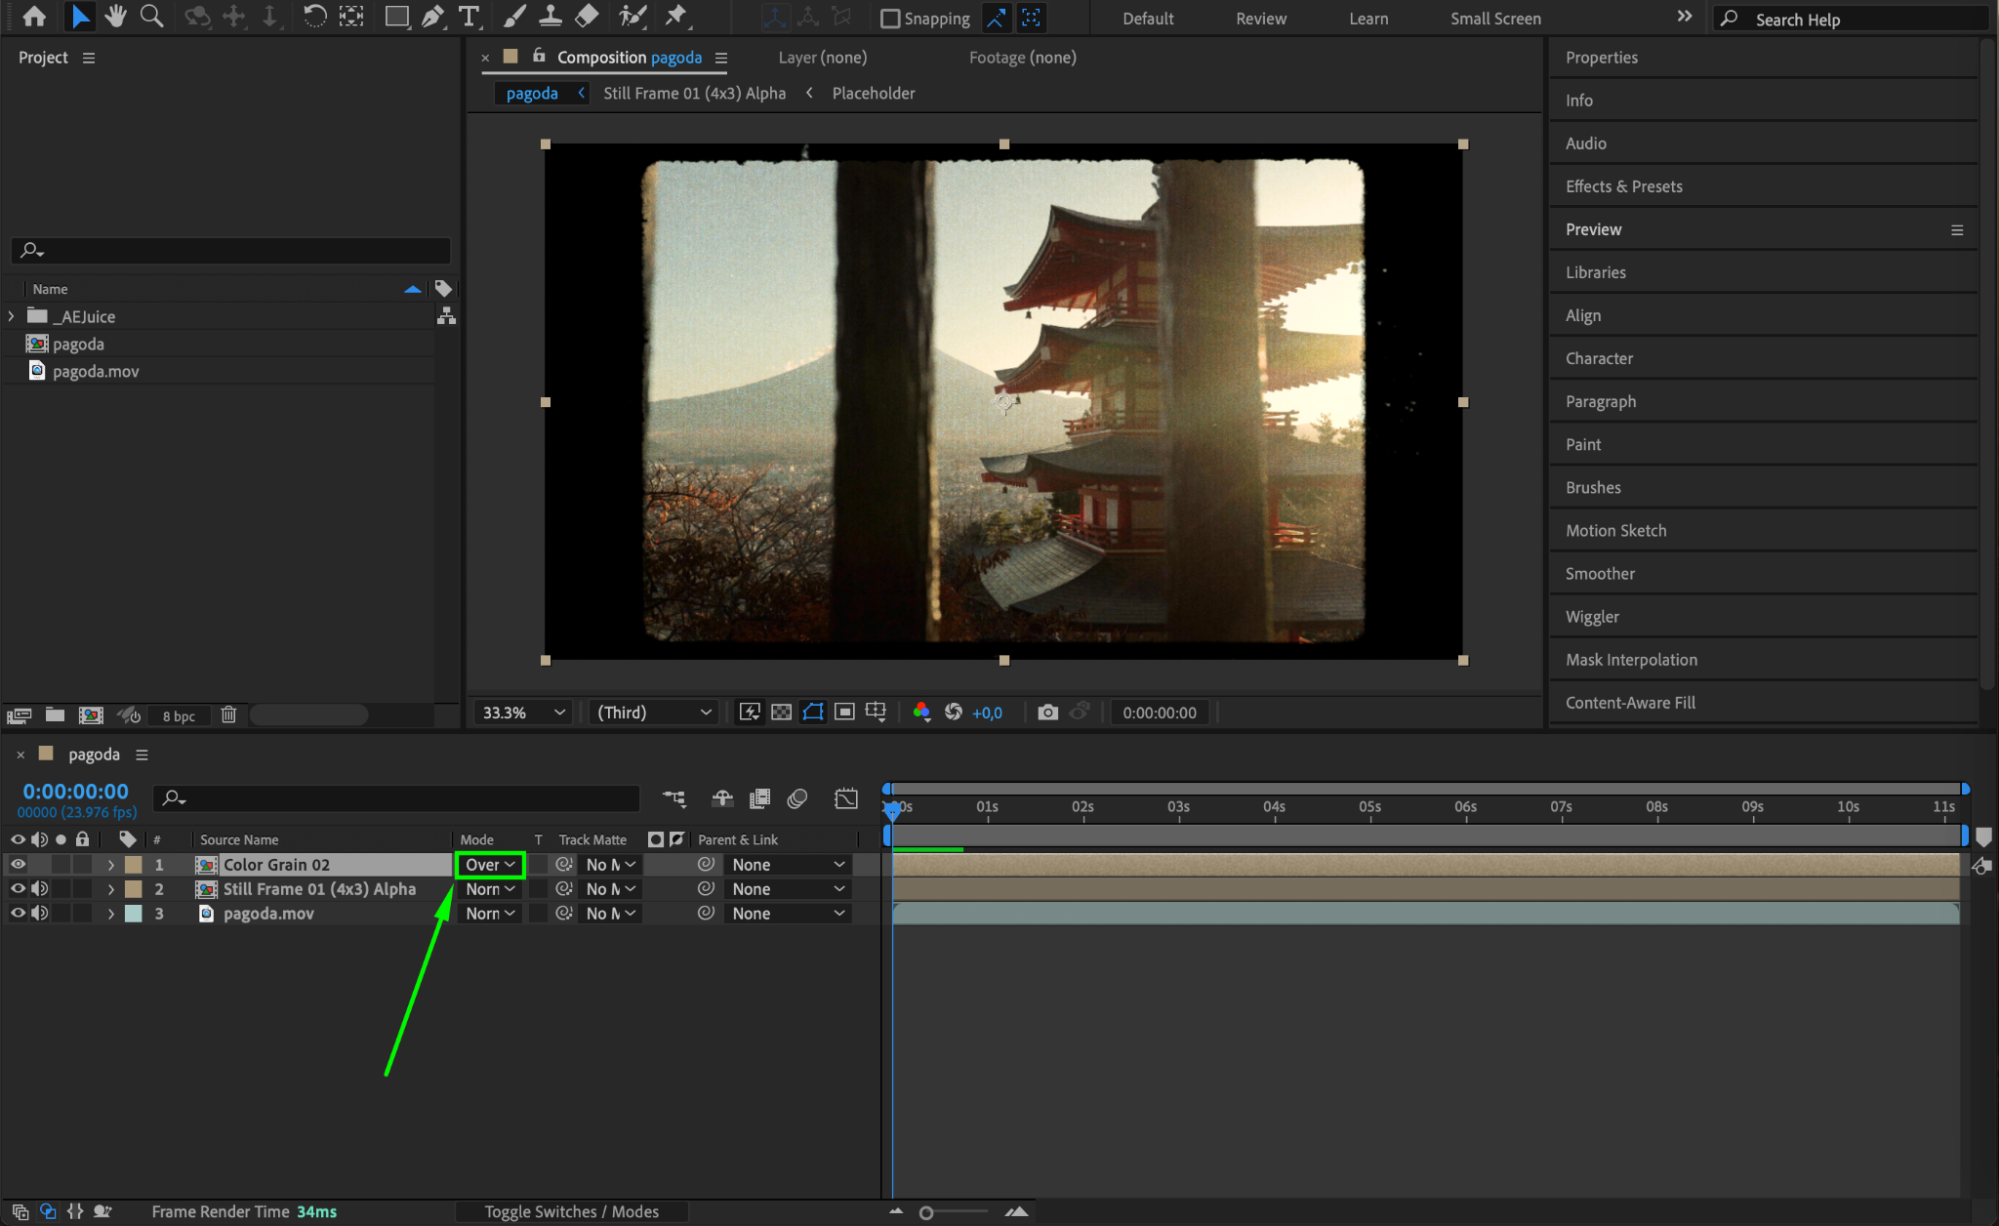
To achieve a more sophisticated and engaging result, repeat the process with various packs and effects. Mix and match different elements, layers, and effects to create a dynamic, high-impact final product. The ability to combine these effects allows you to generate a unique visual style that will set your project apart.
 Step 7: Preview Your Work
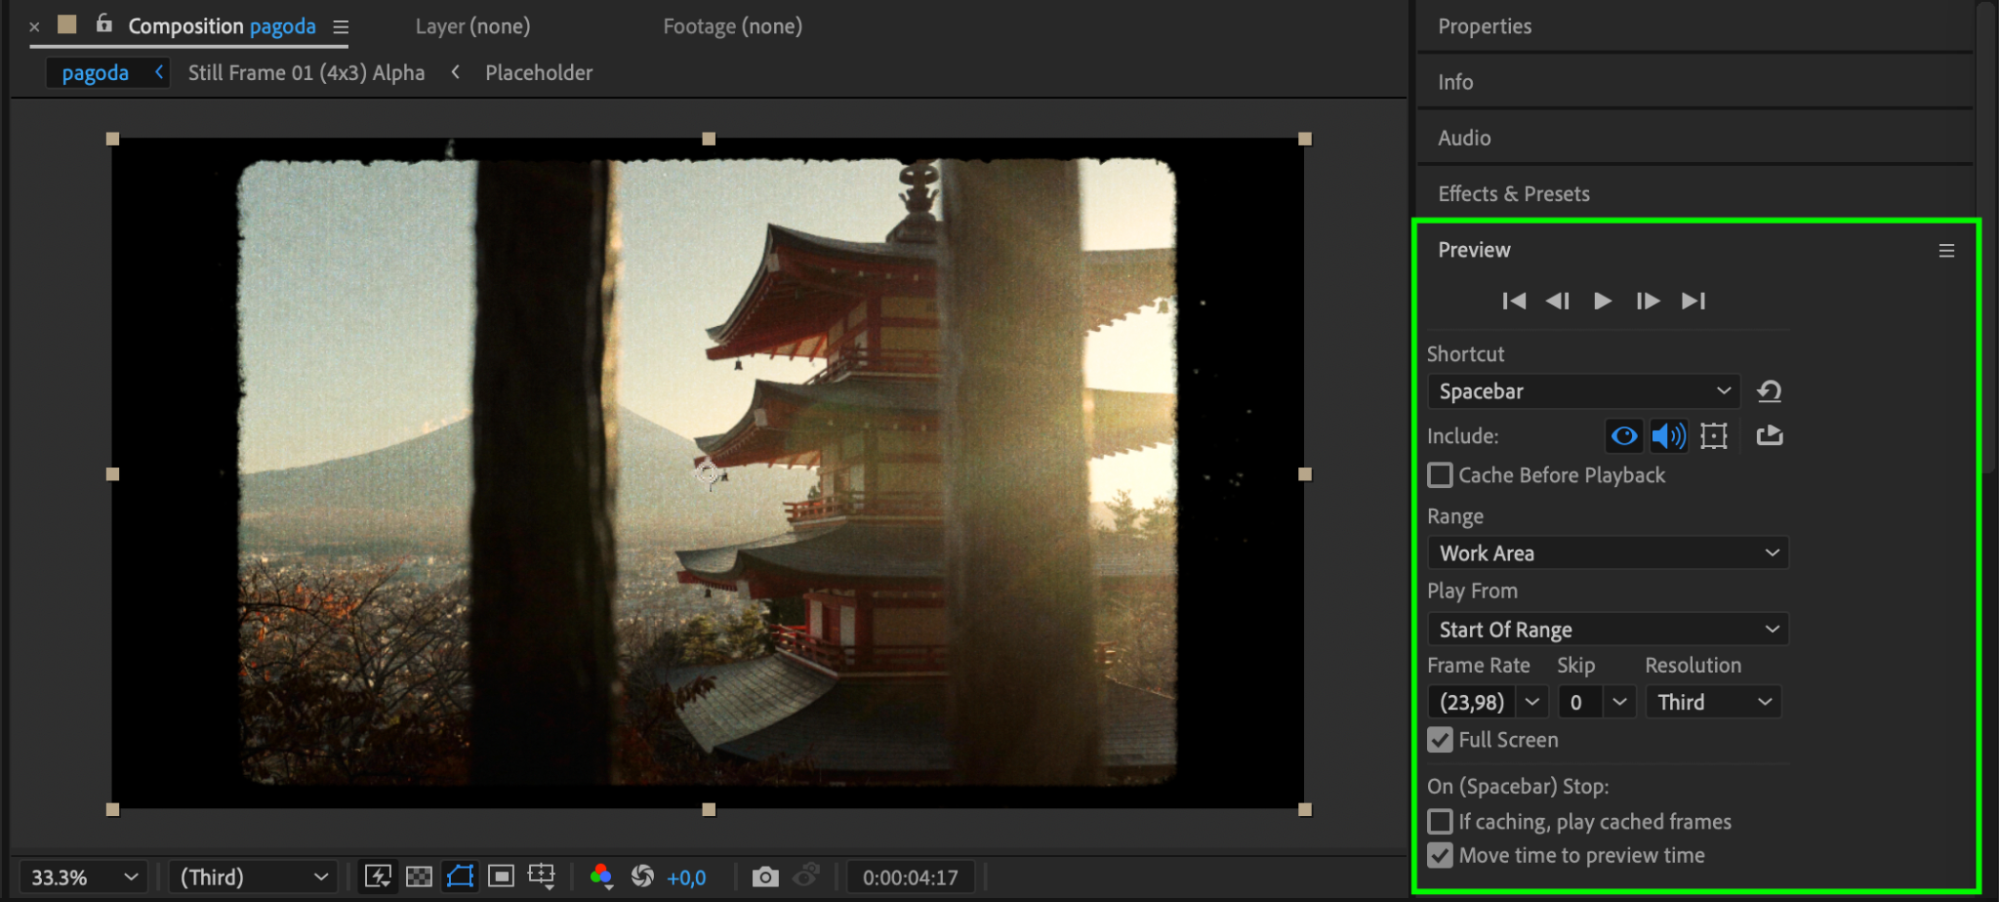
After applying and customizing the effects, it’s time to preview your work. Click the “Preview” button or hit the spacebar to view your project in motion. This will give you a chance to see how the elements interact and make any necessary adjustments before the final export.
 Step 8: Render and Export Your Project
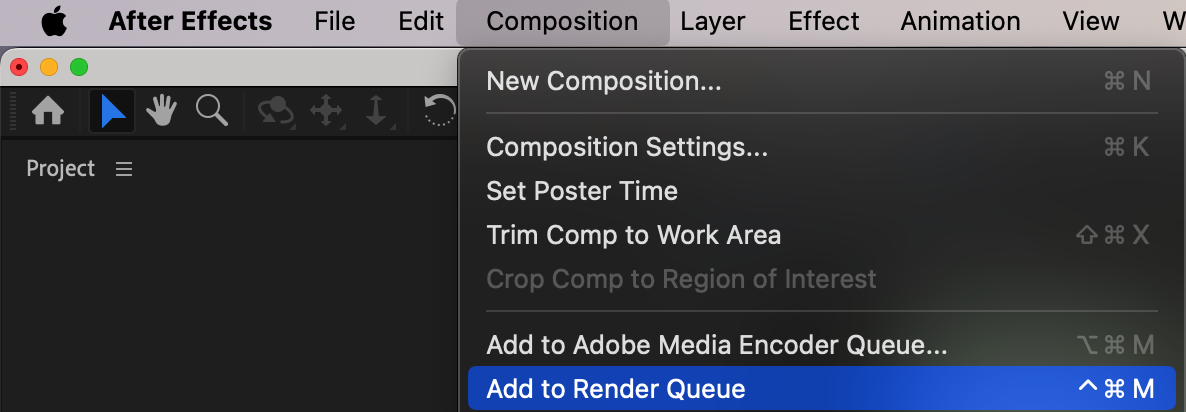
Once you’re satisfied with your project, it’s time to render and export. Head over to Composition > Add to Render Queue to prepare your file for export. After Effects provides multiple rendering options that let you choose the desired format, quality, and settings that suit your needs. After configuring the settings, click “Render,” and your masterpiece will be ready.

Get 10% off when you subscribe to our newsletter

Conclusion
Mastering Adobe After Effects takes your projects to new heights, giving you full control over video design and motion graphics. With tools like AEJuice and the ability to customize every aspect of your project, you can transform your creative vision into reality. Whether you’re just starting out or looking to refine your skills, unlocking the power of After Effects is the key to creating stunning, professional-grade visuals.
So, start experimenting, customize your effects, and make use of the powerful features that After Effects offers. The possibilities are endless!


