Mastering the Art of Using the 3D Camera Tracker in After Effects
Introduction to the Power of 3D Camera Tracker in After Effects
Have you ever wondered how Hollywood directors seamlessly blend realistic 3D elements into their movies? Perhaps, you’ve marveled at stunning visual effects in music videos, commercials, or even your favorite TV series, and secretly wished you could create such eye-catching visuals yourself.
Get 10% off when you subscribe to our newsletter

Fortunately, you no longer have to be a visual effects genius or possess a big budget to achieve professional-looking results. With Adobe After Effects’ 3D Camera Tracker, you can easily incorporate 3D objects into your videos, taking your visual projects to a whole new level.
In this comprehensive guide, we will walk you through the process of using the 3D Camera Tracker in After Effects. Whether you’re a beginner or an experienced motion designer, this tutorial will equip you with the knowledge and skills necessary to harness the full potential of this powerful tool.
Get 10% off when you subscribe to our newsletter
From analyzing footage to tracking points, and from creating virtual cameras to adding 3D objects, we’ll cover every step in detail. So, get ready to explore the exciting world of 3D motion tracking and create stunning visuals that leave your audience in awe. Let’s dive in!
Tips and Tricks for Using the 3D Camera Tracker in After Effects
While the 3D Camera Tracker in After Effects is a powerful tool, mastering its usage requires some insight and practice. To save time, and make the most of this feature, here are some valuable tips and tricks:
Get 10% off when you subscribe to our newsletter
1. Choose the right footage: For accurate tracking results, it’s crucial to select footage with clear, distinct points and features. Avoid shaky or blurry clips as they can hinder the tracking process.
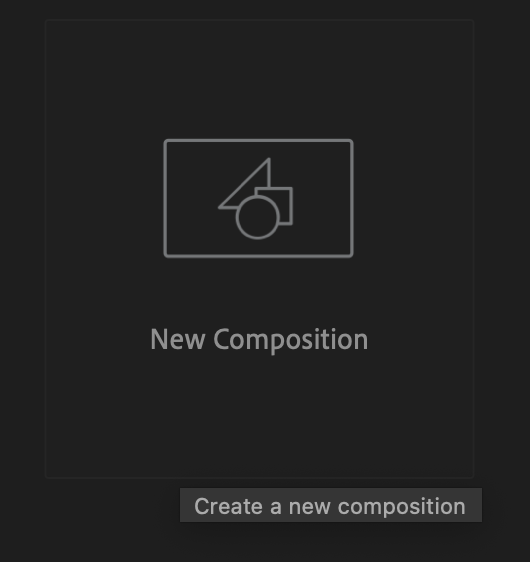
2. Set up your composition: Before applying the 3D Camera Tracker, create a new composition that matches the settings of your footage. This ensures seamless integration and accurate perspective when adding 3D elements.
Get 10% off when you subscribe to our newsletter

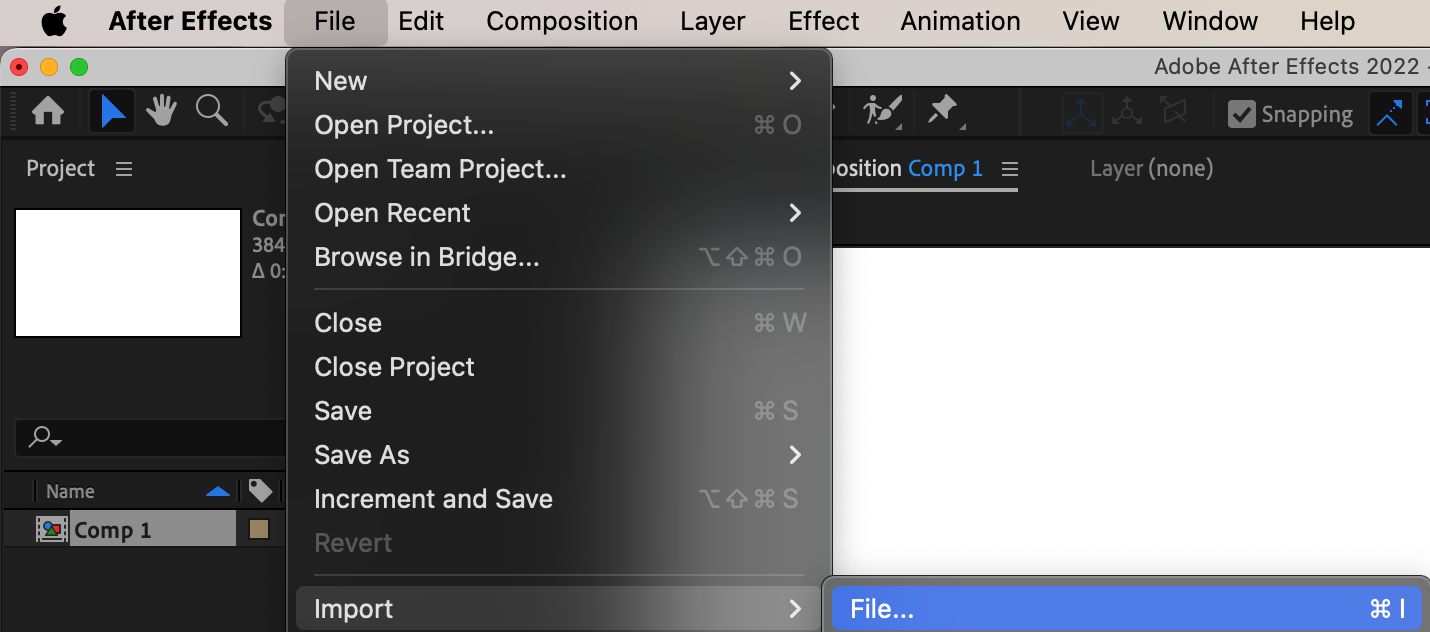
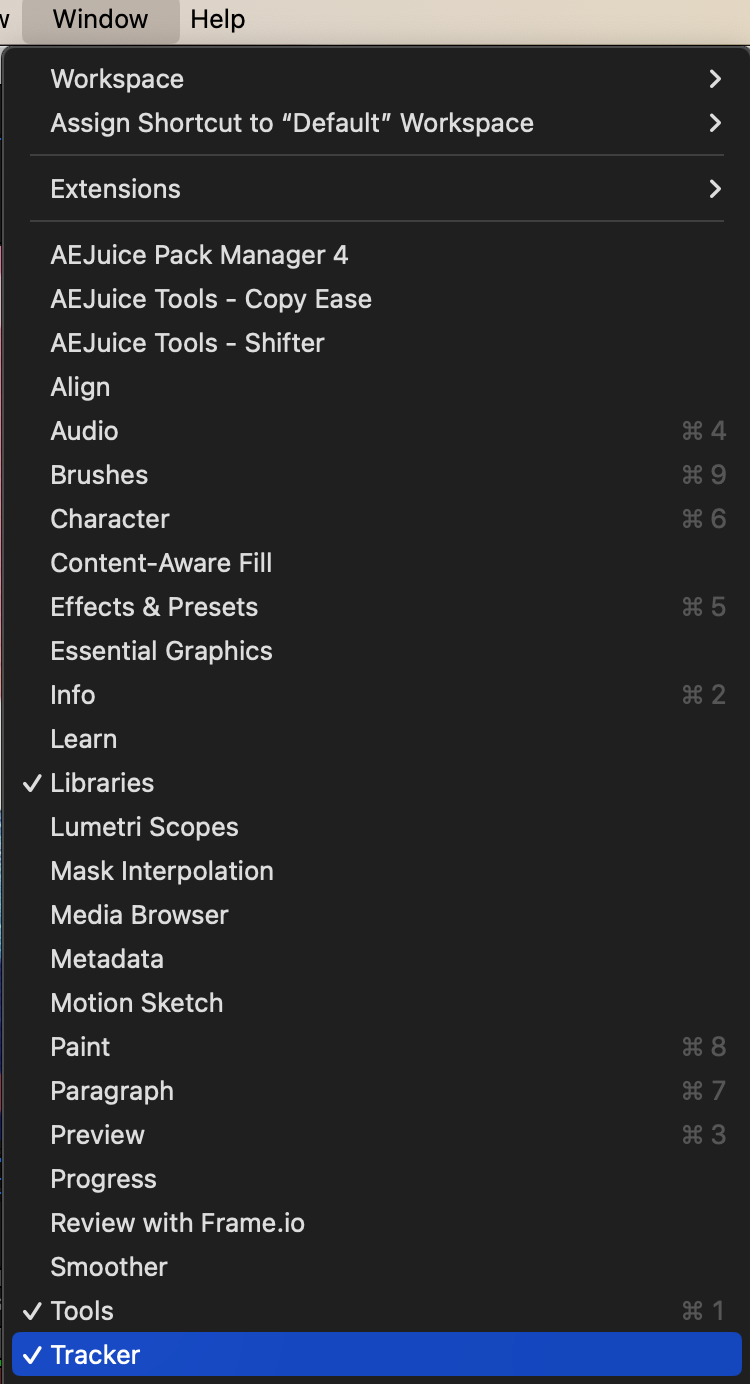
3. Use the “Track Camera” option: After importing your footage and selecting the layer you want to track, navigate to the top menu and choose “Window.” From the dropdown menu, select “Tracker.” Within the Tracker panel, choose “Track Camera” to initiate the process of creating a 3D camera based on the video.
Get 10% off when you subscribe to our newsletter
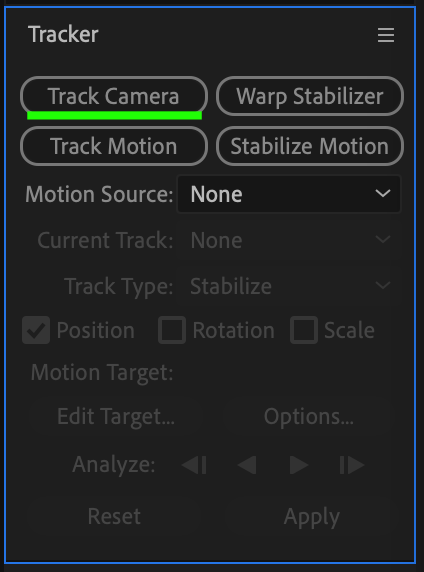
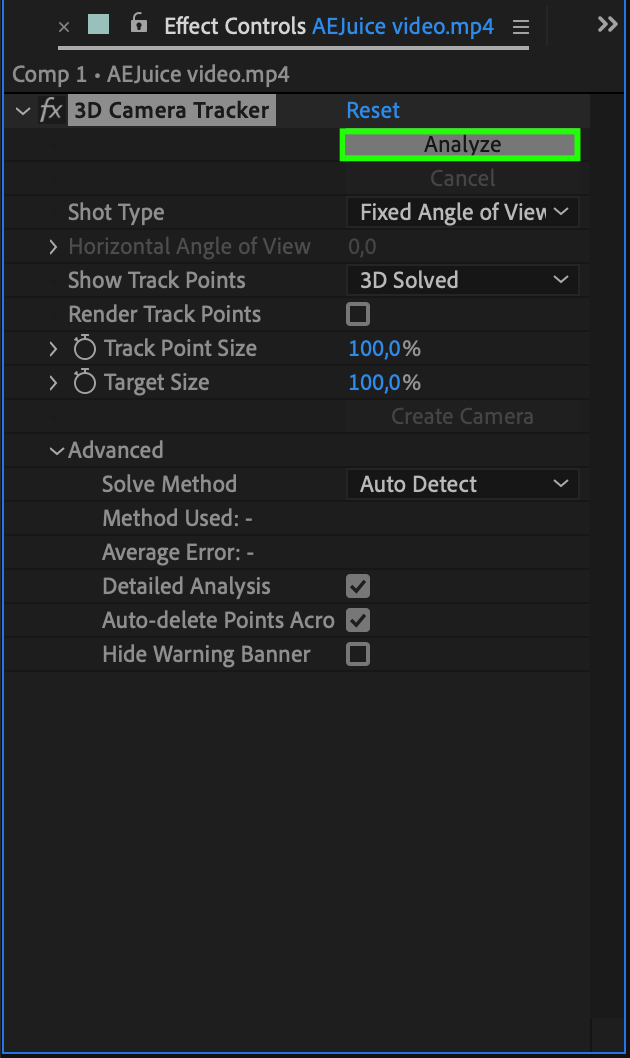
4. Analyze your footage: Click on the “Analyze” button to start the tracking process. After Effects will automatically track the selected points within the frame, building a virtual camera based on the movement in 3D space.
Get 10% off when you subscribe to our newsletter
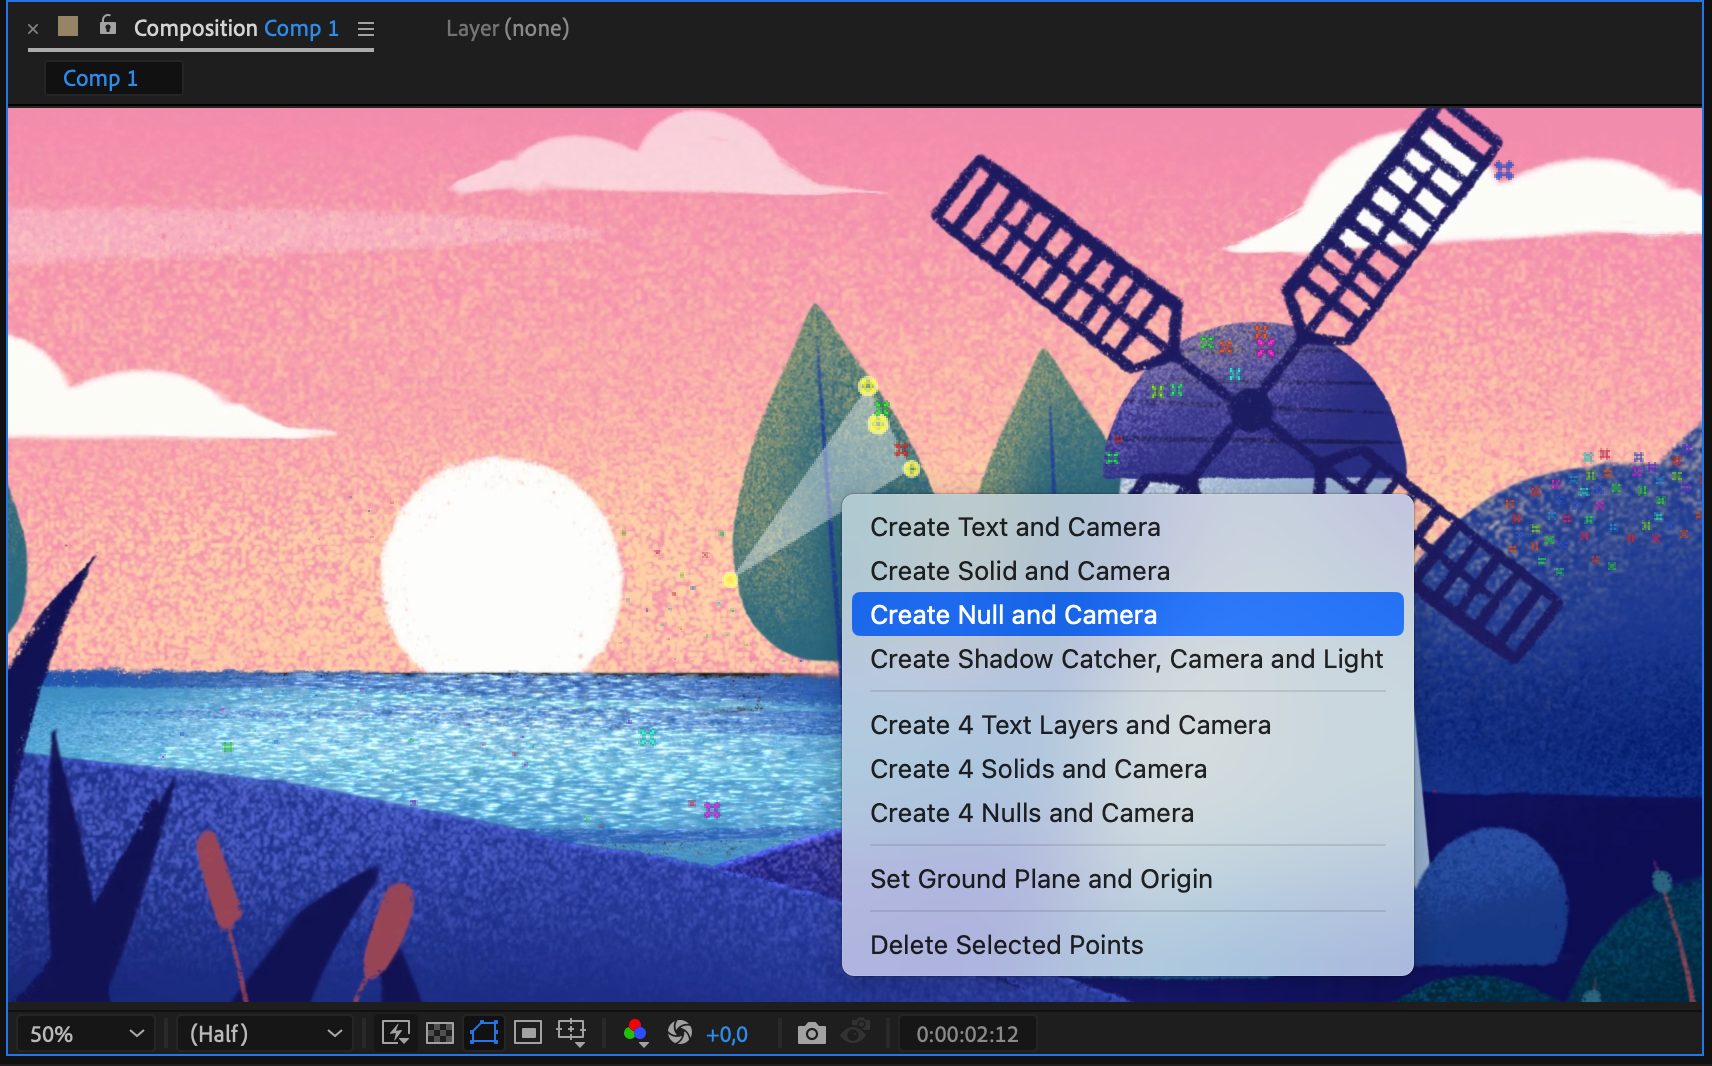
5. Create a null object: After the tracking is complete, create a null object by clicking on the “Create Null and Camera” button. This null object acts as a reference point for your 3D elements, allowing you to easily manipulate and position them within the scene.

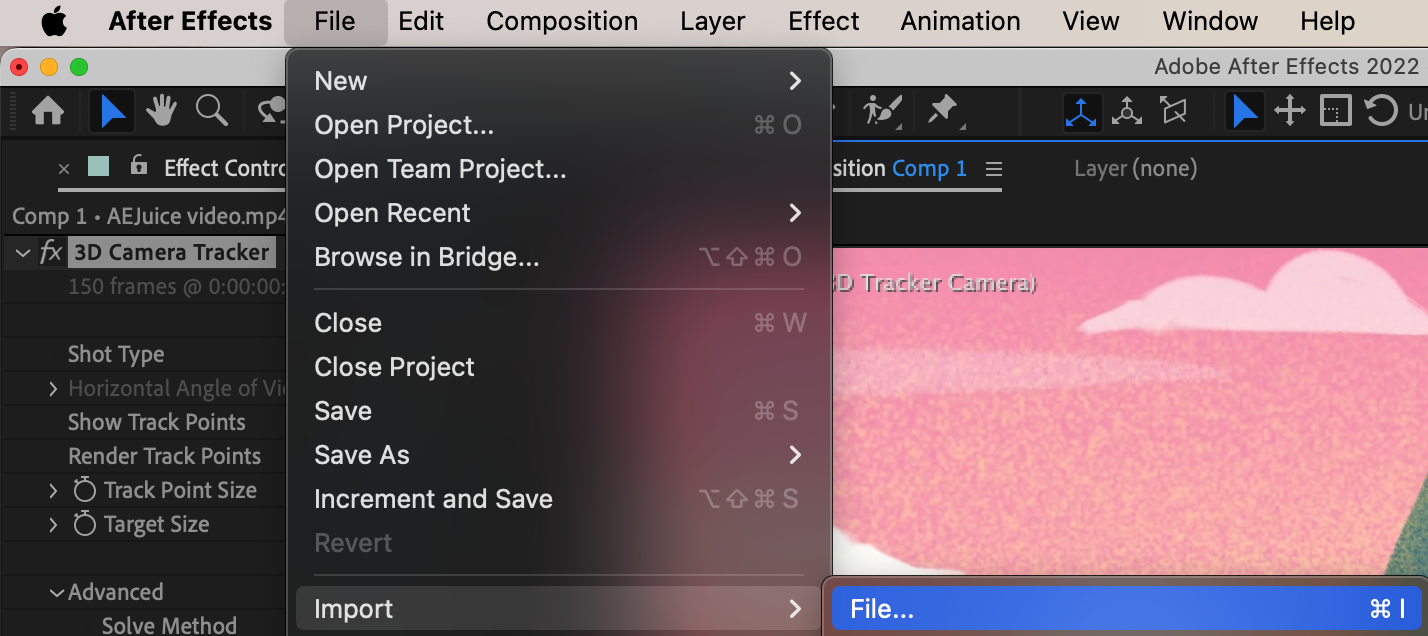
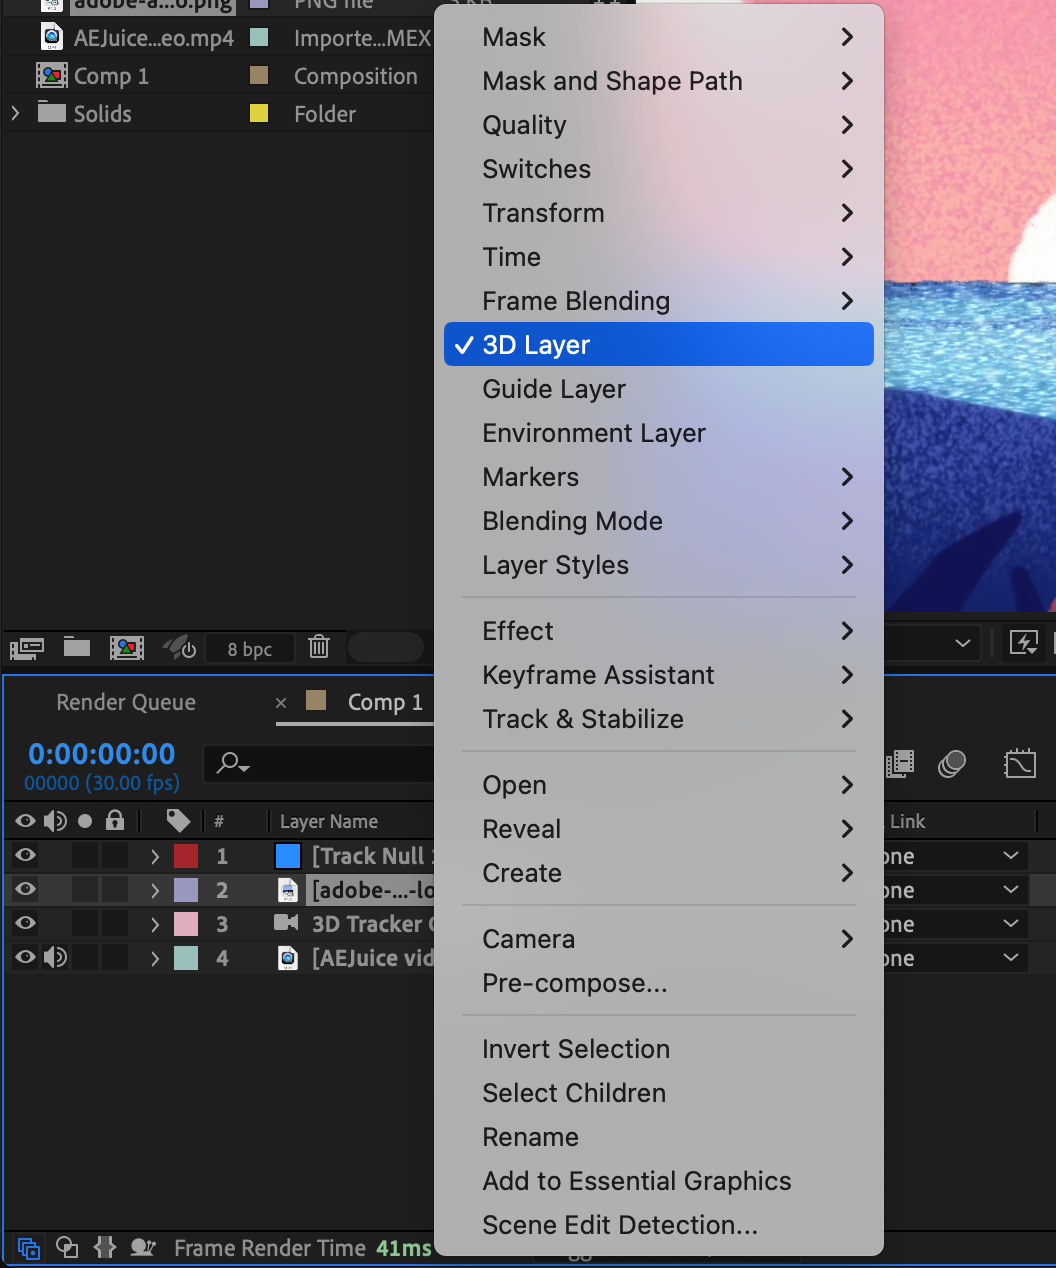
6. Add 3D elements: With the virtual camera and null object in place, it’s time to bring your 3D objects into the scene. Import your 3D model or shape layer, position it in relation to the null object, and enable the 3D properties for the layer.
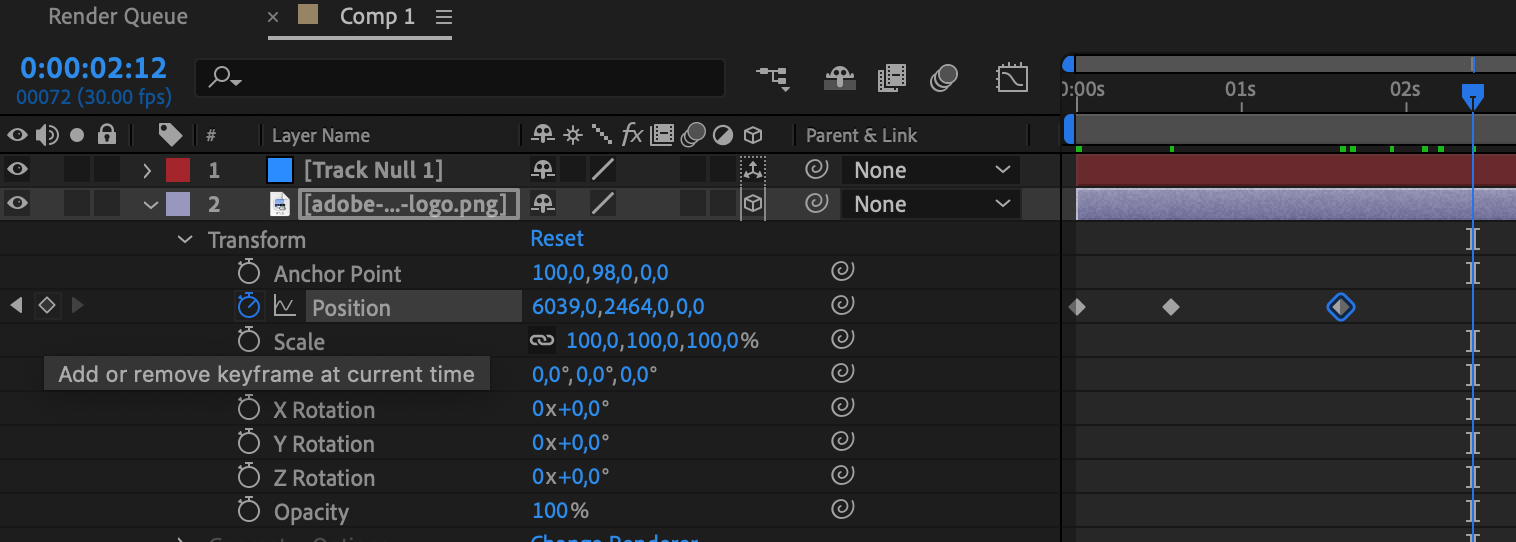
7. Fine-tune the integration: Once you’ve added your 3D elements, you may need to adjust their scale, rotation, and position to align them seamlessly with your footage. Use tools like the Transform controls and keyframes to create smooth animations that blend naturally into the scene.
Get 10% off when you subscribe to our newsletter
8. Experiment and have fun: The 3D Camera Tracker offers endless possibilities for creative visual effects. Don’t be afraid to explore different techniques and push the boundaries of your imagination. Use this tool as a stepping stone to unlock your creativity and create stunning visuals that captivate your audience.
By following these tips and using the 3D Camera Tracker in After Effects, you’ll be able to master the art of seamlessly integrating 3D elements into your videos. With practice, your visual projects will come to life with a whole new dimension, making them truly unforgettable. So, grab your footage, fire up After Effects, and let your creativity soar!
Get 10% off when you subscribe to our newsletter
Conclusion – Unleash Your Creativity with the 3D Camera Tracker in After Effects
Congratulations! You have now reached the end of our comprehensive guide on how to use the 3D Camera Tracker in After Effects. Armed with the knowledge and techniques learned throughout this tutorial, you’re ready to take your visual projects to new heights.
The 3D Camera Tracker in After Effects opens up a world of possibilities, allowing you to seamlessly integrate 3D elements into your videos. By mastering the art of motion tracking, you can create captivating visual effects that amaze and captivate your audience.
Get 10% off when you subscribe to our newsletter
Remember, selecting the right footage, adjusting the tracking settings, and utilizing hotkeys can save you time and improve accuracy. Analyzing your footage, tracking specific points, and utilizing a null object for easy positioning are essential steps to achieve realistic 3D integration. Don’t forget to experiment and have fun – the more you play around with the 3D Camera Tracker, the more proficient you’ll become.
Whether you’re a seasoned motion designer or just starting your creative journey, the 3D Camera Tracker is a powerful tool that can elevate your visual projects to professional levels. With dedication, practice, and a bit of artistic flair, you’ll be able to create stunning visuals that leave a lasting impression.
So, what are you waiting for? Unlock your creativity, dive into the world of 3D motion tracking, and let After Effects help you unleash your imagination. Embrace the possibilities, and transform your videos into masterpieces that showcase your unique vision.
Happy tracking and happy creating!
Our Bestsellers

