
Mastering the Speed Graph for Better Animation Control
Introduction
The Speed Graph in Adobe After Effects allows you to control how fast or slow an animation moves between keyframes. By adjusting the speed of motion instead of just the position, you can create more natural, dynamic, and professional-looking animations. In this guide, you will learn how to access and use the Speed Graph step-by-step.
Step 1: Open Your Project and Add Keyframes
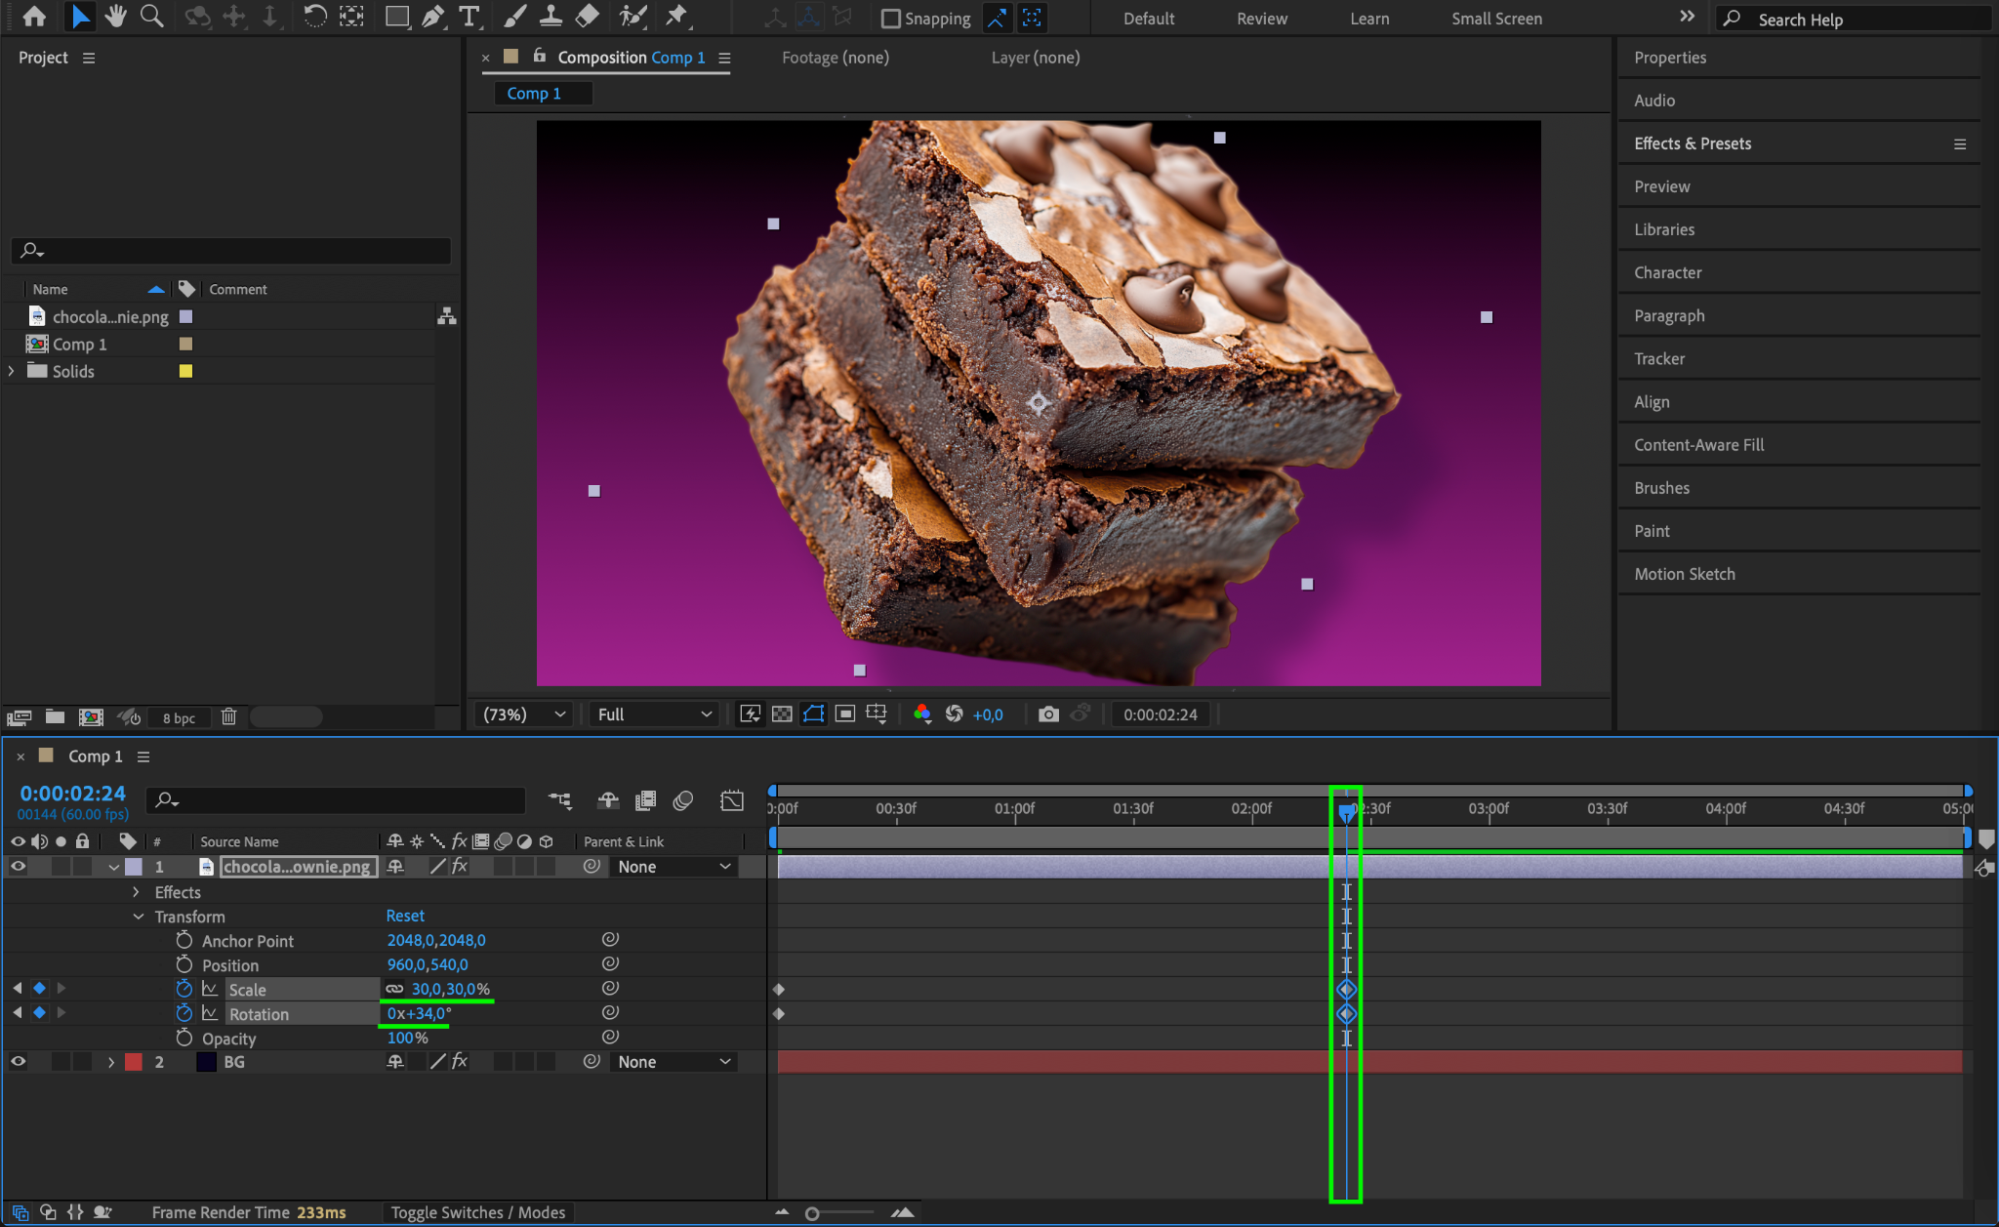
Start by opening your After Effects project and selecting the layer you want to animate. Apply a basic animation, such as Position or Scale, by clicking the stopwatch icon next to the property. Move the CTI (Current Time Indicator) and change the value to automatically create a second keyframe.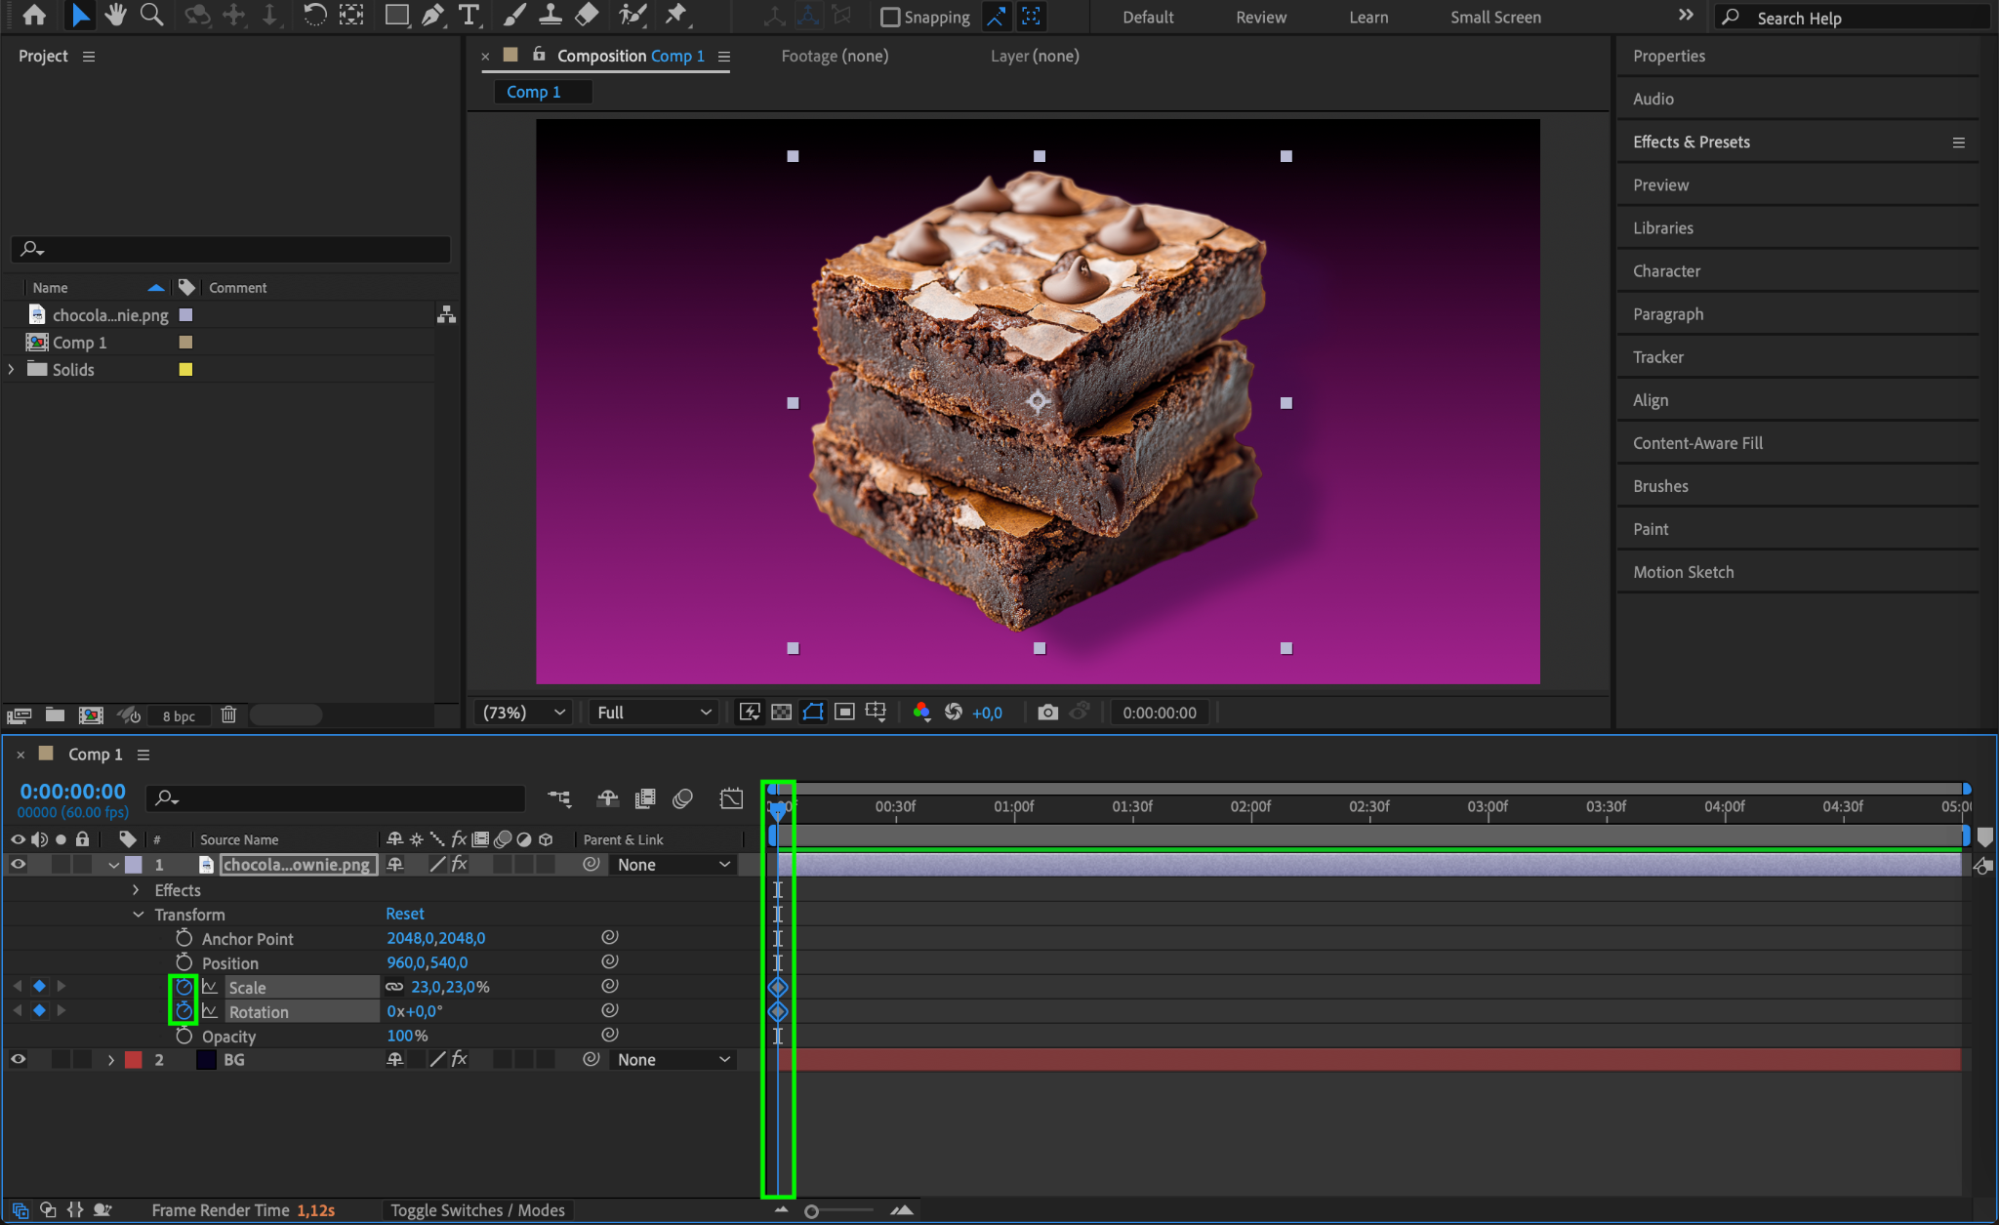
 Step 2: Select Your Keyframes
Click and drag to select the keyframes you want to adjust. Selected keyframes will be highlighted in blue. This step is necessary before you can access the Graph Editor and adjust the speed.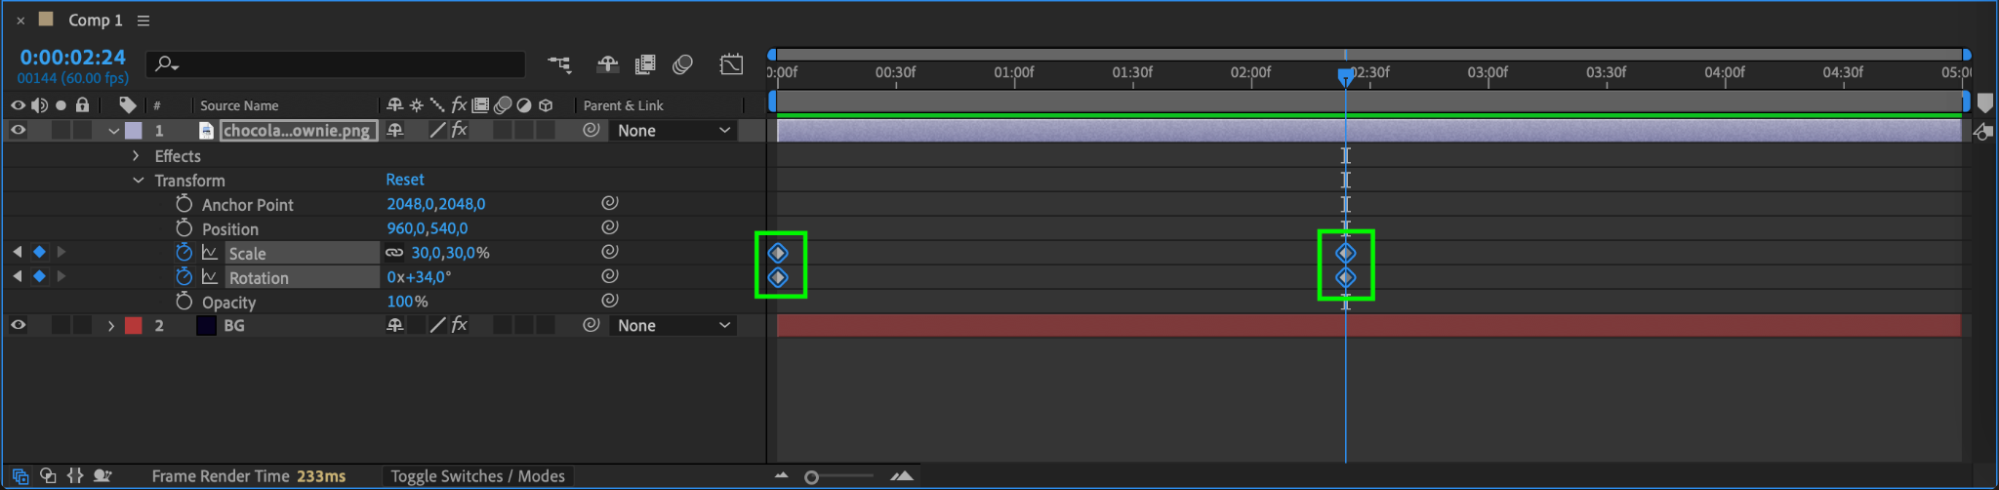
Step 3: Open the Graph Editor
At the top of the timeline panel, click on the Graph Editor button (it looks like a small graph). This will switch your timeline view from keyframes to a graph view, where you can manipulate speed or value curves.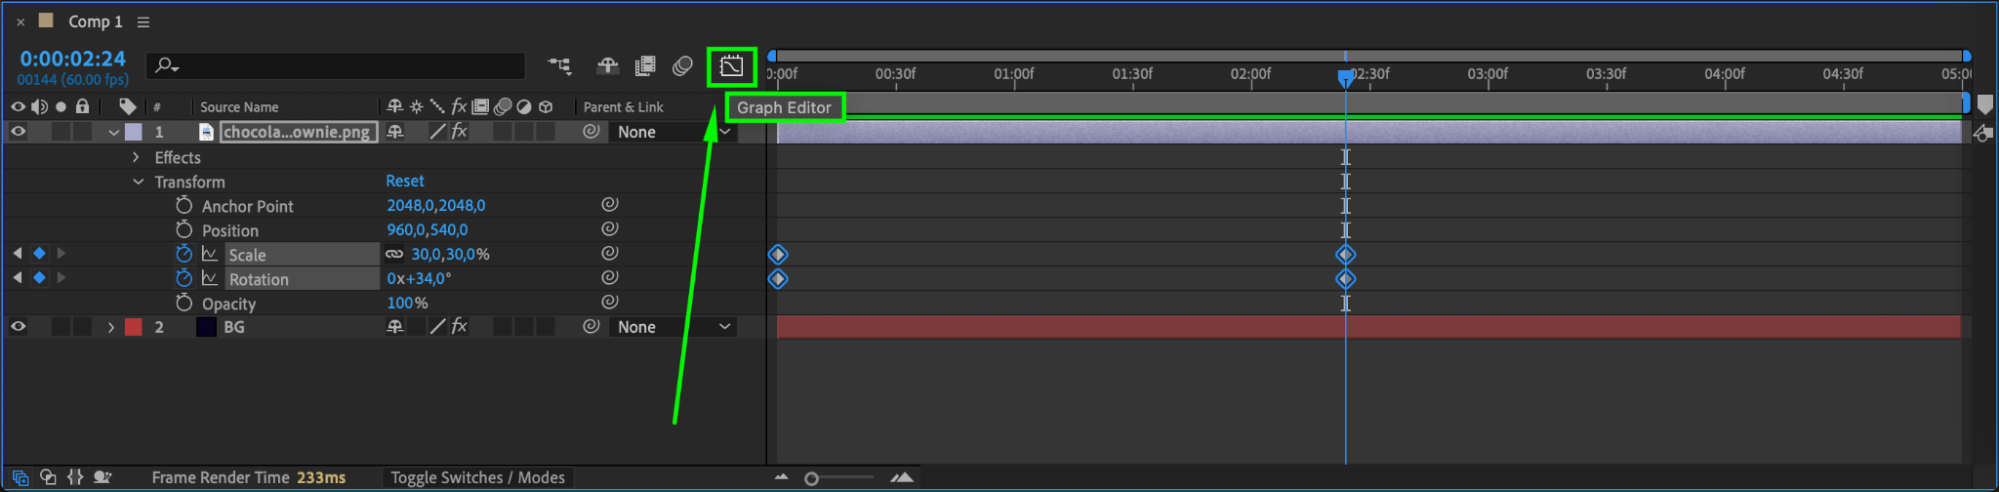 Step 4: Choose the Speed Graph
In the Graph Editor, click the “Choose Graph Type and Options” button (small menu icon) and select “Edit Speed Graph.” This ensures you are editing the speed of motion, not the value of the property.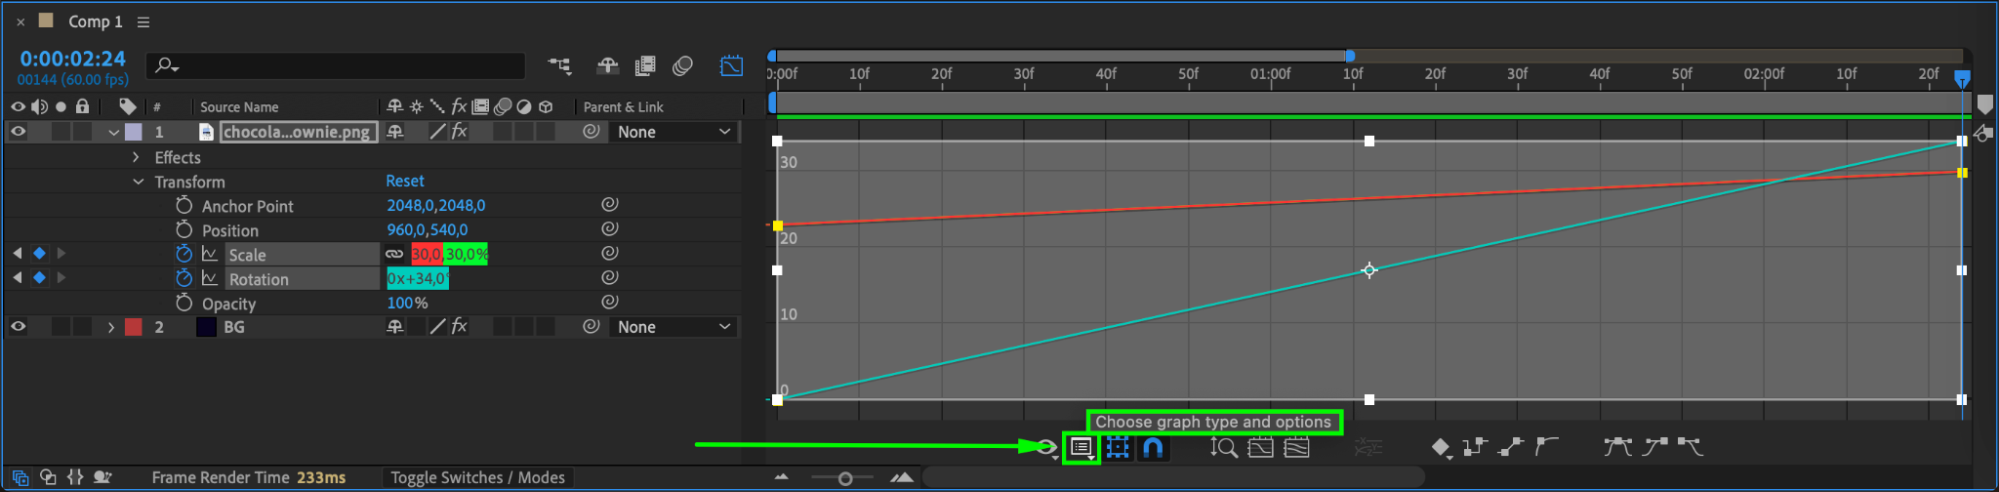
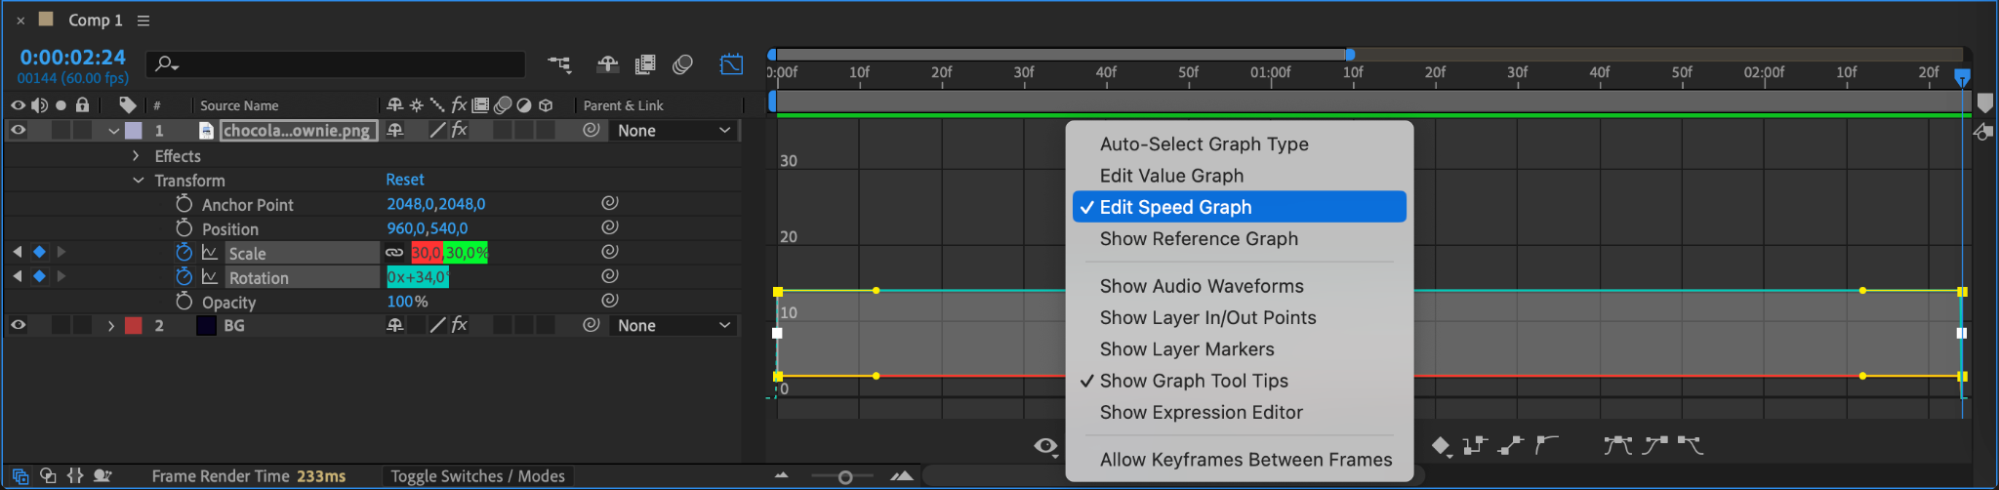 Step 5: Adjust the Speed Graph Handles
Click on a keyframe point in the graph. You will see handles appear. Drag these handles up to increase the speed after a keyframe or down to decrease it. Pull the handles left or right to control how quickly the animation accelerates or decelerates.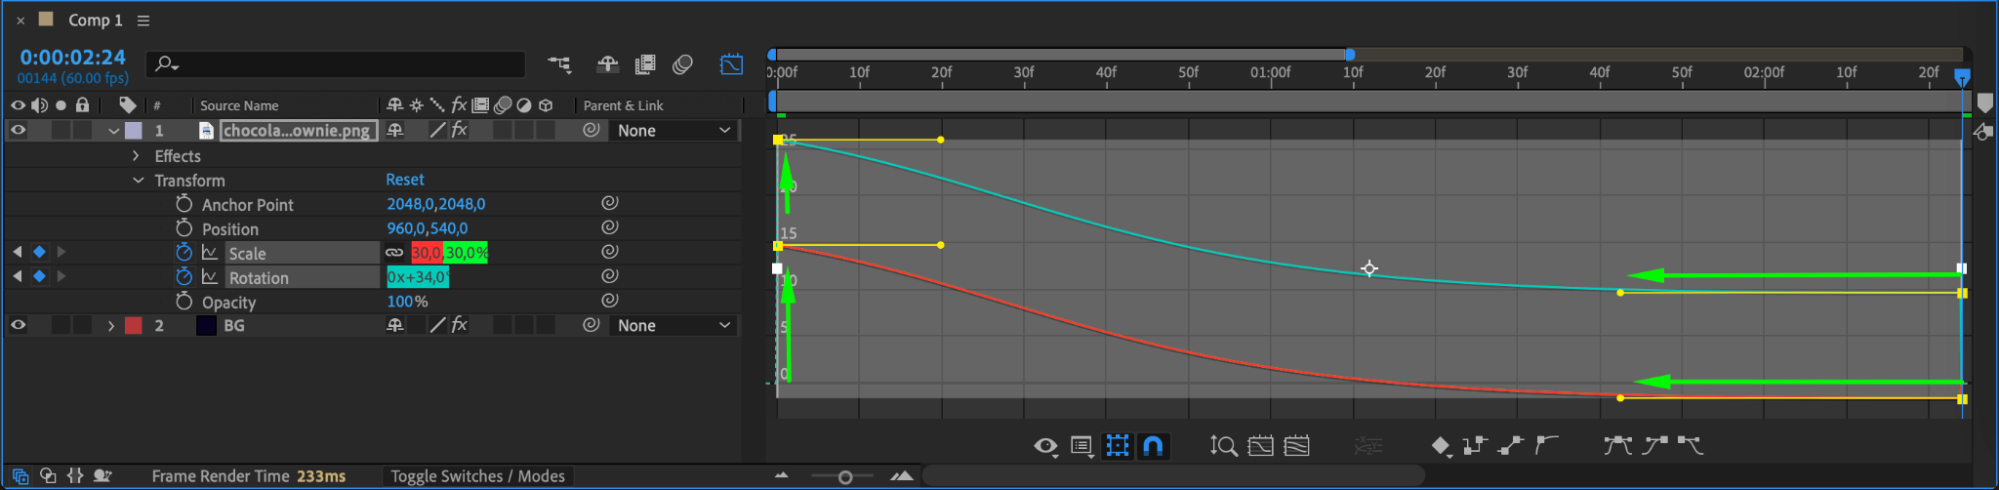
Step 6: Use Easy Ease for a Smoother Start
For smoother animations, right-click on a selected keyframe, go to Keyframe Assistant > Easy Ease. This automatically softens the motion, making the movement start slowly, speed up, and then slow down again.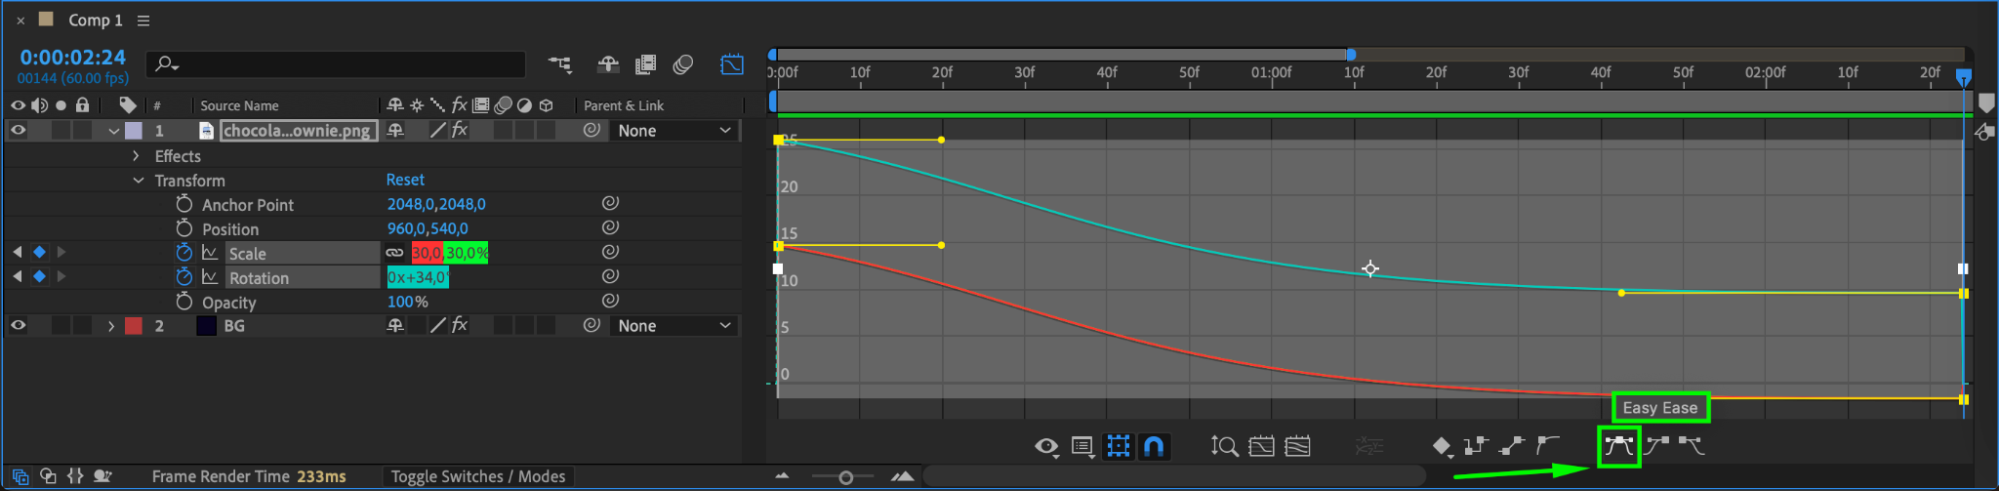 Step 7: Fine-Tune Motion with the Graph Editor
After applying Easy Ease, use the Speed Graph to customize the timing even more. You can create sharp accelerations, slow ramps, or very smooth, natural movements by carefully adjusting the curve shapes.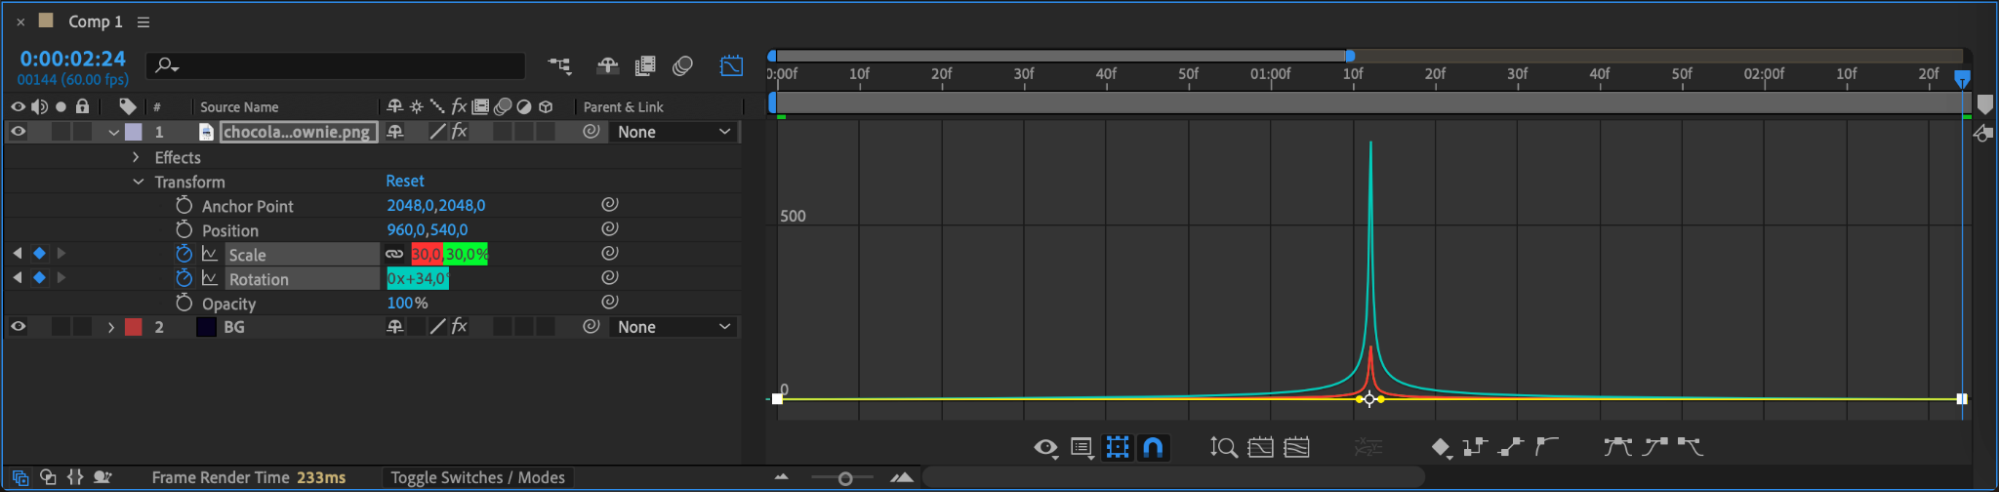 Step 8: Preview Your Animation
Press the spacebar to preview your animation. Watch how the speed changes throughout the movement. If needed, return to the Graph Editor and make small adjustments for the perfect result.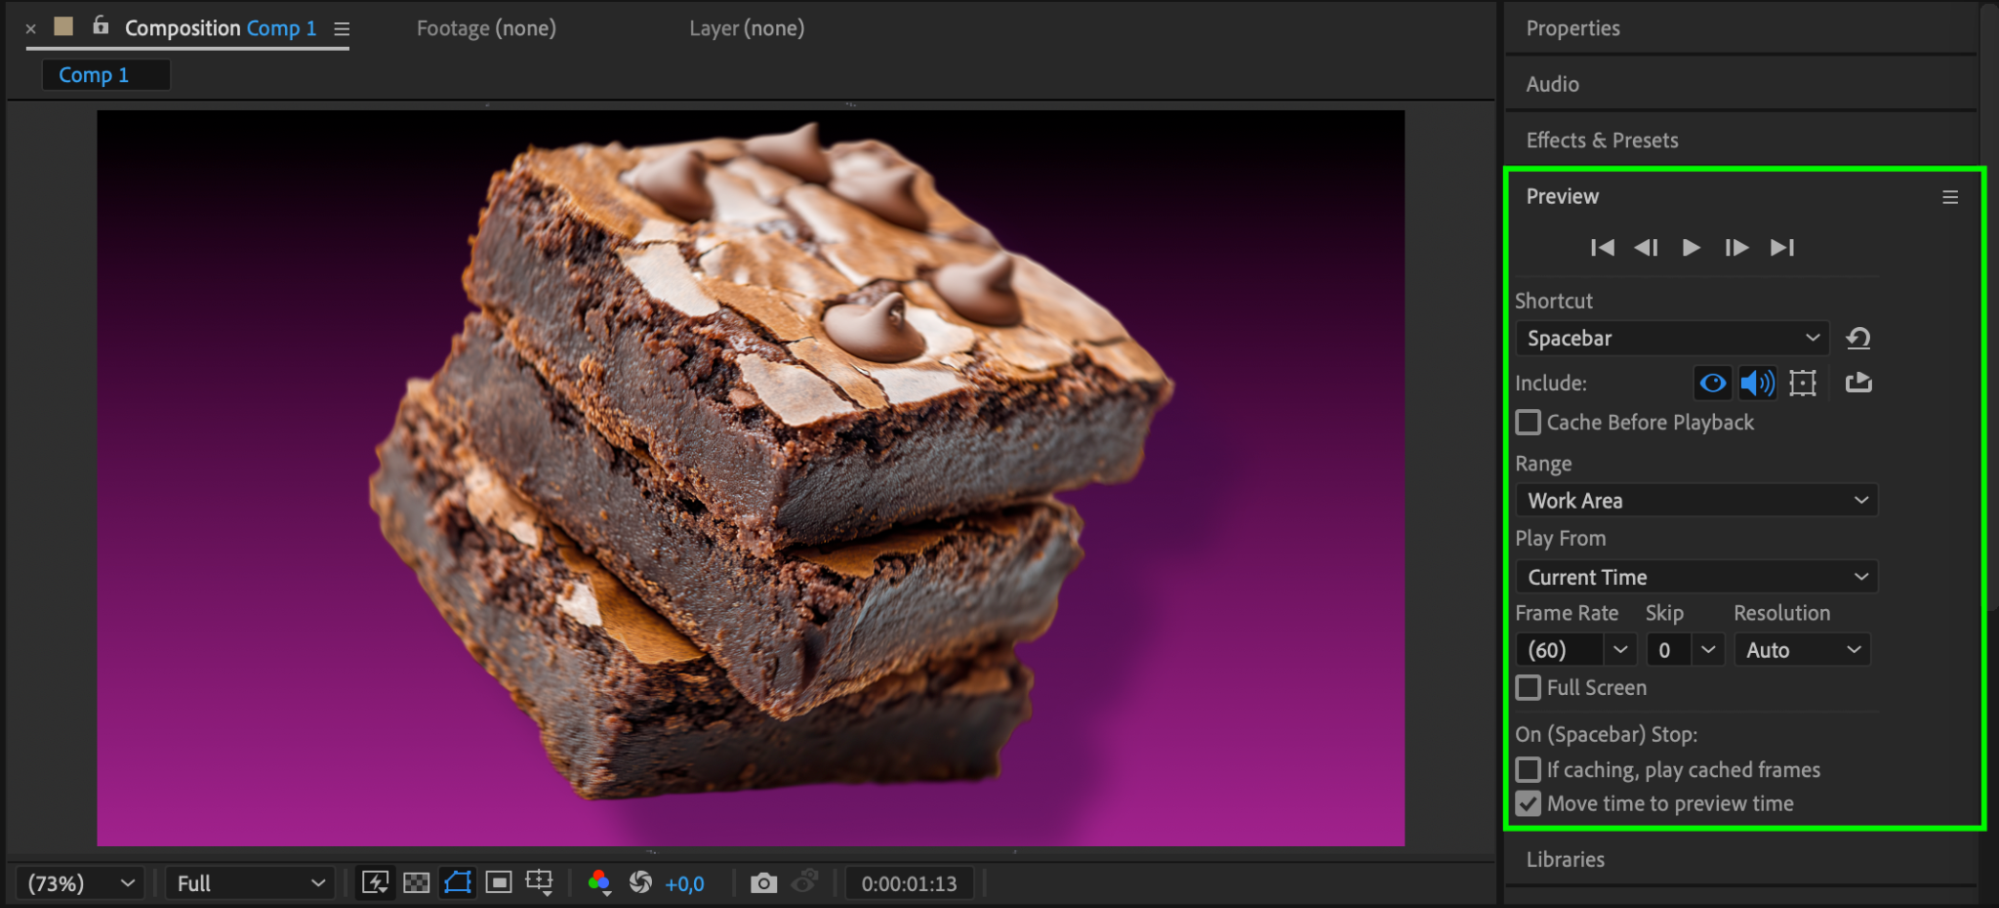 Conclusion
The Speed Graph is a powerful tool in After Effects that gives you fine control over how your animations feel. Instead of moving at a constant pace, your animations can accelerate, decelerate, or move organically. Mastering the Speed Graph will make your motion graphics look more professional and polished.
Our Bestsellers
Our Bestsellers


