Moving Layers in After Effects: Essential Tips and Techniques

Introduction – Mastering Layer Positioning for Better Animations

Moving layers in After Effects is a core skill for creating clean, professional animations. Whether you’re arranging elements in a composition or fine-tuning motion, understanding the different ways to move layers will help you work faster and more accurately. Below is a step-by-step guide with practical tips to make your workflow smoother.

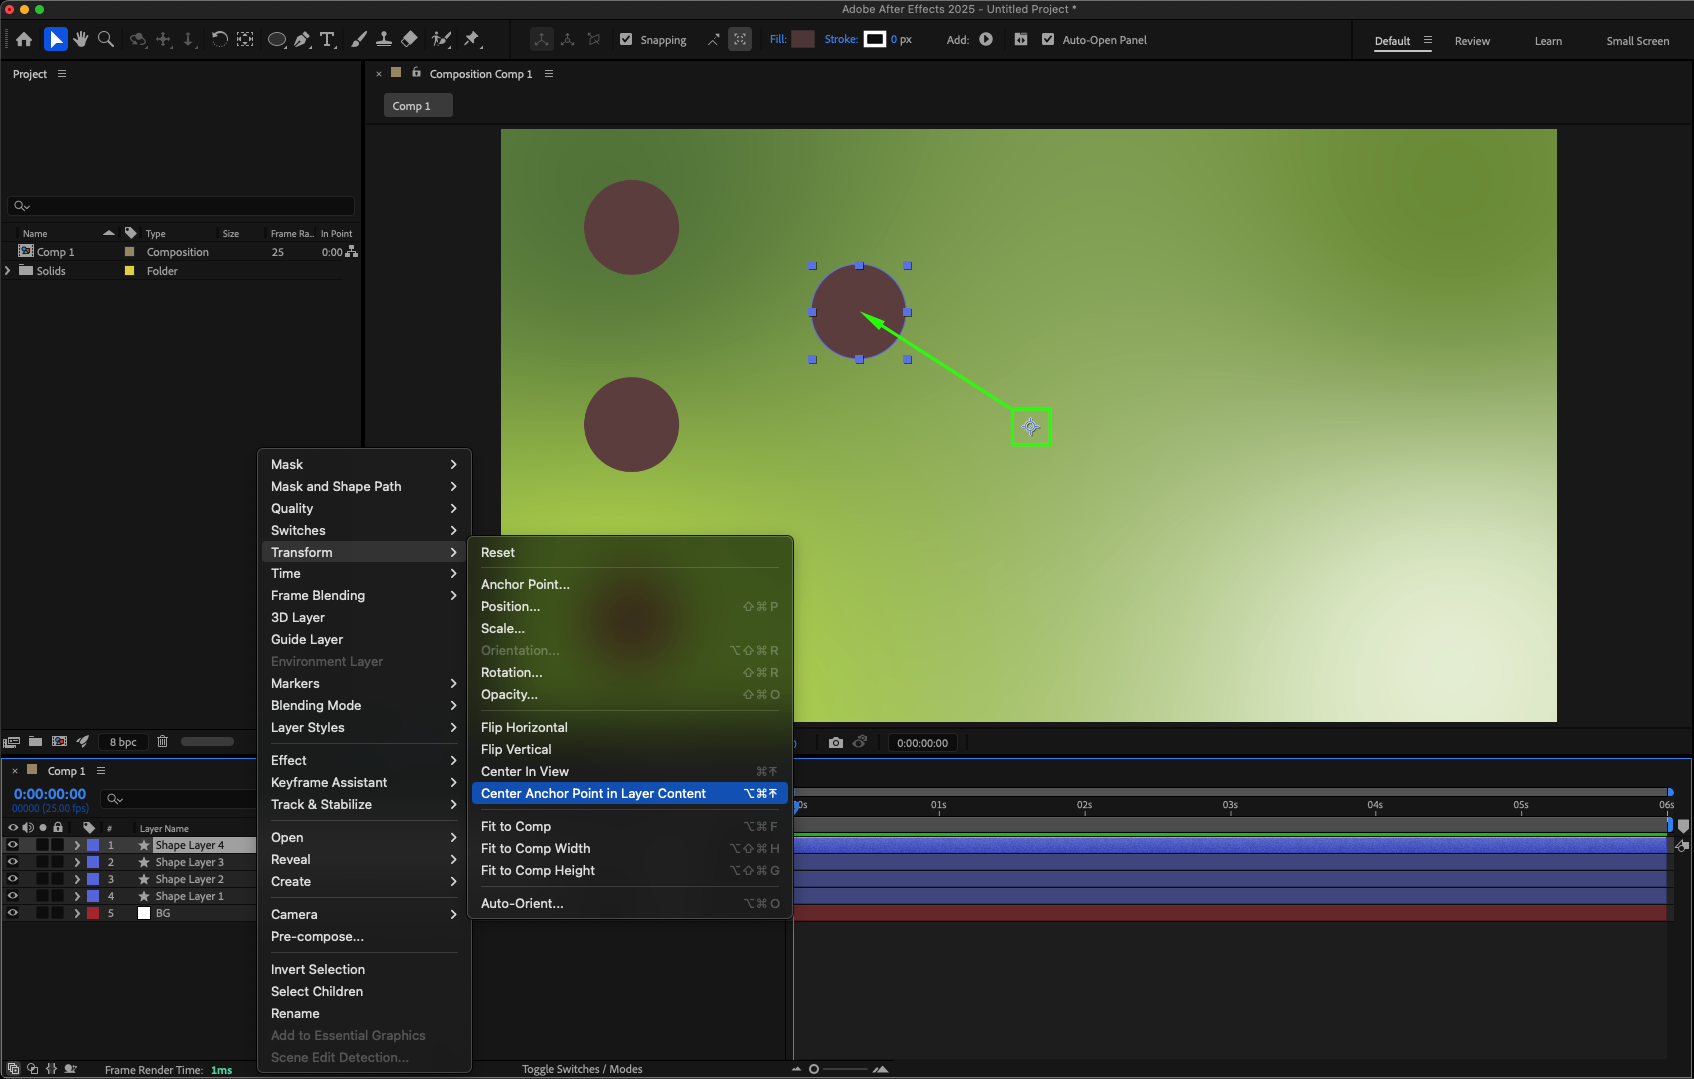
Step 1: Center the Anchor Point

Select your layer in the timeline, right-click, and choose Transform > Center Anchor Point in Layer Content. This ensures movements and transformations happen from the correct center point.

Step 2: Use Snapping for Precise Alignment

Above the Composition panel, enable the Snapping button. This makes it easier to align layers to each other or to guides without guessing positions.
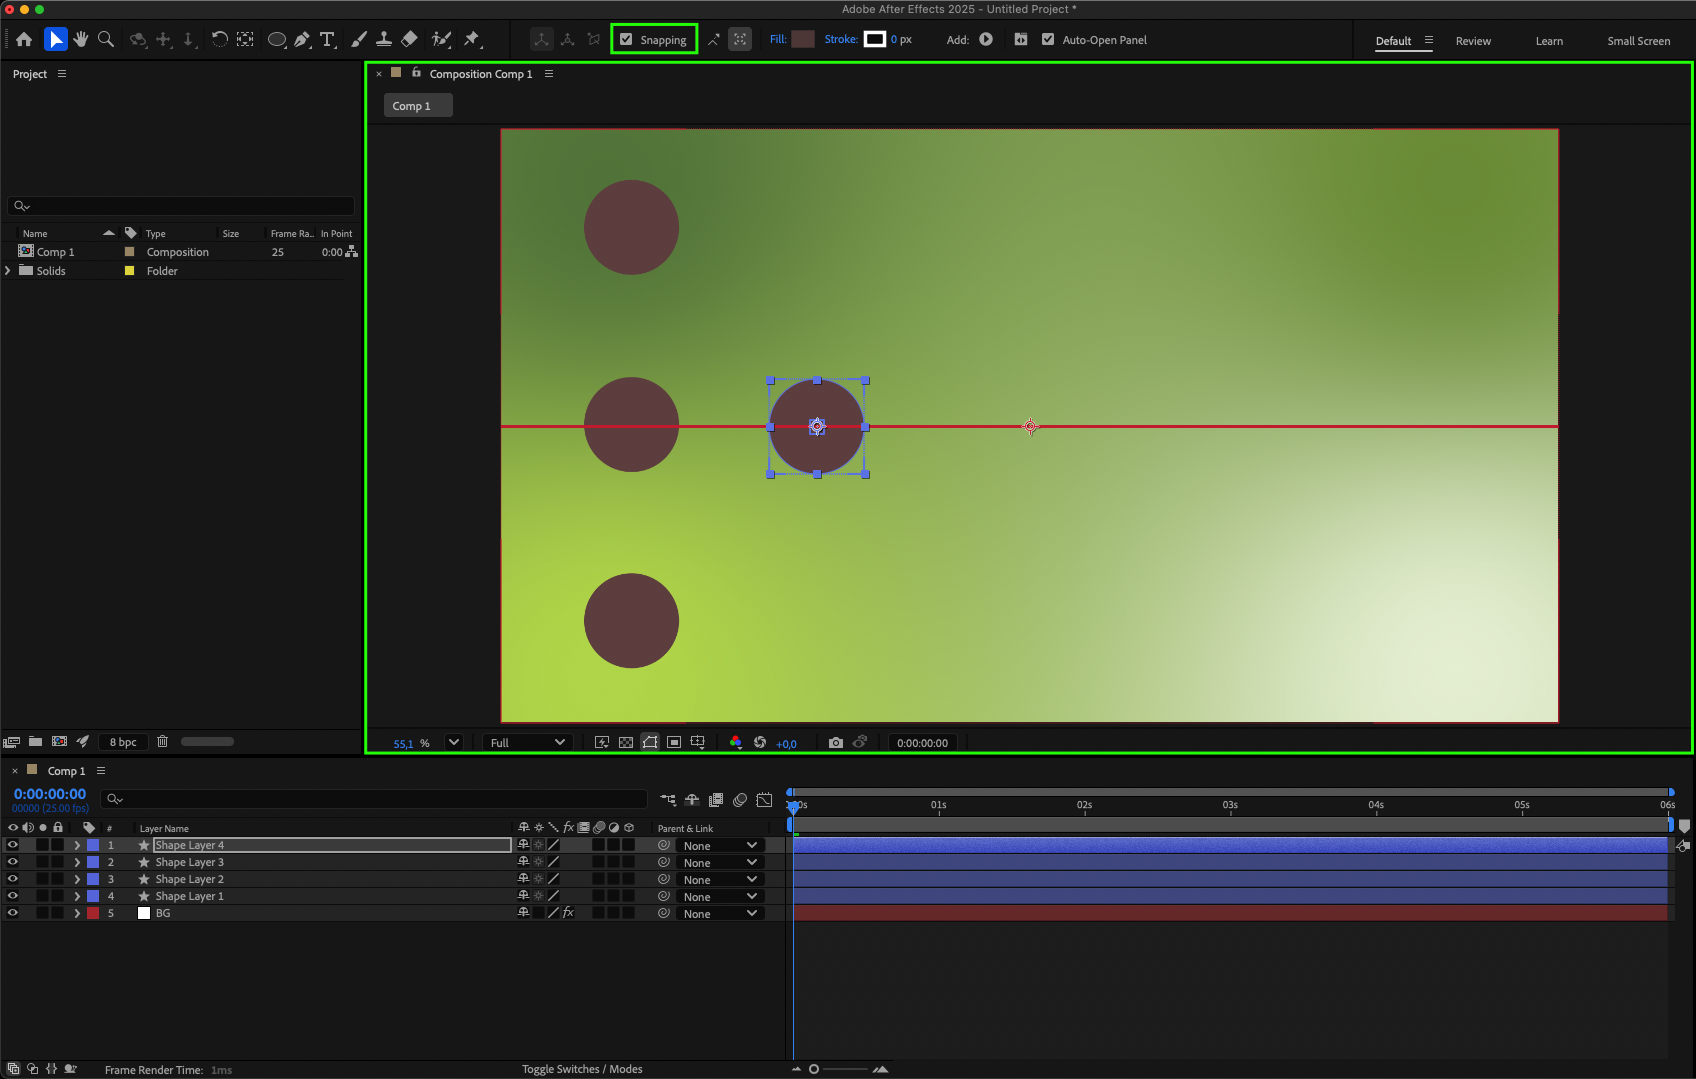
Get 10% off when you subscribe to our newsletter

By subscribing you agree to your email being stored and used to receive the emails in accordance to our Privacy Policy
descount

Step 3: Select Multiple Layers

Hold Shift and click on multiple layers in the timeline to move them together. This is useful for repositioning groups of elements without breaking their layout.

Step 4: Nudge Layers with Arrow Keys

Select the layer and use your arrow keys to move it in small steps. Hold “Shift” while pressing arrow keys to move in larger increments for quicker positioning.

Step 5: Use Grids and Guides

At the bottom of the Composition panel, turn on Proportional Grid or Guides. These help you align elements accurately and maintain consistent spacing.

-50%
-50%
00hrs : 00mins : 00sec
Happy HolidaysSale sitewide
Shop now

Step 6: Adjust Position in Transform Properties

Select your layer and press “P” to open the Position property. You can type exact coordinates or animate them with keyframes for precise movements. Other transform properties like Scale and Rotation can also be animated for more complex effects.

Step 7: Align Layers with the Align Panel

Use the Align Panel to quickly center or distribute layers evenly. This is ideal for layouts where consistent spacing matters.

Step 8: Use Parenting or Pre-Compositions

Parent one layer to another using the Pick Whip icon so child layers follow the parent’s movement. Alternatively, group multiple layers into a Pre-Composition for better organization.

Step 9: Preview and Refine

Press Spacebar to preview your composition. Make small adjustments until everything is positioned exactly as you want.

Conclusion

Mastering layer movement in After Effects will make your animations cleaner, faster to produce, and more visually appealing. By using snapping, guides, anchor point adjustments, and alignment tools, you can work with greater precision and speed. Keep practicing, experiment with different techniques, and soon moving layers will feel effortless — freeing you to focus on the creative side of your projects.

-50%
-50%
00hrs : 00mins : 00sec
Happy HolidaysSale sitewide
Shop now

Our Bestsellers