Introduction
After Effects does not have a built-in diagonal alignment tool, but you can easily achieve precise diagonal alignment by using guides, snapping, and a temporary reference line. This method is perfect for clean motion design, layouts, and stylized compositions.
Step 1: Open Your Project
Open the project and composition containing the layers you want to align.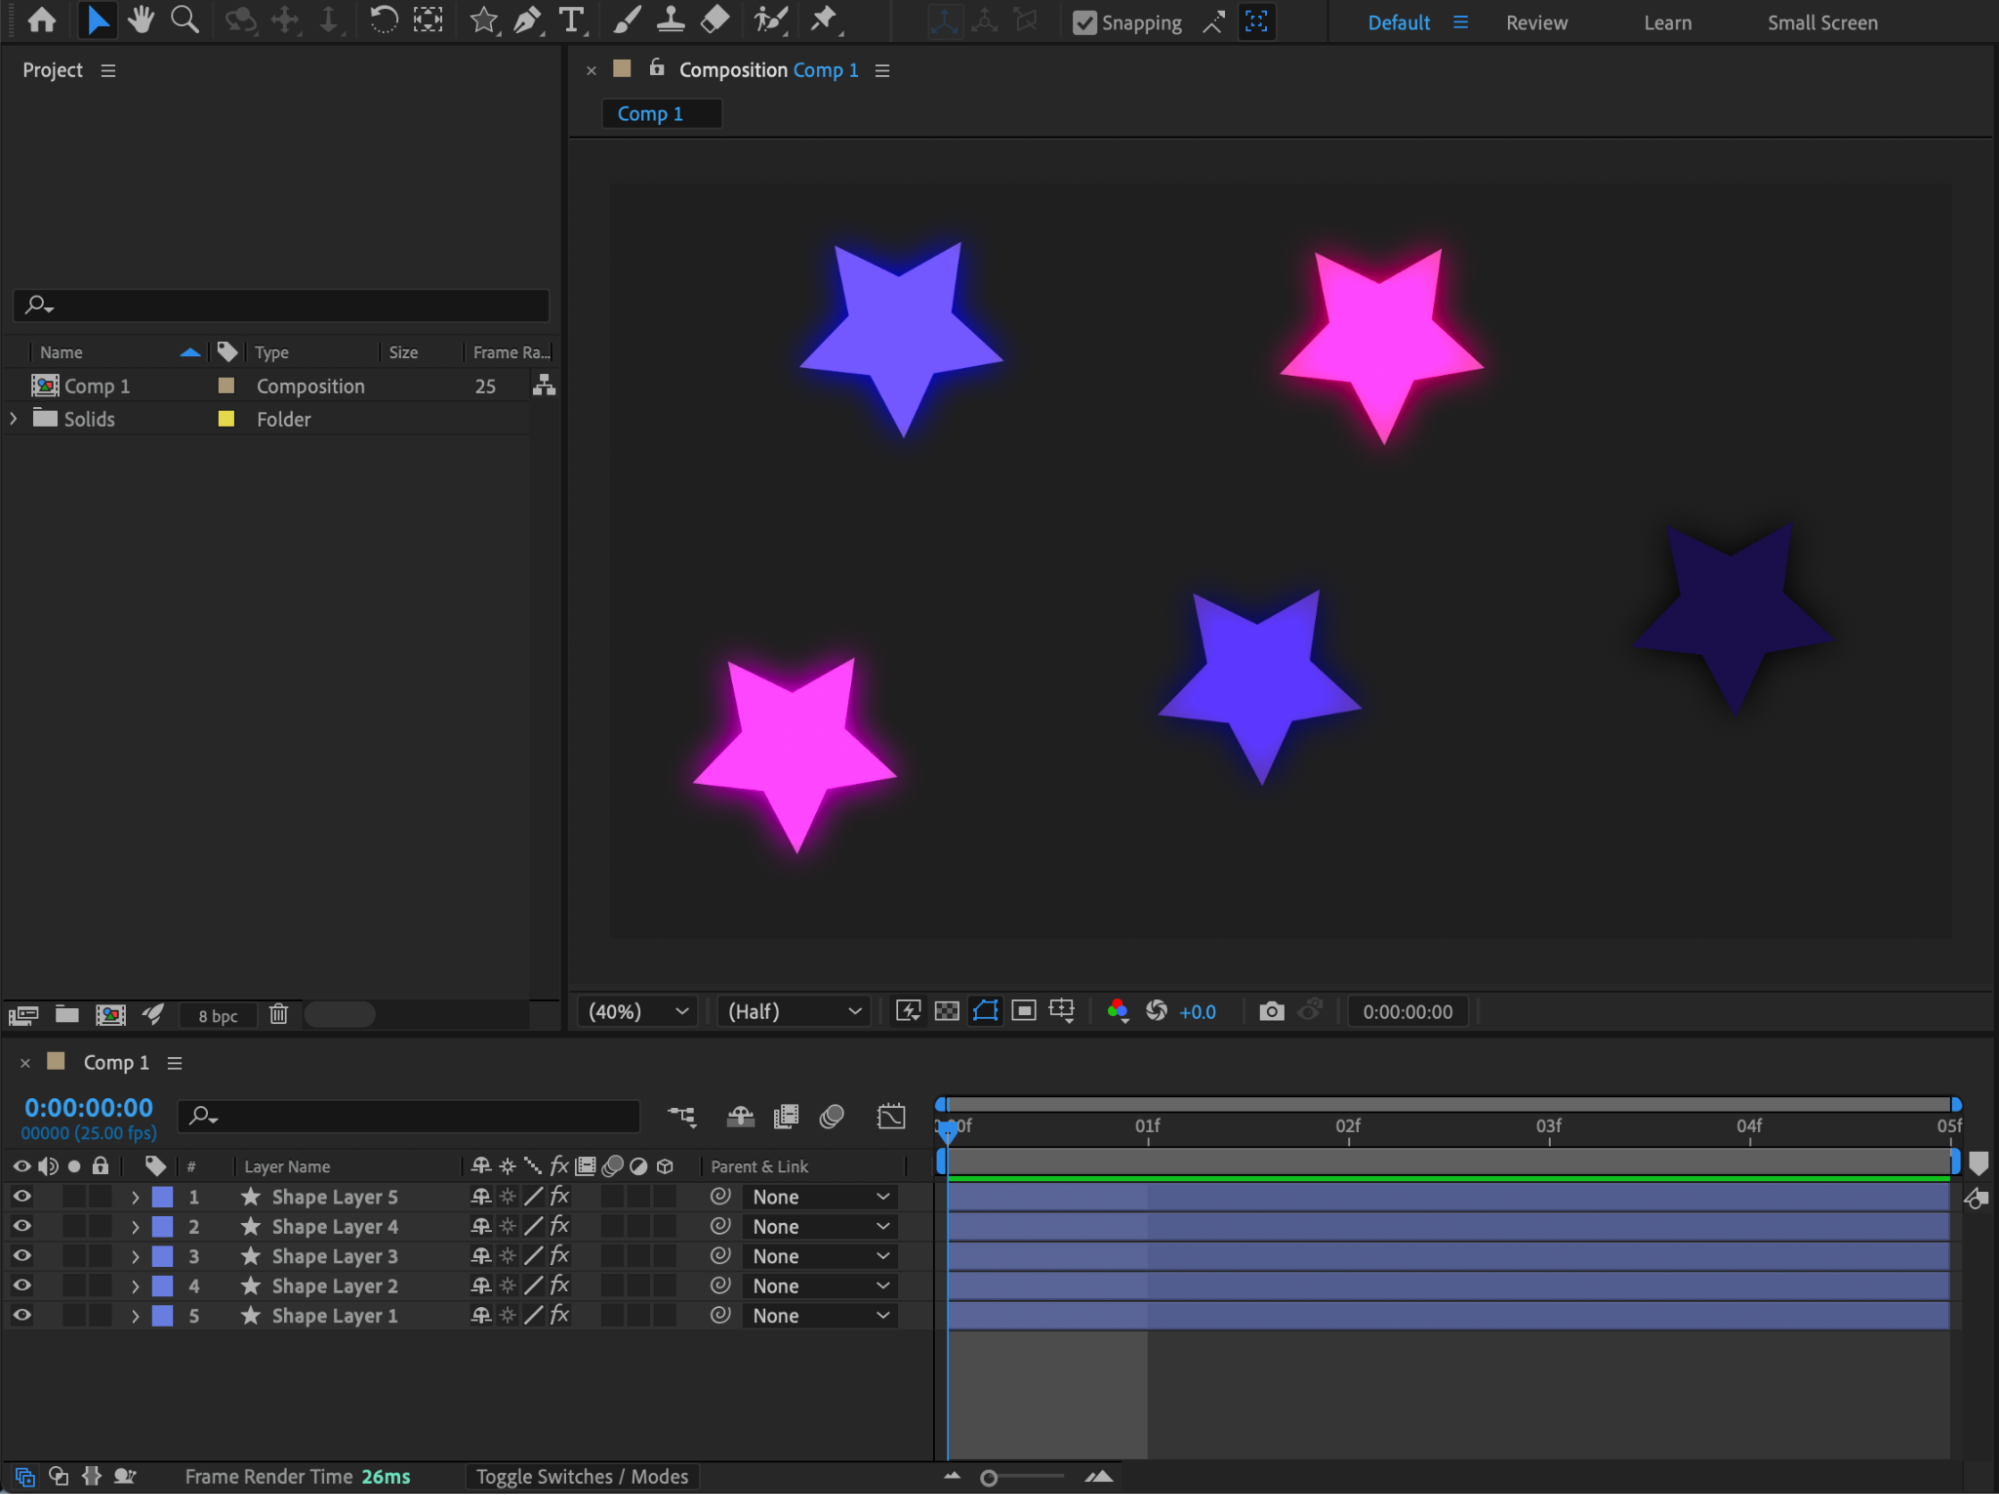 Step 2: Center Anchor Points
Select all layers you want to align. Right-click and choose Transform > Center Anchor Point in Layer Content. This ensures accurate snapping and alignment.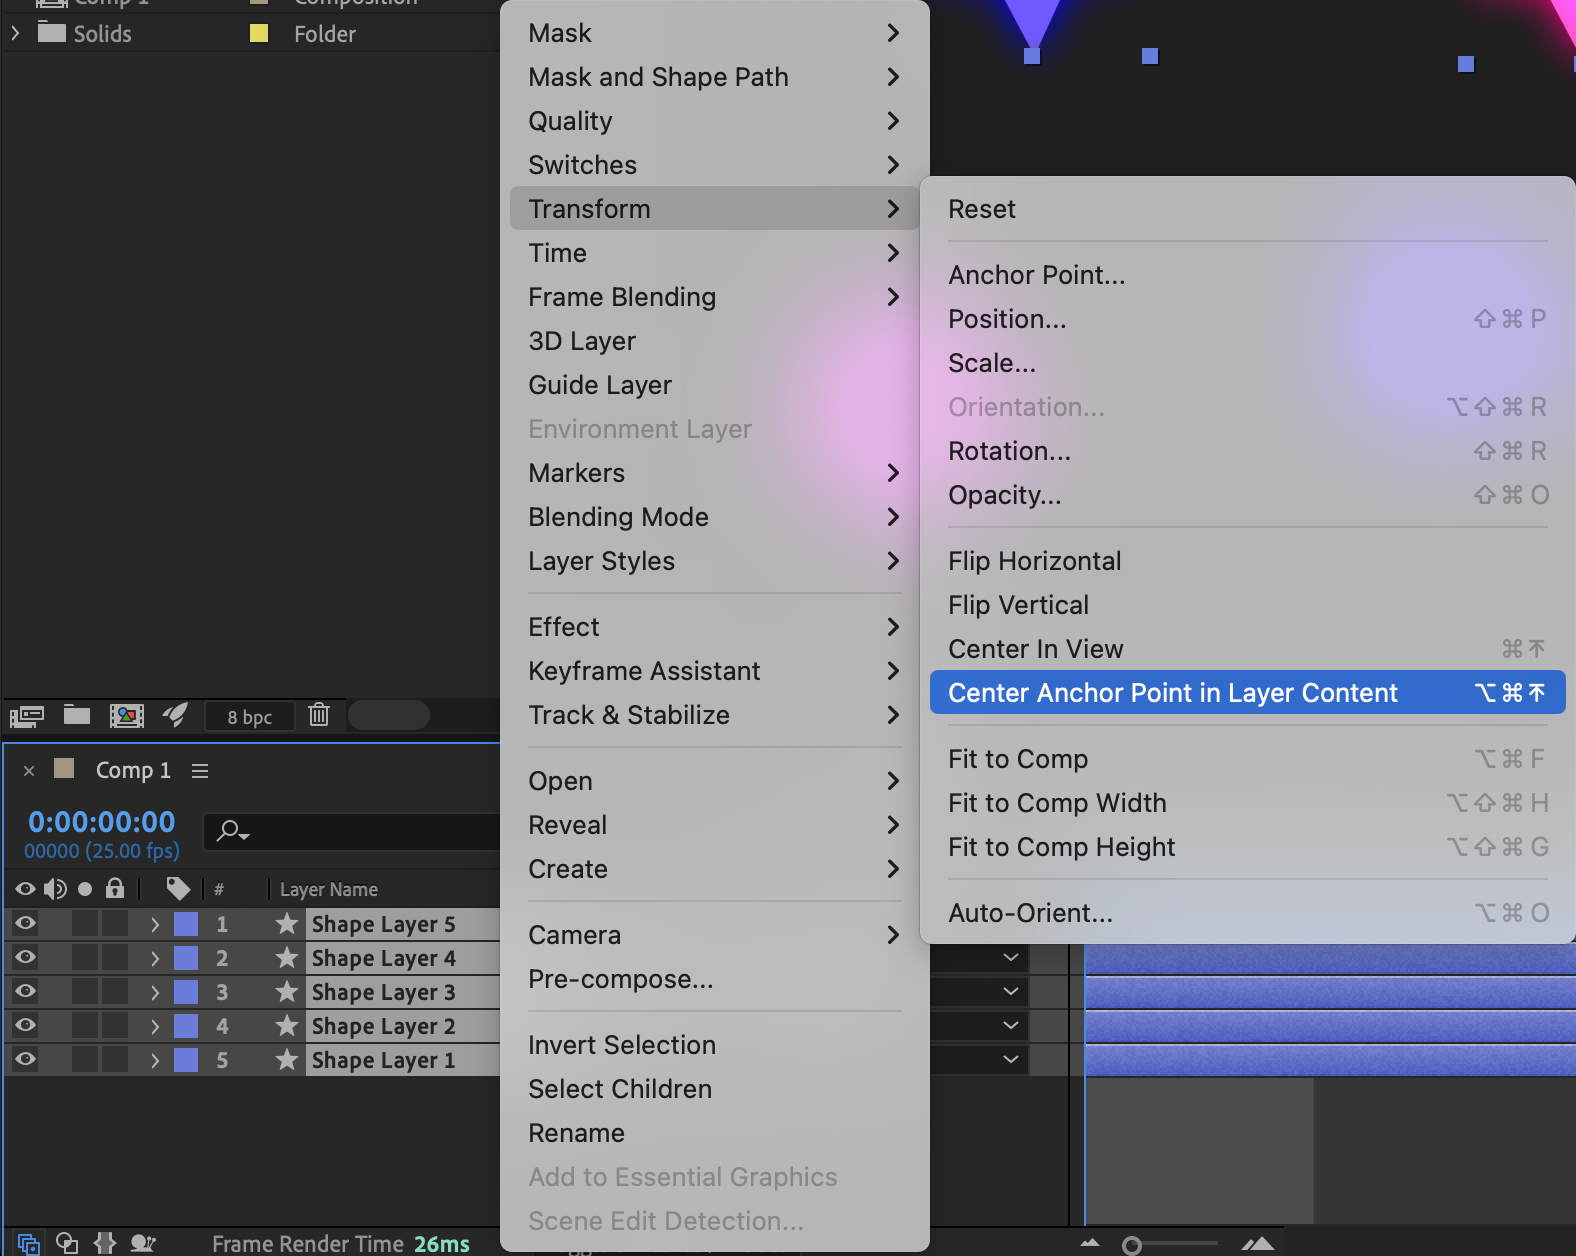 Step 3: Enable Title/Action Safe Guides
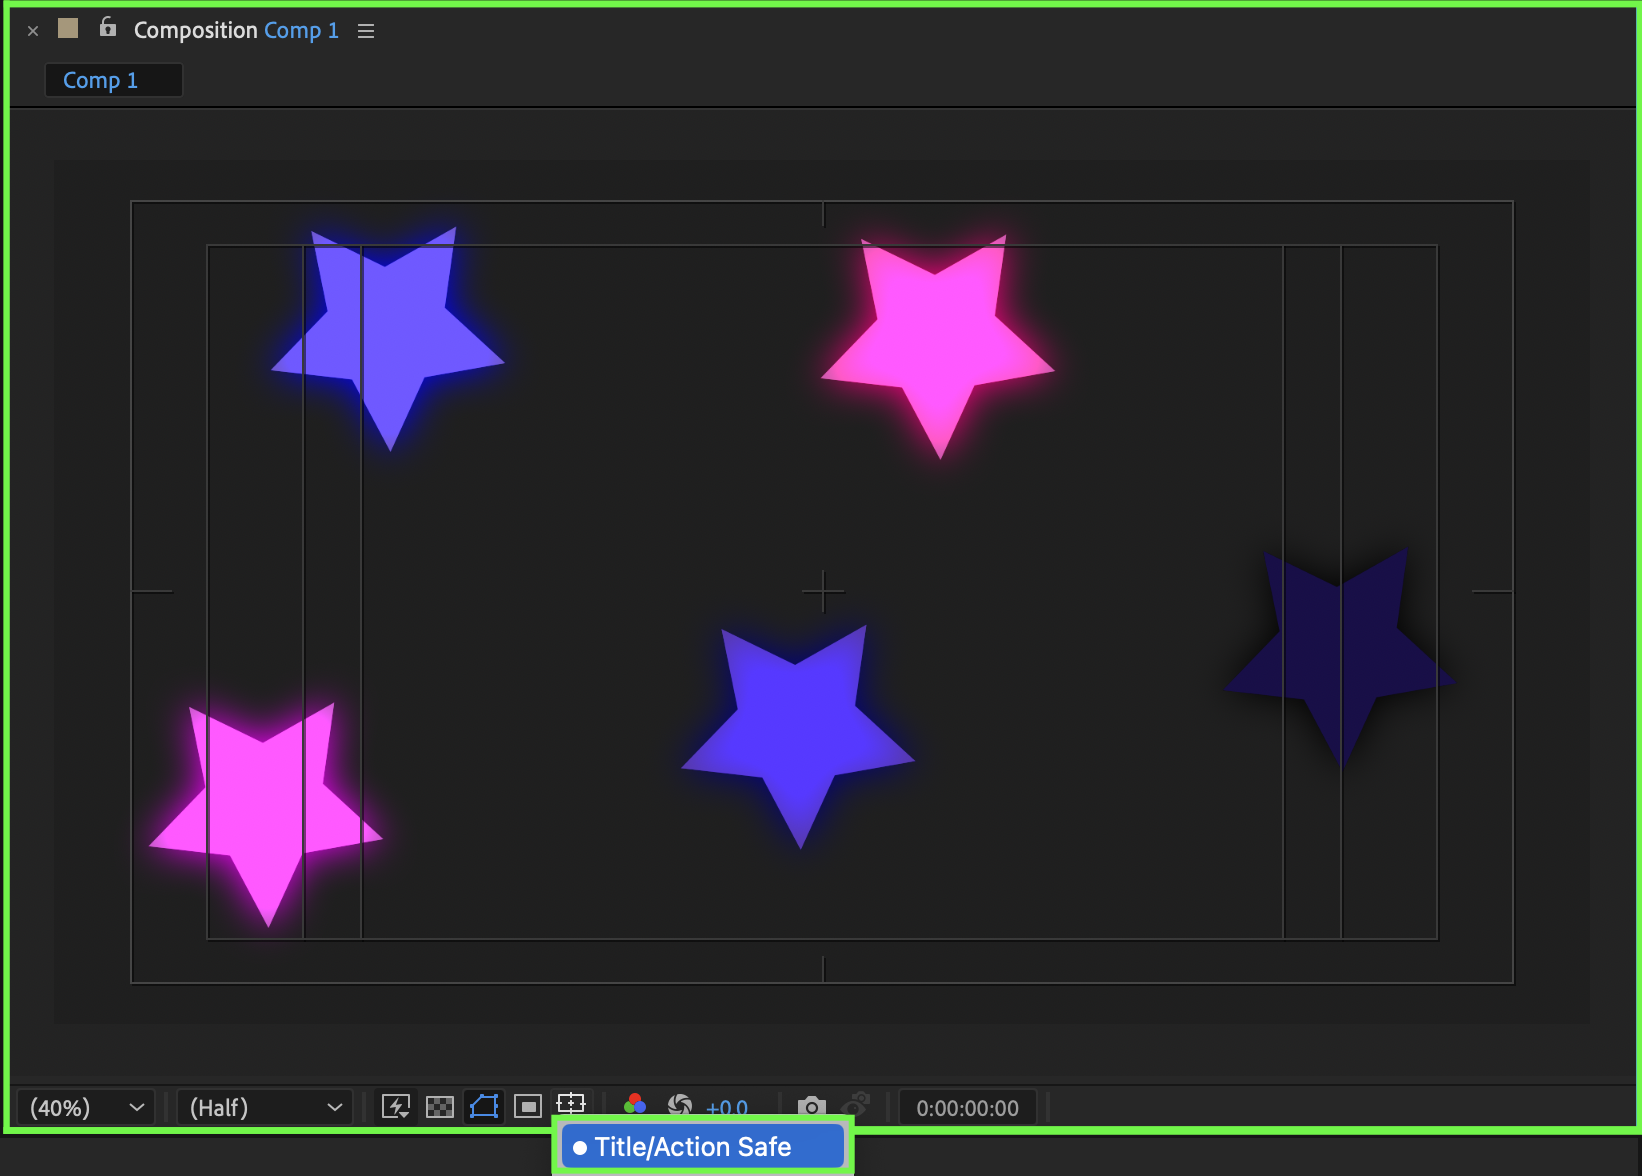
At the bottom of the Composition panel, click the Rectangle with a dot in the center icon. Enable Title/Action Safe to display reference guides and the center cross.
 Step 4: Draw a Diagonal Guide Line
Use the Pen Tool (G) to create a shape layer. Set Fill to None, choose a white stroke, and set the Stroke Width to 2 px. Draw a diagonal line that:
Starts at the bottom-left corner of the outer safe rectangle
Passes exactly through the center cross
Ends at the top-right corner of the outer safe rectangle
This line will serve as your diagonal alignment guide.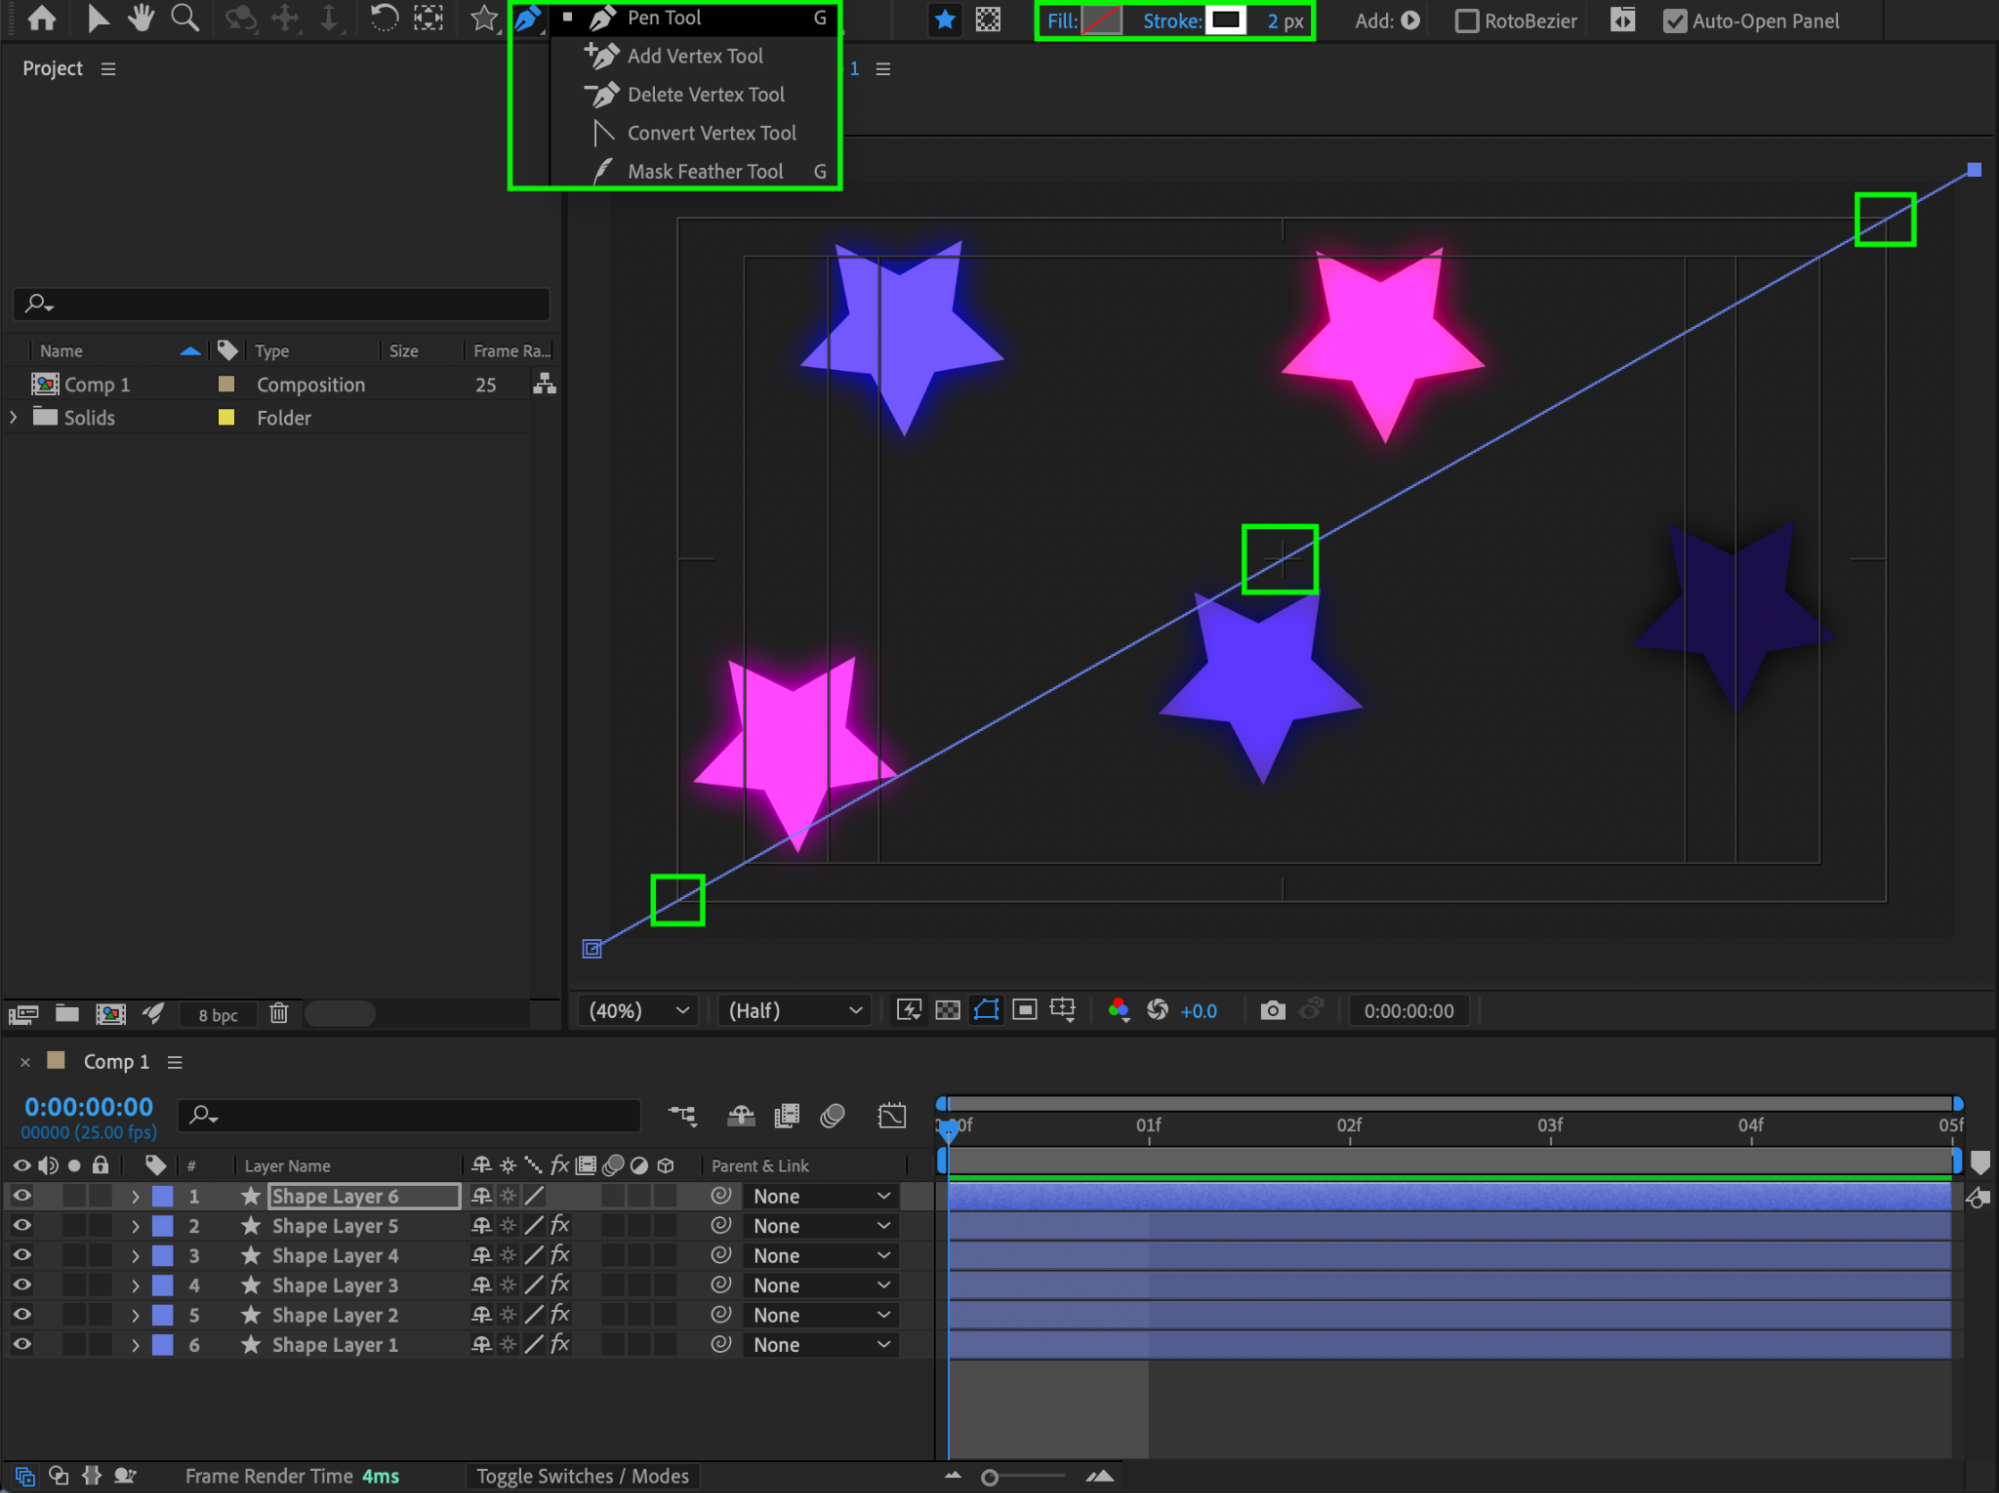 Step 5: Align Objects Using Snapping
Enable Snapping in the Composition panel. Select each object and move it so its anchor point snaps precisely to the diagonal guide line.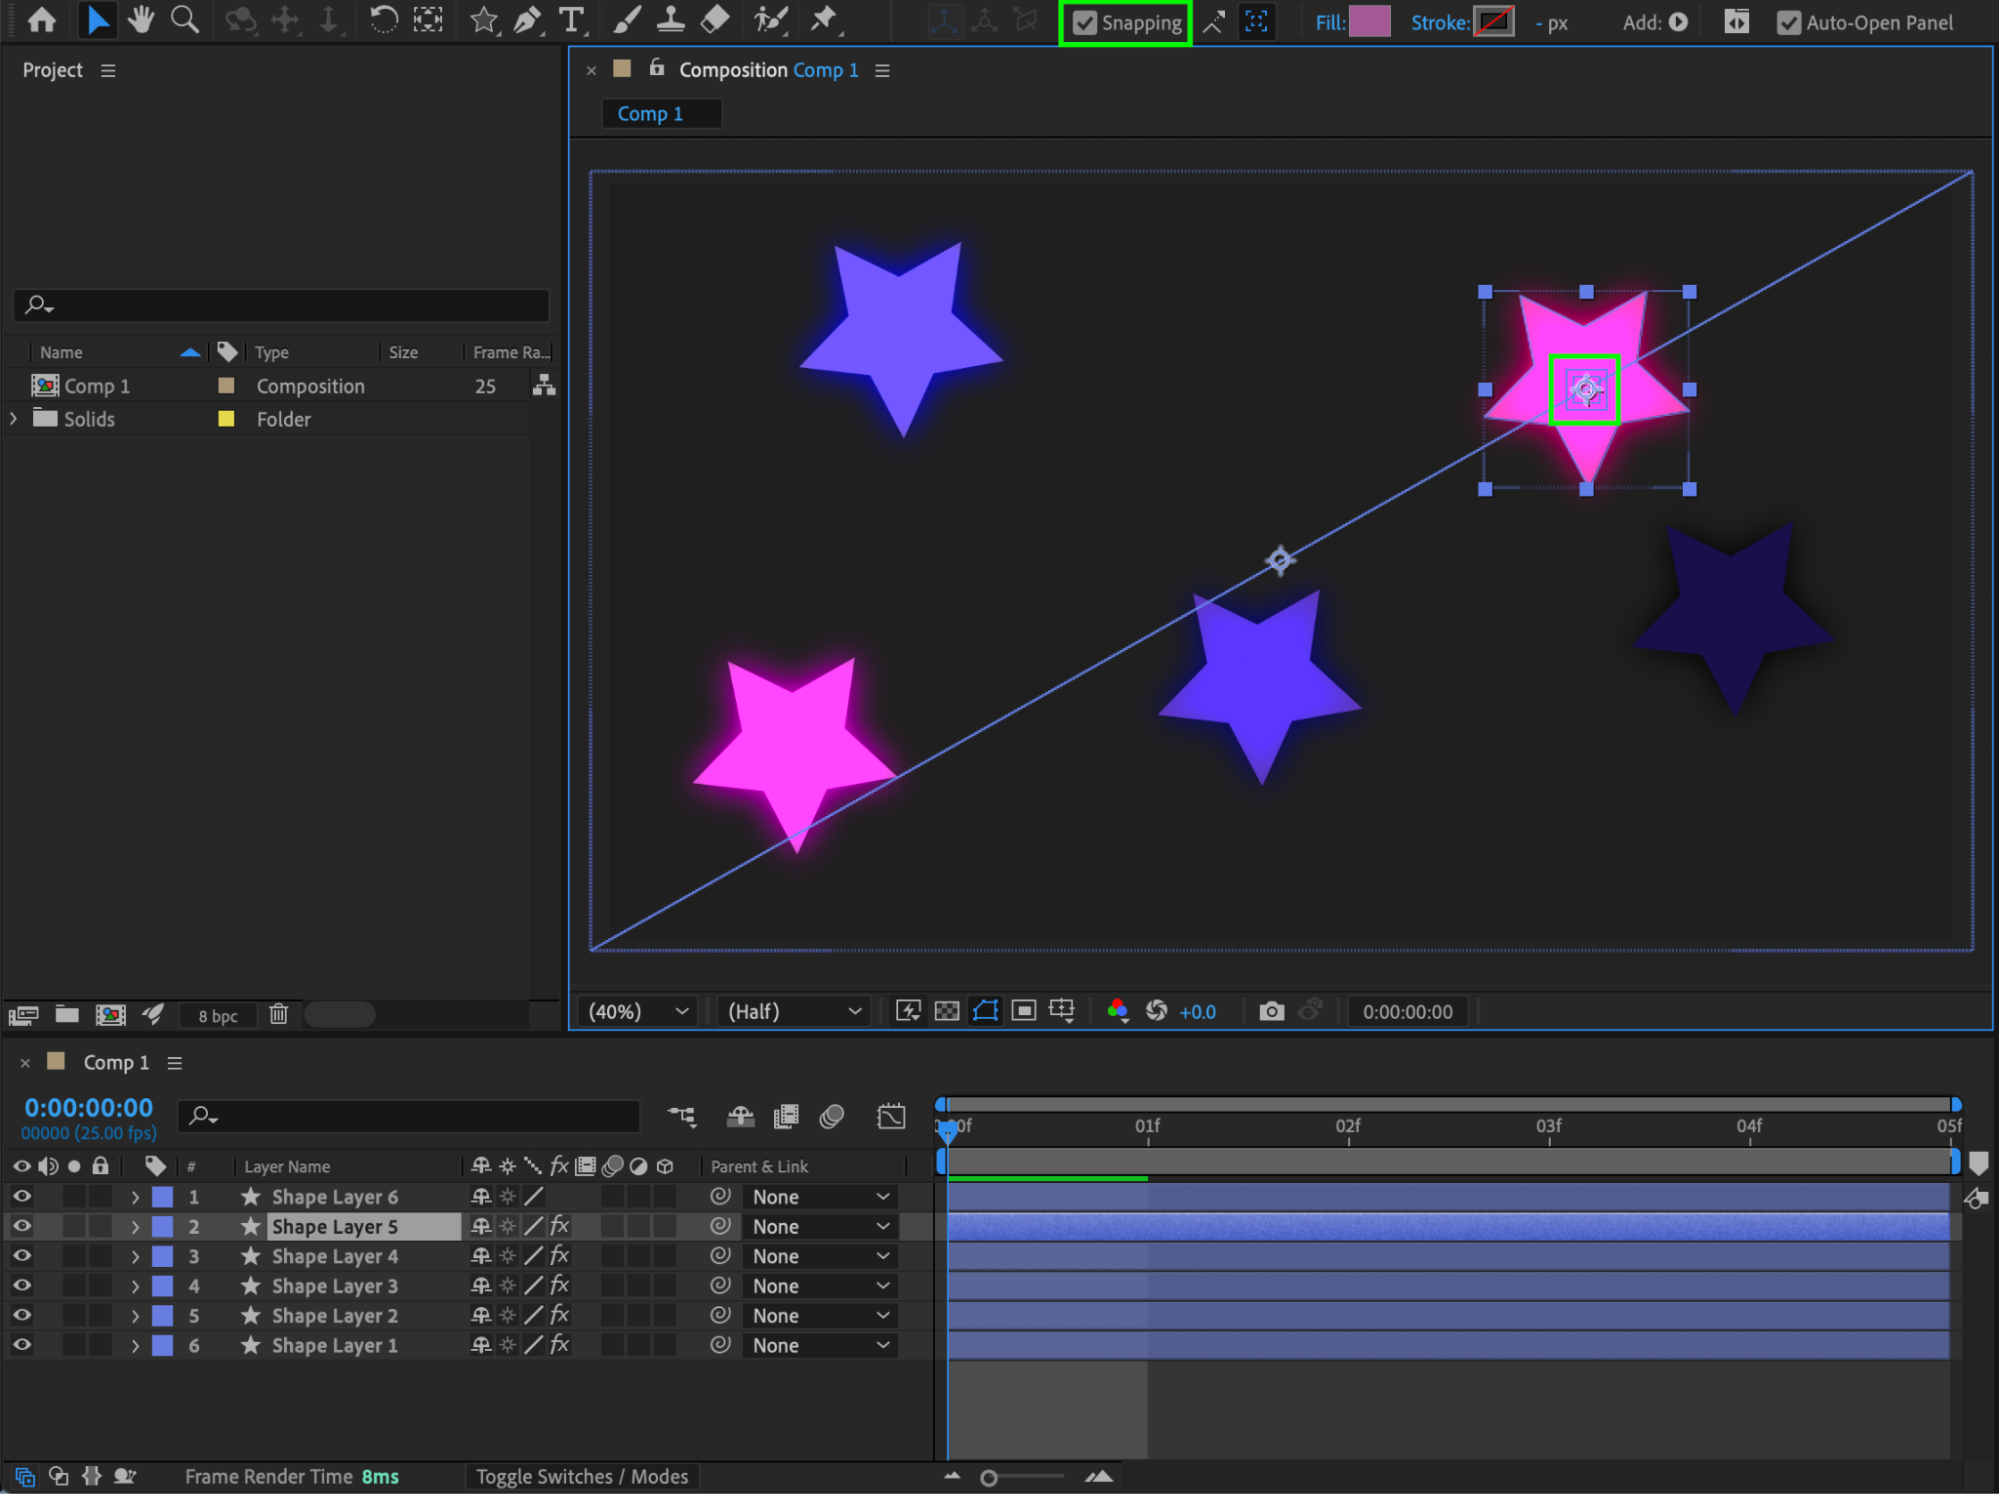 Step 6: Remove the Guide Line
Once all objects are aligned, delete the diagonal line shape layer.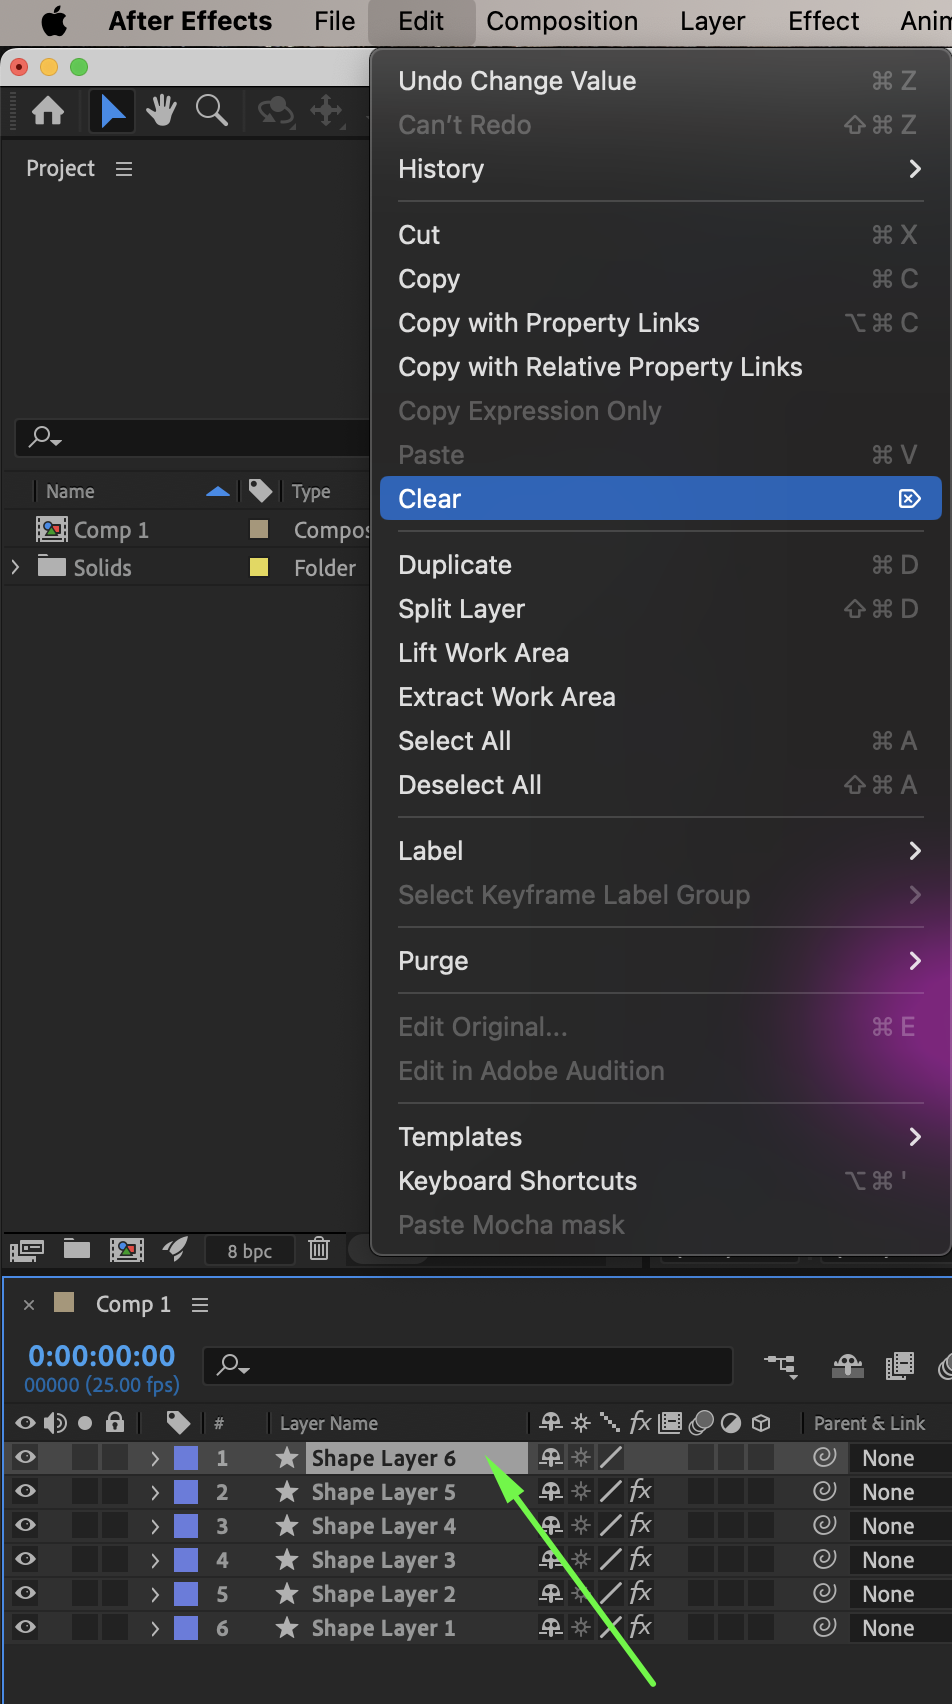 Step 7: Preview the Result
Preview the composition and make any final adjustments if needed.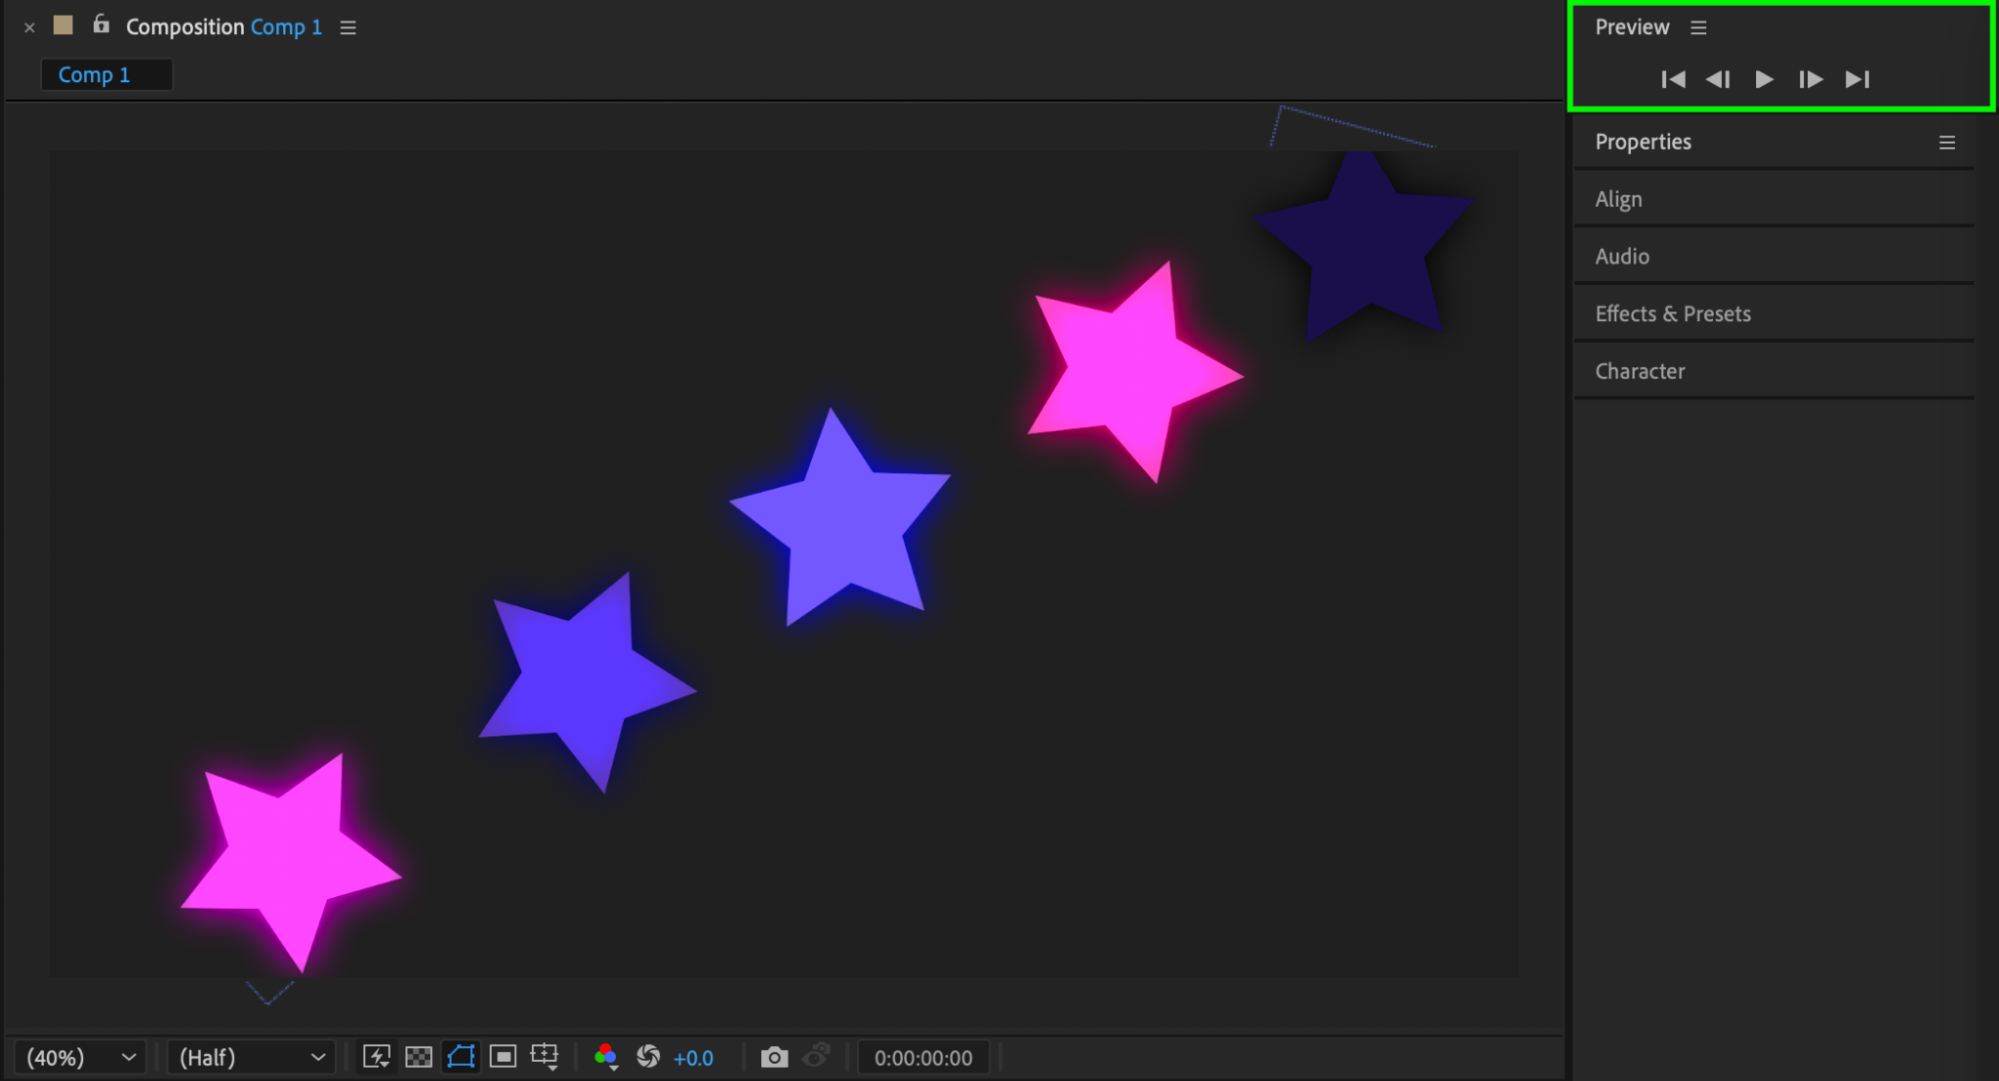
Conclusion
By creating a temporary diagonal guide and using snapping, you can precisely align objects along a diagonal axis in After Effects. This technique is ideal for clean layouts, dynamic compositions, and professional motion graphics.
Get 10% off when you subscribe to our newsletter

Our Bestsellers
Our Bestsellers


