Introduction
Blur layers are commonly used to improve text readability, create depth, or draw attention to specific areas of a frame. In this tutorial, you’ll learn how to add a blur layer in After Effects using an Adjustment Layer for a flexible, non-destructive workflow.
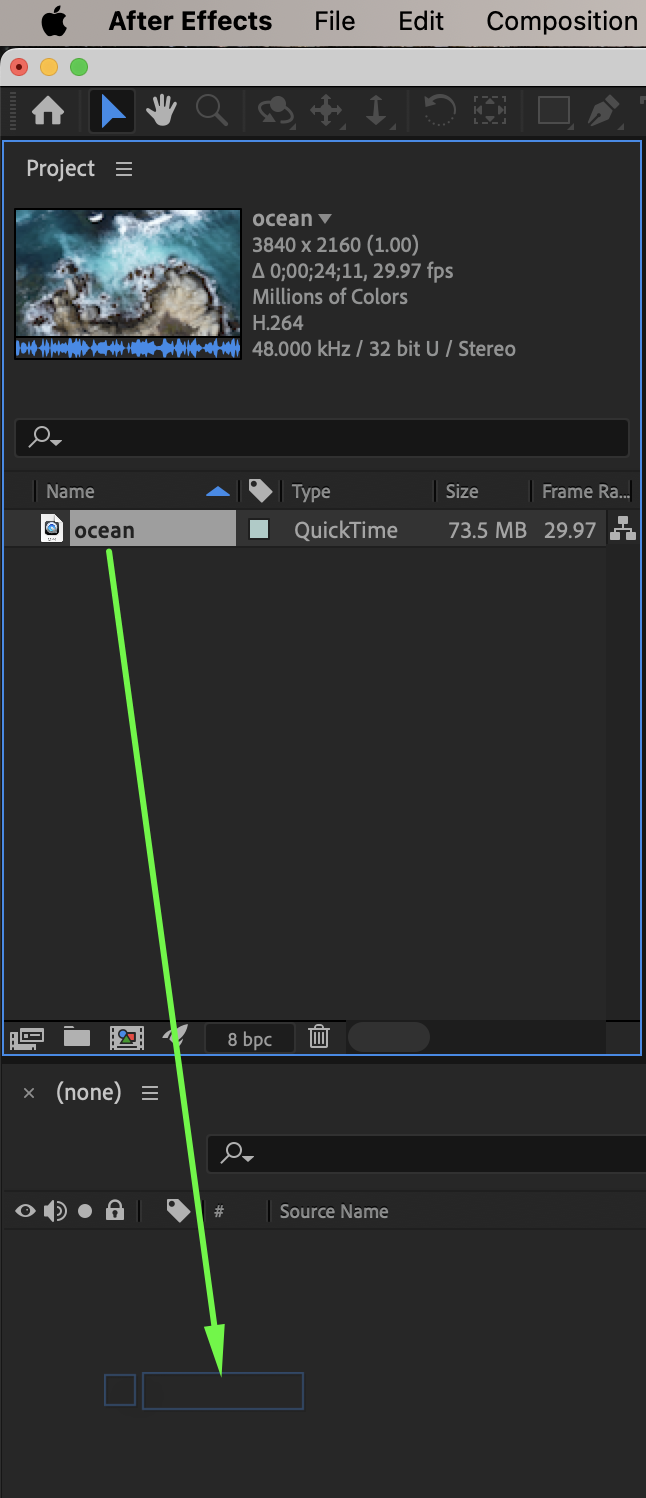
Step 1: Import Your Video
Go to File → Import → File and select your video. Drag the video onto the timeline.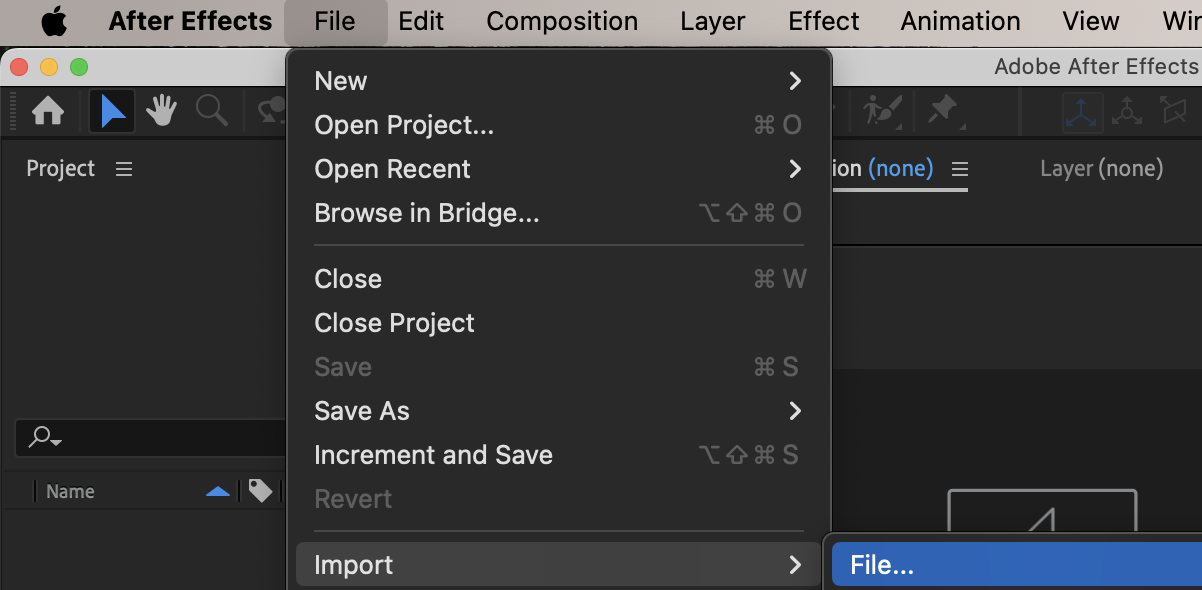
Step 2: Create an Adjustment Layer
Go to Layer → New → Adjustment Layer. This layer will affect all layers below it.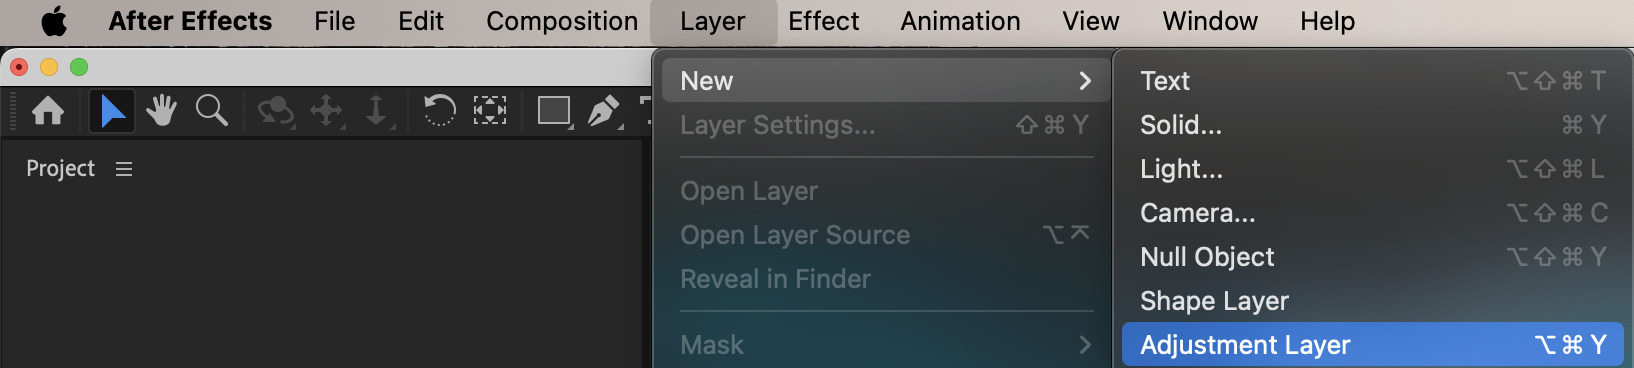
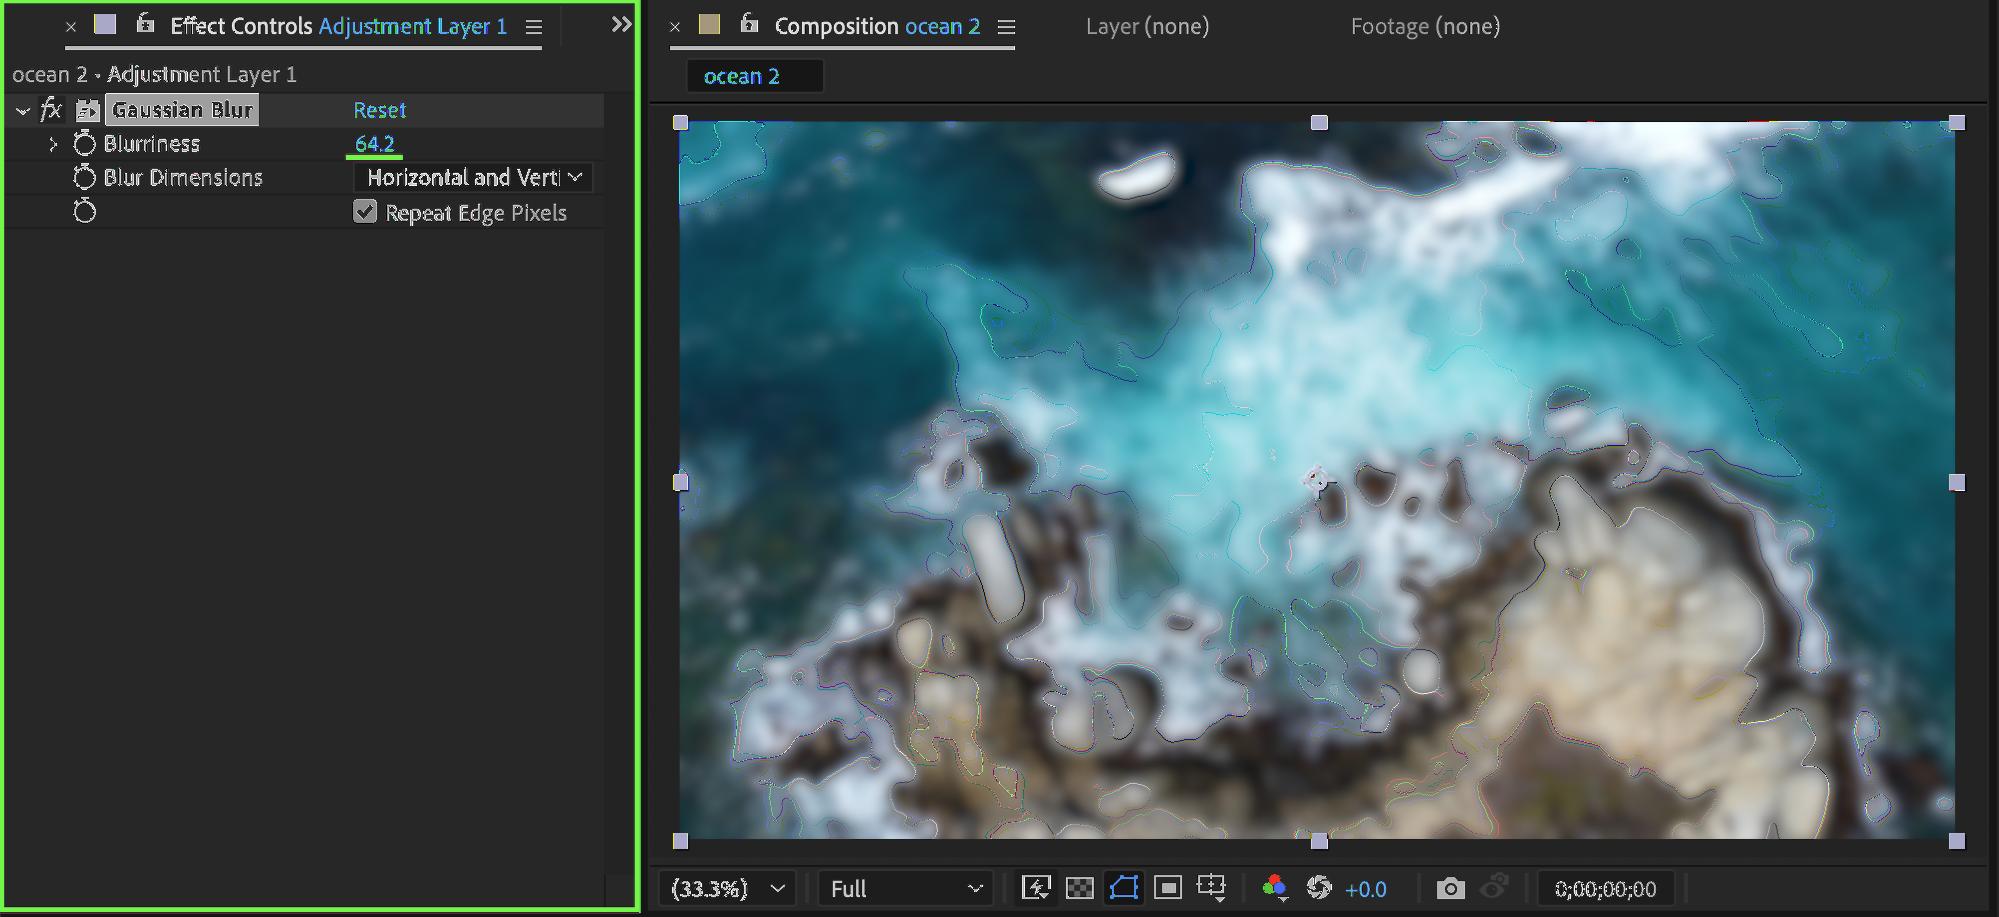
Step 3: Apply Gaussian Blur
Select the Adjustment Layer. From the Effects & Presets panel, apply Gaussian Blur. In the Effect Controls panel, adjust:
Blurriness: around 64 (or any value that fits your design)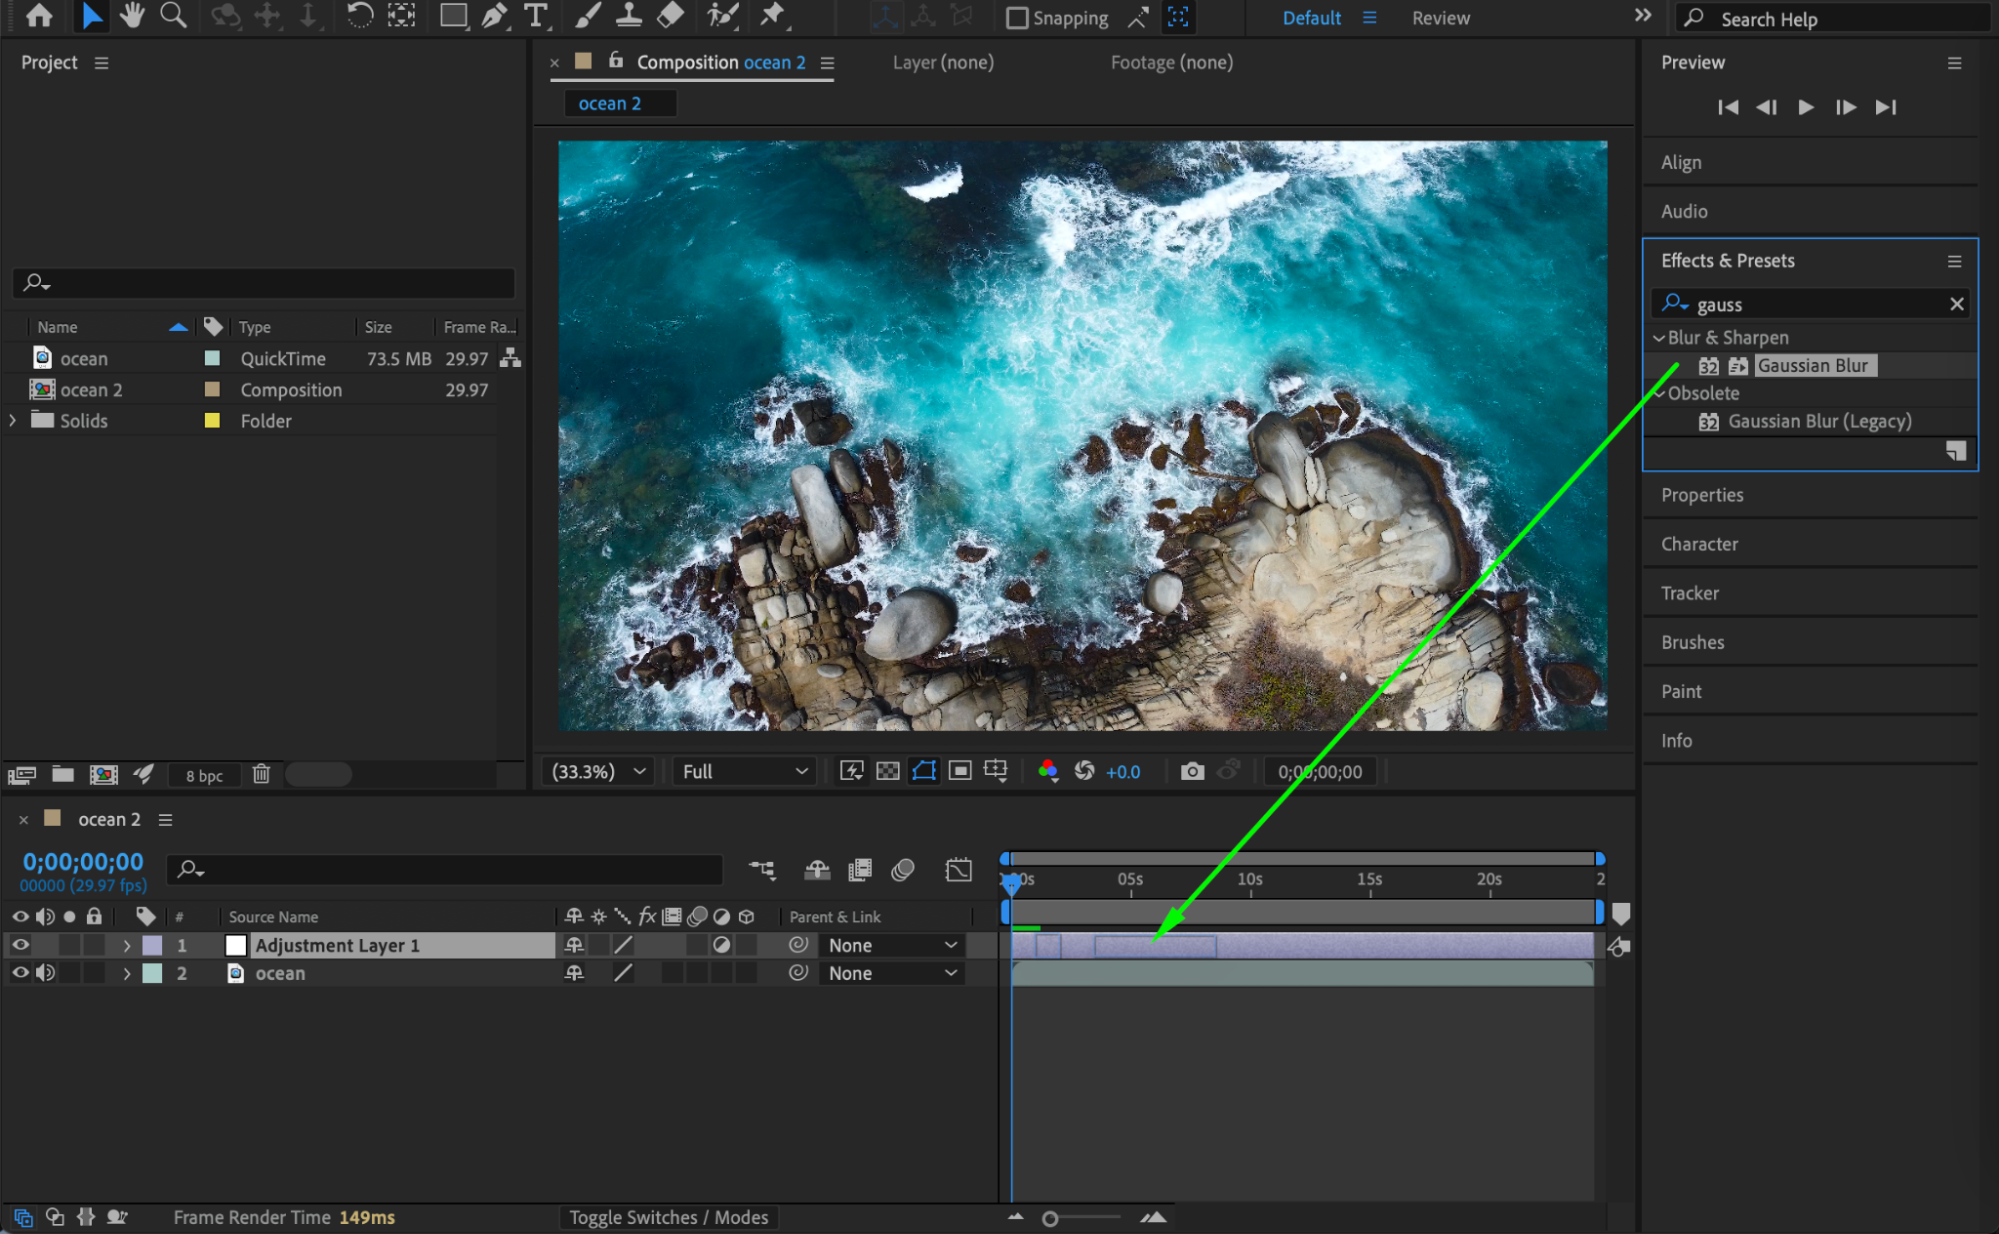
Step 4: Position the Blur Area
Adjust the Scale and Position of the adjustment layer if needed. You can place text above the blurred area so the blur layer increases readability without affecting the entire frame. (Optional: add a mask to the adjustment layer to blur only part of the screen.)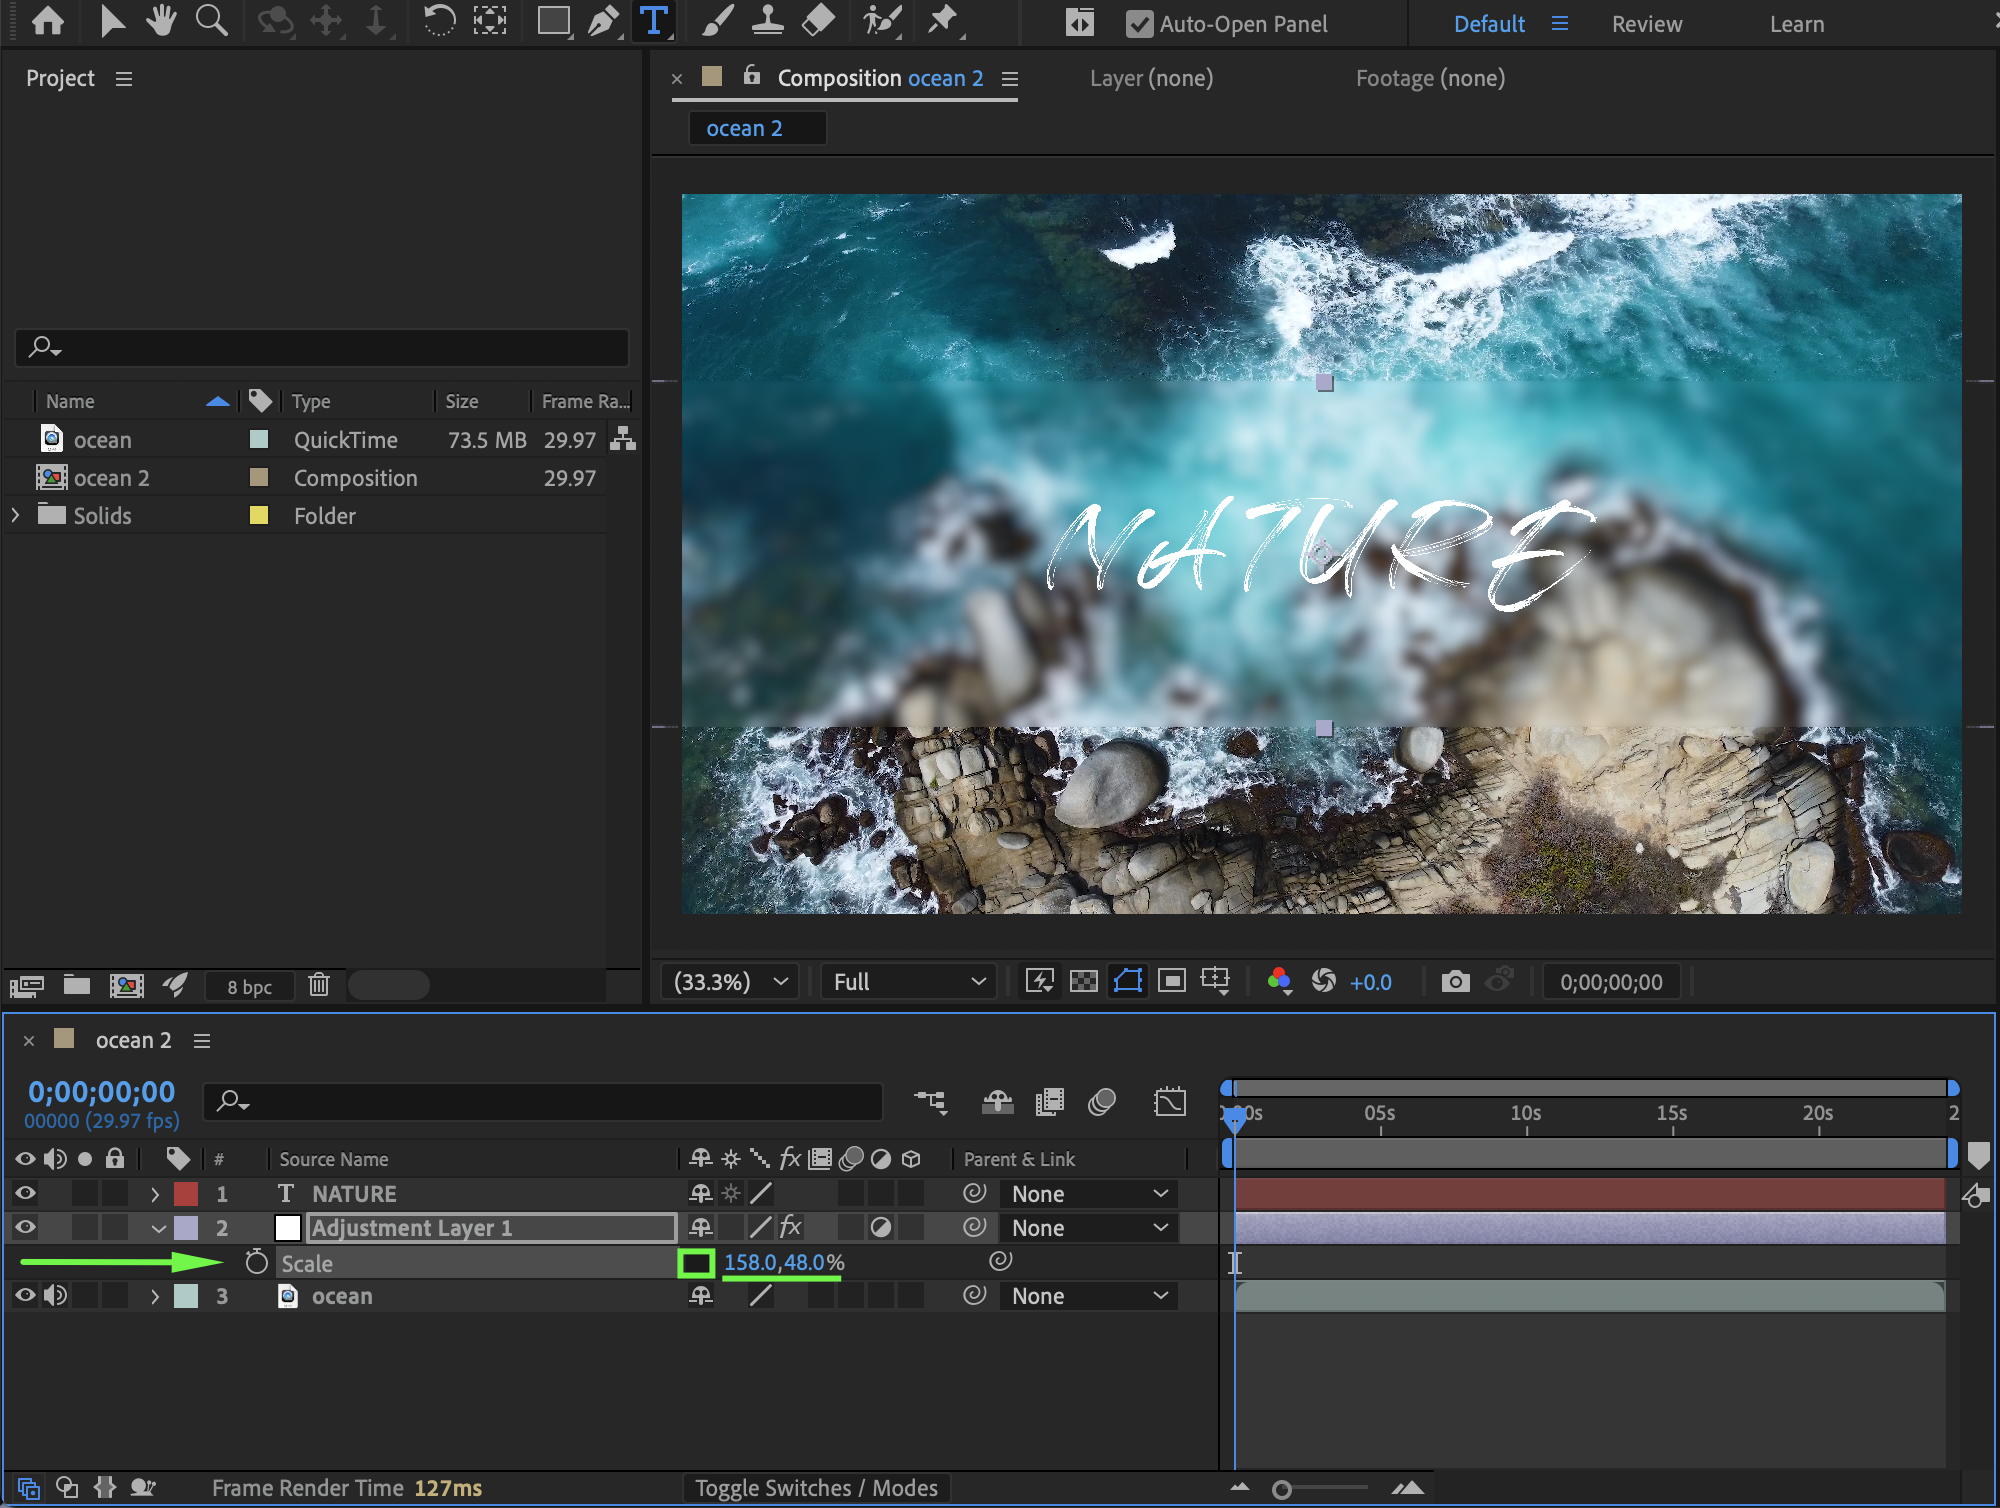 Step 5: Preview the Result
Preview the composition and fine-tune the blur strength and placement for the best visual result.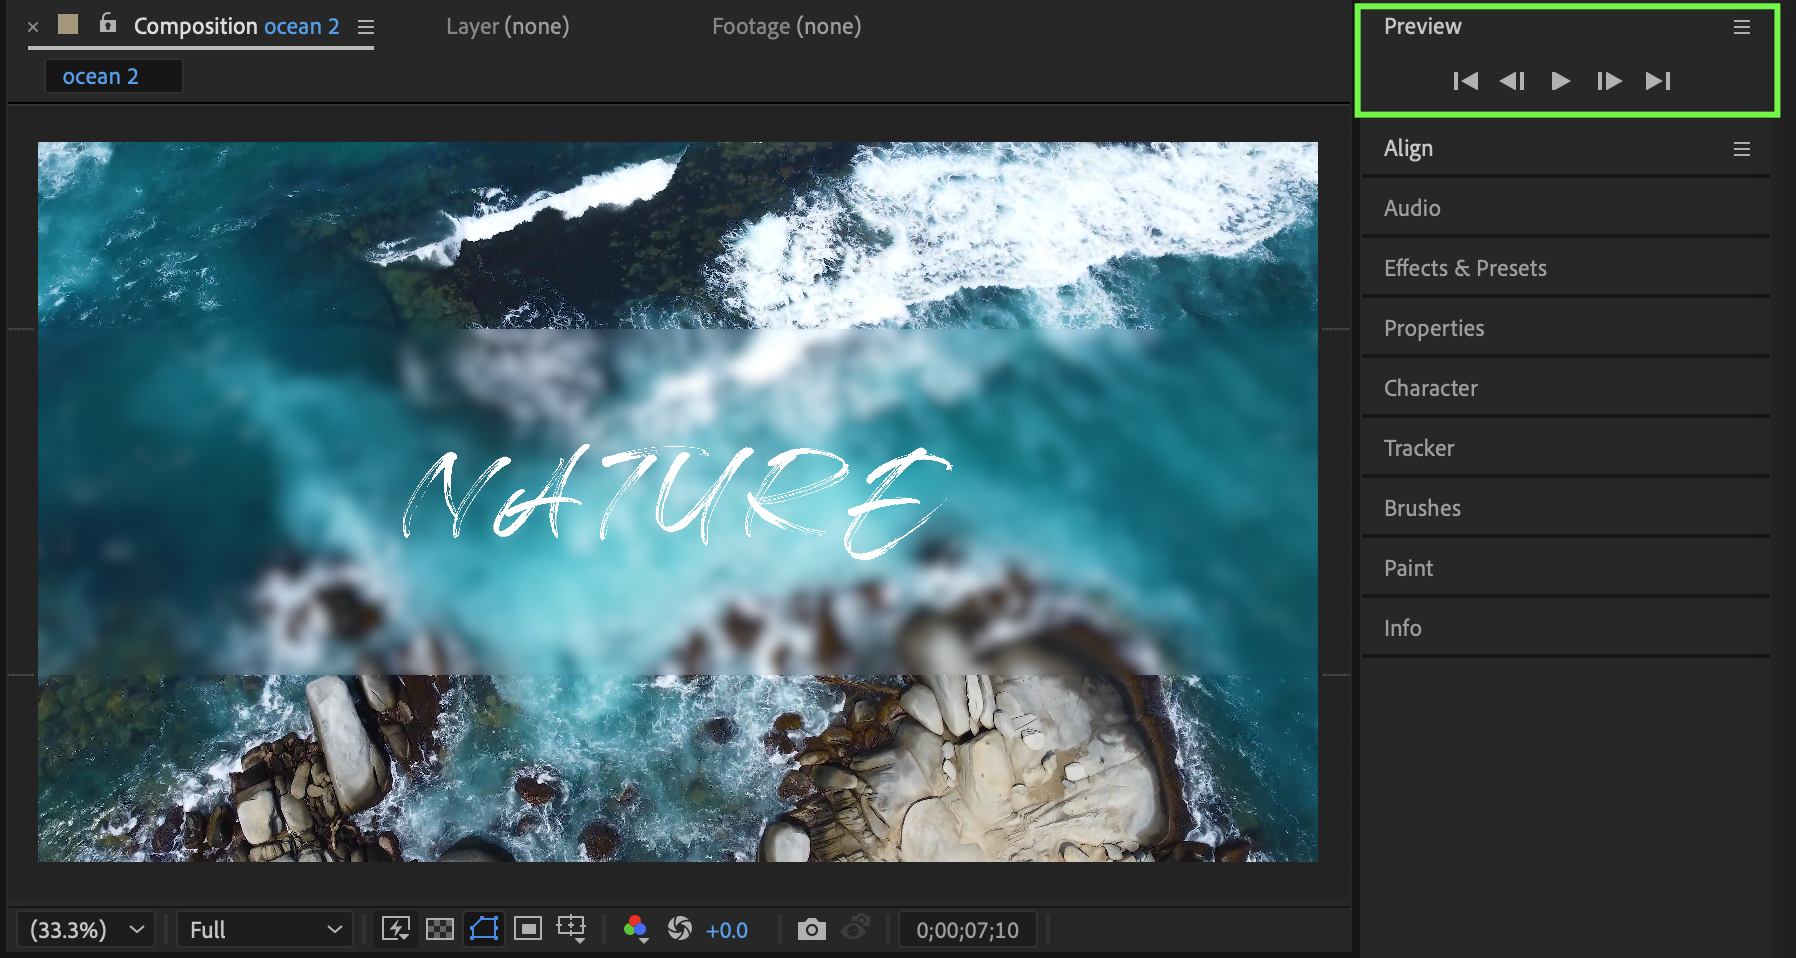
Conclusion
Using an Adjustment Layer with Gaussian Blur is a simple and effective way to add blur in After Effects. This method is ideal for background softening, text overlays, and modern motion design layouts.
Our Bestsellers

