Introduction
Stroke masks are commonly used to highlight areas of a video, create reveal animations, or add stylish outlines. In this tutorial, you’ll learn how to create a stroke mask effect in After Effects using masks and the Stroke effect.
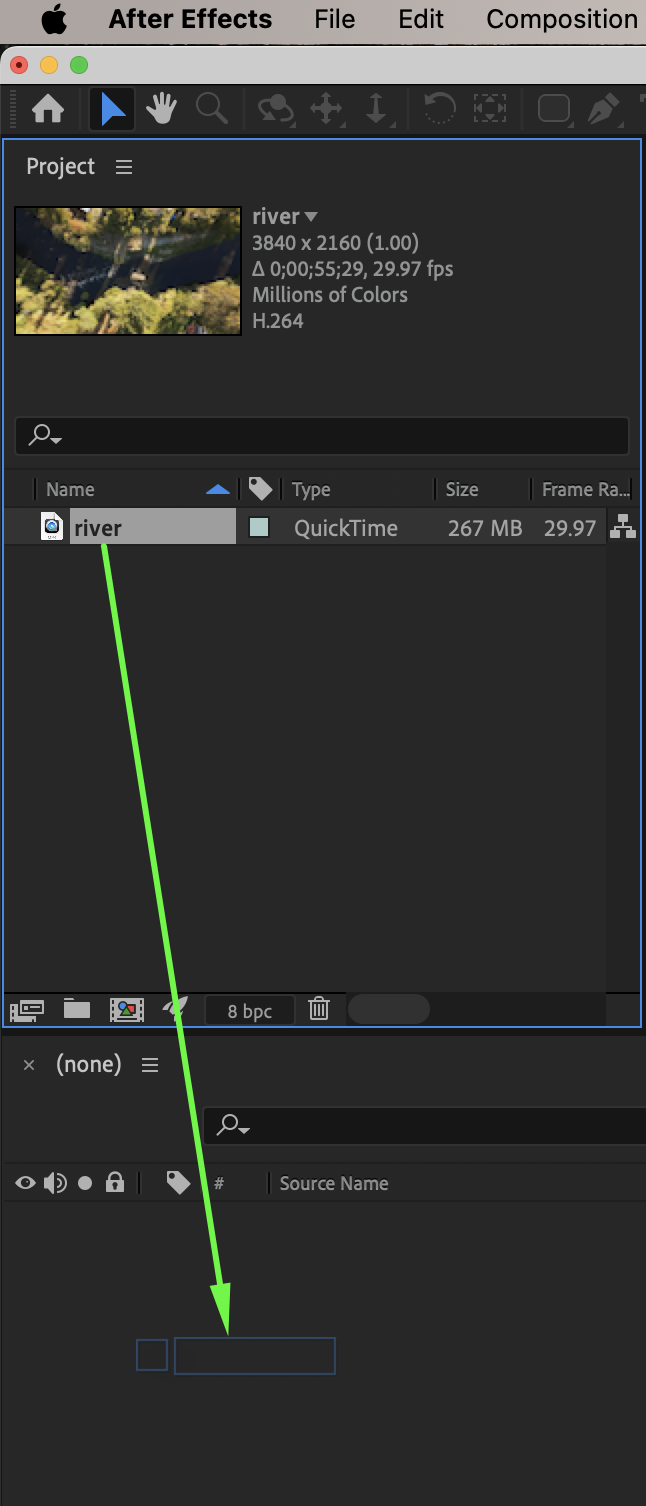
Step 1: Import Your Video
Go to File → Import → File and import your video. Drag it onto the timeline.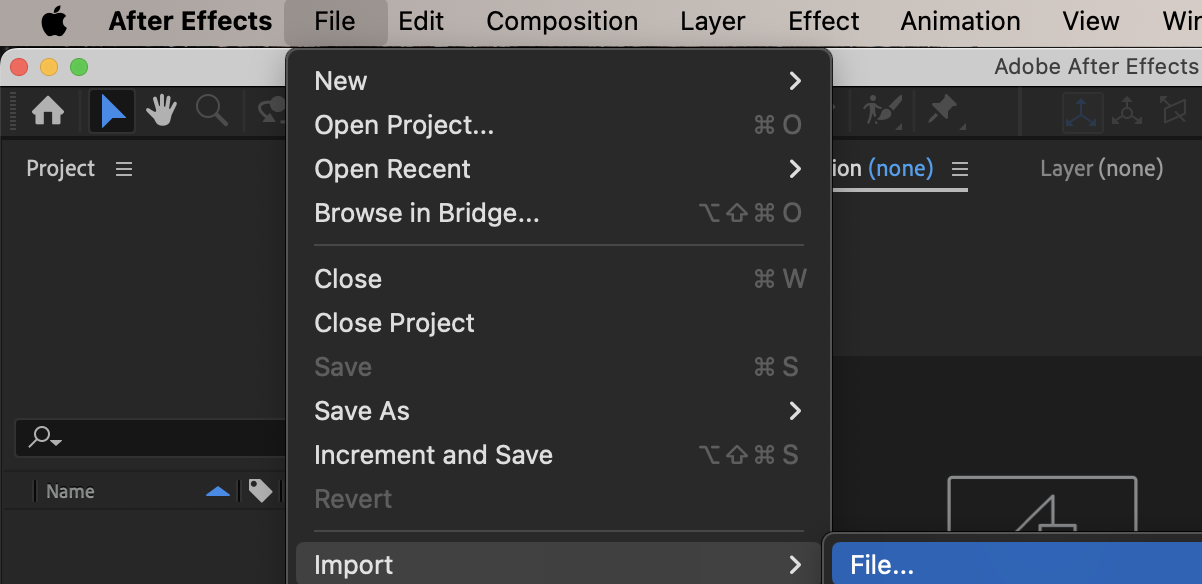
Get 10% off when you subscribe to our newsletter

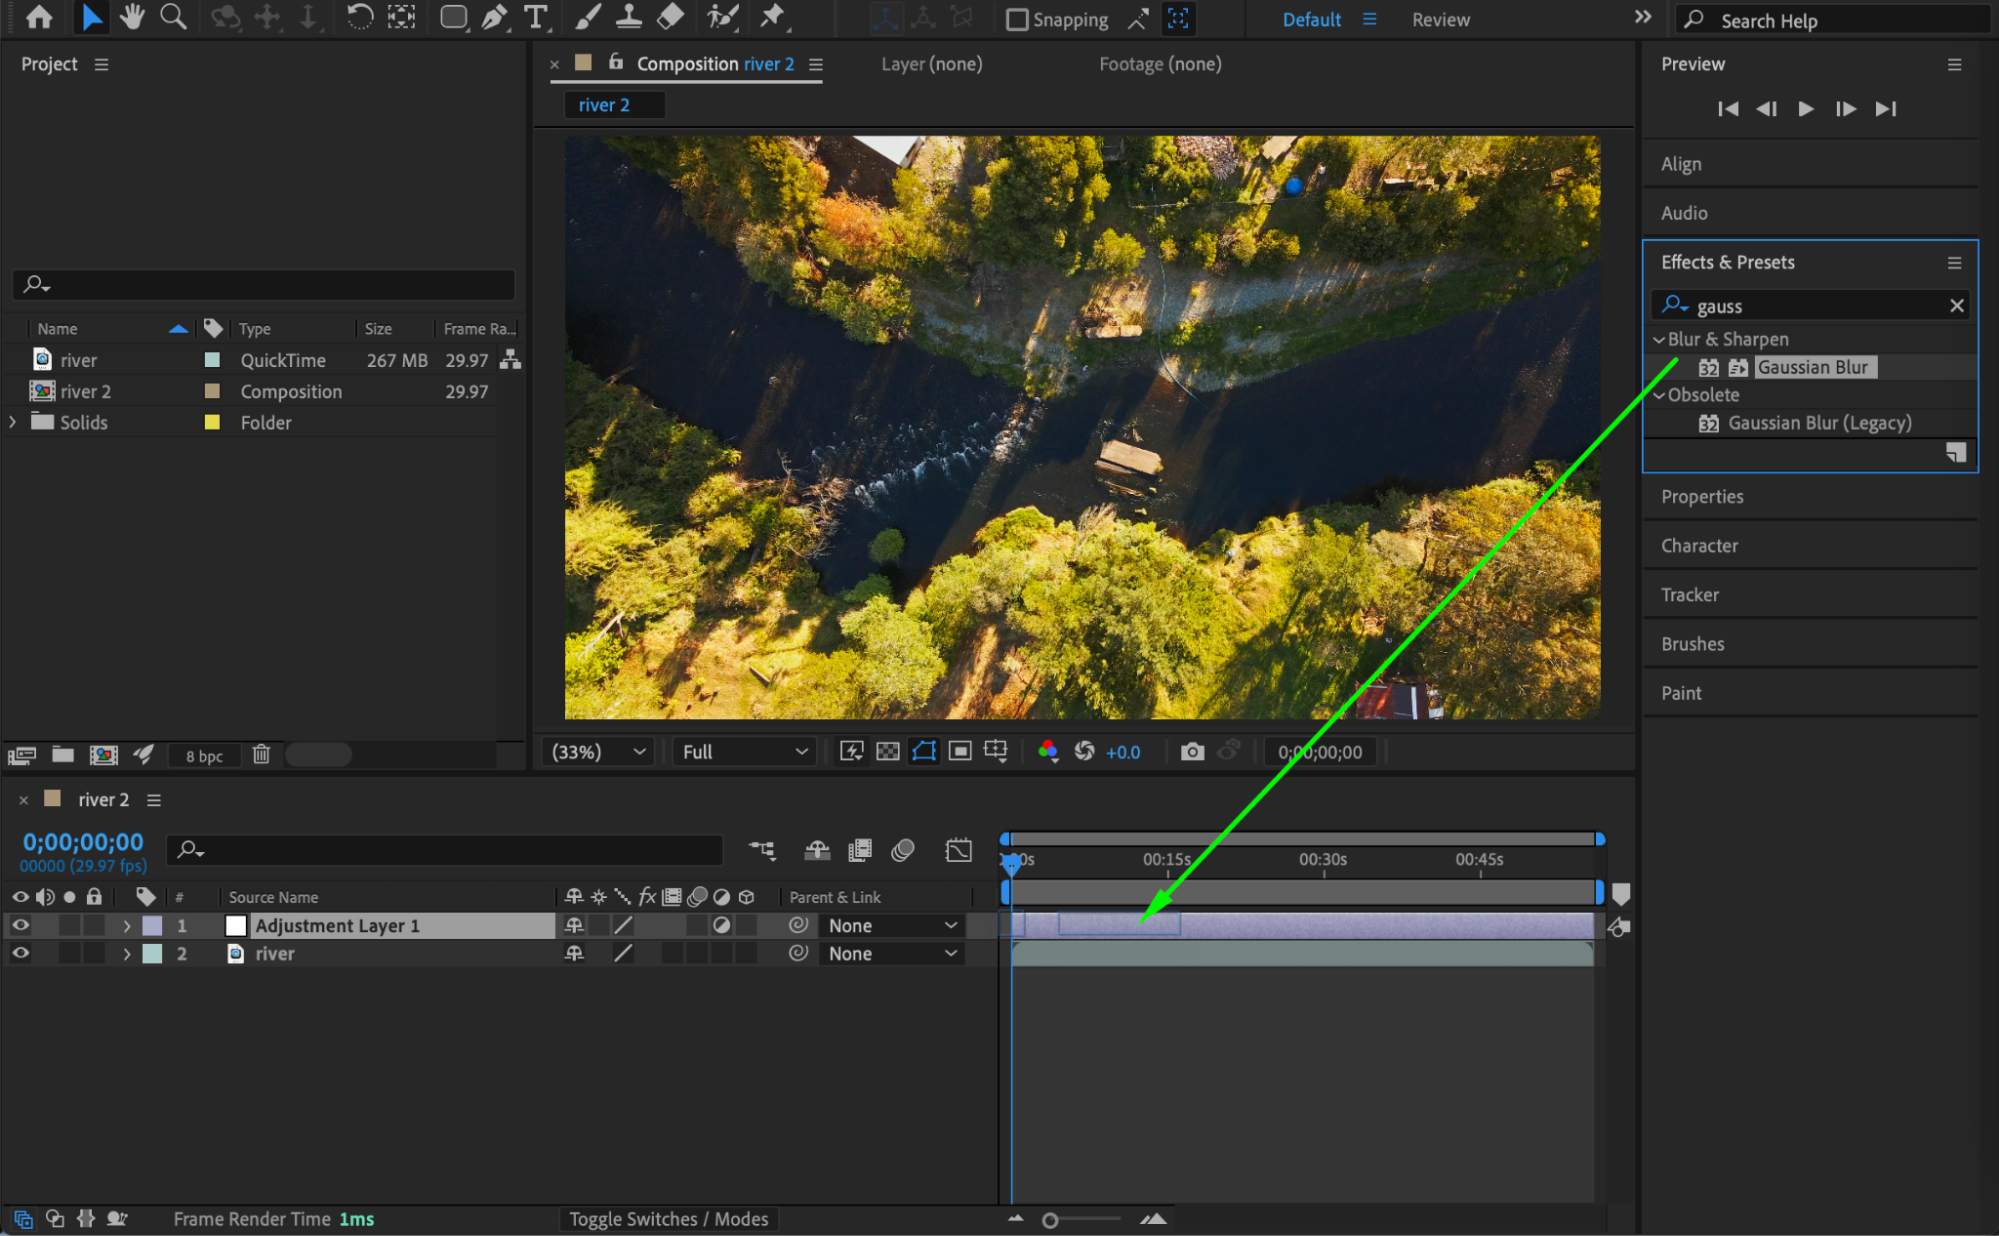
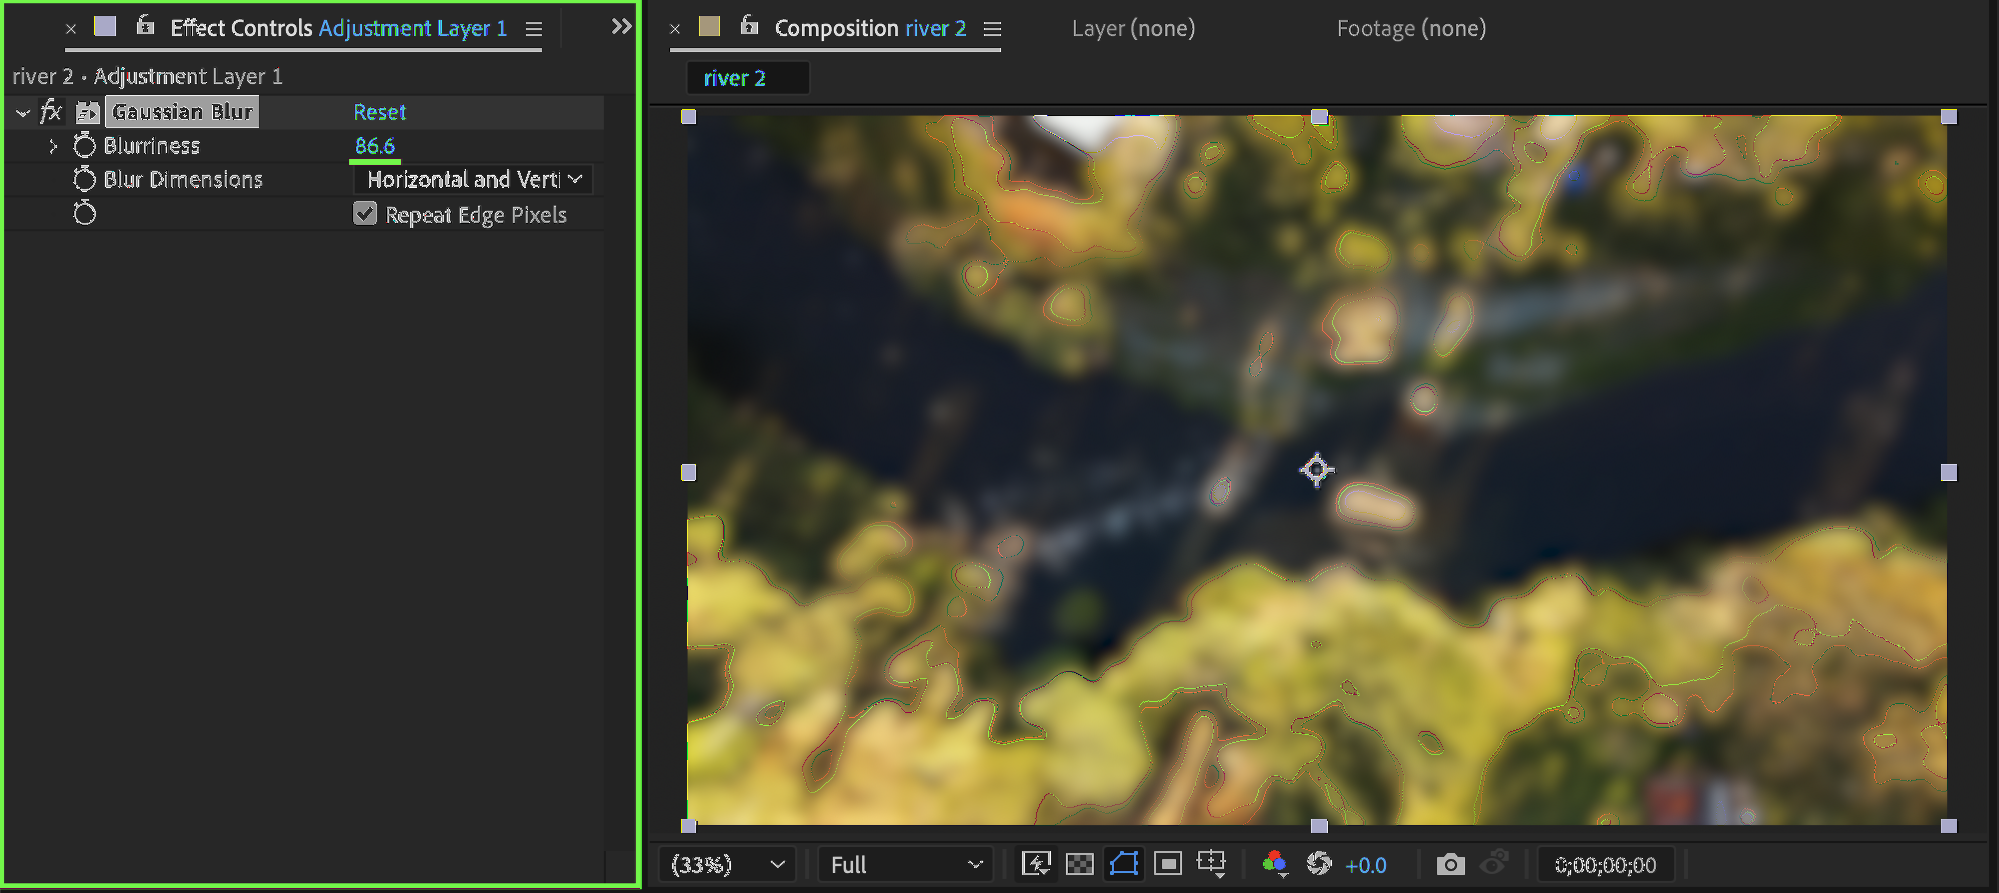
Step 2: Create an Adjustment Layer
Go to Layer → New → Adjustment Layer. Apply the Gaussian Blur effect from Effects & Presets to the adjustment layer. This helps you clearly see the masked area while creating the stroke effect.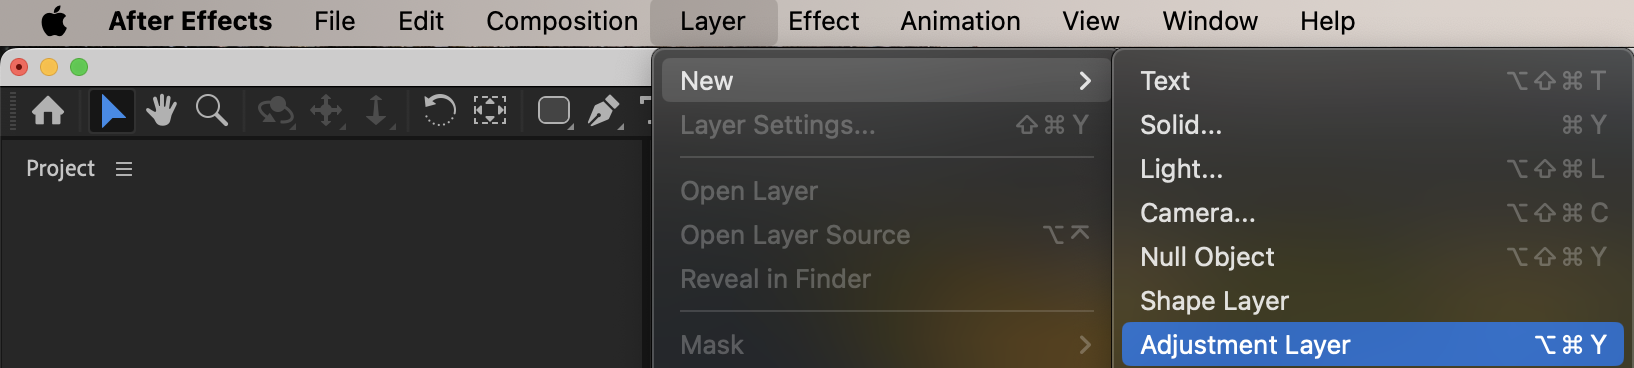
 Step 3: Create a Mask
Select the adjustment layer. Use the Shape Tool (Q) or Pen Tool (G) to draw a mask around the area you want to highlight. Choose the appropriate Mask Mode (for example, Add or Subtract) depending on the desired effect.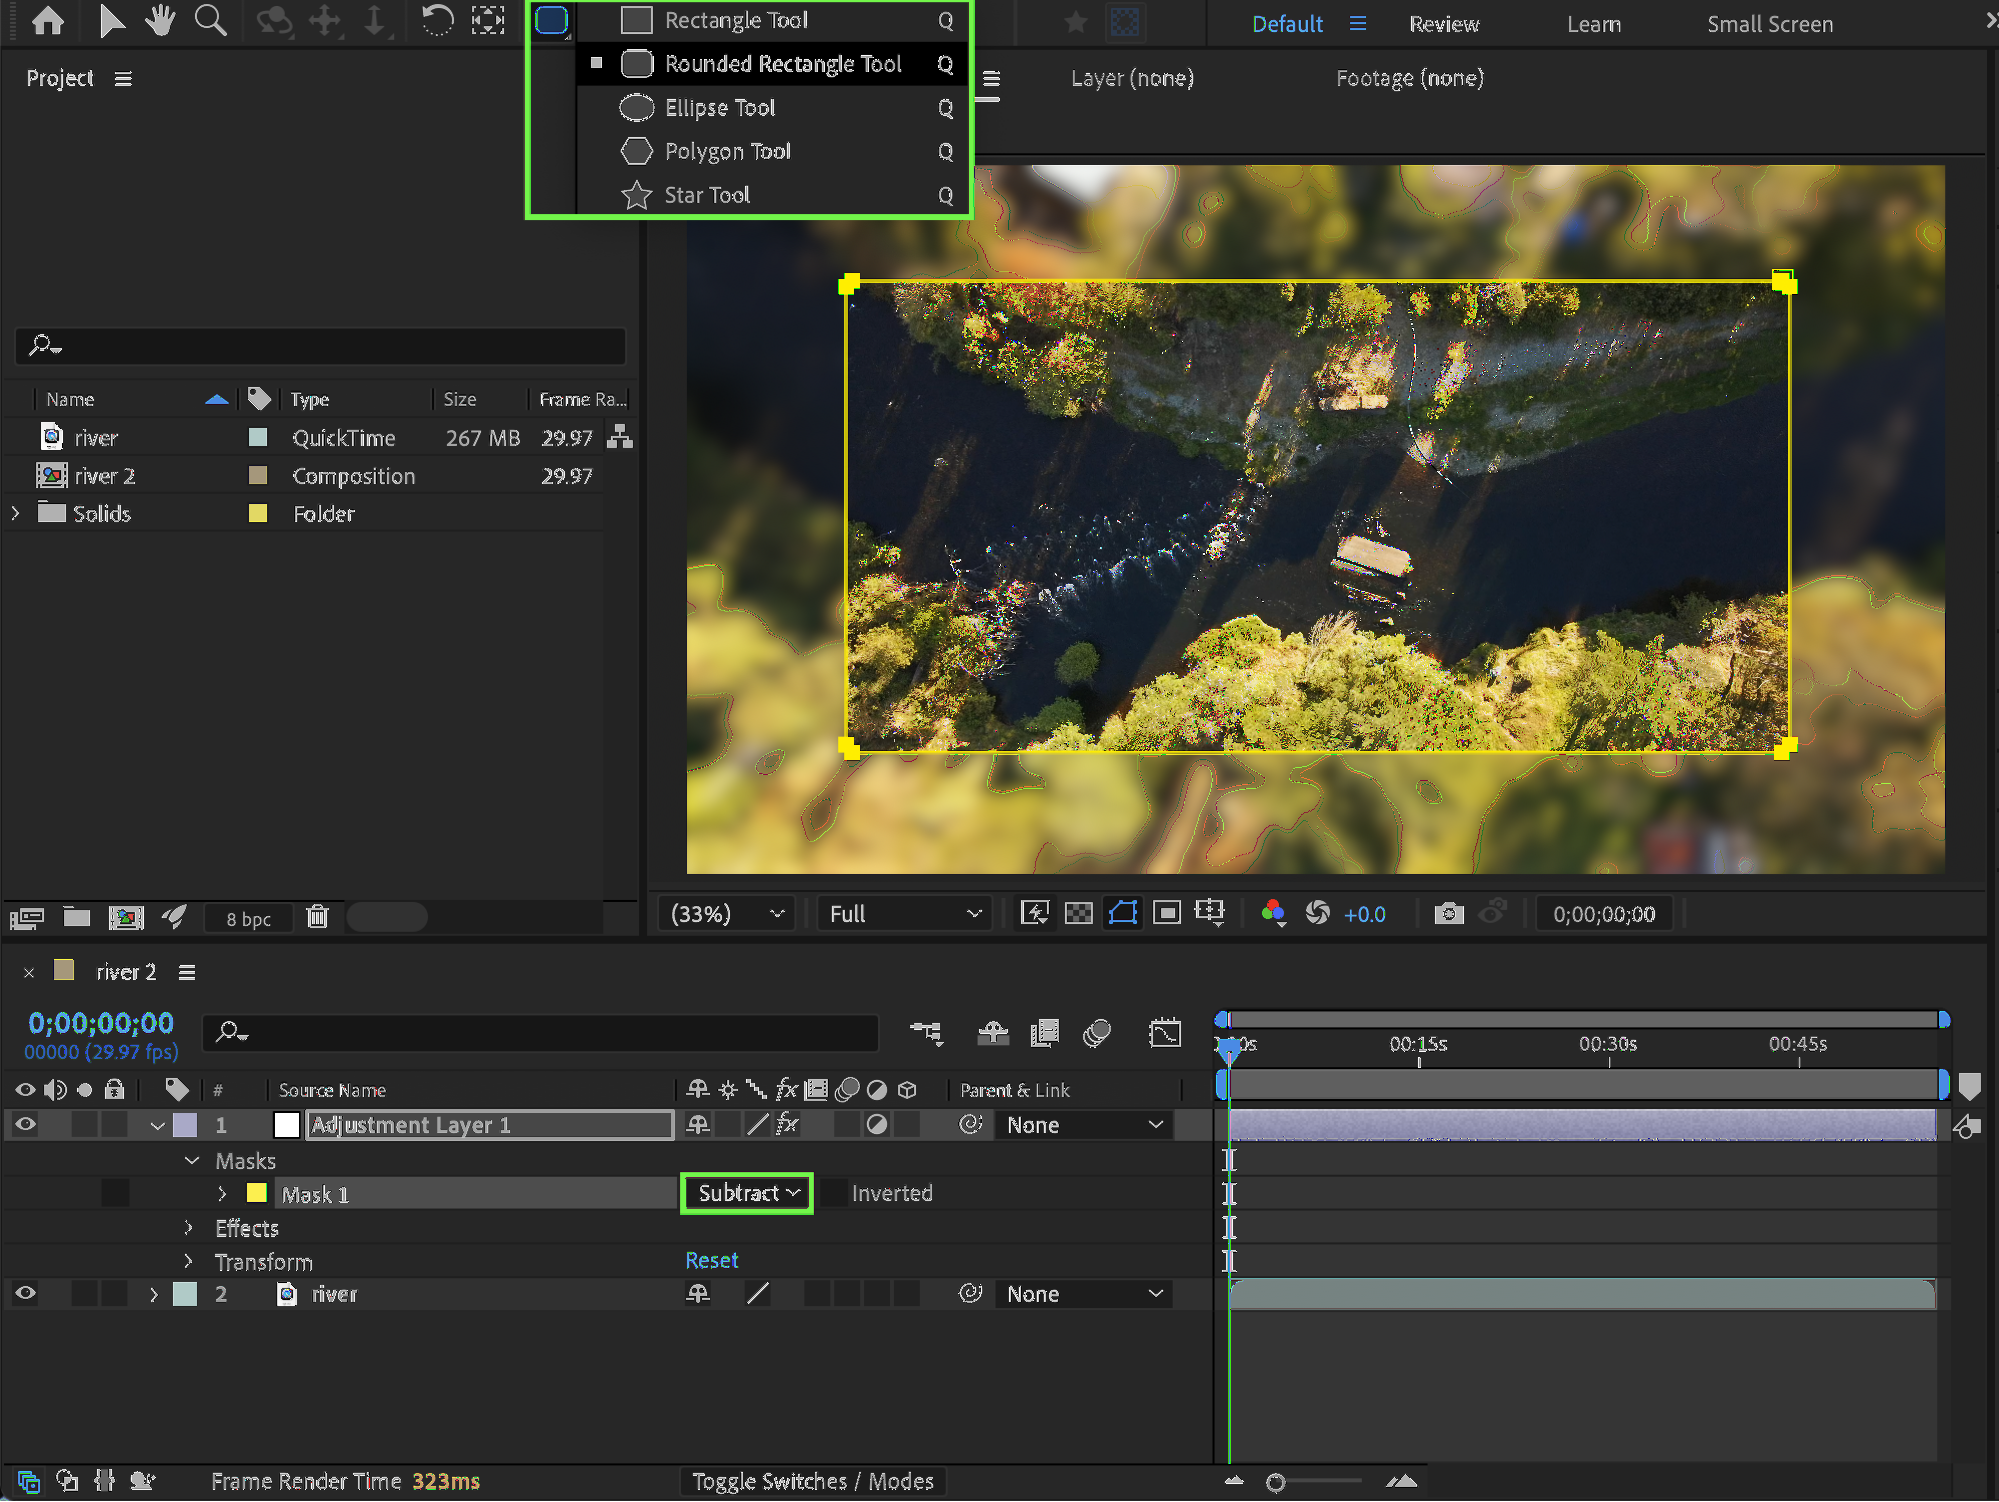
Step 4: Apply the Stroke Effect
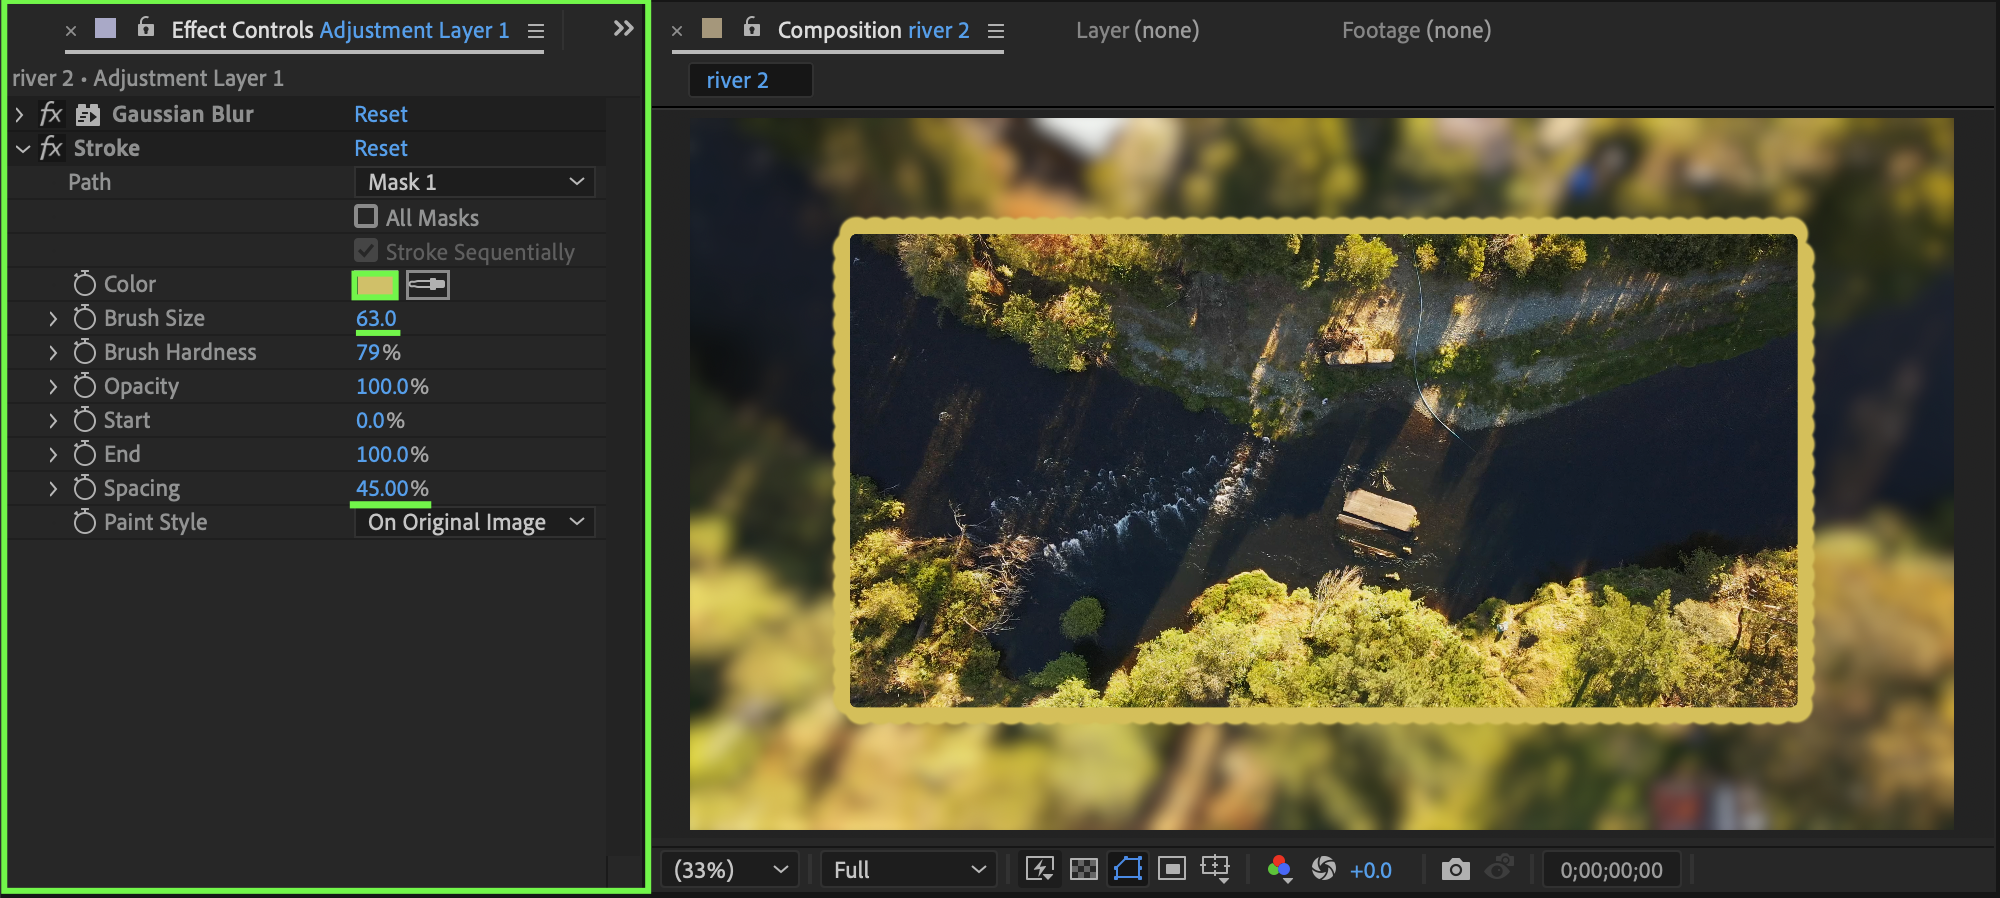
From the Effects & Presets panel, apply the Stroke effect to the adjustment layer. In the Effect Controls panel:
Set Paint Style to On Transparent or Reveal Original Image
Choose Mask 1 (or enable All Masks if you are using multiple masks)
Adjust Brush Size to control stroke thickness
Choose a Color for the stroke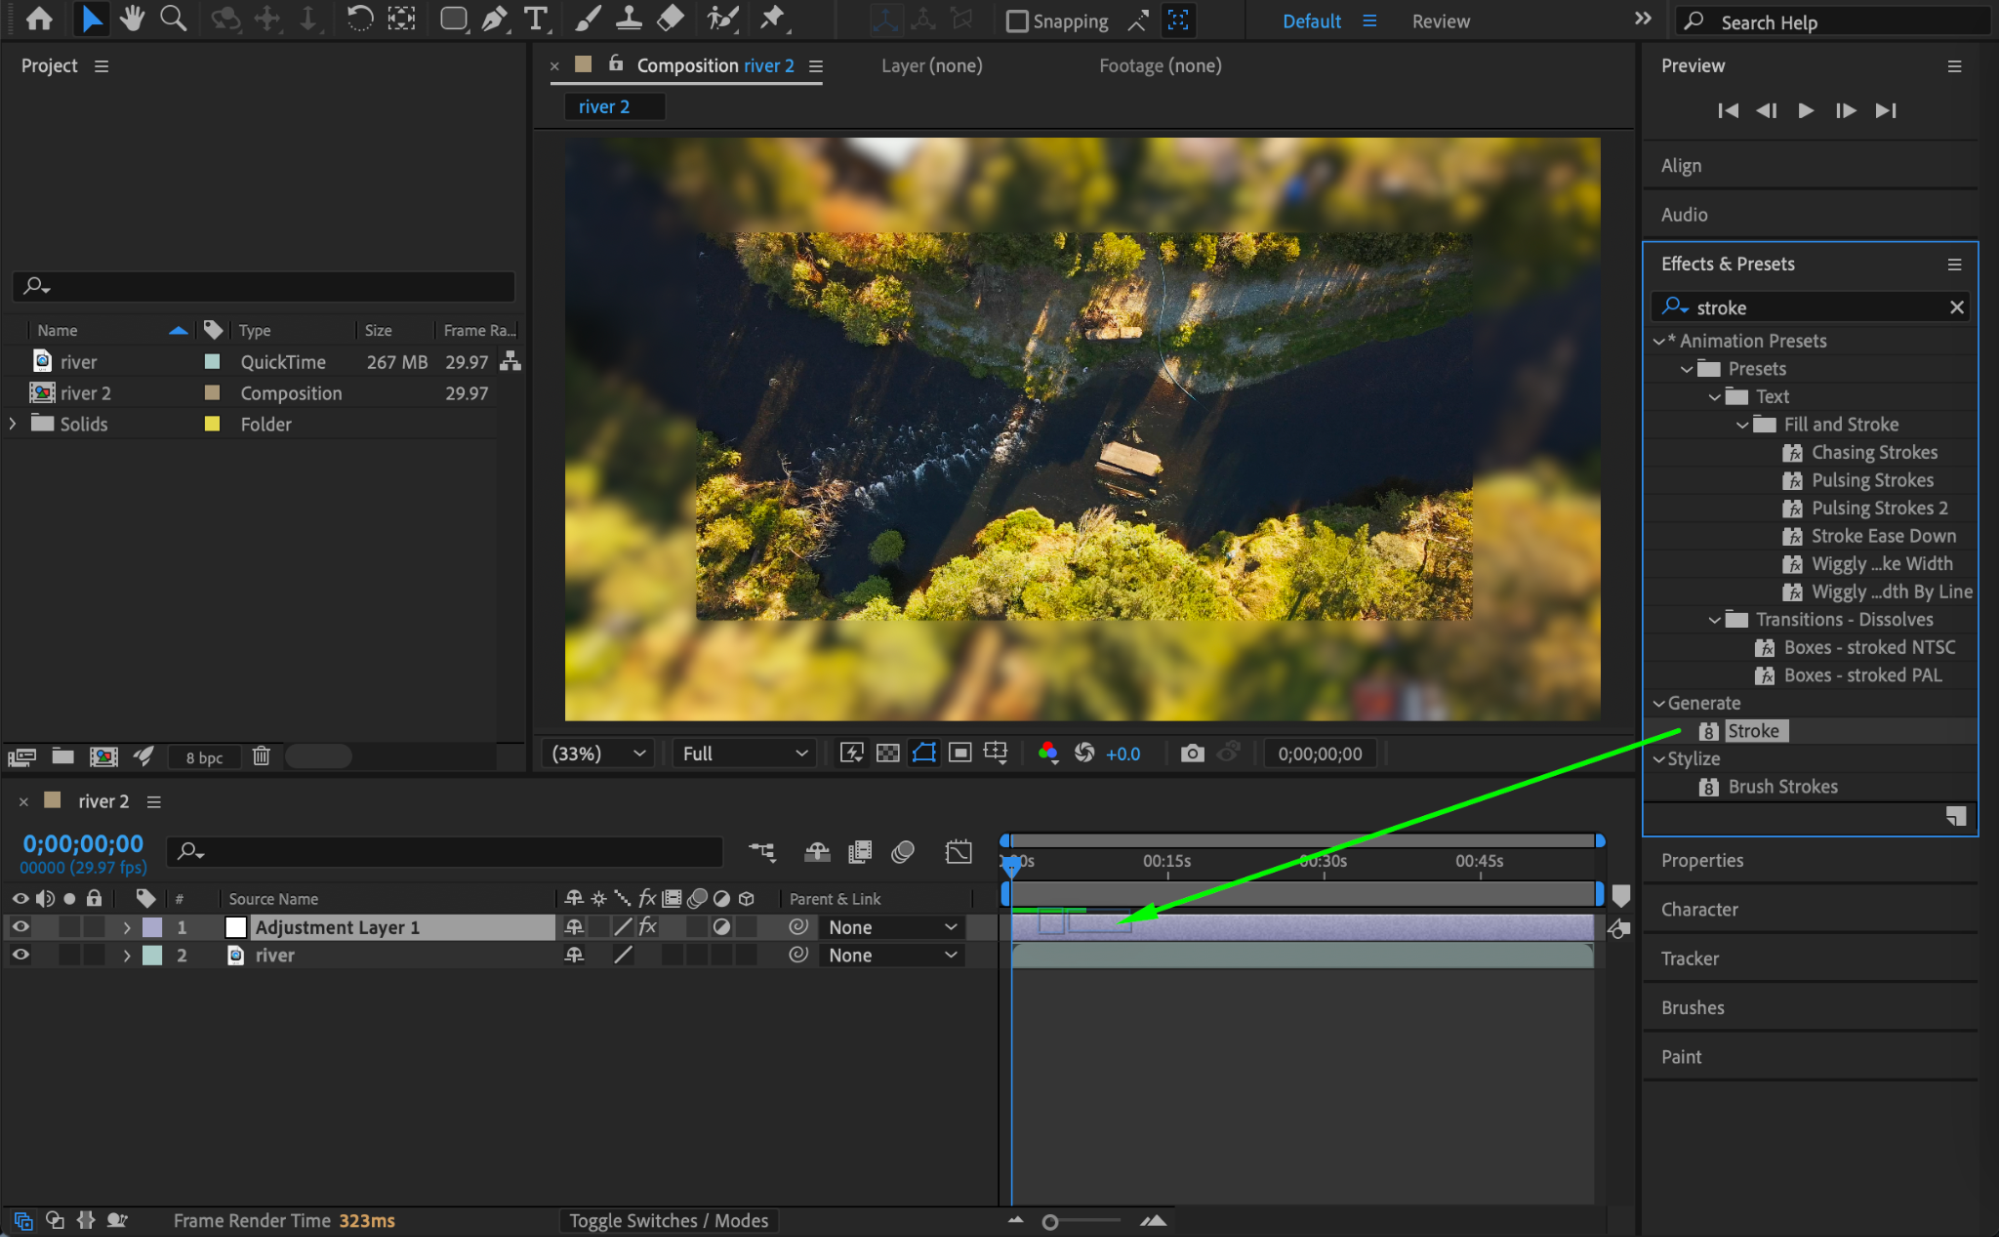
 Step 5: Preview the Result
Preview your composition and fine-tune the stroke size, color, and blur amount to achieve the desired look.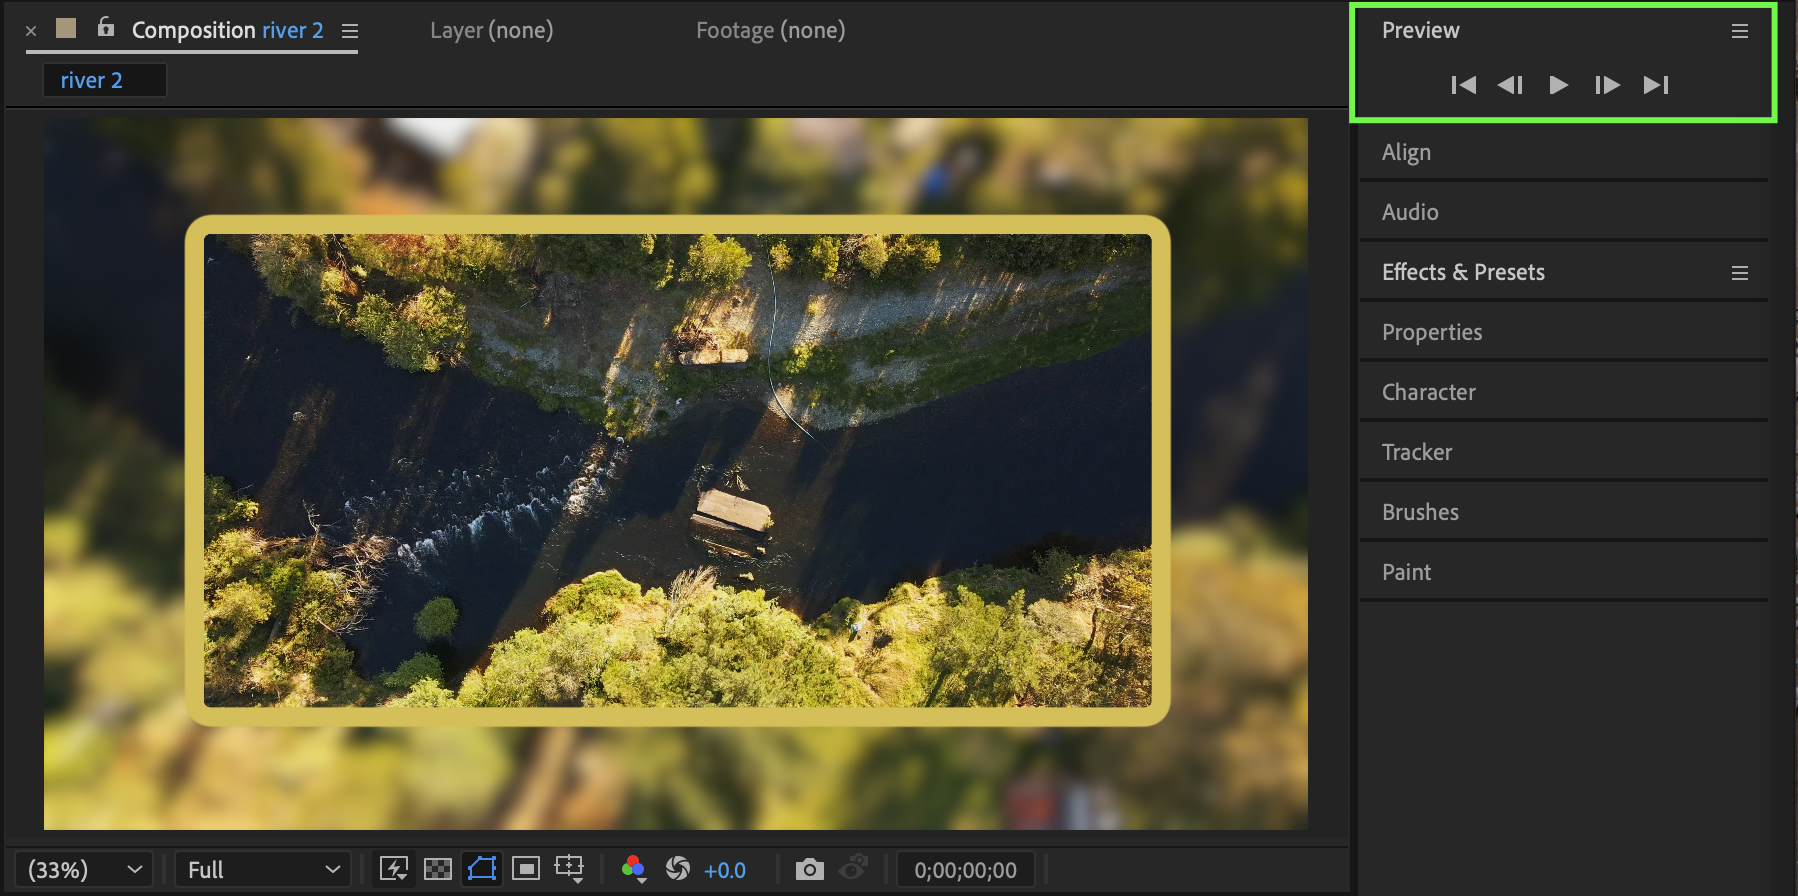 Conclusion
By combining Adjustment Layers, Masks, and the Stroke effect, you can easily create clean and flexible stroke mask effects in After Effects for highlights, reveals, and creative transitions.
Our Bestsellers

