The VHS effect is a popular retro style that mimics the look of old analog tapes – complete with noise, color distortion, scan lines, and flicker.
There are two main ways to achieve this effect in After Effects:
Manual method – more control, but takes time
Using a plugin (AEJuice) – faster, easier, and more polished
Below, you’ll learn both approaches step by step.
Method 1: Create VHS Effect Manually in After Effects
Step 1: Import Your Video
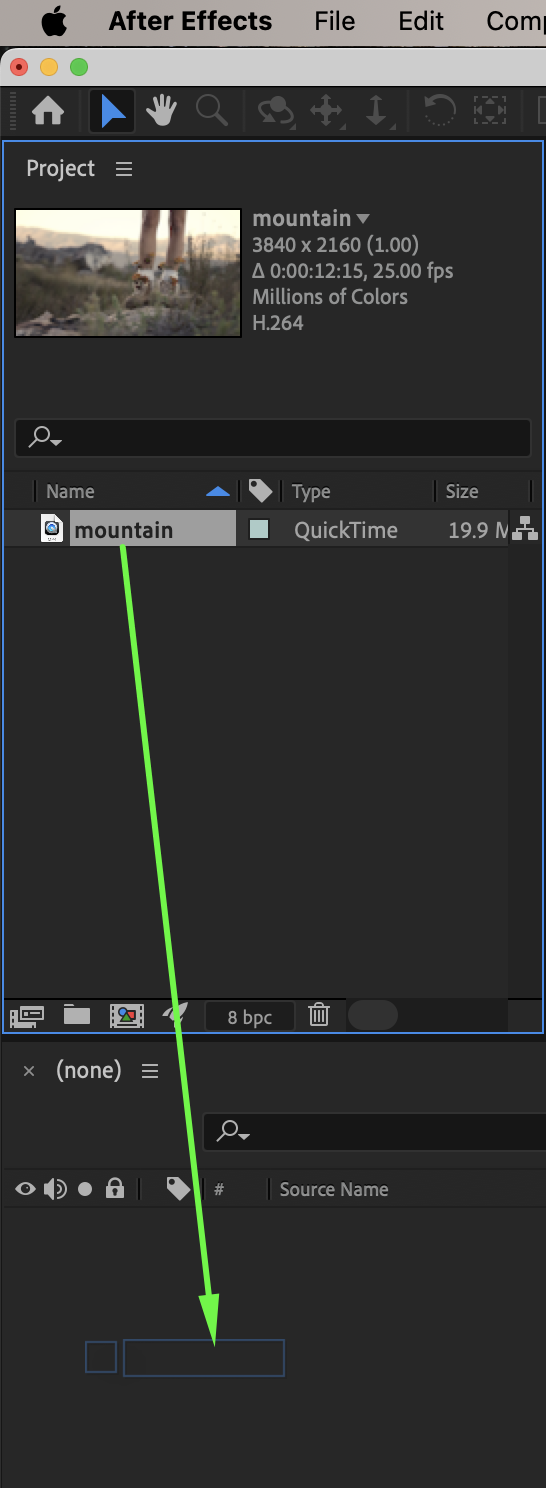
Go to File → Import → File, then drag your video onto the timeline to start working.
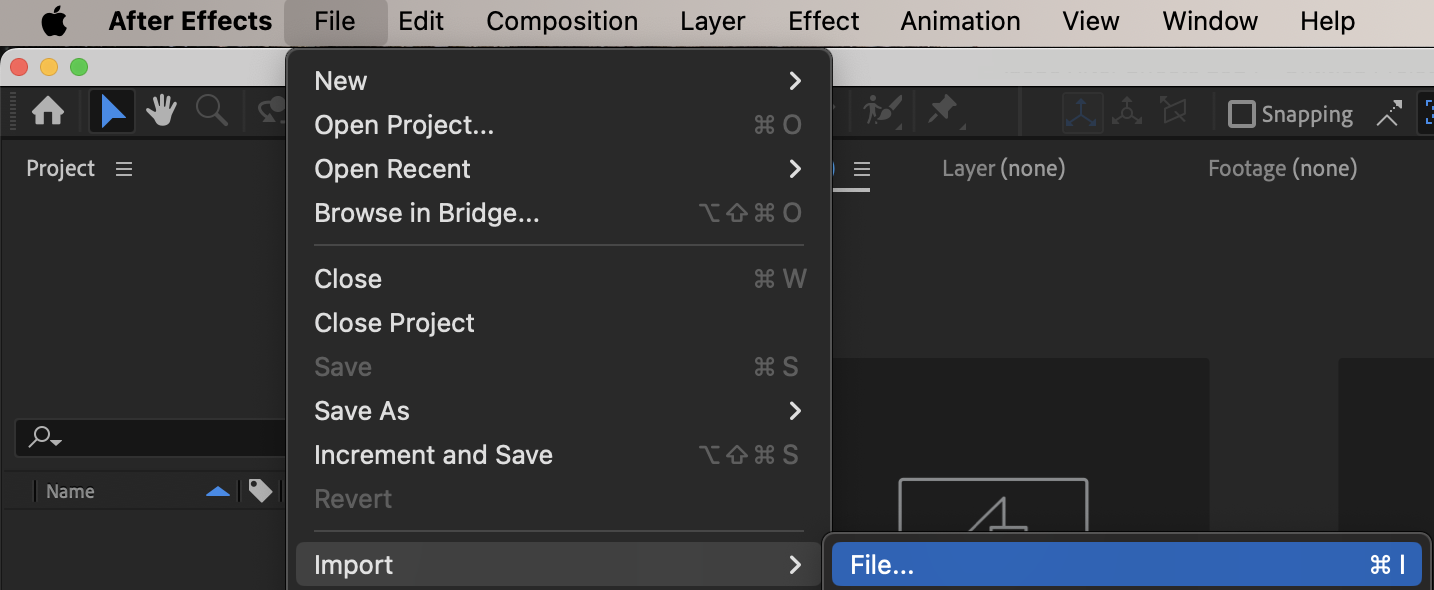
Step 2: Add Grain
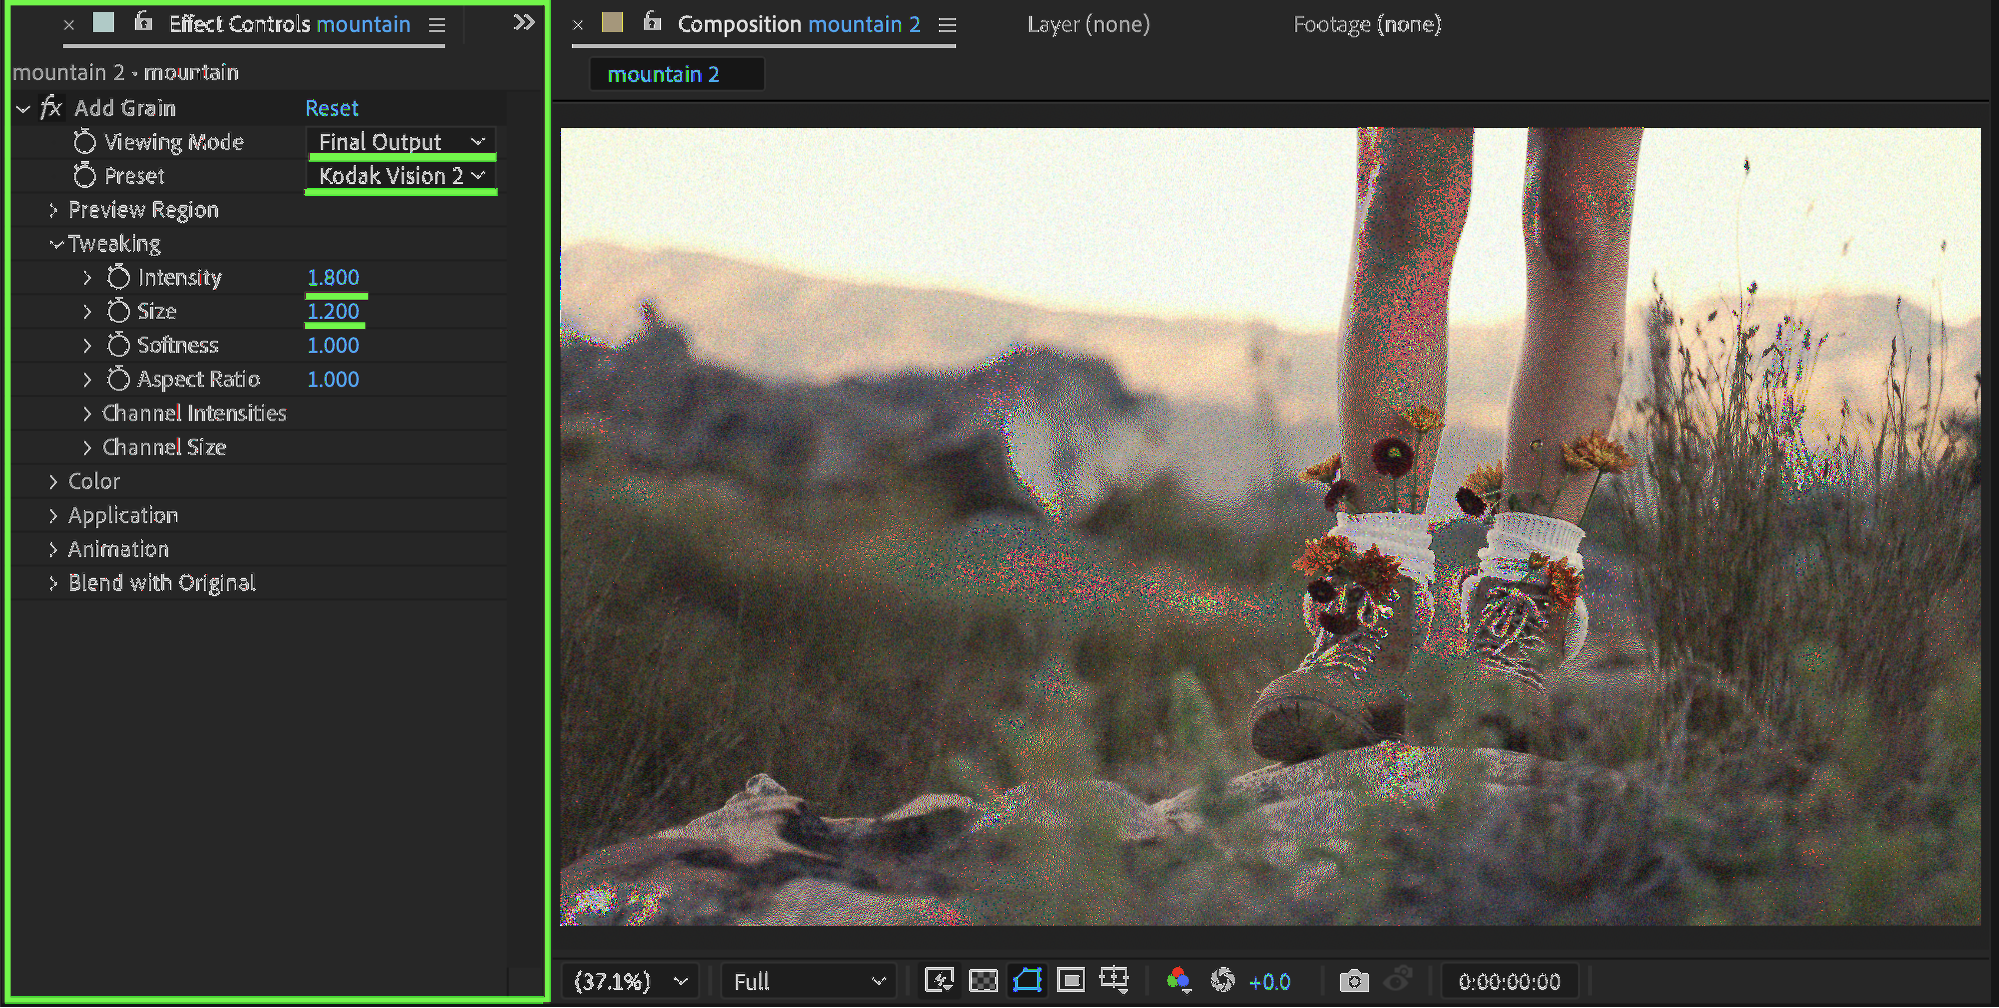
From the Effects & Presets panel, apply Add Grain to your video. In the Effect Controls panel, set:
Viewing Mode: Final Output
Preset: Kodak Vision 250D
Intensity: 1.8
Size: 1.2
This simulates analog noise found in VHS footage.
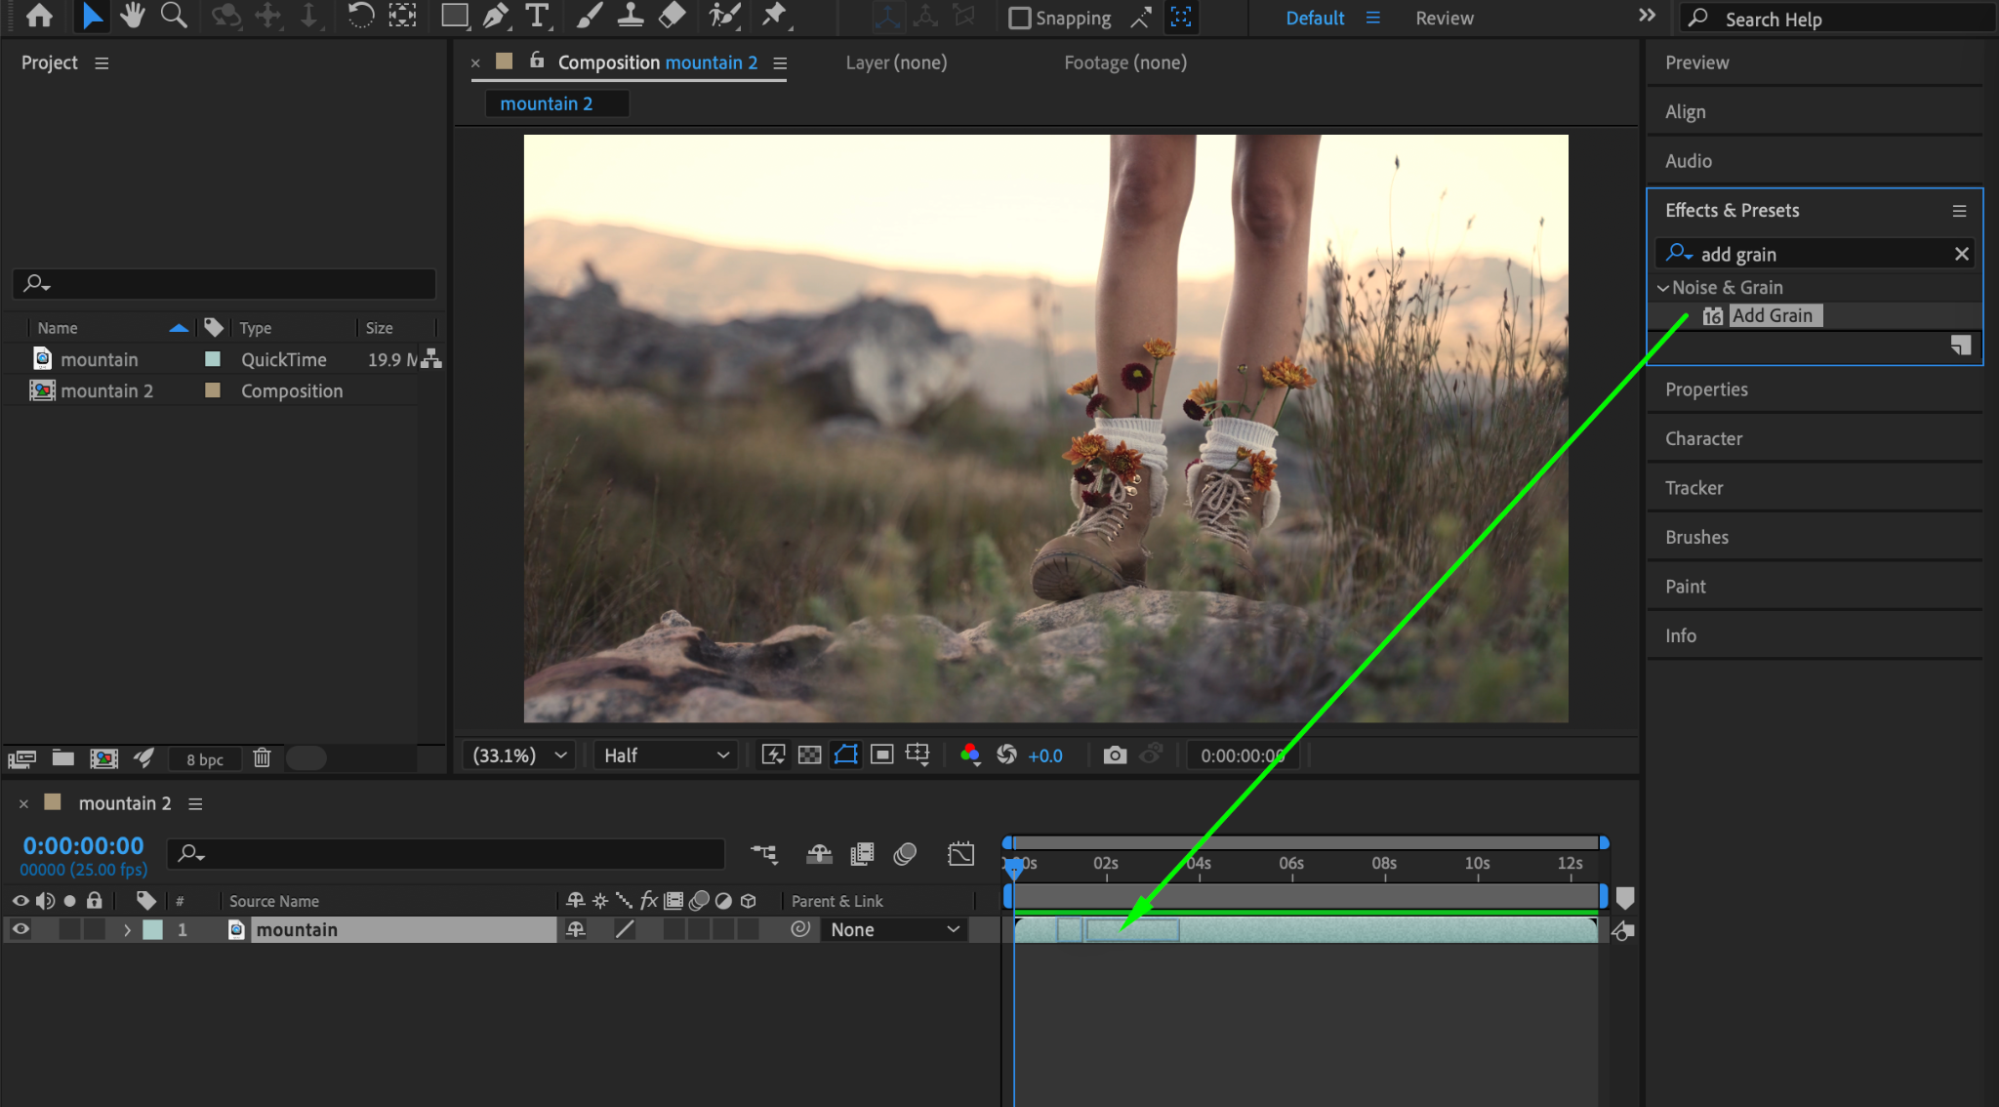
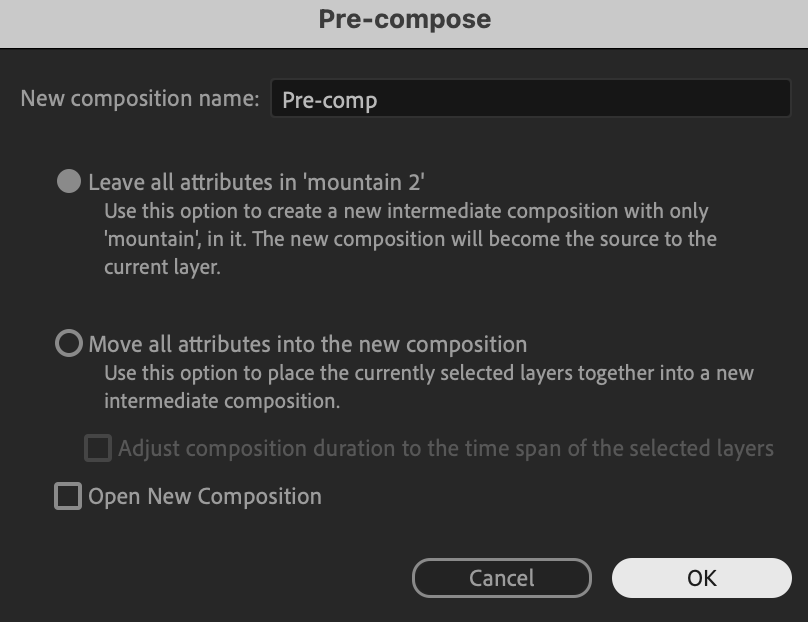
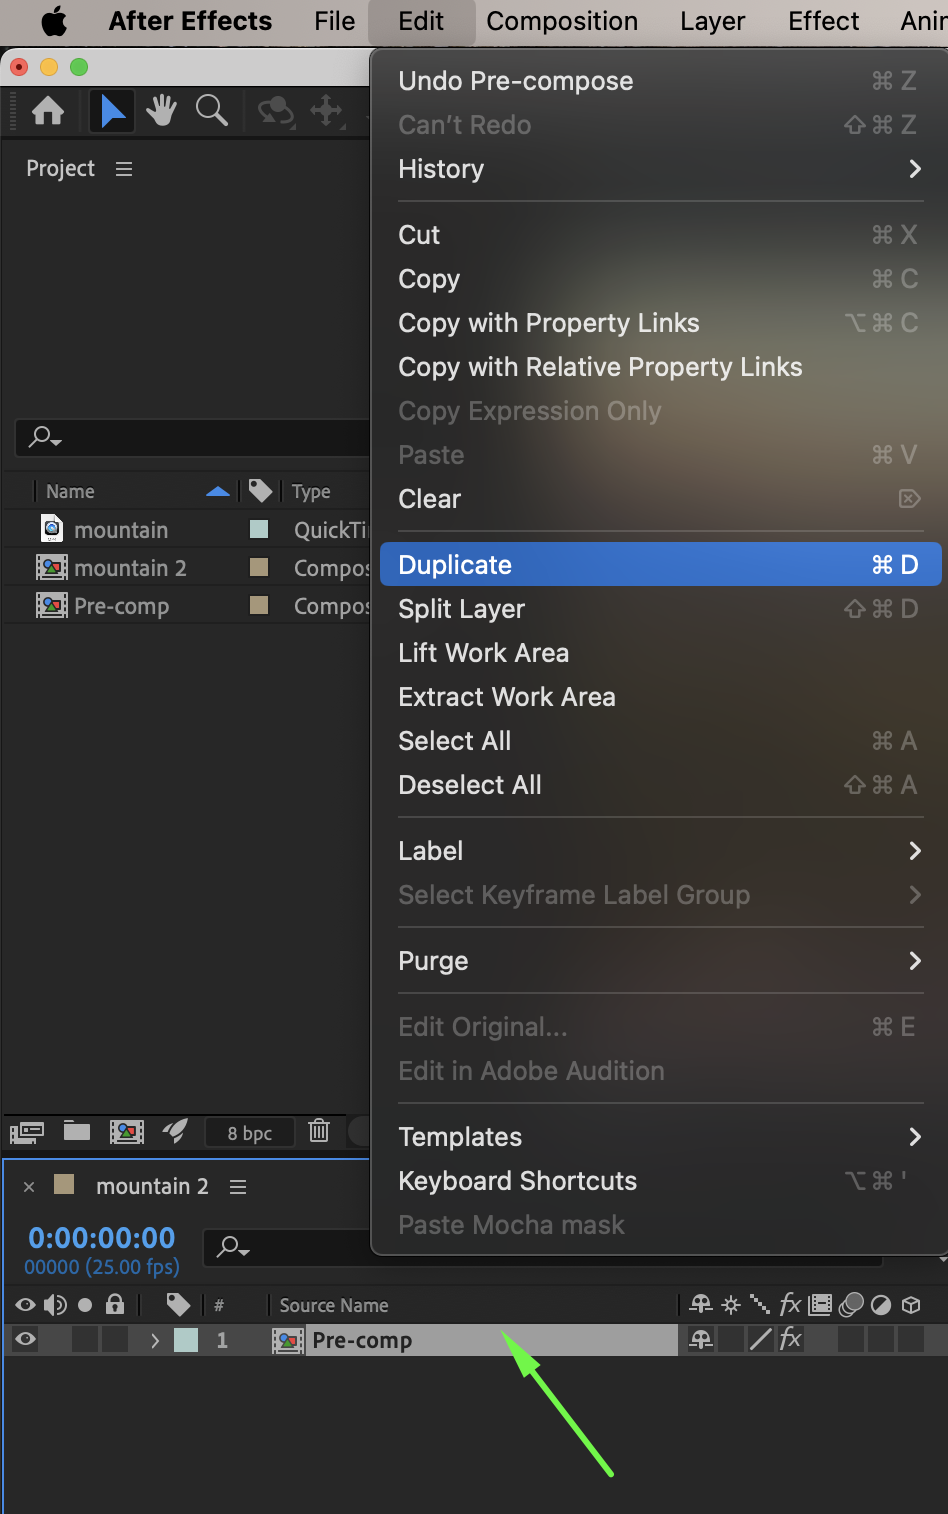
Step 3: Pre-compose and Duplicate
Right-click the video layer → Pre-compose. Then duplicate the pre-comp twice so you have three identical layers.

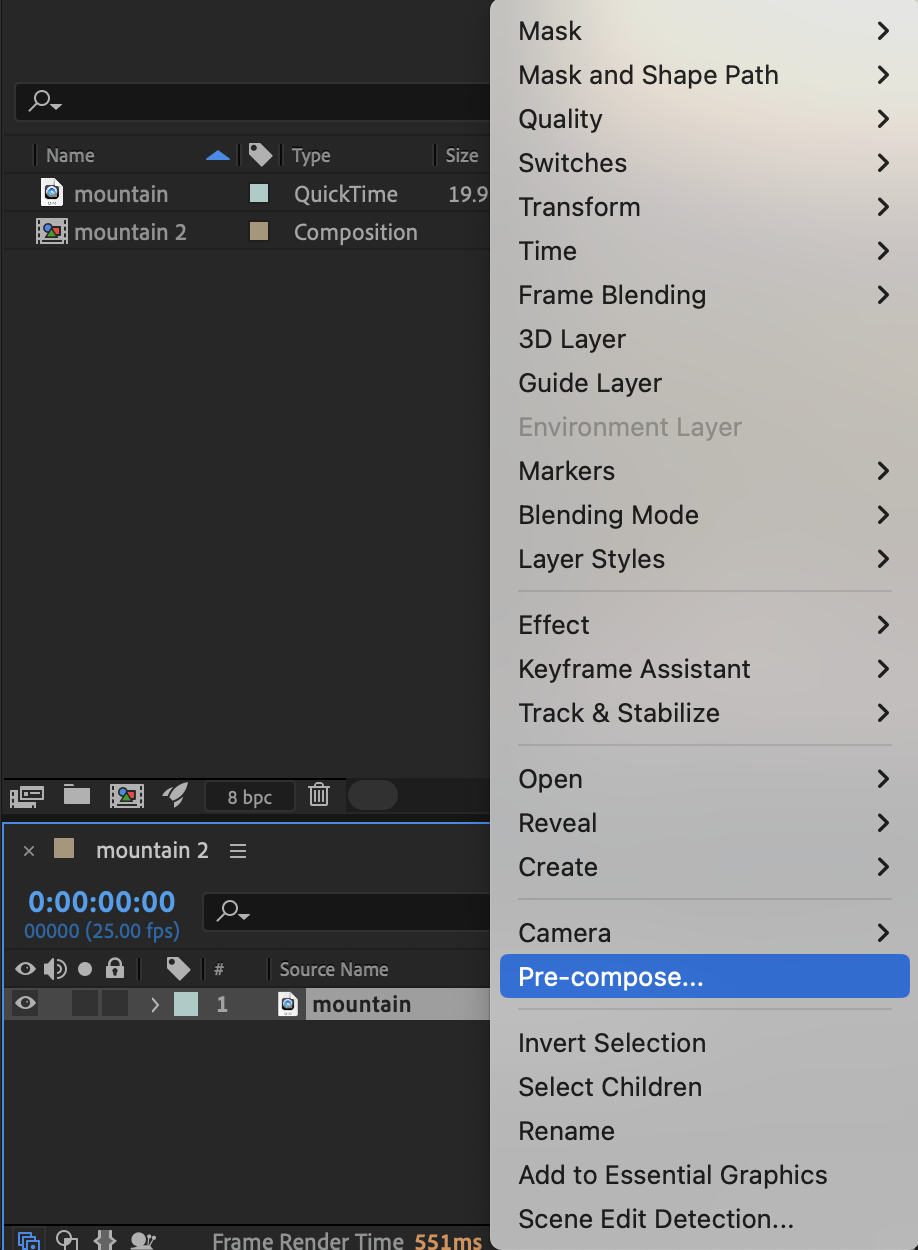
Get 10% off when you subscribe to our newsletter

Step 4: Split RGB Channels
Apply Shift Channels to each pre-comp and configure:
Layer 1:
Red → Red
Green & Blue → Full Off
Layer 2:
Green → Green
Red & Blue → Full Off
Layer 3:
Blue → Blue
Red & Green → Full Off
Select all three layers and set Blending Mode → Add. Press P (Position) and slightly offset each layer to create RGB separation.
Step 5: Create Adjustment Layer
Go to Layer → New → Adjustment Layer and place it above all layers.
Step 6: Add Scan Lines
Apply Venetian Blinds to the adjustment layer:
Transition Completion: 14
Direction: 90
Width: 36
Feather: 23
This creates classic VHS scan lines

Step 7: Add Distortion
Apply Turbulent Displace:
Displacement: Horizontal
Amount: 5
Size: 48
Complexity: 6
This simulates tape warping and signal instability.
Step 8: Add Second Adjustment Layer
Create another Adjustment Layer above everything.
Step 9: Add Flicker
Apply Opacity Flicker preset, or manually animate opacity to simulate brightness fluctuations.
Step 10: Reduce Frame Rate
Apply Posterize Time and set:
Frame Rate: 10
This gives a more “dirty” and old-school VHS feel.
Result & Difficulty
This manual method gives you full control, but it takes around 20–30 minutes to set up properly.
Method 2: Create VHS Effect Using AEJuice (Fast Way)
Step 1: Open AEJuice Pack Manager
After importing your video, go to: Window → AEJuice Pack Manager 4
Step 2: Find VHS Pack
In the AEJuice window, search for a VHS pack and download it.
Step 3: Apply Effect
Choose a VHS preset or color correction effect. Move your CTI (playhead) to the beginning of the video and click Import.
Step 4: Open Settings
Select the imported layer on the timeline. In AEJuice, click the Edit button (icon with three sliders).
Step 5: Customize the Effect
Adjust parameters such as:
Look Intensity
TV Lines
Blending Mode
Step 6: Add More Overlays
Enhance the VHS look by adding extra elements like:
Tape functions
Distortions
Glitches

Step 7: Preview
Preview your composition and tweak settings if needed.
Compared to the manual approach, using AEJuice is much faster and easier in practice – you can get a solid VHS look in seconds instead of spending 20–30 minutes setting everything up. There’s no need to deal with complex effects or layer setups, and the results usually look more polished right away. On top of that, it’s easy to experiment with different styles and quickly find the look that fits your video.

Conclusion
You can create a VHS effect in After Effects either manually for full control or by using AEJuice for speed and convenience. If you enjoy fine-tuning every detail, the manual method is a great learning experience. But for most workflows, using AEJuice is the fastest way to achieve a professional VHS look.
