
How to Create an Orbital Animation in After Effects
Introduction – Step-by-Step Guide to Creating a Rotating Orbital Animation in After Effects
In this tutorial, you will learn how to create an orbital animation in After Effects. This animation involves making an object revolve around a central point, which can be great for simulating planets or rotating objects in 3D space. Follow these easy steps to set up the animation.
Step 1: Create the Large Orbiting Circle
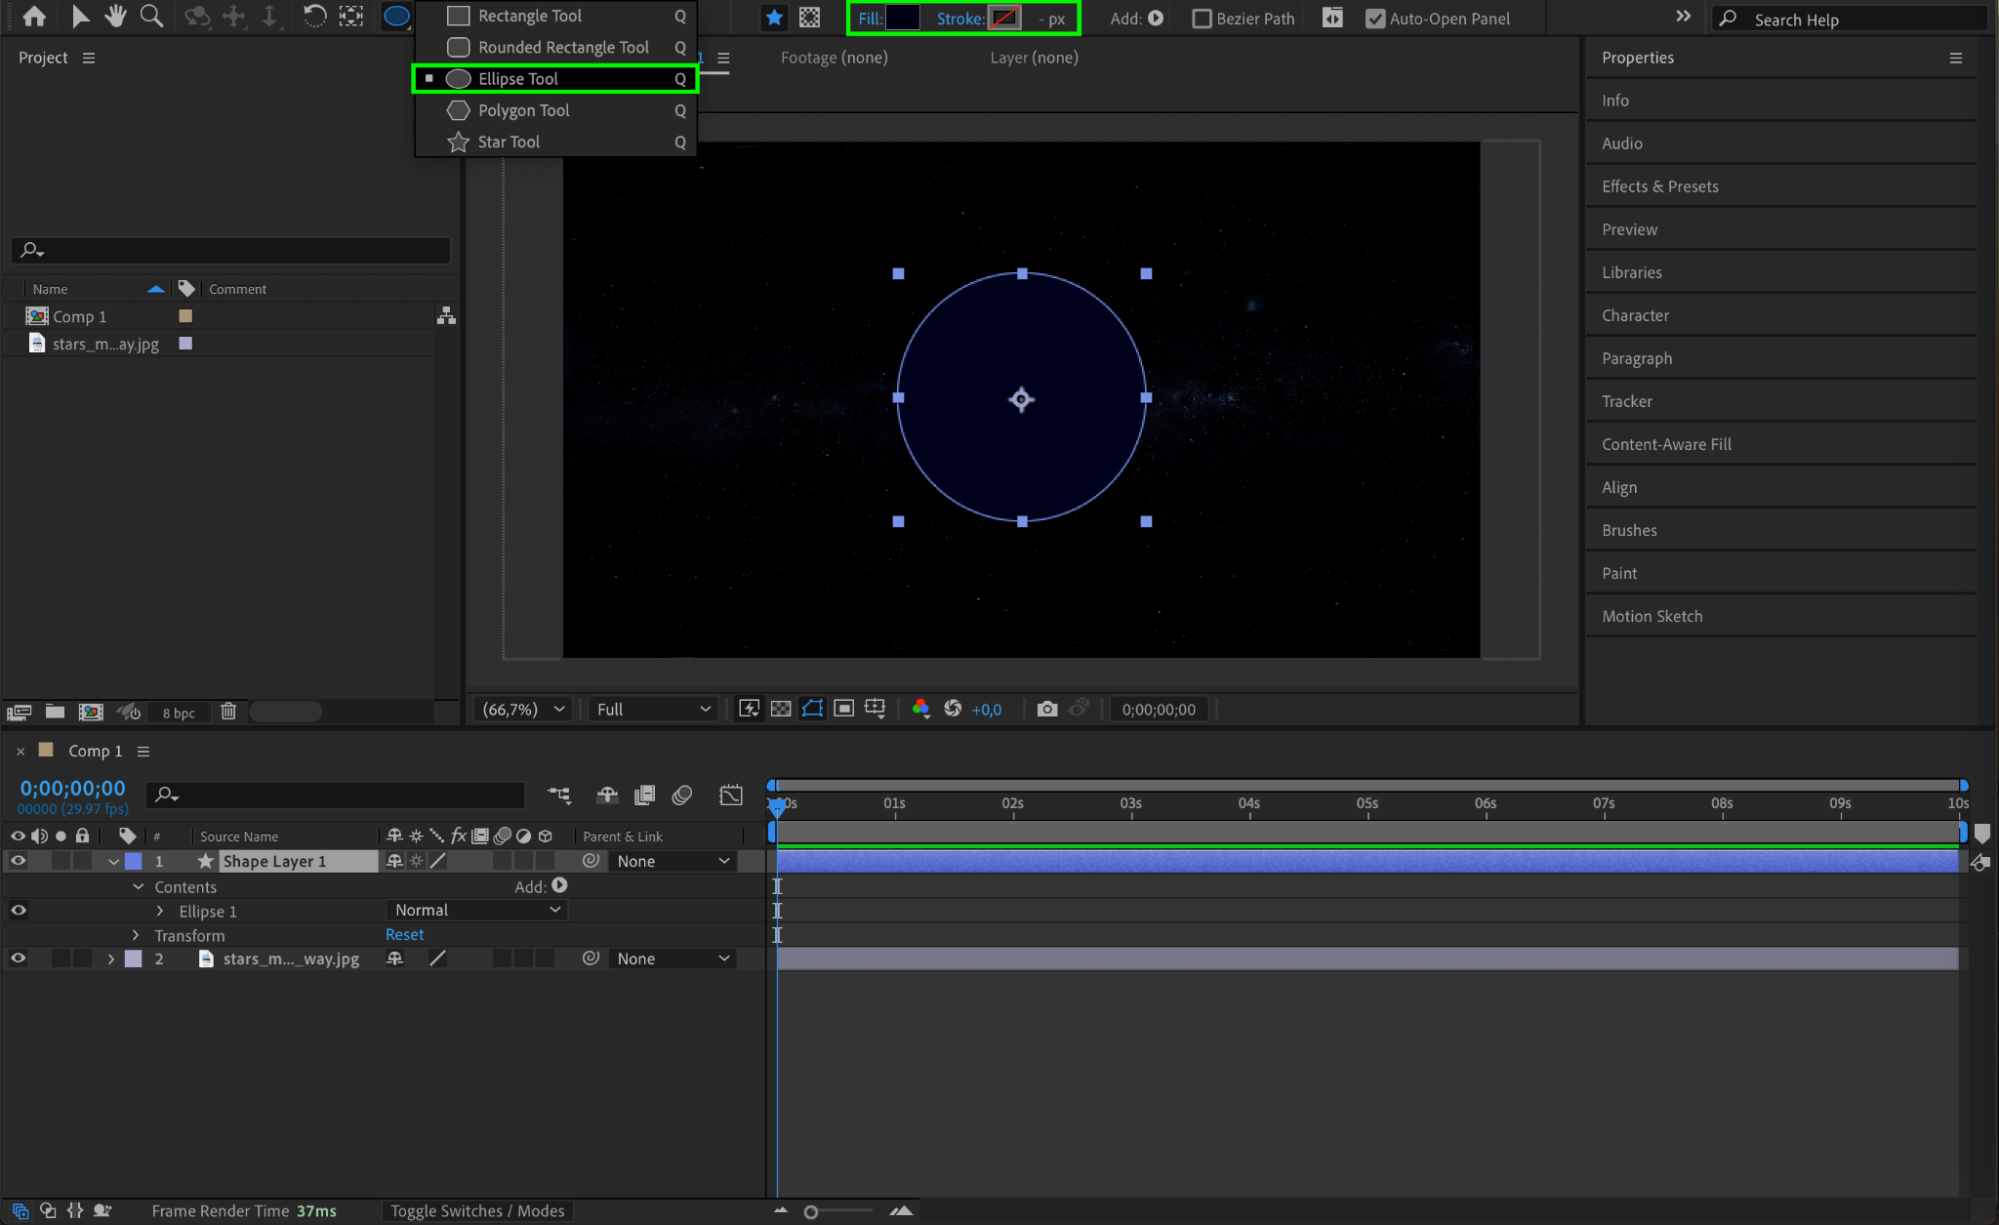
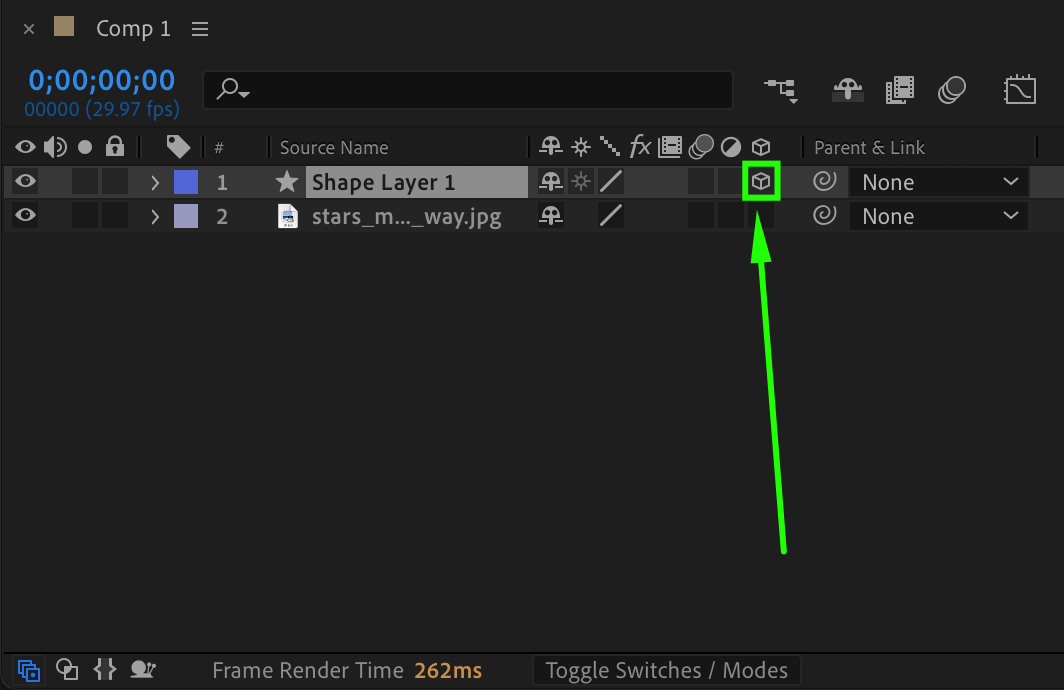
Open your After Effects project and select the Ellipse Tool (Q). Hold Ctrl/Cmd + Shift to create a perfect circle. Choose a dark blue fill color for the circle. Once the shape is created, enable 3D Layer by clicking the 3D box next to the layer. This will allow the circle to interact in 3D space.
 Step 2: Create the Smaller Orbiting Circle
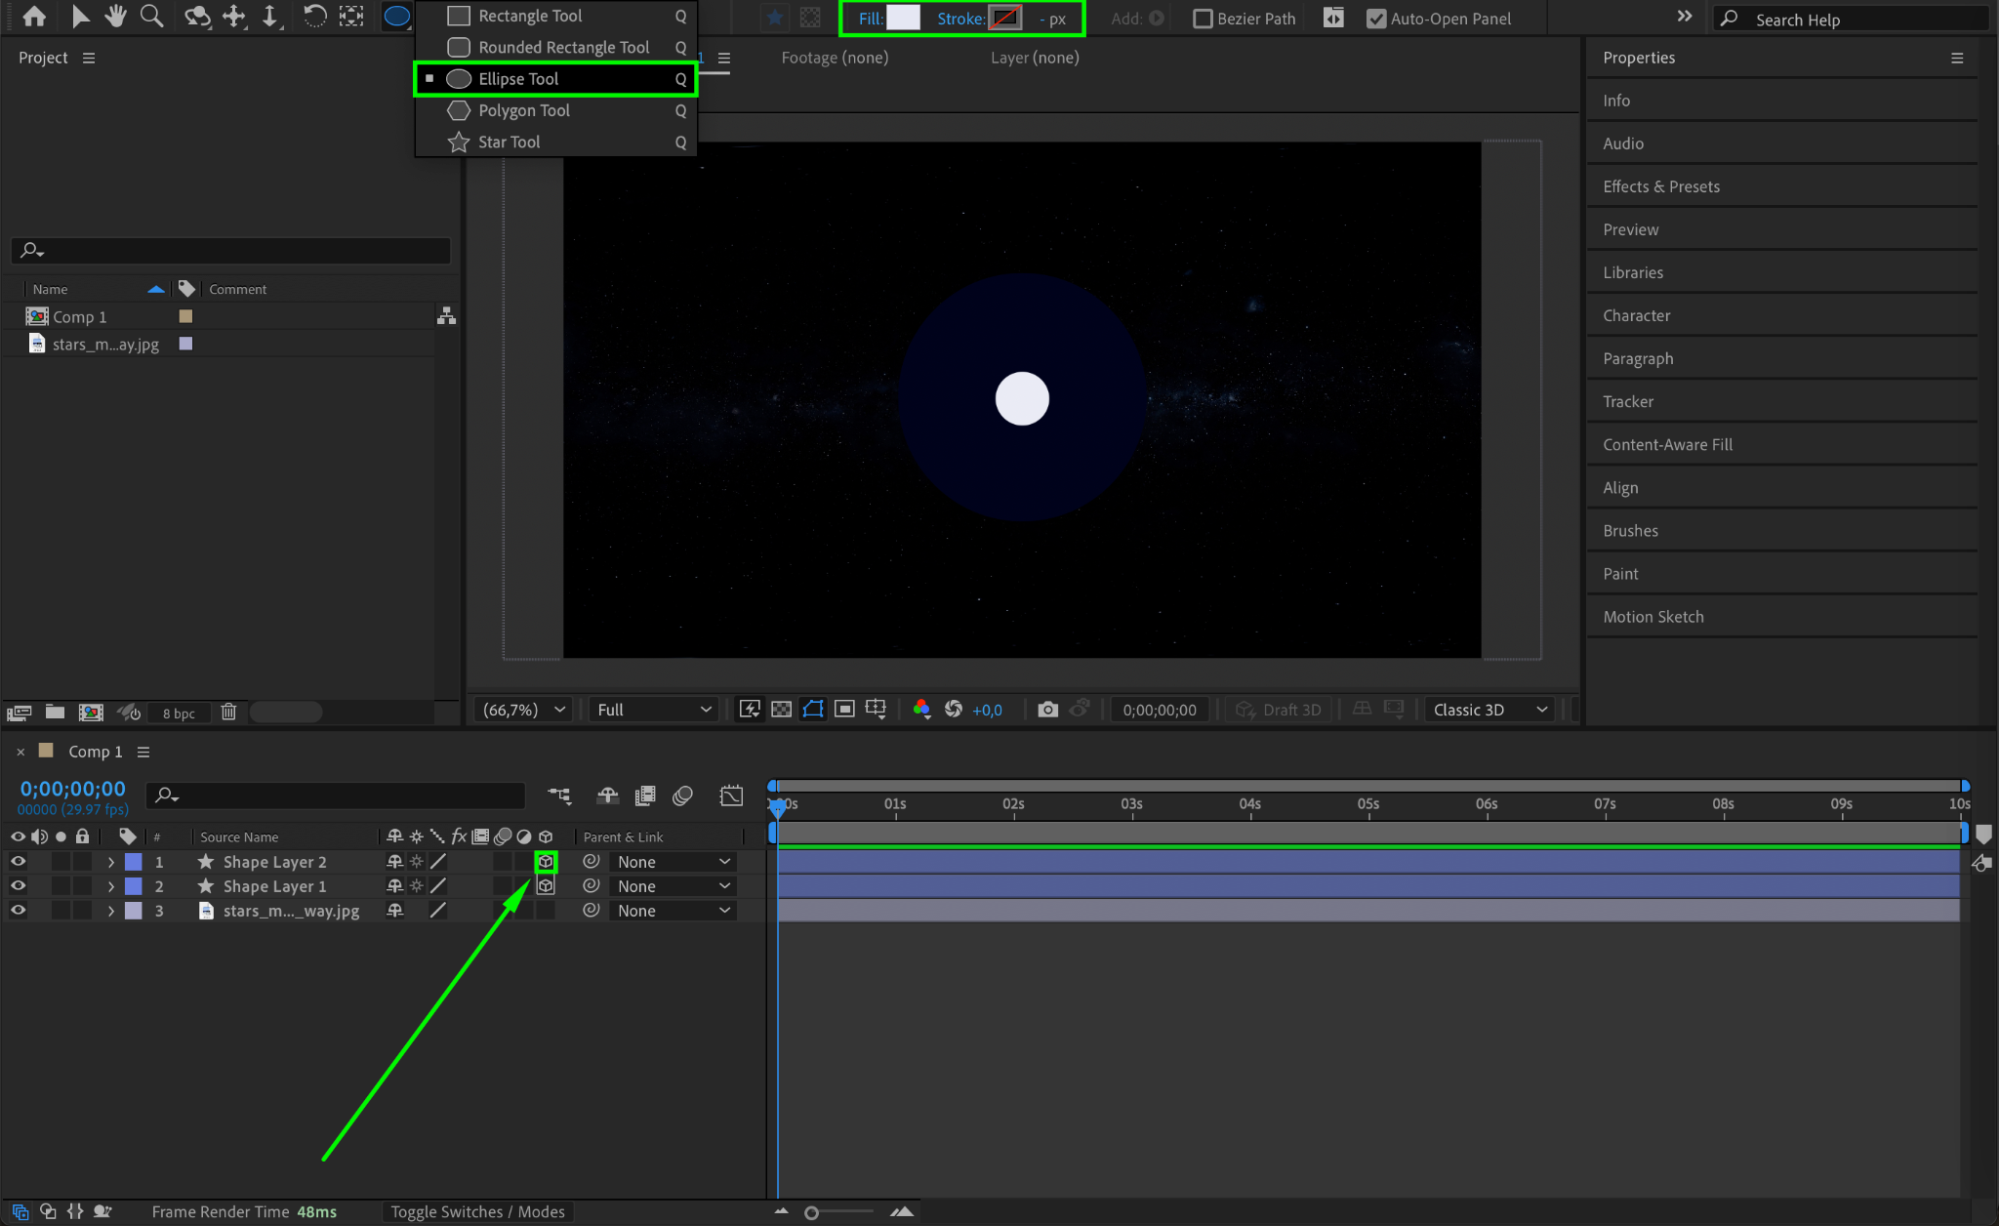
Next, create a smaller white circle that will rotate around the larger circle. Select the Ellipse Tool (Q) again to draw the smaller circle. Also, make sure this layer is set as 3D by enabling the 3D box in the layer settings. This ensures it can move in 3D space just like the larger circle.
Step 3: Add a Null Object
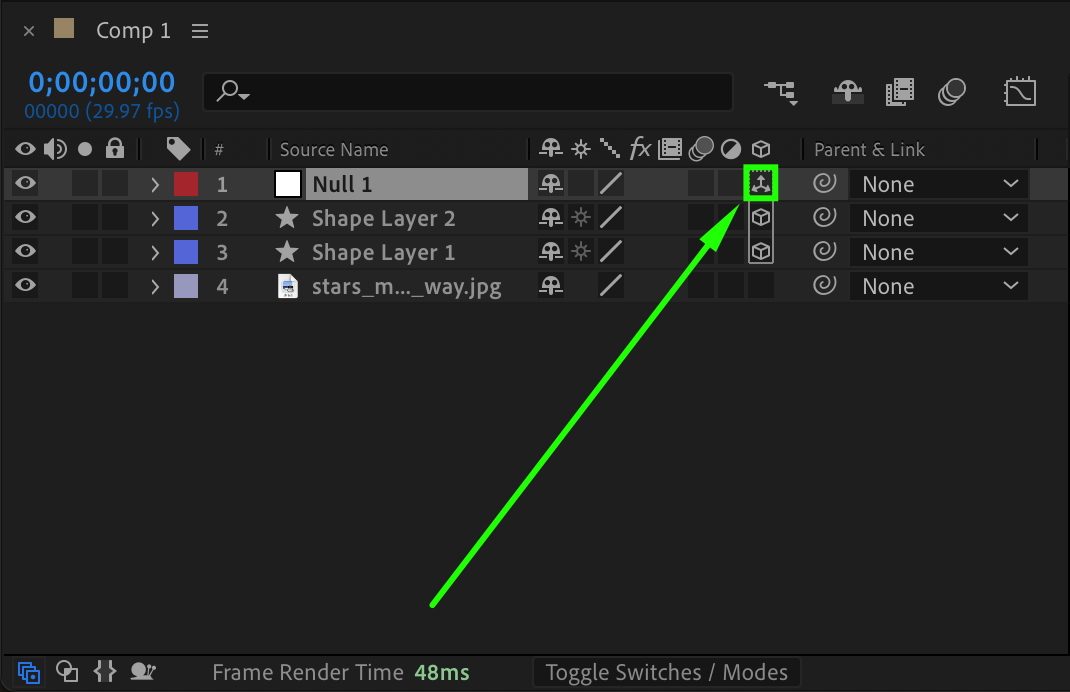
Go to Layer > New > Null Object and create a null object. Make this null object 3D by clicking the 3D box next to it. The null object will serve as the center point for the rotation of the smaller circle.
 Step 4: Apply Rotation Expression to the Null Object
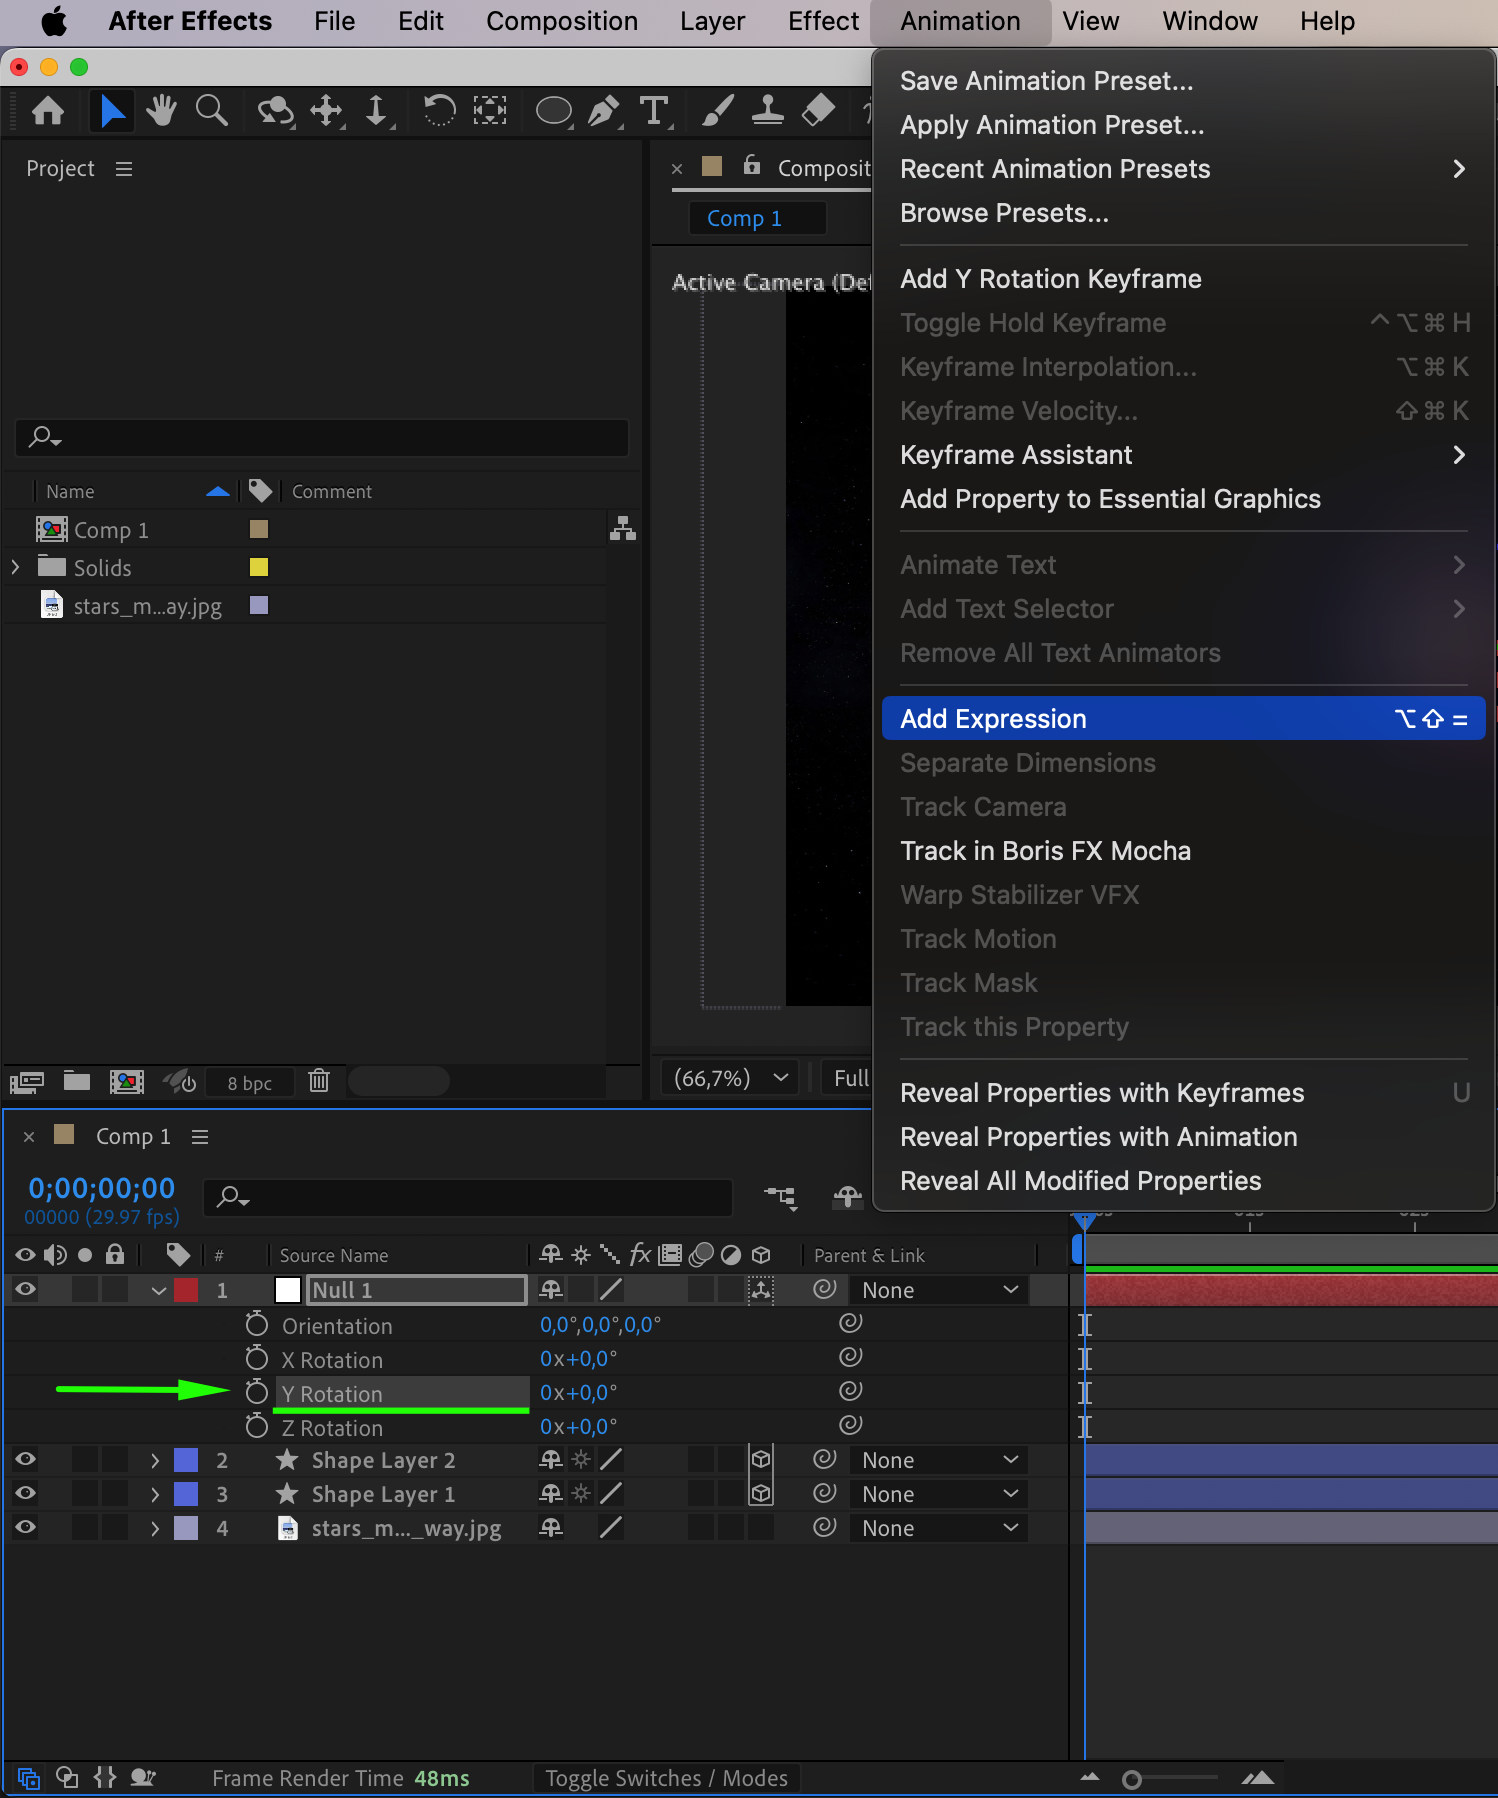
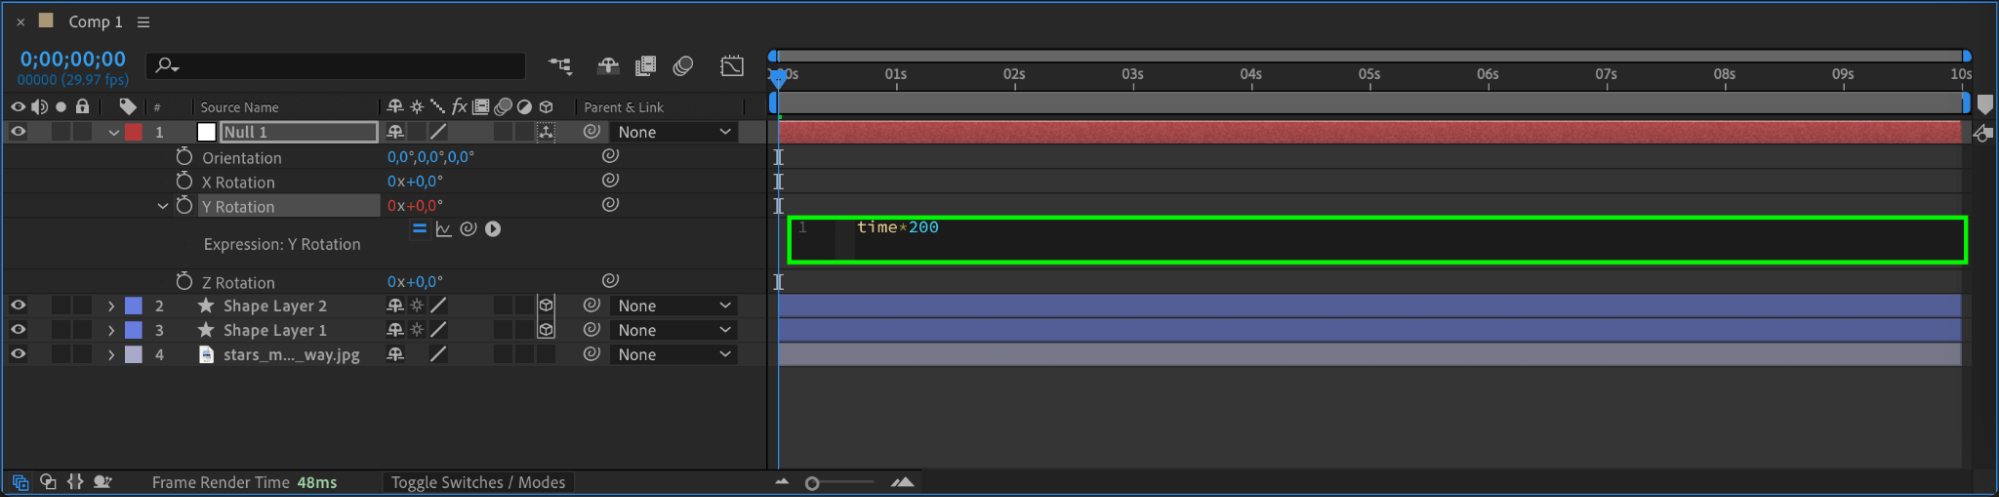
Click on the Y Rotation of the null object to make it rotate. Then, go to Animation > Add Expression and type in the expression time*200. This will animate the rotation of the null object, making the smaller circle orbit around the larger one.
 Step 5: Parent the Smaller Circle to the Null Object
Select the smaller circle and parent it to the null object by using the Pick Whip tool. This will link the smaller circle’s movement to the rotation of the null object, so it orbits as the null object rotates.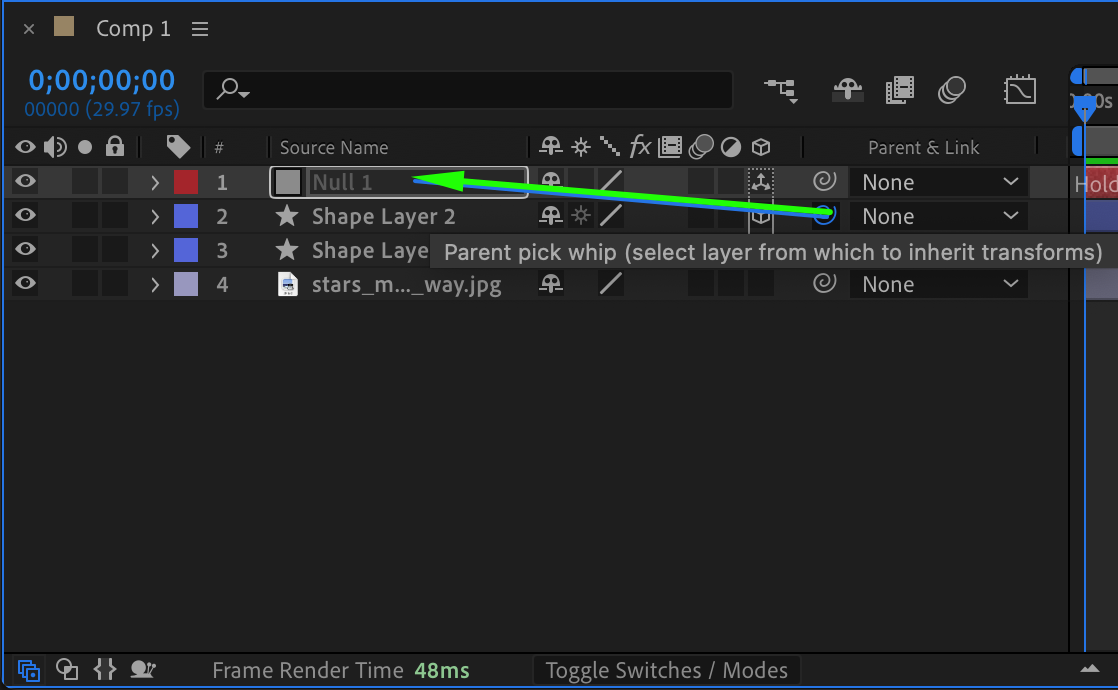 Step 6: Adjust the Position of the Smaller Circle
Now, select the smaller circle and press “P” to open the Position properties. Change the Z value to -599 to position it properly in 3D space, ensuring it stays at the correct distance from the larger circle.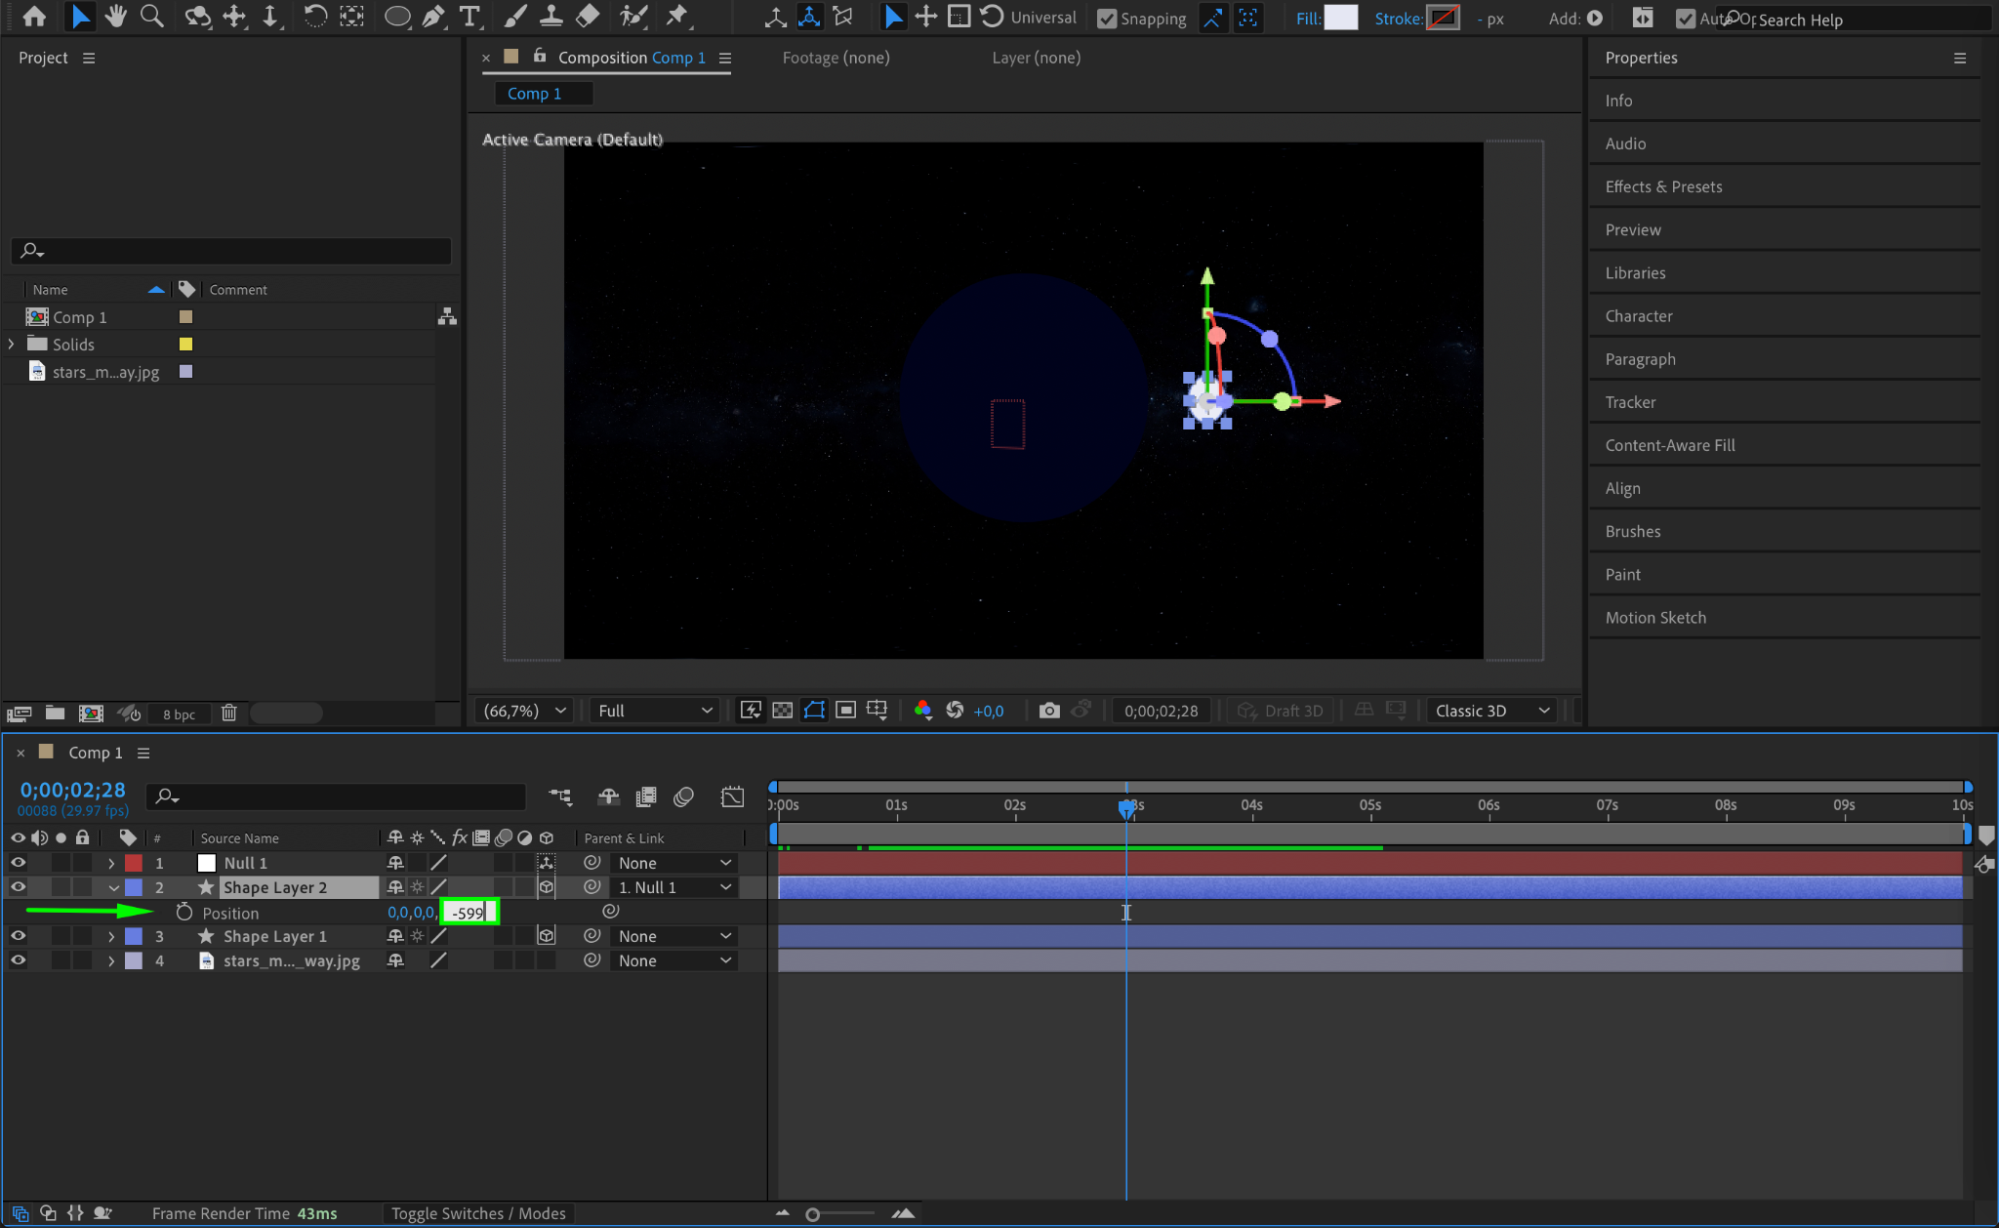
Step 7: Enable Auto-Orientation for the Smaller Circle
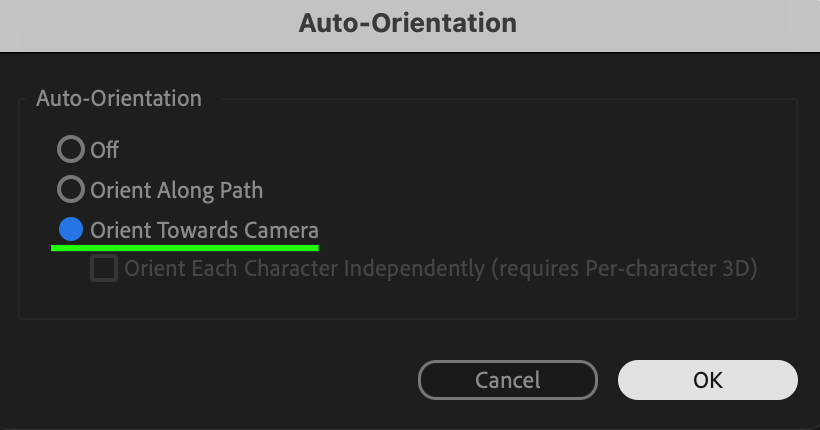
Next, select the smaller circle (Shape Layer 2). Go to Layer > Transform > Auto-Orient. In the Auto-Orientation window, choose Orient Towards Camera and click OK. This will ensure the smaller circle always faces the camera while it orbits.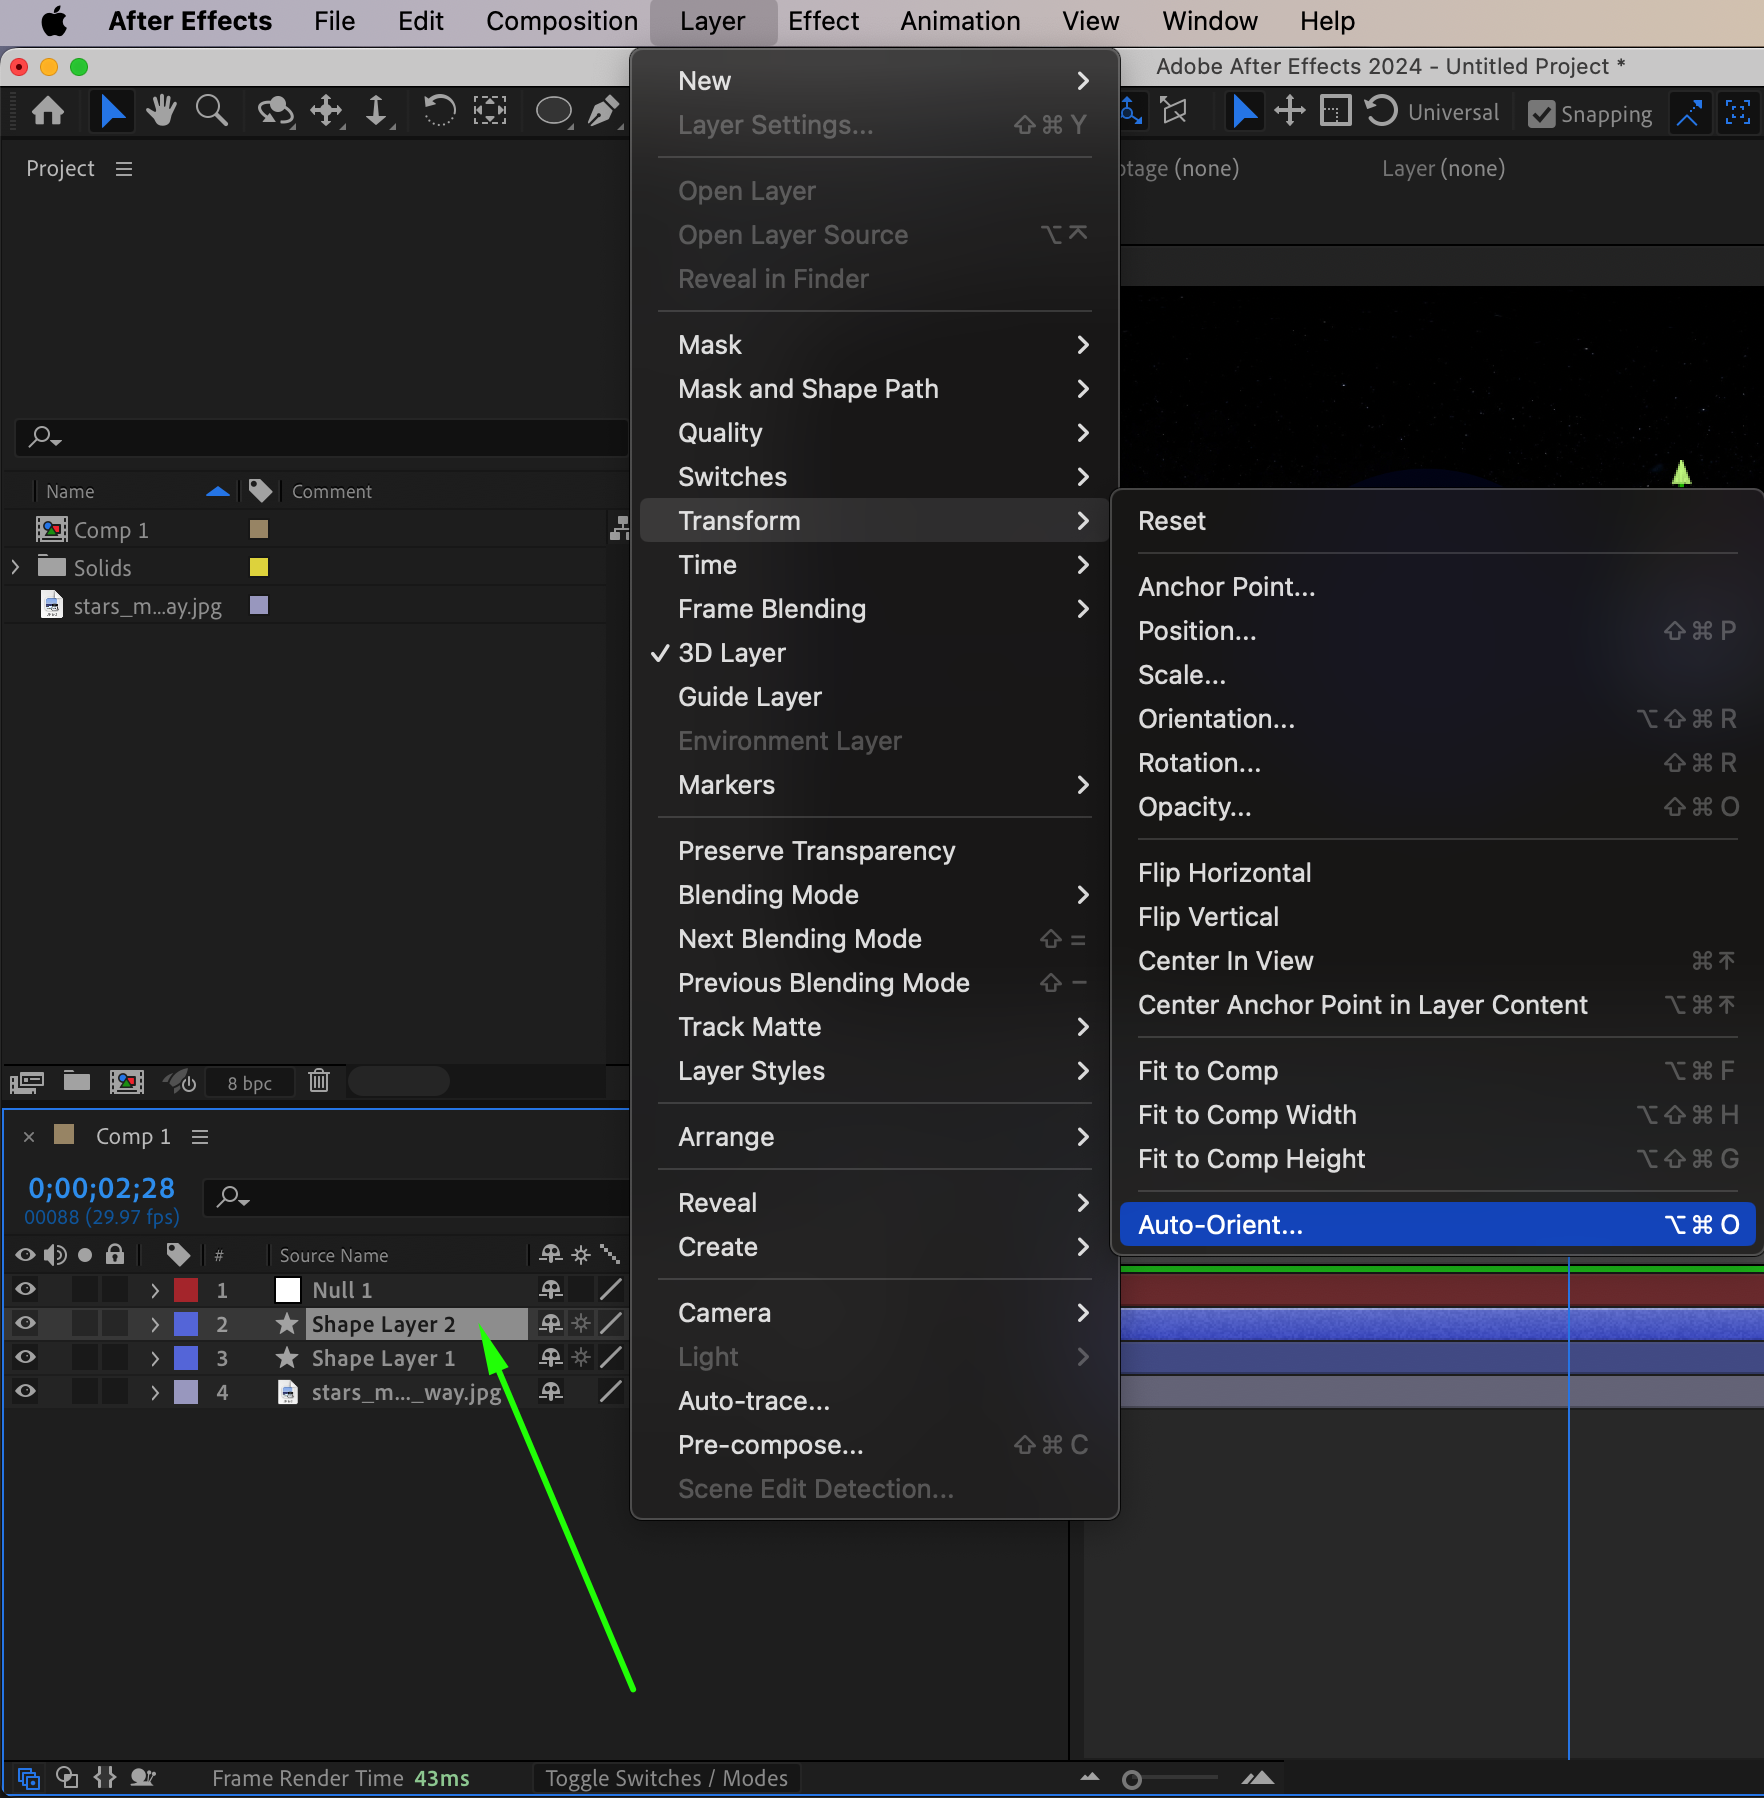
 Step 8: Preview the Animation
After completing all the steps, click the Preview button to view the animation. Make sure the smaller circle smoothly orbits around the larger circle while staying oriented towards the camera.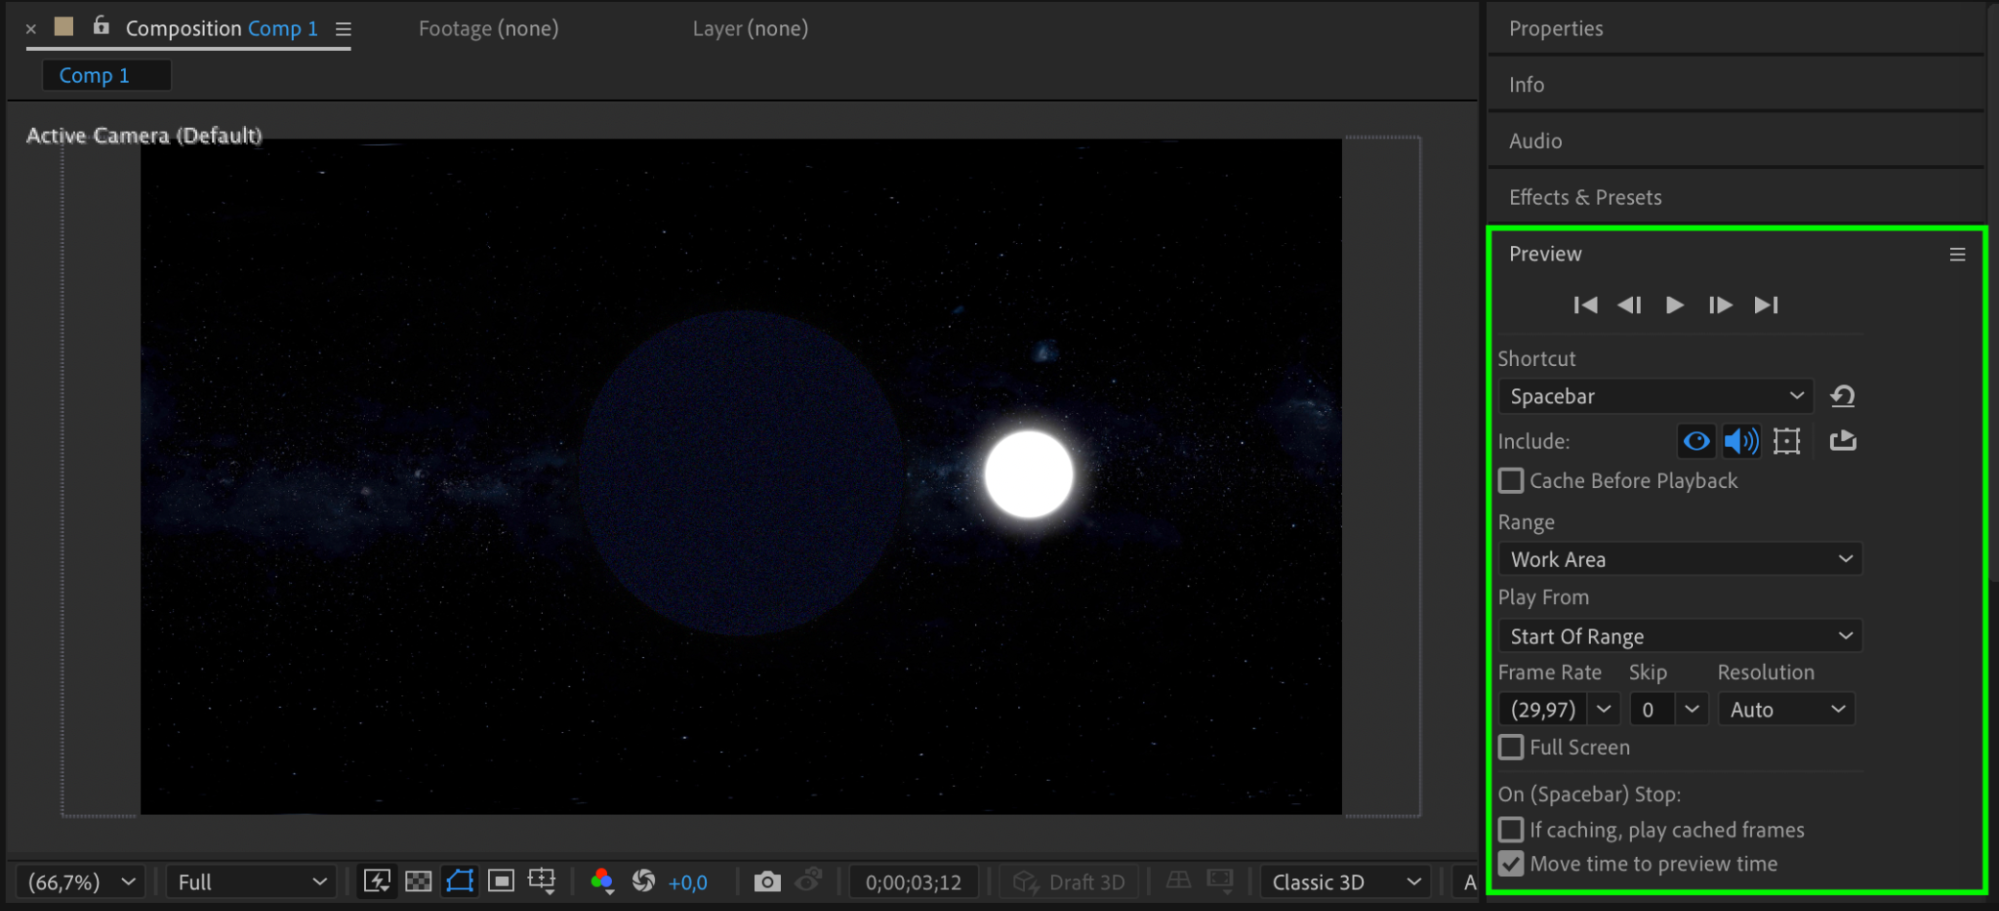 Conclusion
With these steps, you’ve created a simple orbital animation in After Effects, where a smaller object revolves around a larger one in 3D space. This technique can be used to create many different animations, from simulating planets to rotating logos. You can further adjust the speed of the rotation or the size of the objects to suit your needs.
Our Bestsellers
Our Bestsellers


