
Four Easy Steps to Export an After Effects Project for Seamless Integration
Introduction: Streamlining Your After Effects Workflow with Exportation
In today’s digital age, the art of motion graphics and visual storytelling has become an integral part of various industries, from film and television to marketing and advertising. Adobe After Effects, being the industry-standard software for creating stunning animations and visual effects, empowers artists to bring their creative visions to life. However, once you’ve finished designing your masterpiece in After Effects, the next step is to export your project, ensuring its seamless integration across different platforms and devices.
Exporting an After Effects project may seem like a simple task, but it requires careful consideration of various factors such as file formats, settings, and specific requirements of the intended platform or distribution channel. To help you navigate this crucial step and streamline your workflow, this article will guide you through the essential steps and best practices for exporting an After Effects project.
Whether you are a seasoned motion designer or new to the world of After Effects, understanding the export process is crucial for delivering your work in a format that retains the highest quality and visual impact. By mastering the art of exporting, you can ensure that your animations and visual effects are seamless, visually stunning, and optimized for whichever platform or medium your project will be displayed on.
In the following sections of this article, we will explore the best export settings, recommended file formats, and valuable tips to not only make your exporting process efficient but also ensure your project stands out with its captivating visuals and smooth animation transitions. Let’s dive in and unlock the secrets to successful exportation of After Effects projects.
Essential Tips and Tricks for Exporting Your After Effects Project
Exporting an After Effects project can sometimes be a complex process, but with the right knowledge and techniques, you can simplify and optimize your workflow. Here are some key tips and tricks to help you achieve seamless integration and maintain the highest quality in your exported projects:
1. Begin with the End in Mind:
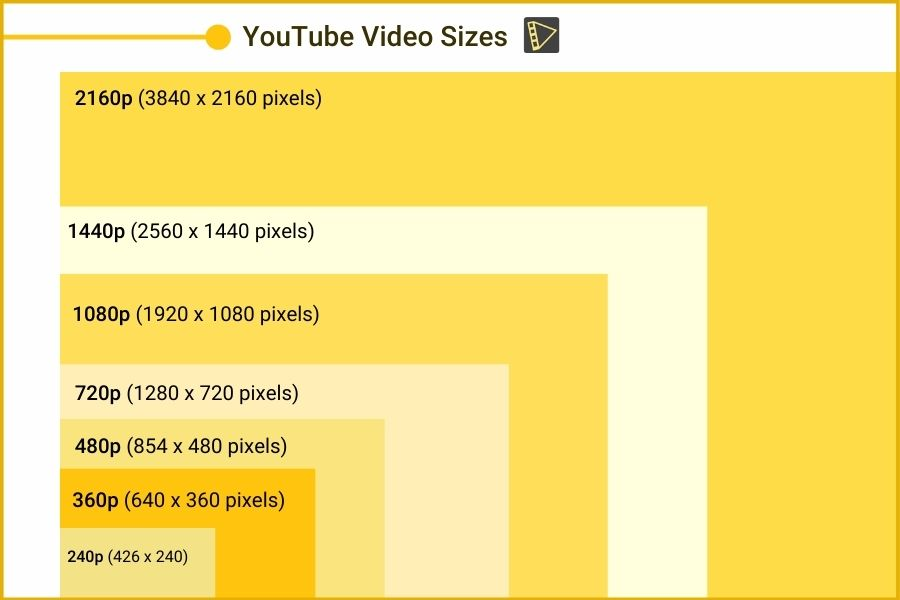
Before you start exporting, have a clear understanding of the intended platform or medium for your project. Consider the specific requirements, such as resolution, aspect ratio, and frame rate. This will help you choose the appropriate export settings right from the start.
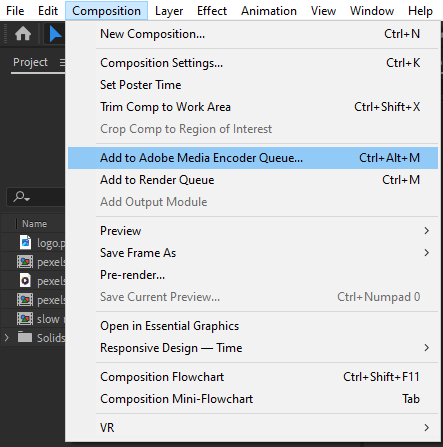
2. Master the Art of Composition:
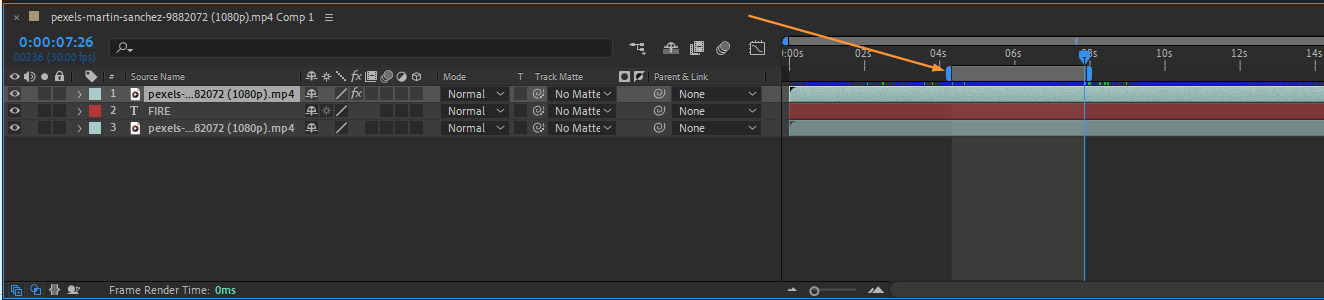
Use composition markers and work area bars (B and N hotkeys) to define the exact portion of your project that you want to export. This is helpful when you only want to export a specific section or a single animation from a larger composition.
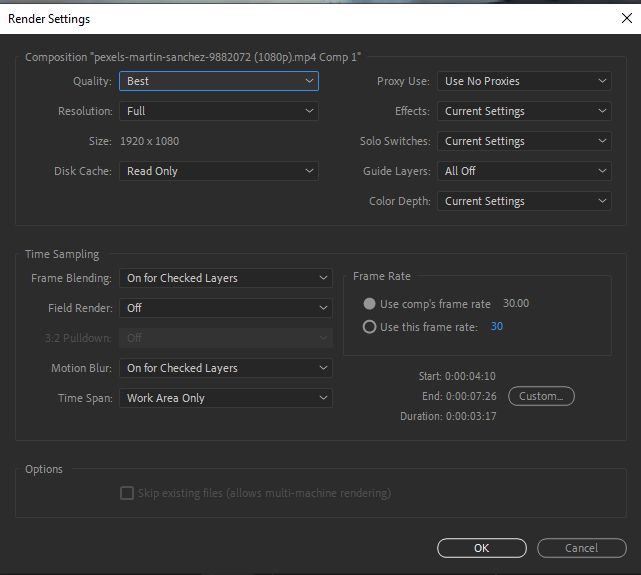
3. Optimize Your Render Settings:
In the Render Queue panel, ensure that your Composition Settings match your project requirements. Adjust the output module settings for optimal results. Experiment with different render settings to balance output quality and file size.
4. Choose the Right File Format:
The ideal file format for exporting your After Effects project depends on your intended use. For high-quality and lossless results, consider exporting to the Animation or ProRes codec. For web and online distribution, utilize formats like MP4 or H.264. Research the recommended formats for your specific platform to ensure the best compatibility.
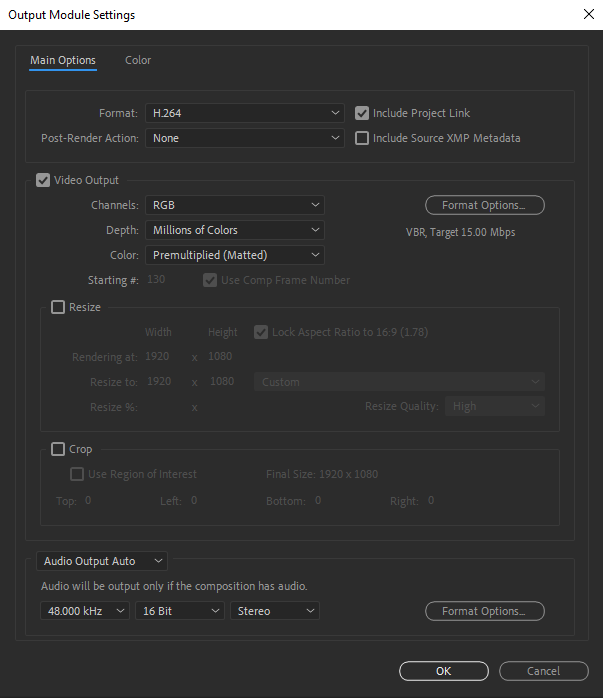
5. Utilize Alpha Channels:
To preserve transparency in your compositions, enable the alpha channel when exporting. This is particularly important if you plan to overlay your After Effects project on another video or integrate it into a website or graphic design.
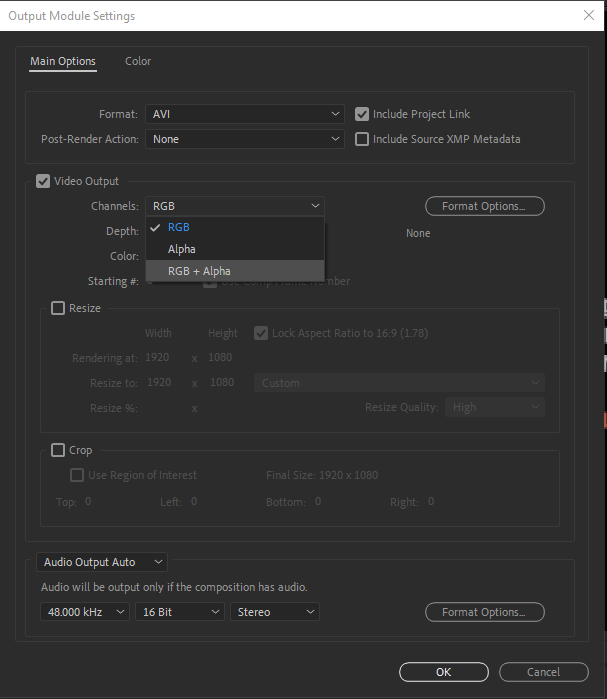
6. Check your Color Profiles:
Keep an eye on the color profiles of your project. If your composition uses specific color profiles like Rec. 709 or sRGB, ensure that your export settings match them. This will maintain accurate color representation throughout the export process.

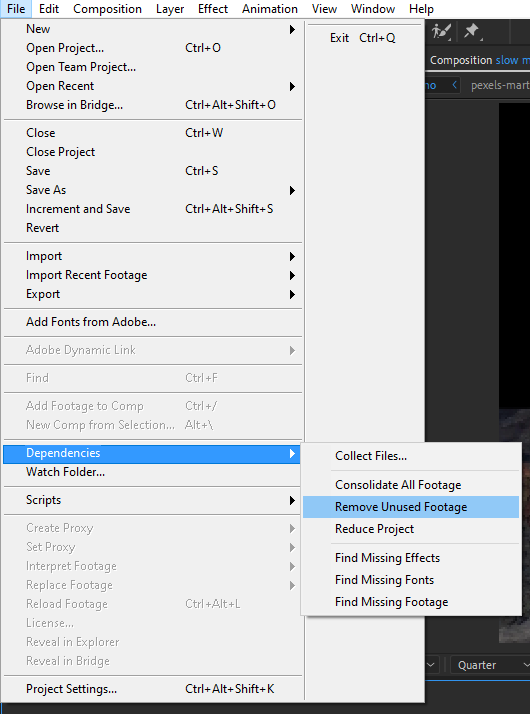
7. Maintain Project Organization:
Before exporting, make sure your project is properly organized. Trim unnecessary layers, precomps, or effects that may not be visible in the final export. This helps reduce file size and ensures a cleaner and more efficient project.
8. Consider Render in Background with Adobe Media Encoder:
If you have a multi-core processor, take advantage of a render in background feature in Media Encoder. This allows you to continue working on your project in After Effects while the export process runs concurrently in the background.
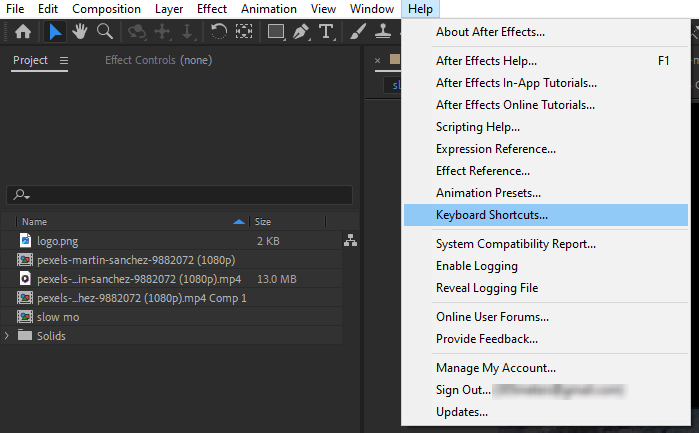
9. Learn Keyboard Shortcuts:
Keyboard shortcuts can significantly speed up your workflow. Familiarize yourself with important shortcuts like Ctrl/Cmd + M to open the Render Queue panel, Ctrl/Cmd + K to access Composition Settings, and Ctrl/Cmd + S to save your project.
Following these tips and tricks will not only simplify your exporting process but also ensure consistent, high-quality results that seamlessly integrate into your desired platforms. Experimenting with different techniques and settings will allow you to find the perfect balance between file size and visual fidelity, helping you achieve stunning animations and visual effects that leave a lasting impression.
Now that you’re armed with these essential tips, go forth and export your After Effects projects with confidence and finesse!
Conclusion: Export with Confidence and Seamless Integration
Exporting an After Effects project is a crucial step in turning your creative vision into a tangible reality for your intended audience. By following the tips and tricks outlined in this article, you can enhance your workflow, optimize your export settings, and ensure seamless integration across different platforms and devices.
From understanding the specific requirements of your intended platform to choosing the right file format and mastering the use of composition markers and render presets, every step plays a vital role in delivering high-quality, visually stunning projects.
Remember to keep experimenting with different settings and techniques to find the perfect balance between file size and visual fidelity, maintaining the highest level of quality while ensuring compatibility with your intended distribution channels.
By staying organized, utilizing keyboard shortcuts, and taking advantage of features such as background rendering, you can further streamline your workflow and save valuable time during the export process.
So, armed with these insights, go forth and export your After Effects projects with confidence! Achieve seamless integration, impress your audience, and showcase your creativity in the most captivating way possible.
With the knowledge gained from this article, you’ll be able to navigate the export process with ease, creating animations and visual effects that stand out in today’s competitive digital landscape.
Remember, exporting is not just a technical process; it’s an art form that allows you to share your unique creations with the world. So, continue to refine your skills, push the boundaries of your creativity, and export your After Effects projects with finesse and confidence. The possibilities are endless, and the results are limited only by your imagination. Happy exporting!
Our Bestsellers

